

DIGITAL PRINT OF A CONSERVED MAP: REPRO OF THE PALMSE ESTATE MAP
Autor:
Jaak Rand
Number:
Anno 2019/2020
Category:
Digitisation


Digital print as a concept
Digitisation is a process of coding co-ordinates and attributes into a digital data set that is file-formatted as digital databank according to requirements. viide1 ⁽¹⁾
What then is digital and what is analogue printing? The difference of the notions is often revealed through the antipodes.
Digital printing contrasts with analogue printing method (techniques like lithography or engraving) first of all due to the missing physical press relief. Briefly said – instead of press relief there is virtual gridline or matrix, that is the co-ordinate frame on which the digital data forms an electronic surface image through algorithm. It can be displayed in a monitor or a printer can physically bring it out on a sheet.
Today digital printing techniques make it possible on almost all kinds of surfaces, even on liquid ones.
The notion ‘digital print’, however, is actually nothing digital, as print cannot be digital. Print is made of inks that form contours on the surface of physical material and so print is a trace or copy of a digital data bank. The term ‘digital print’ is still functionally used in applied sciences, as the print of an image is generated through the computer and printer that ‘translate’ the digital info into an image.
Earlier the notion hard copy was in use in digital printing, as the final copy on a physical surface does not allow any digital changes. This notion was taken into use in contrast to soft copy, that could be changed on the screen, as it submits both to modifying and changing file formats. The formats can also be called images only conditionally, as files they contain algorithm and data bits that the computer mediates to the monitor for a visual image.
A rapid change in digital printing occurred in the nearest past, simultaneously with digital photography and the development of computer programmes necessary for photo processing i.e. in the 1990s. Digital printing has indeed been most influenced by the development of the techniques in digital photography and digital imaging. Next to continuous upgrading of computer graphics and ink-printers the development has also been influenced by photo-processing programme Adobe Photoshop.
The word ‘photography’ itself is actually only a conditional notion when we take it in the context of digital images. Digital photography does not create any image on light-sensitive photo material, neither does the process contain any chemical processing.
A digital camera creates digital data through a light-sensitive sensor. The file substitutes the image. The visual image or picture on a physical carrier belongs to the field of digital printing. [Ill 1]
How the image appears on the sheet (material) emerging from the printer is the most pivotal and complex topic of the digitised visual reproduction. A short answer would be that the digital printer carries dots or drops of ink onto the sheet. This answer, however, is neither exhaustive nor precise because when considering contemporary digitising and printing technologies we have wall-to-wall answers.
What is the concrete answer to a project, what kind of print, which digital photo or repro is needed depends first on the kind of repro required. One can find an extensive and detailed overview of digital printing in the monograph The Digital Print viide2 ⁽²⁾ written by German photo-conservator Martin C. Jürgens in 2009.
Preparations for digitising
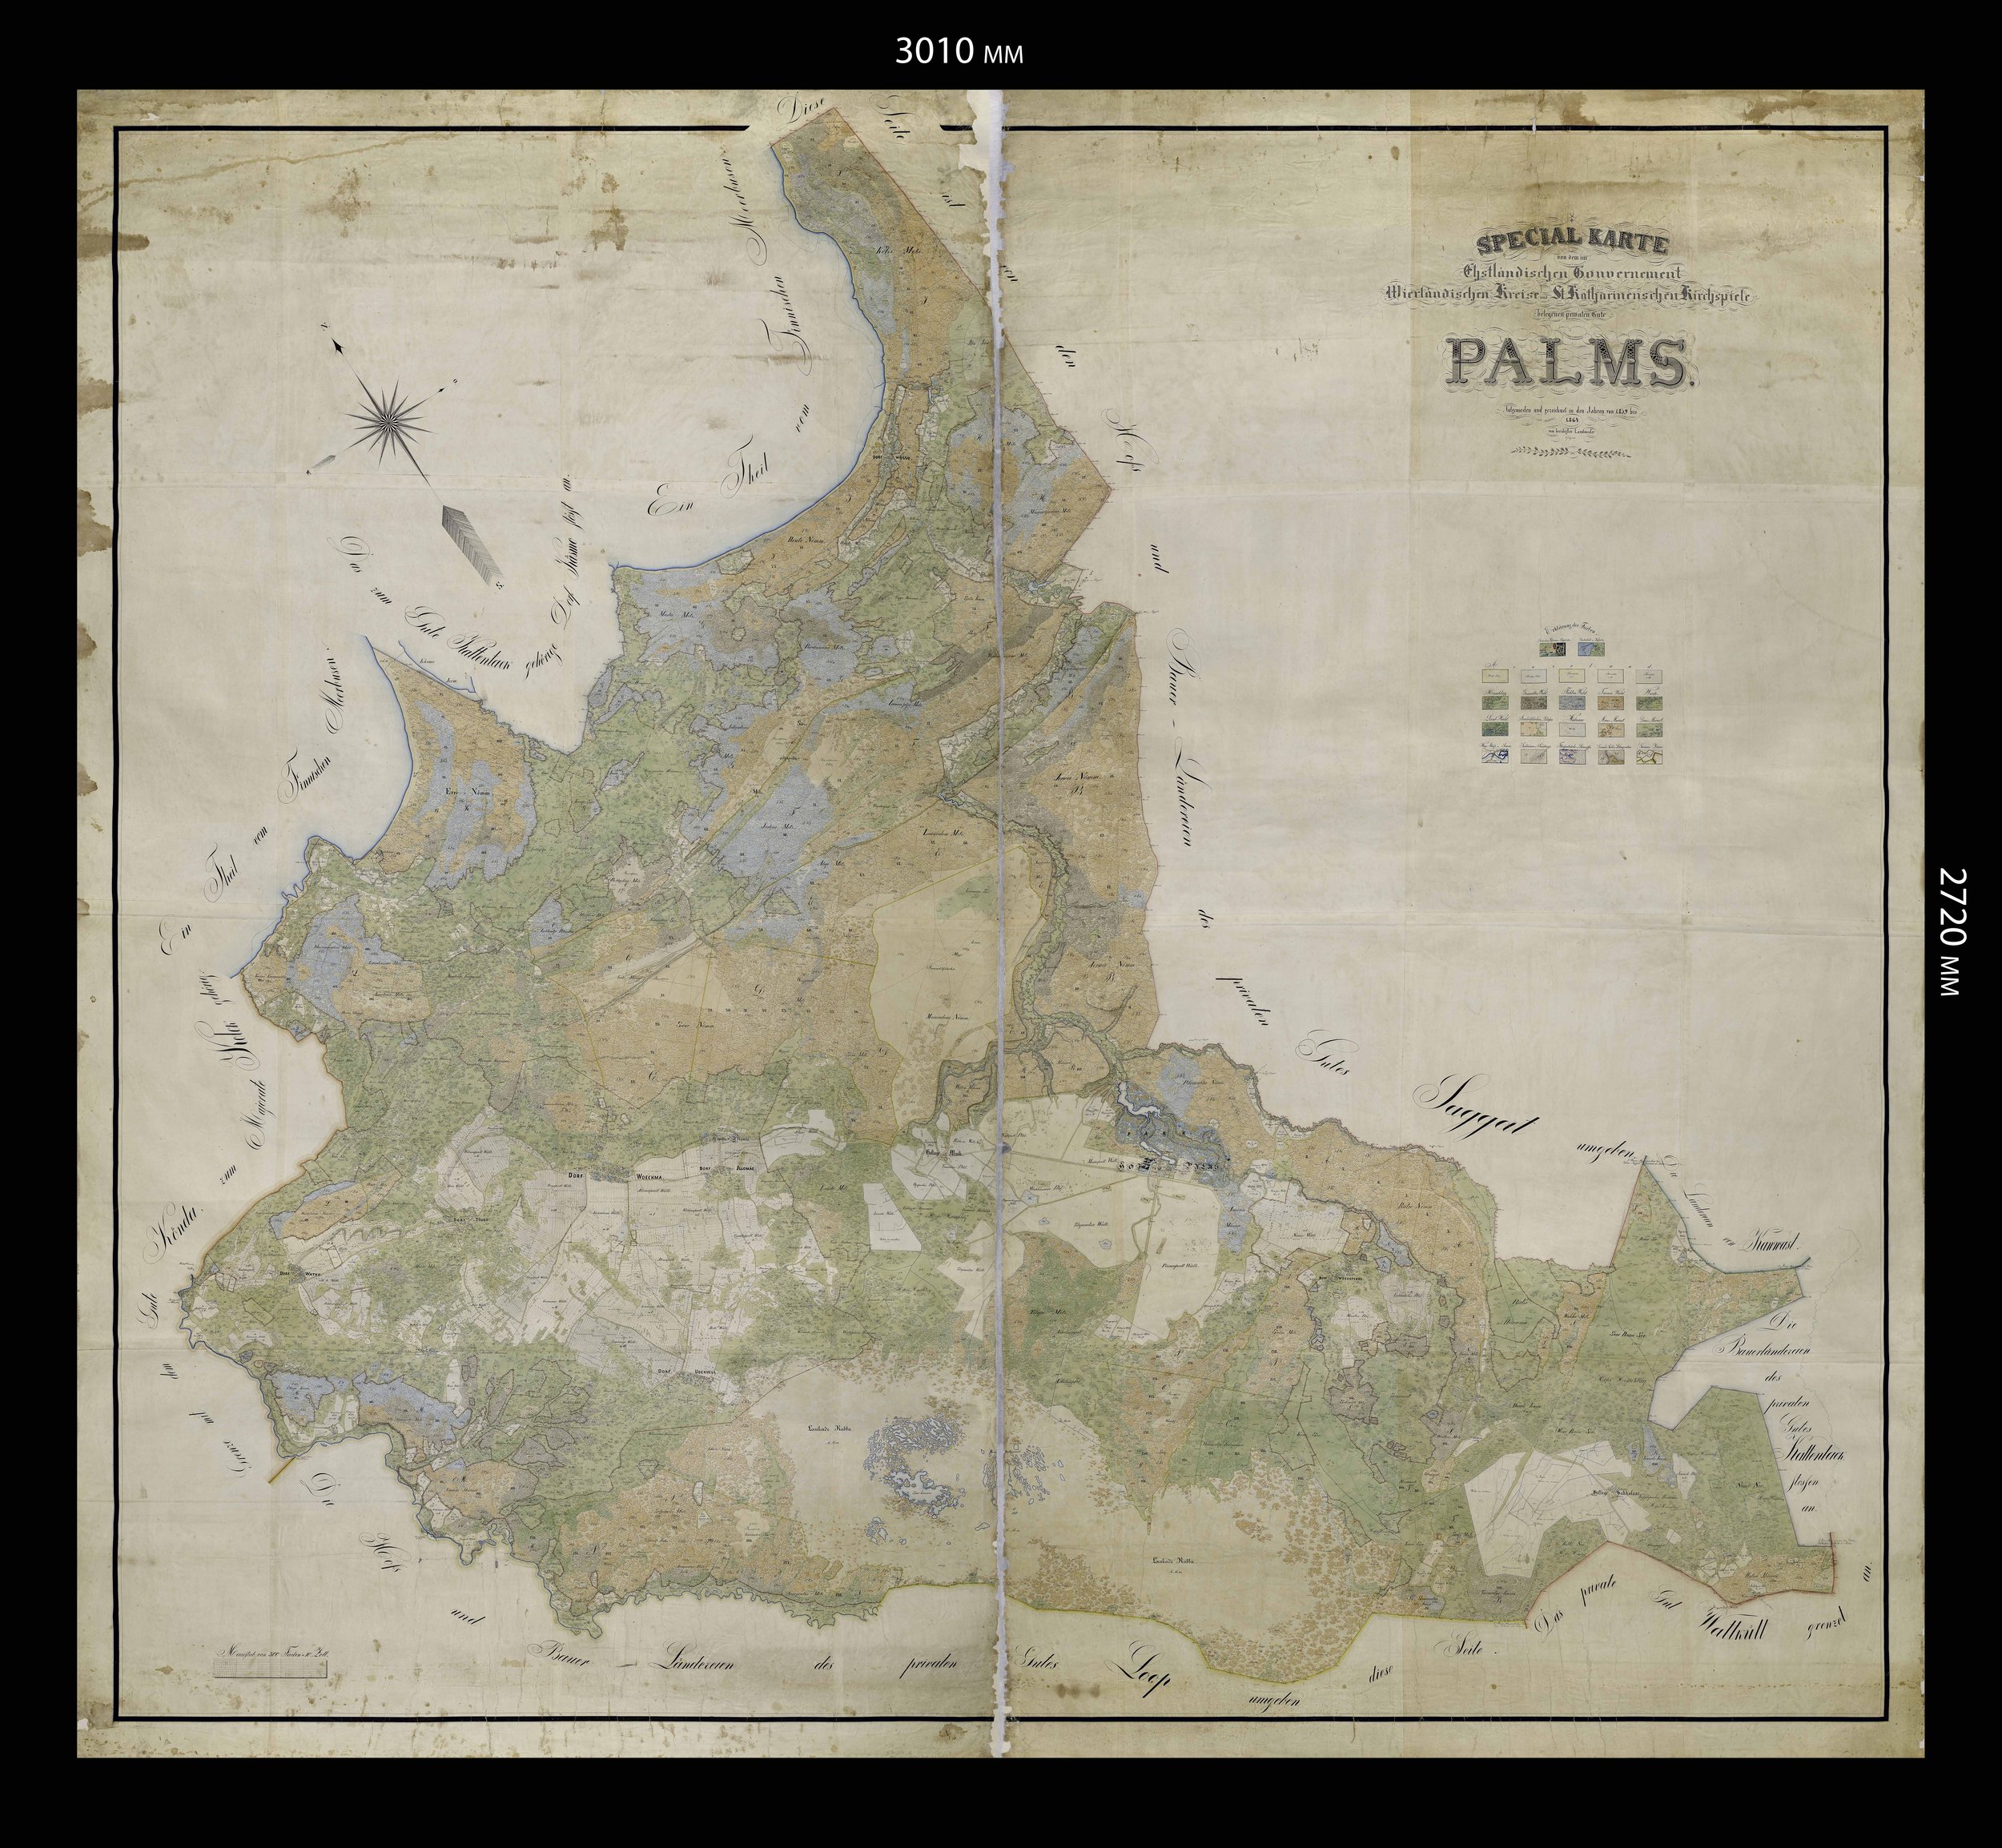
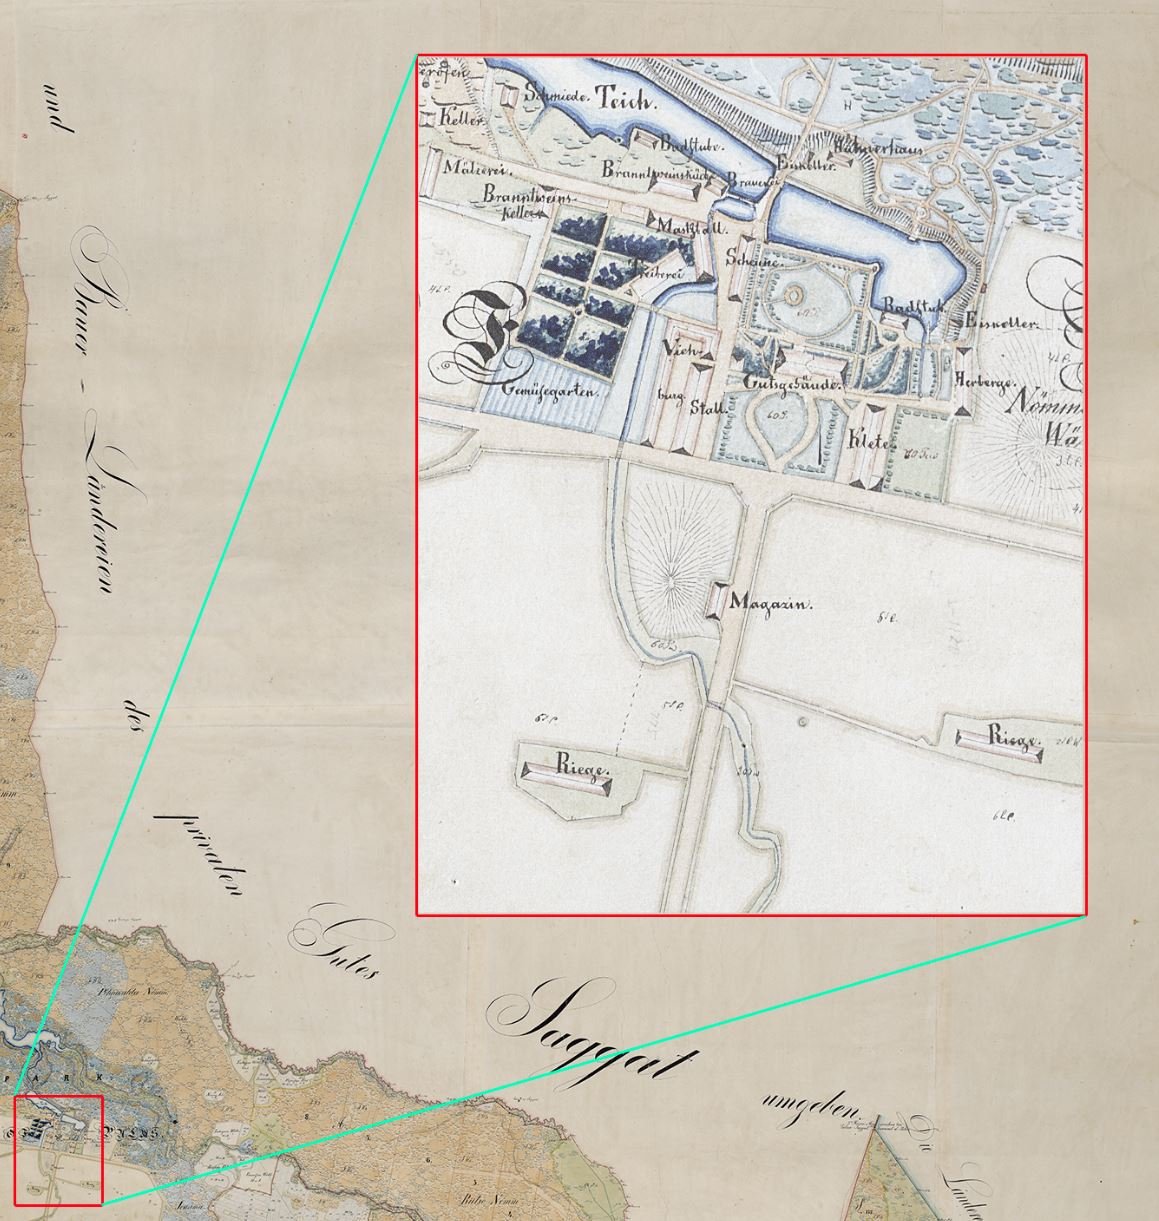
For an example we are taking a large topographic map – the Palmse manorial estate map from 1864. viide3 ⁽³⁾ The assignment was to make a one-to-one copy or hard copy of it.
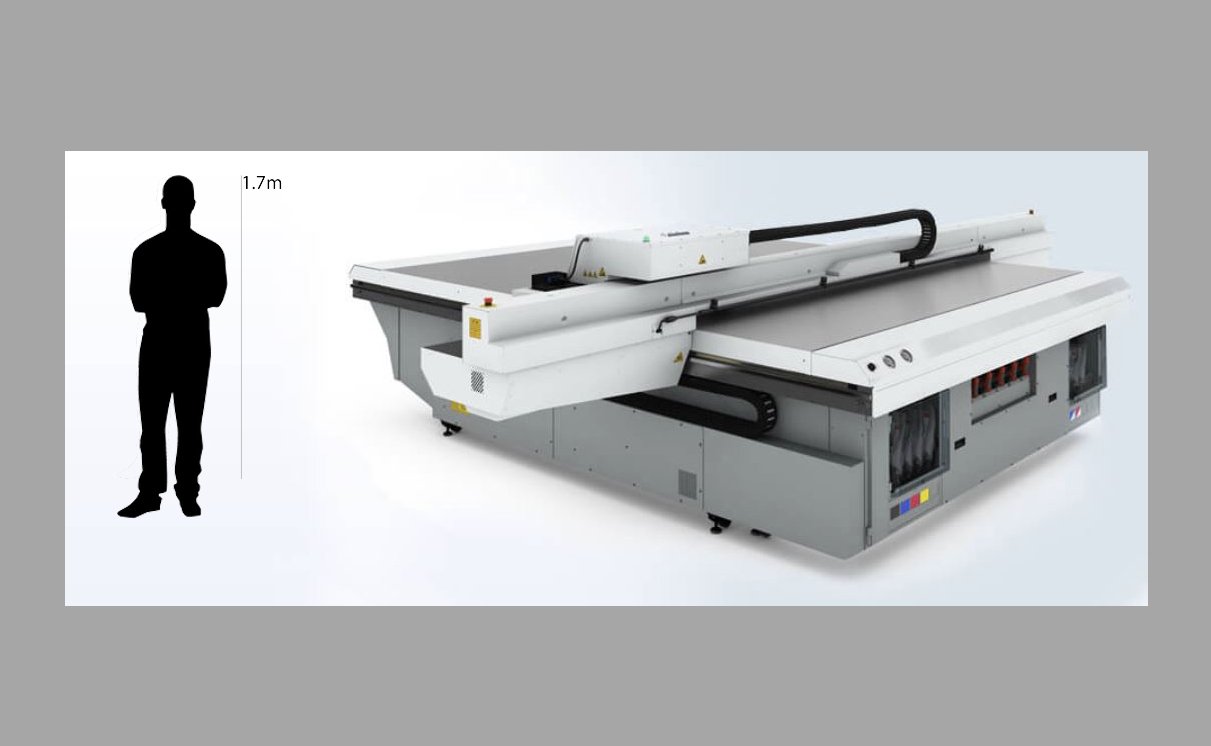
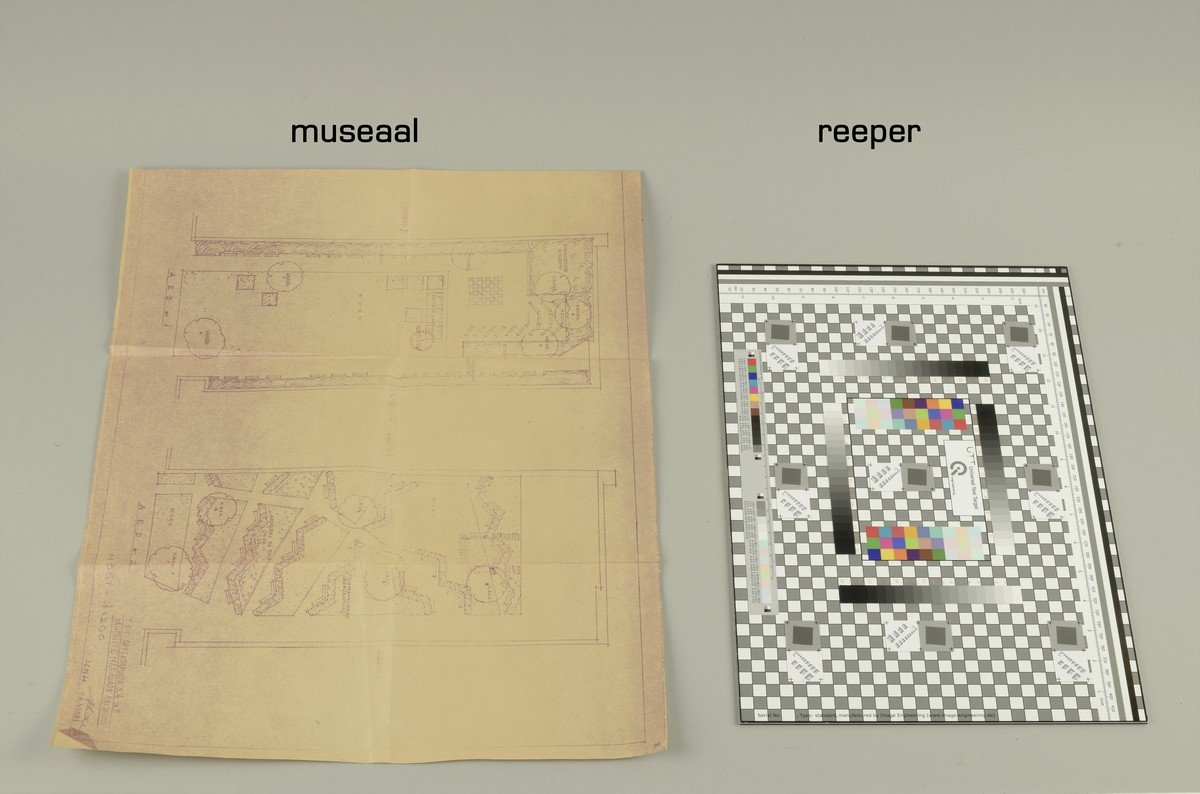
Modelling the preceding data is necessary for making decisions later on and visualising the expected result. The choice of labour-consuming processes depends on that. Both, the guarantee copy and the presentable copy must be well used and so several variables should be foreseen. Visual deformities caused by the light, camera lense, or file formats have always been a challenge when digitising a painting, a map, a print or whatever other even/plane image. Most frequent deformities are bent images that come from using wrong lense and optics, colour mis-registration owing to wrong lighting or camera adjustment and the loss of image details due to wrong distance between the object and the camera lense. The risks could be diminished when the equipment is tested. As a rule, for light and camera adjustments test target is digitised before the object. An ideal size of test target should be close to the size of digitised shot. [Ill 2] However, in case of extra-large even/plane digitising job like scanning at a distance the test target help to check the digital info of the image file only partially. Choosing the most cost-effective method is problematic – should one make more shots of the big image and dedicate more time to photo processing, or prepare an area with several sets of juxtaposed test targets for a much more extensive shot. viide4 ⁽⁴⁾
Quality test targets are quite expensive testing equipment and generally digitizers do not have them in excess. When making a repro, reprocessing cannot be avoided. This poses its own challenges on image processing programme and printing hardware.
One of the requirements for the Palmse Manor estate map was copy fidelity. Naturally it meant the collation of colours and elements of the image. When conservation is completed, preparations for digitising start with finding out how to place and spread the object best. Some practical means to digitize a plane/even object that is creased, wavy, or bent do exist, but every one of them compromises the result. It is possible to use a static table, a vacuum desk, to smooth the object beneath glass, use magnets or clamps. Glass is generally avoided, as even totally clean crystal glass plates diminish the sensitivity of the digitising sensor. Various fixing details and clamps leave traces both on the original as well as the digitised image and so further detailed photo processing and possibly additional conservation will be necessary. A static table is not potent enough to smooth a strongly bent or wavy sheet. Thus, every technique has its merits and drawbacks. Together with the conservator it is decided what the maximum acceptable ‘error’ is in the digitised result and how much distortion the original may take. It should also be discussed how to avoid possible additional risks during the digitising process, such as the lamps’ fading or damaging the object through unnecessary warming.
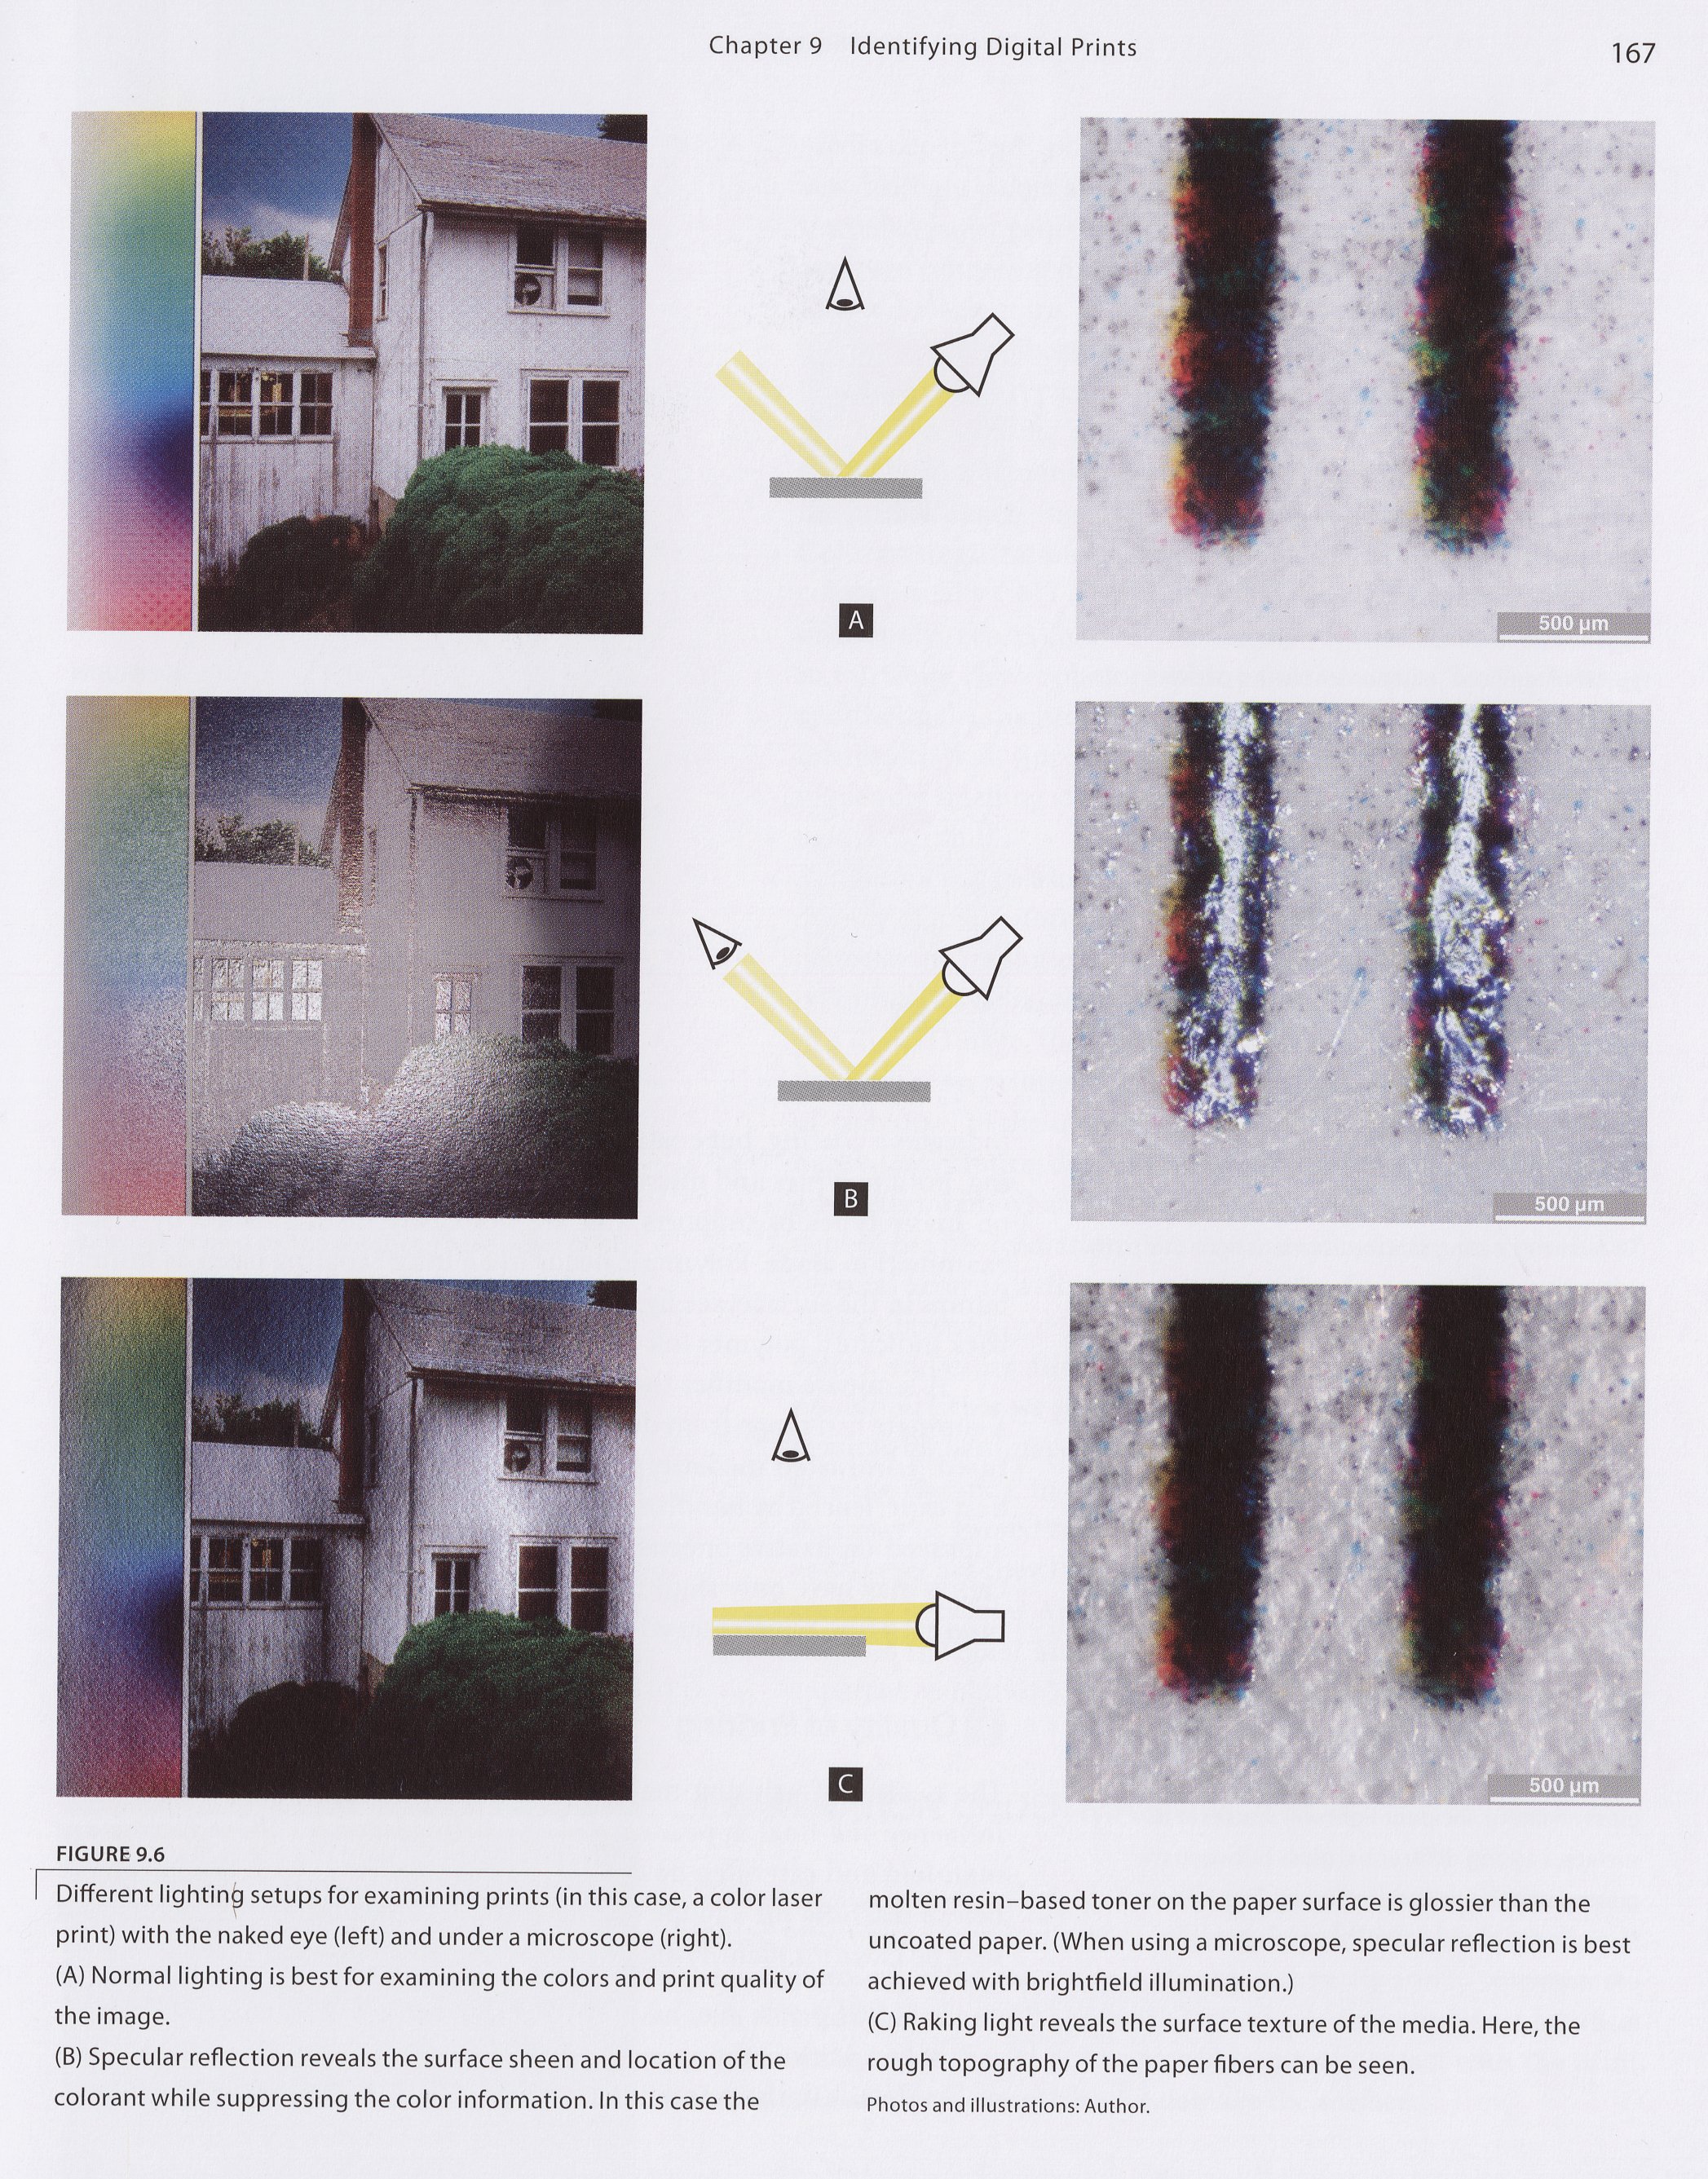
When the material has been digitised, the next vital step is test-printing a sample to find out what the digitised image would be like on new material. Here the process is influenced by the quality of printers and their limits. The material may seem ideal, but nevertheless the printing can fail, or vice versa. It depends on the size of the repro and requirements to its quality. The criteria should be the HDR (High Dynamic Range), high resolution (pixels per inch, ppi), equable light reflection (flat), and the surface structure. Uneven sheen of the digital print may influence the perceptible visage. [Ill 3]
High resolution means a greater number of pixels on a smallest possible area that makes the picture richer in detail.
Before digitization step, a wish was expressed that the repro should be similar to the physical weight of the map, showing how thick and solid the material of the original is. Naturally, it had to be durable when displayed either in daylight or in artificial lighting.
Considering all the conditions given above the large map had to be assessed again and again simultaneously searching for printing possibilities and assessment of repro qualities.
A digital print designer was also engaged in the process.
As already mentioned, the immense size of the map had to be considered at all times. The size of the estate map was about 16 square metres! As the original map was conserved keeping in mind its further storing in a wrapped-up form, the main effort was to prepare it for digitising first. The preparations for digitization took over a year despite the fact that it did not make up the whole conservation process. viide5 ⁽⁵⁾
To make the repro fit the wall in the manor, its measurements had to be decreased – the repro map had to be half the size (area), its height had to be only 71% of the original. Thus, the initial idea to print a one-to-one map could not be met. The new measurements of the repro were decided to be 2720mm high and 3010mm wide. This, in its turn, presented new requirements to the digitizing process. Decreasing the axle for almost a third of its length causes losses in details despite the high resolution of the previous digitising. Squeezing the whole image together makes smaller details less visible. The resolution on the digital image may be 300ppi (pixels per inch) but decreasing its physical size (meaning that the number of pixels on the surface of the sheet becomes smaller) the common printer produces the result with a substantially lower resolution dpi (ink dots per inch). When we found a compromise about the details, the technicians of digital printing helped to survey the printing materials for choosing suitable technologies that diminish and may even avoid further losses. Two possibilities for printing the map were chosen.
Digitising
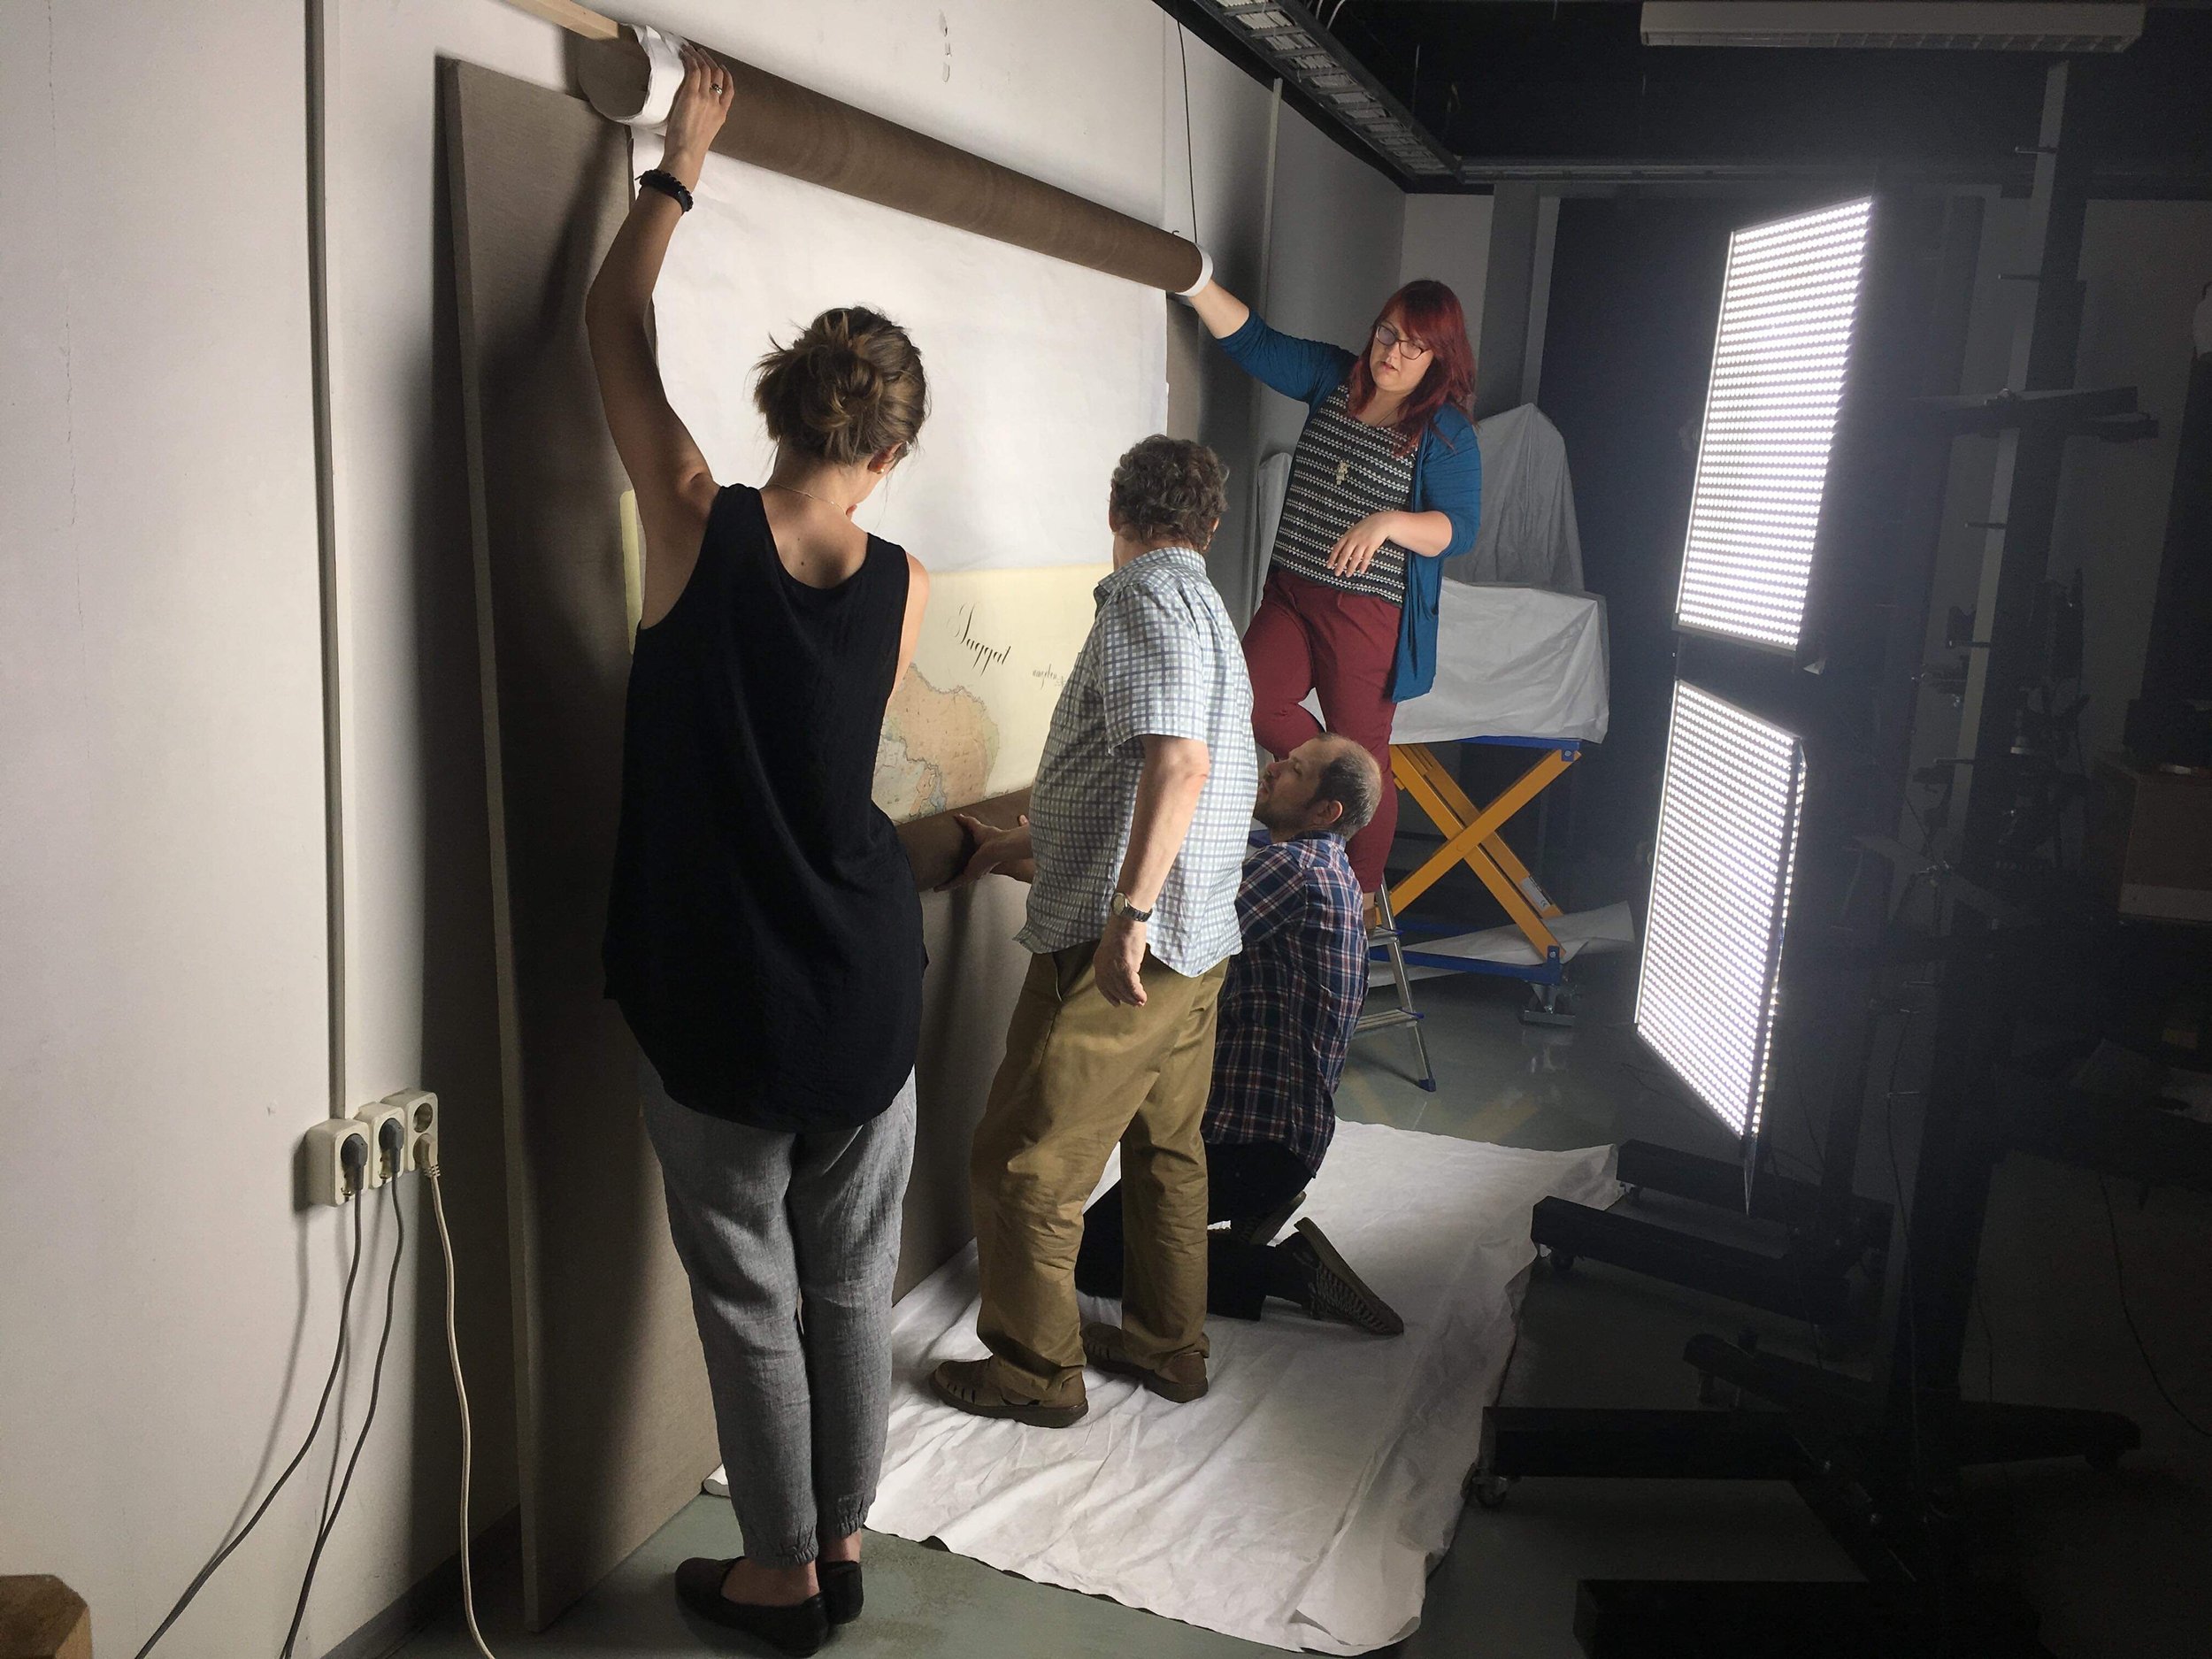
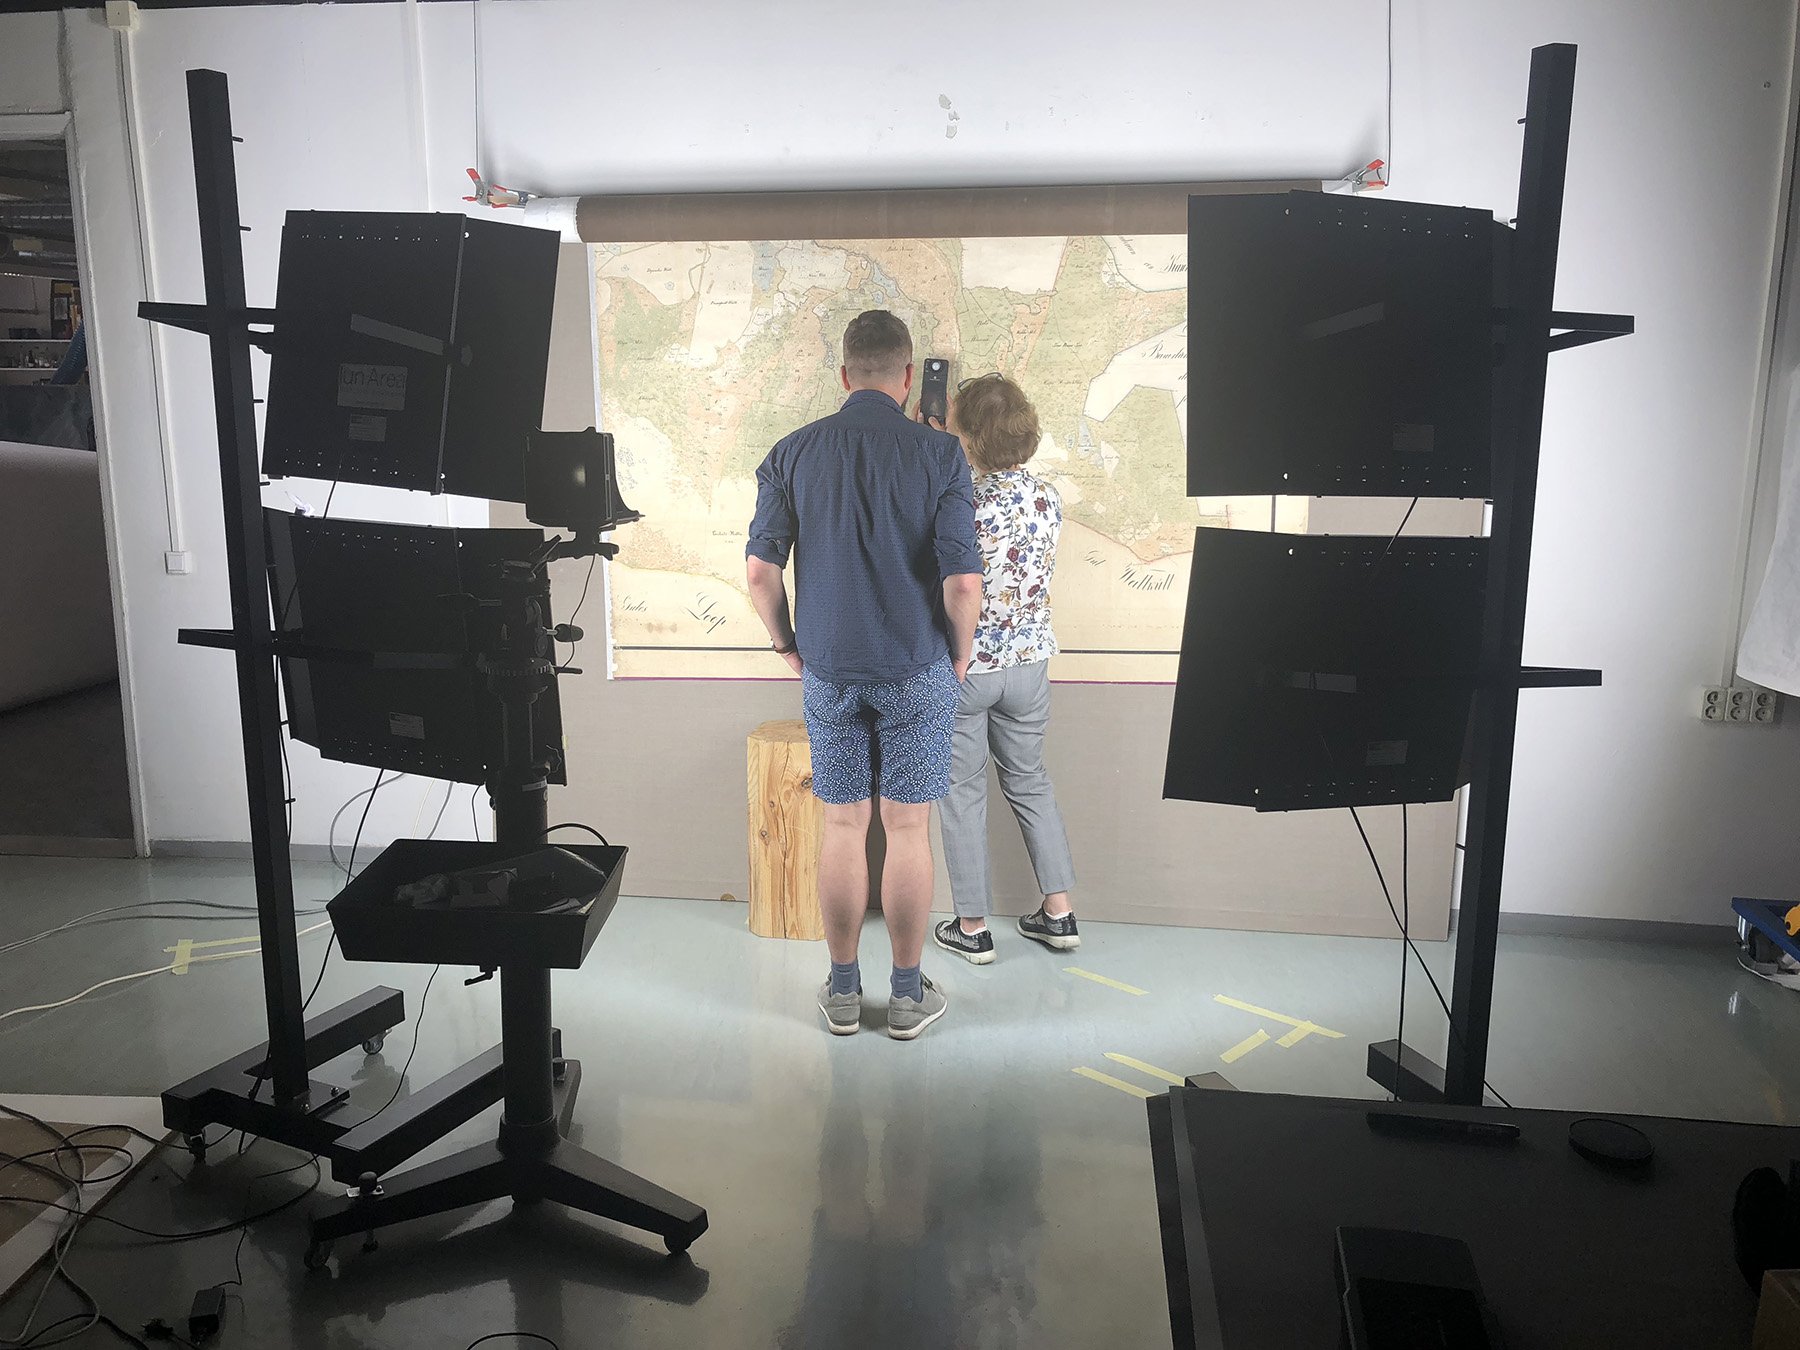
It was a delicate and complicated operation – transporting and setting the map up for conservation and digitising, as it was large and clumsy to handle, but fragile at the same time.
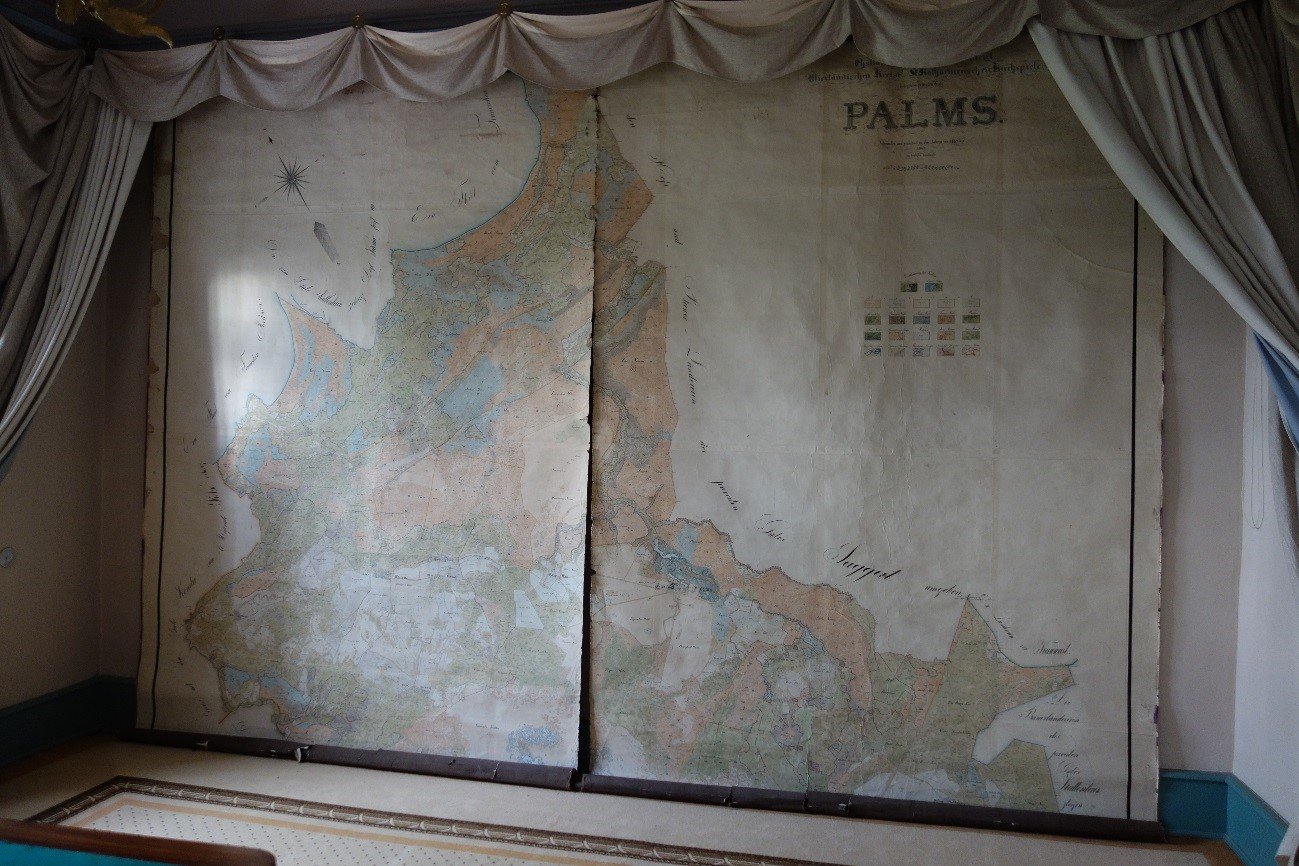
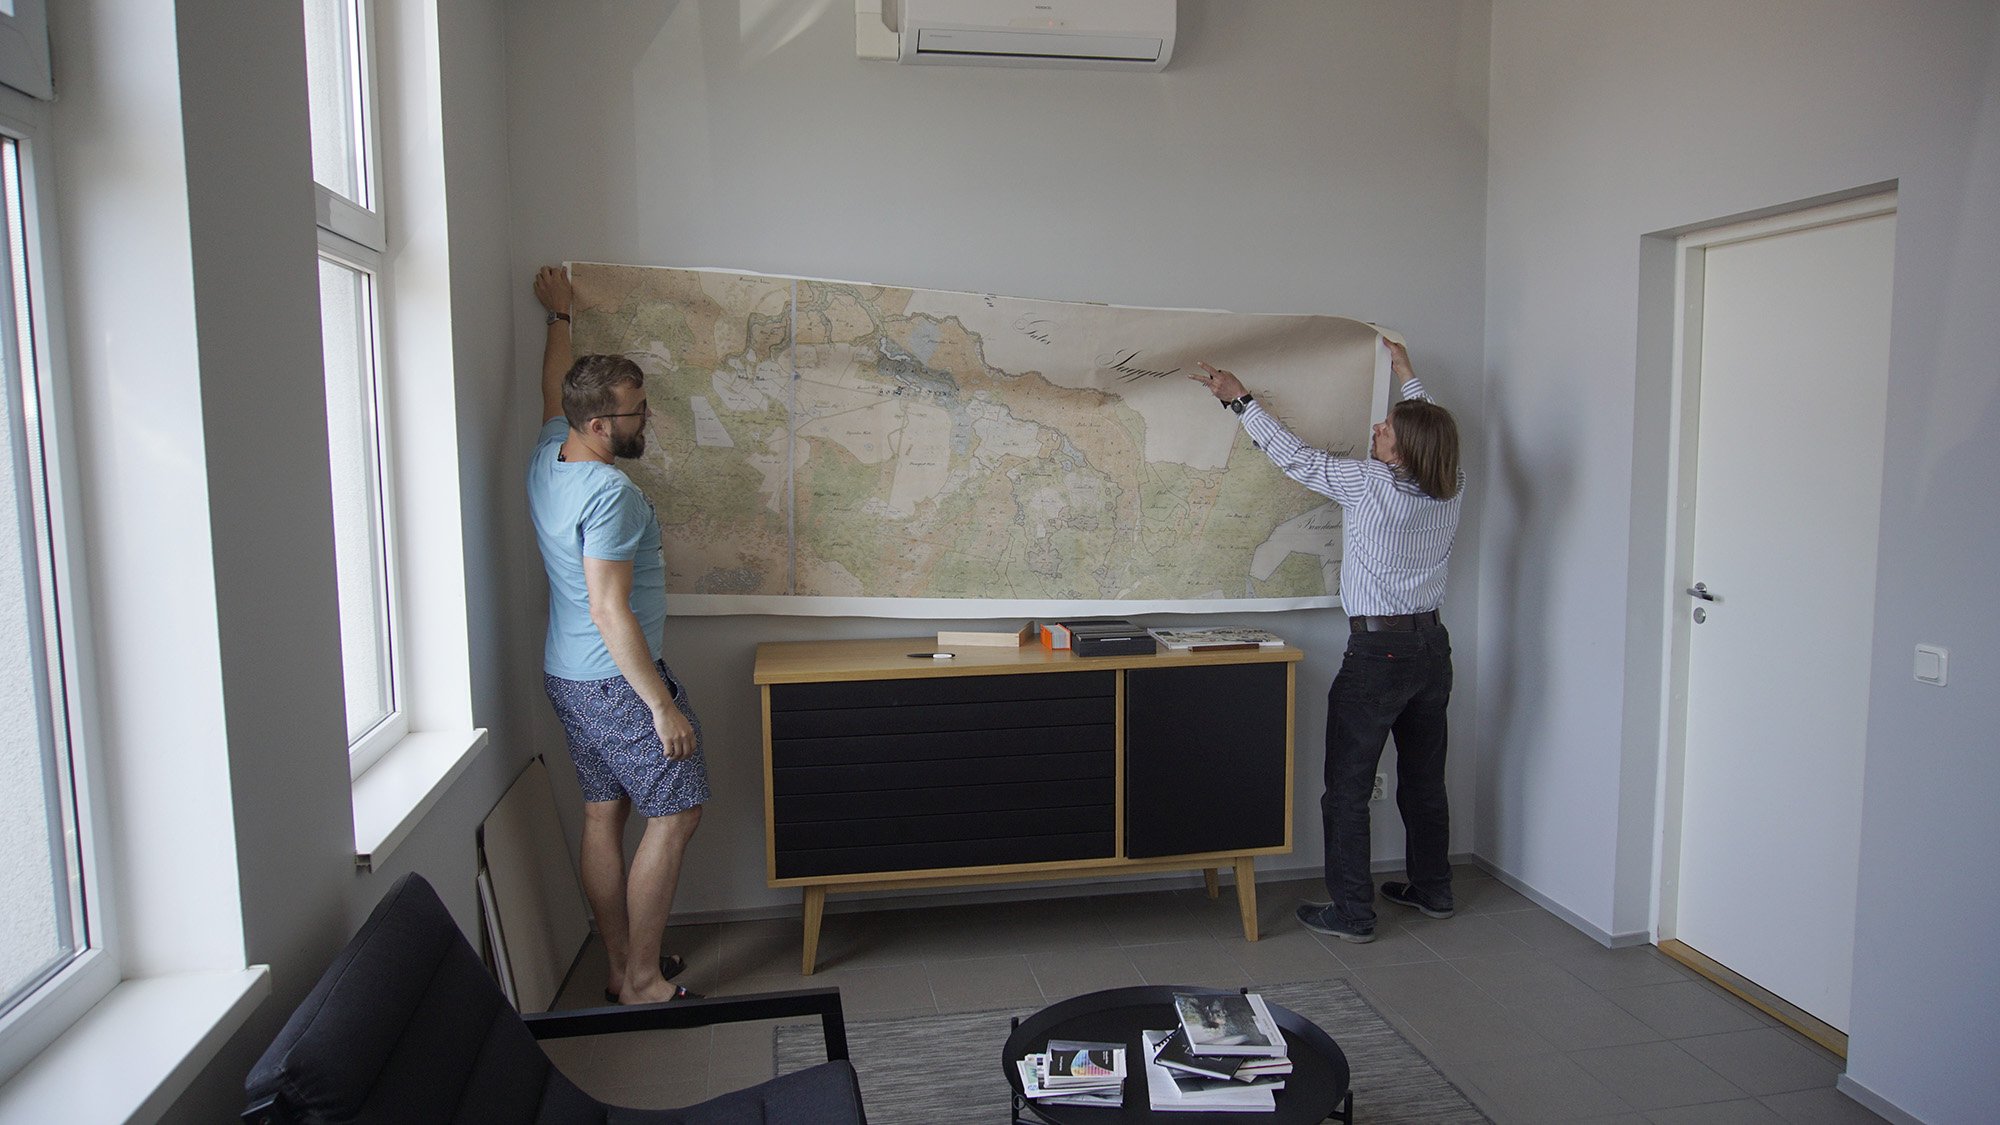
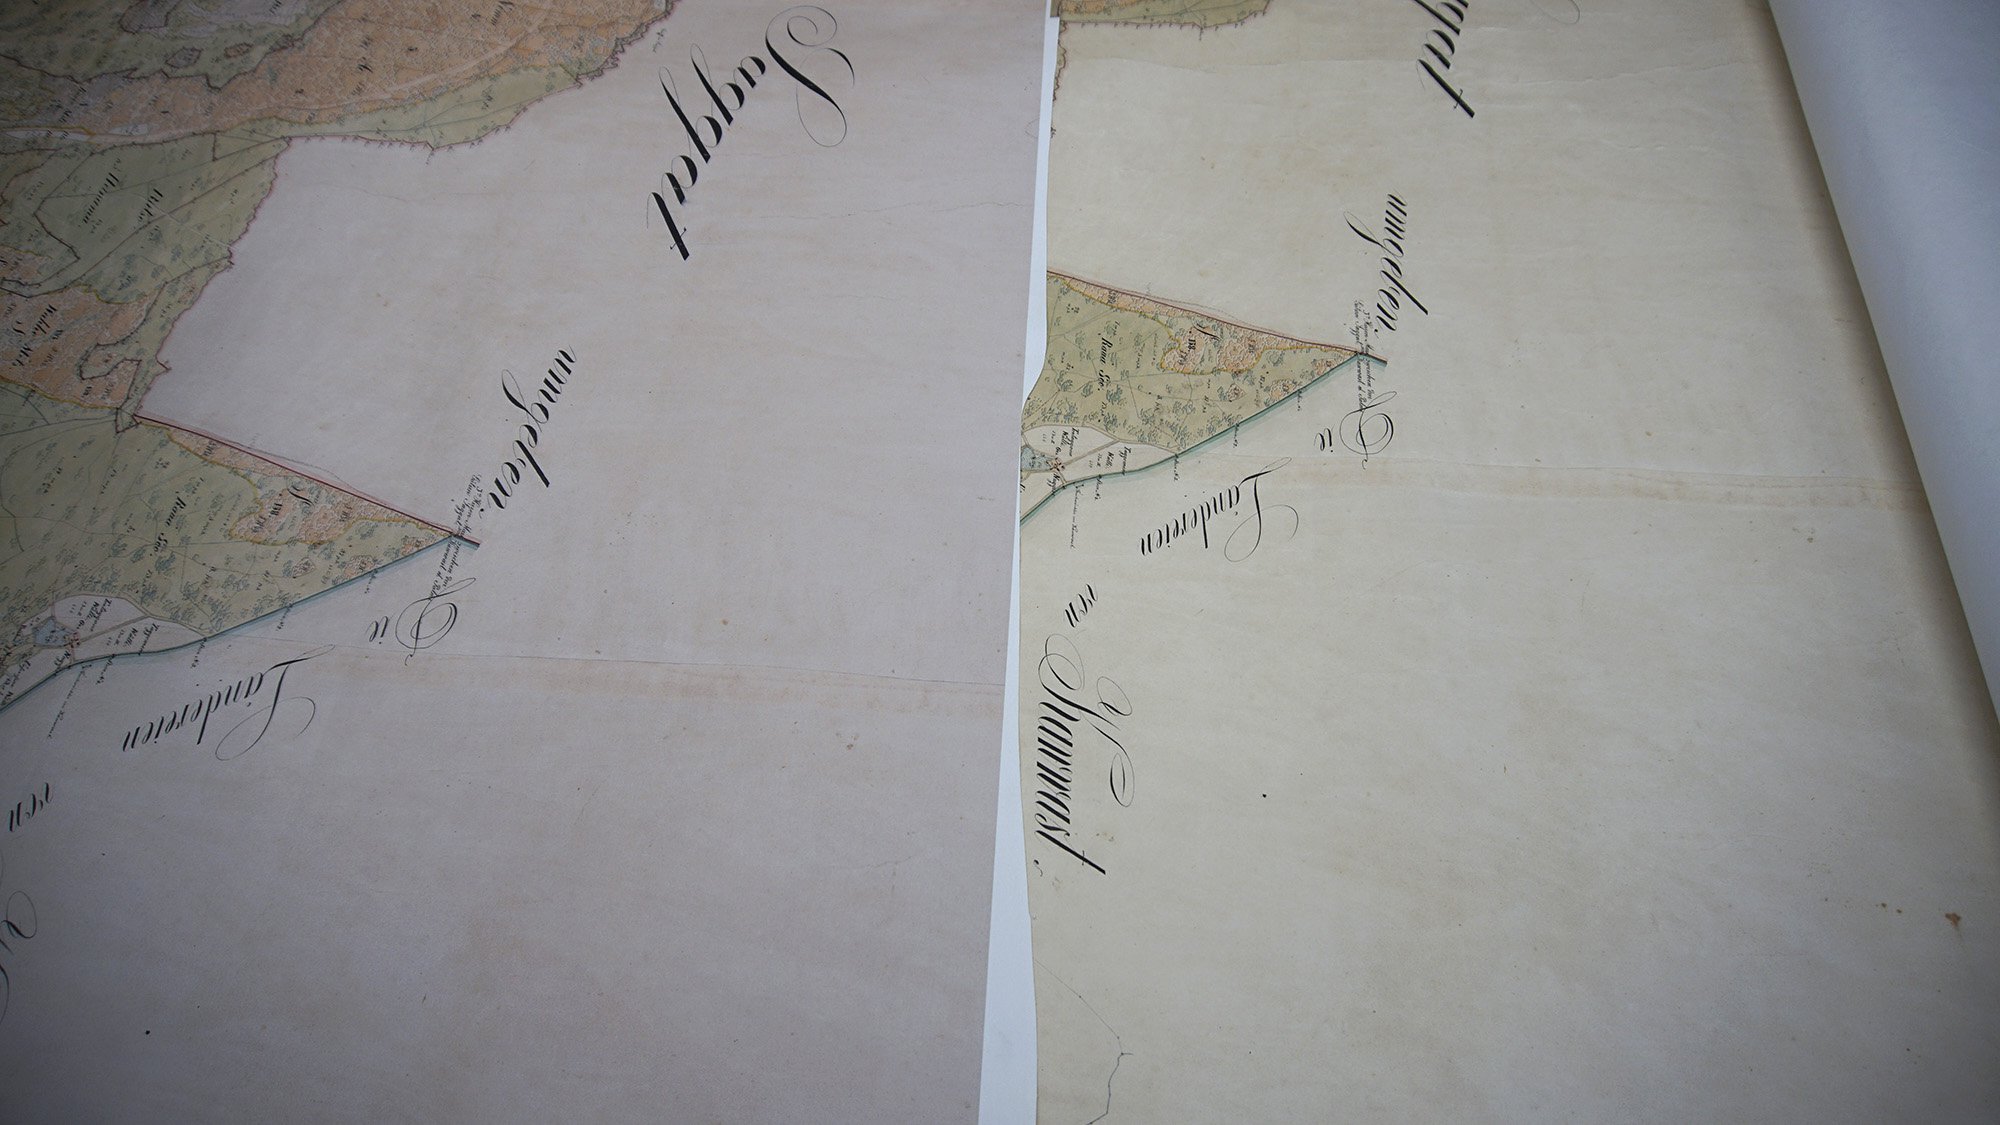
The original map had been torn in the middle already earlier. It had been exhibited in the museum in two separate pieces next to each other. [Ill 4] The separate parts were not joined for conservation.
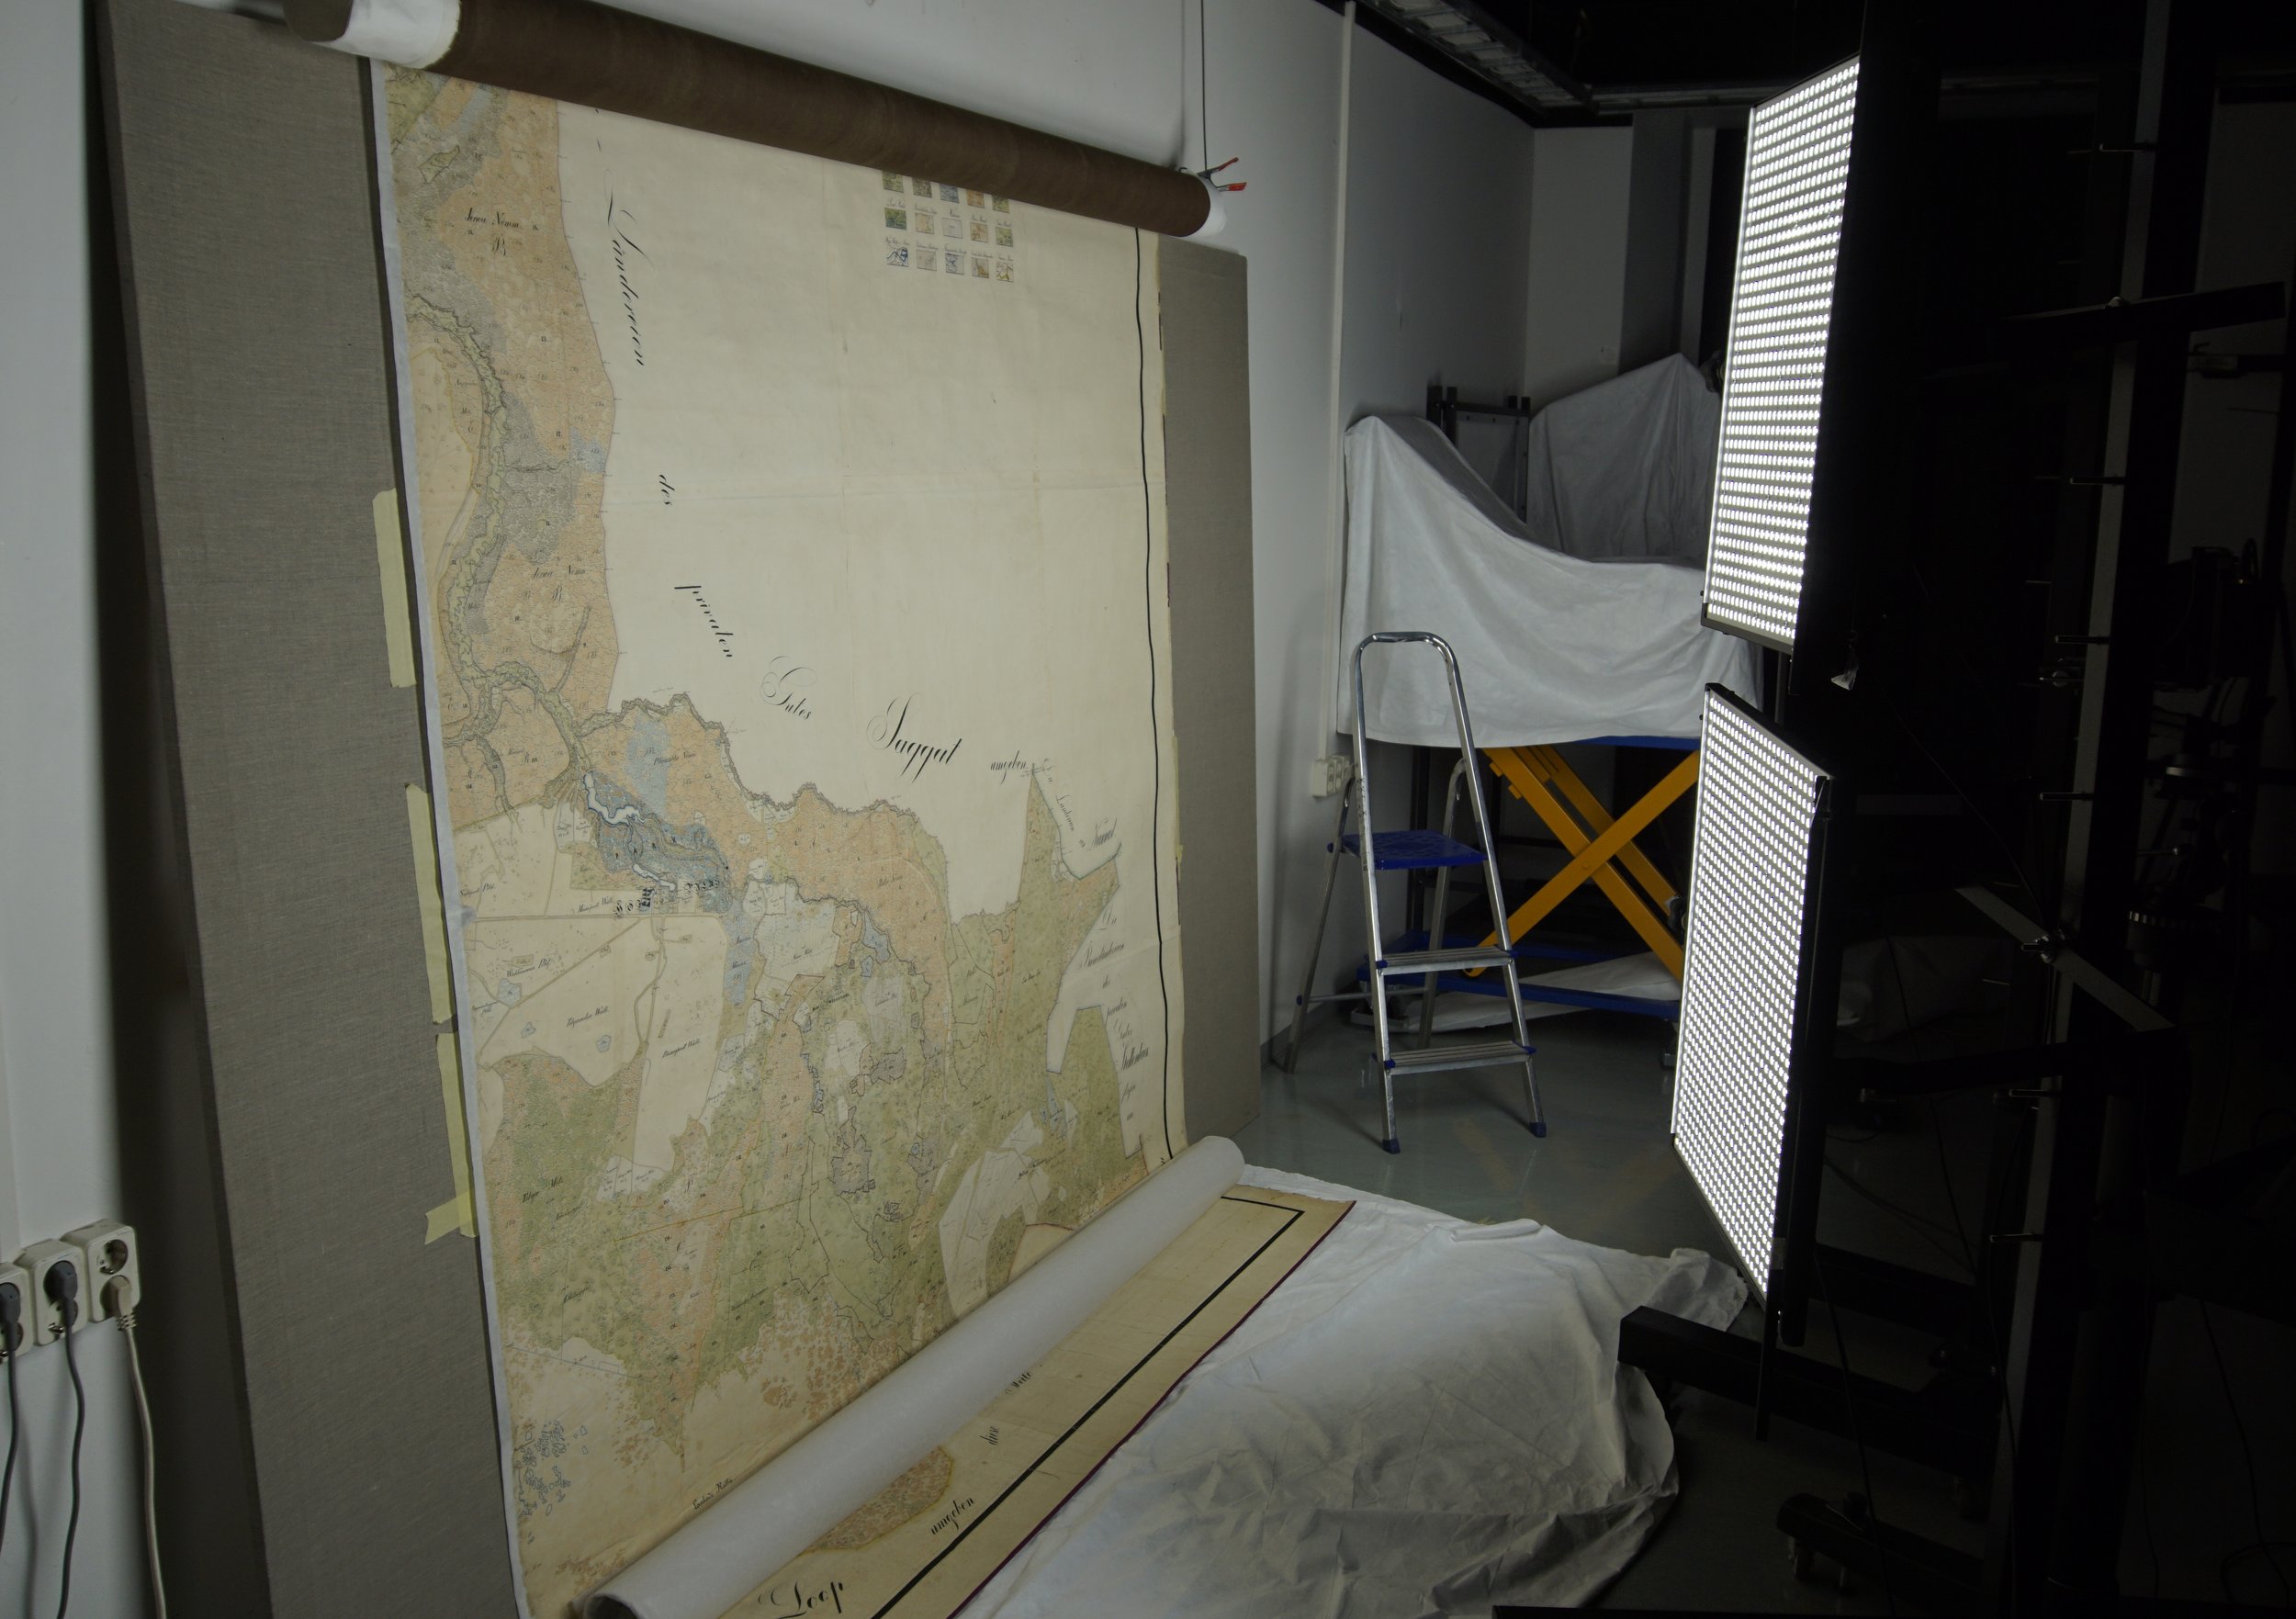
The map was digitised in two separate strips.
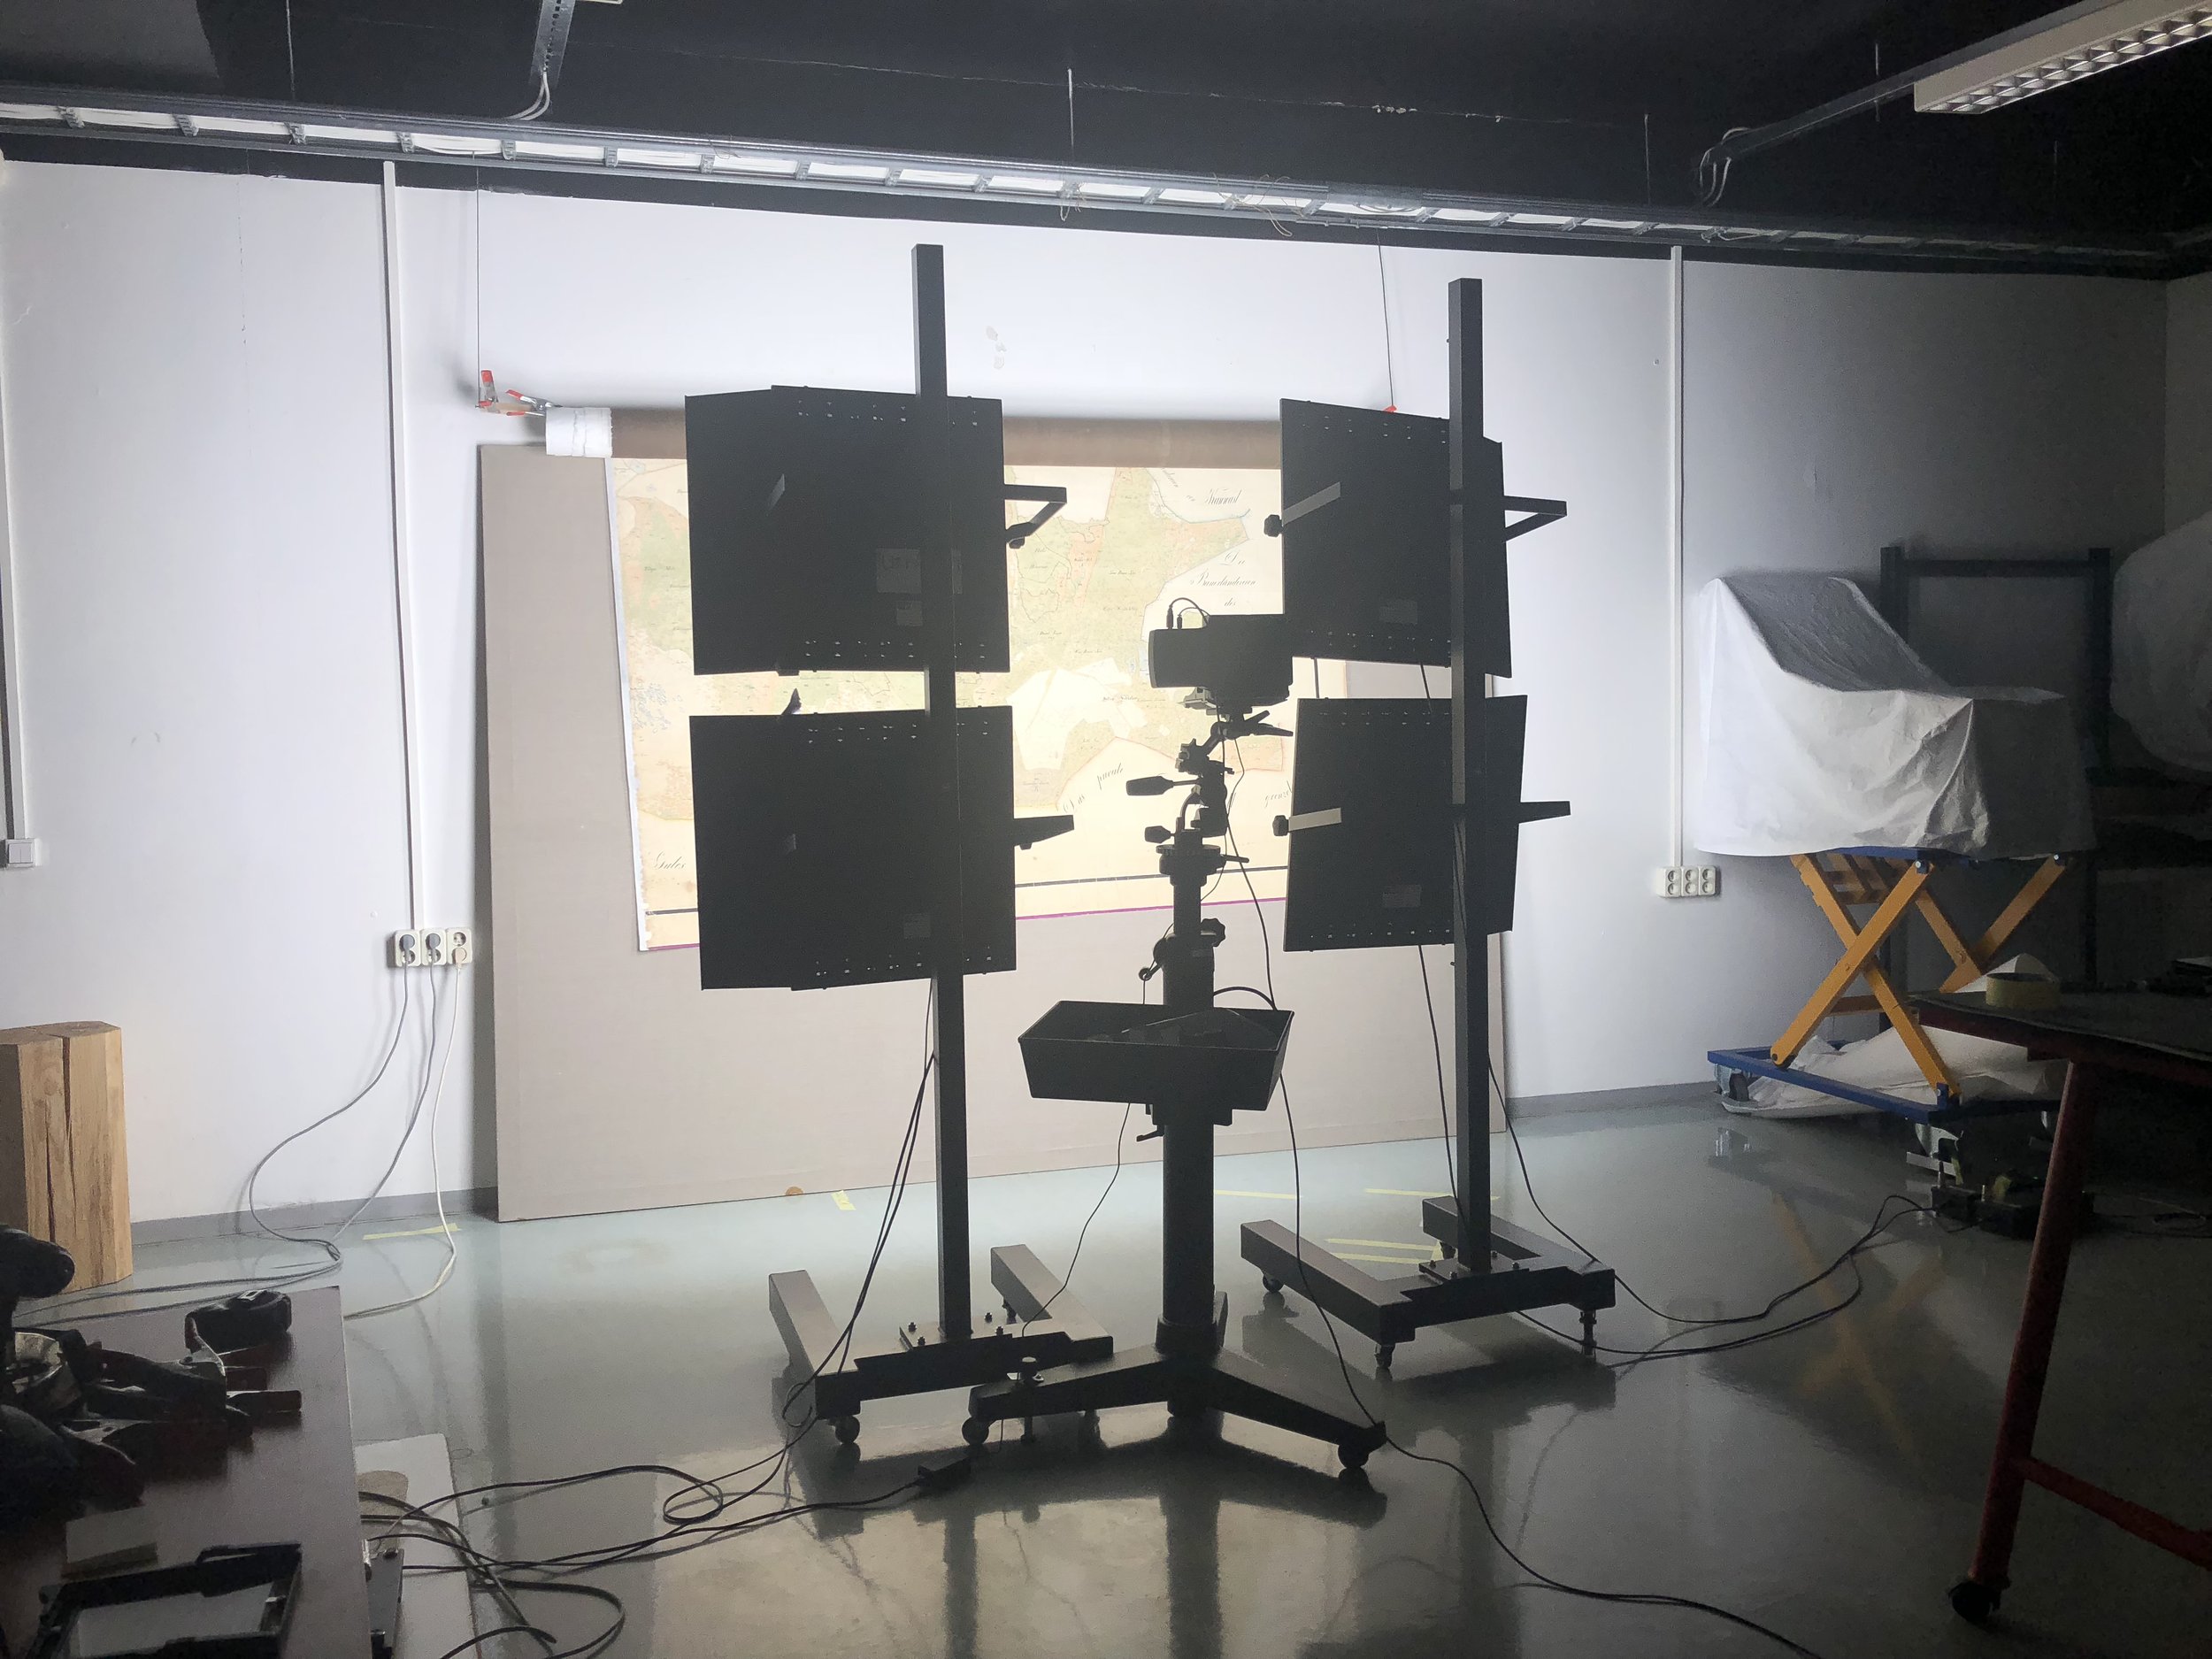
With the help of many hands, it was possible to hang a pane up and partly unroll it. When scanning it sometimes four people were needed to move and set it. [Ill 5] The map was digitised in parts, rolling it out step by step. [Ill 6] A kind of mosaic appeared after digitising. When joining the pieces (in picture processing programme) separate images were created of the two strips and after that a whole image that brought them together onto the same surface that still had traces of the tear in the middle. Three digital images were produced: the left strip, the right strip and both strips together.
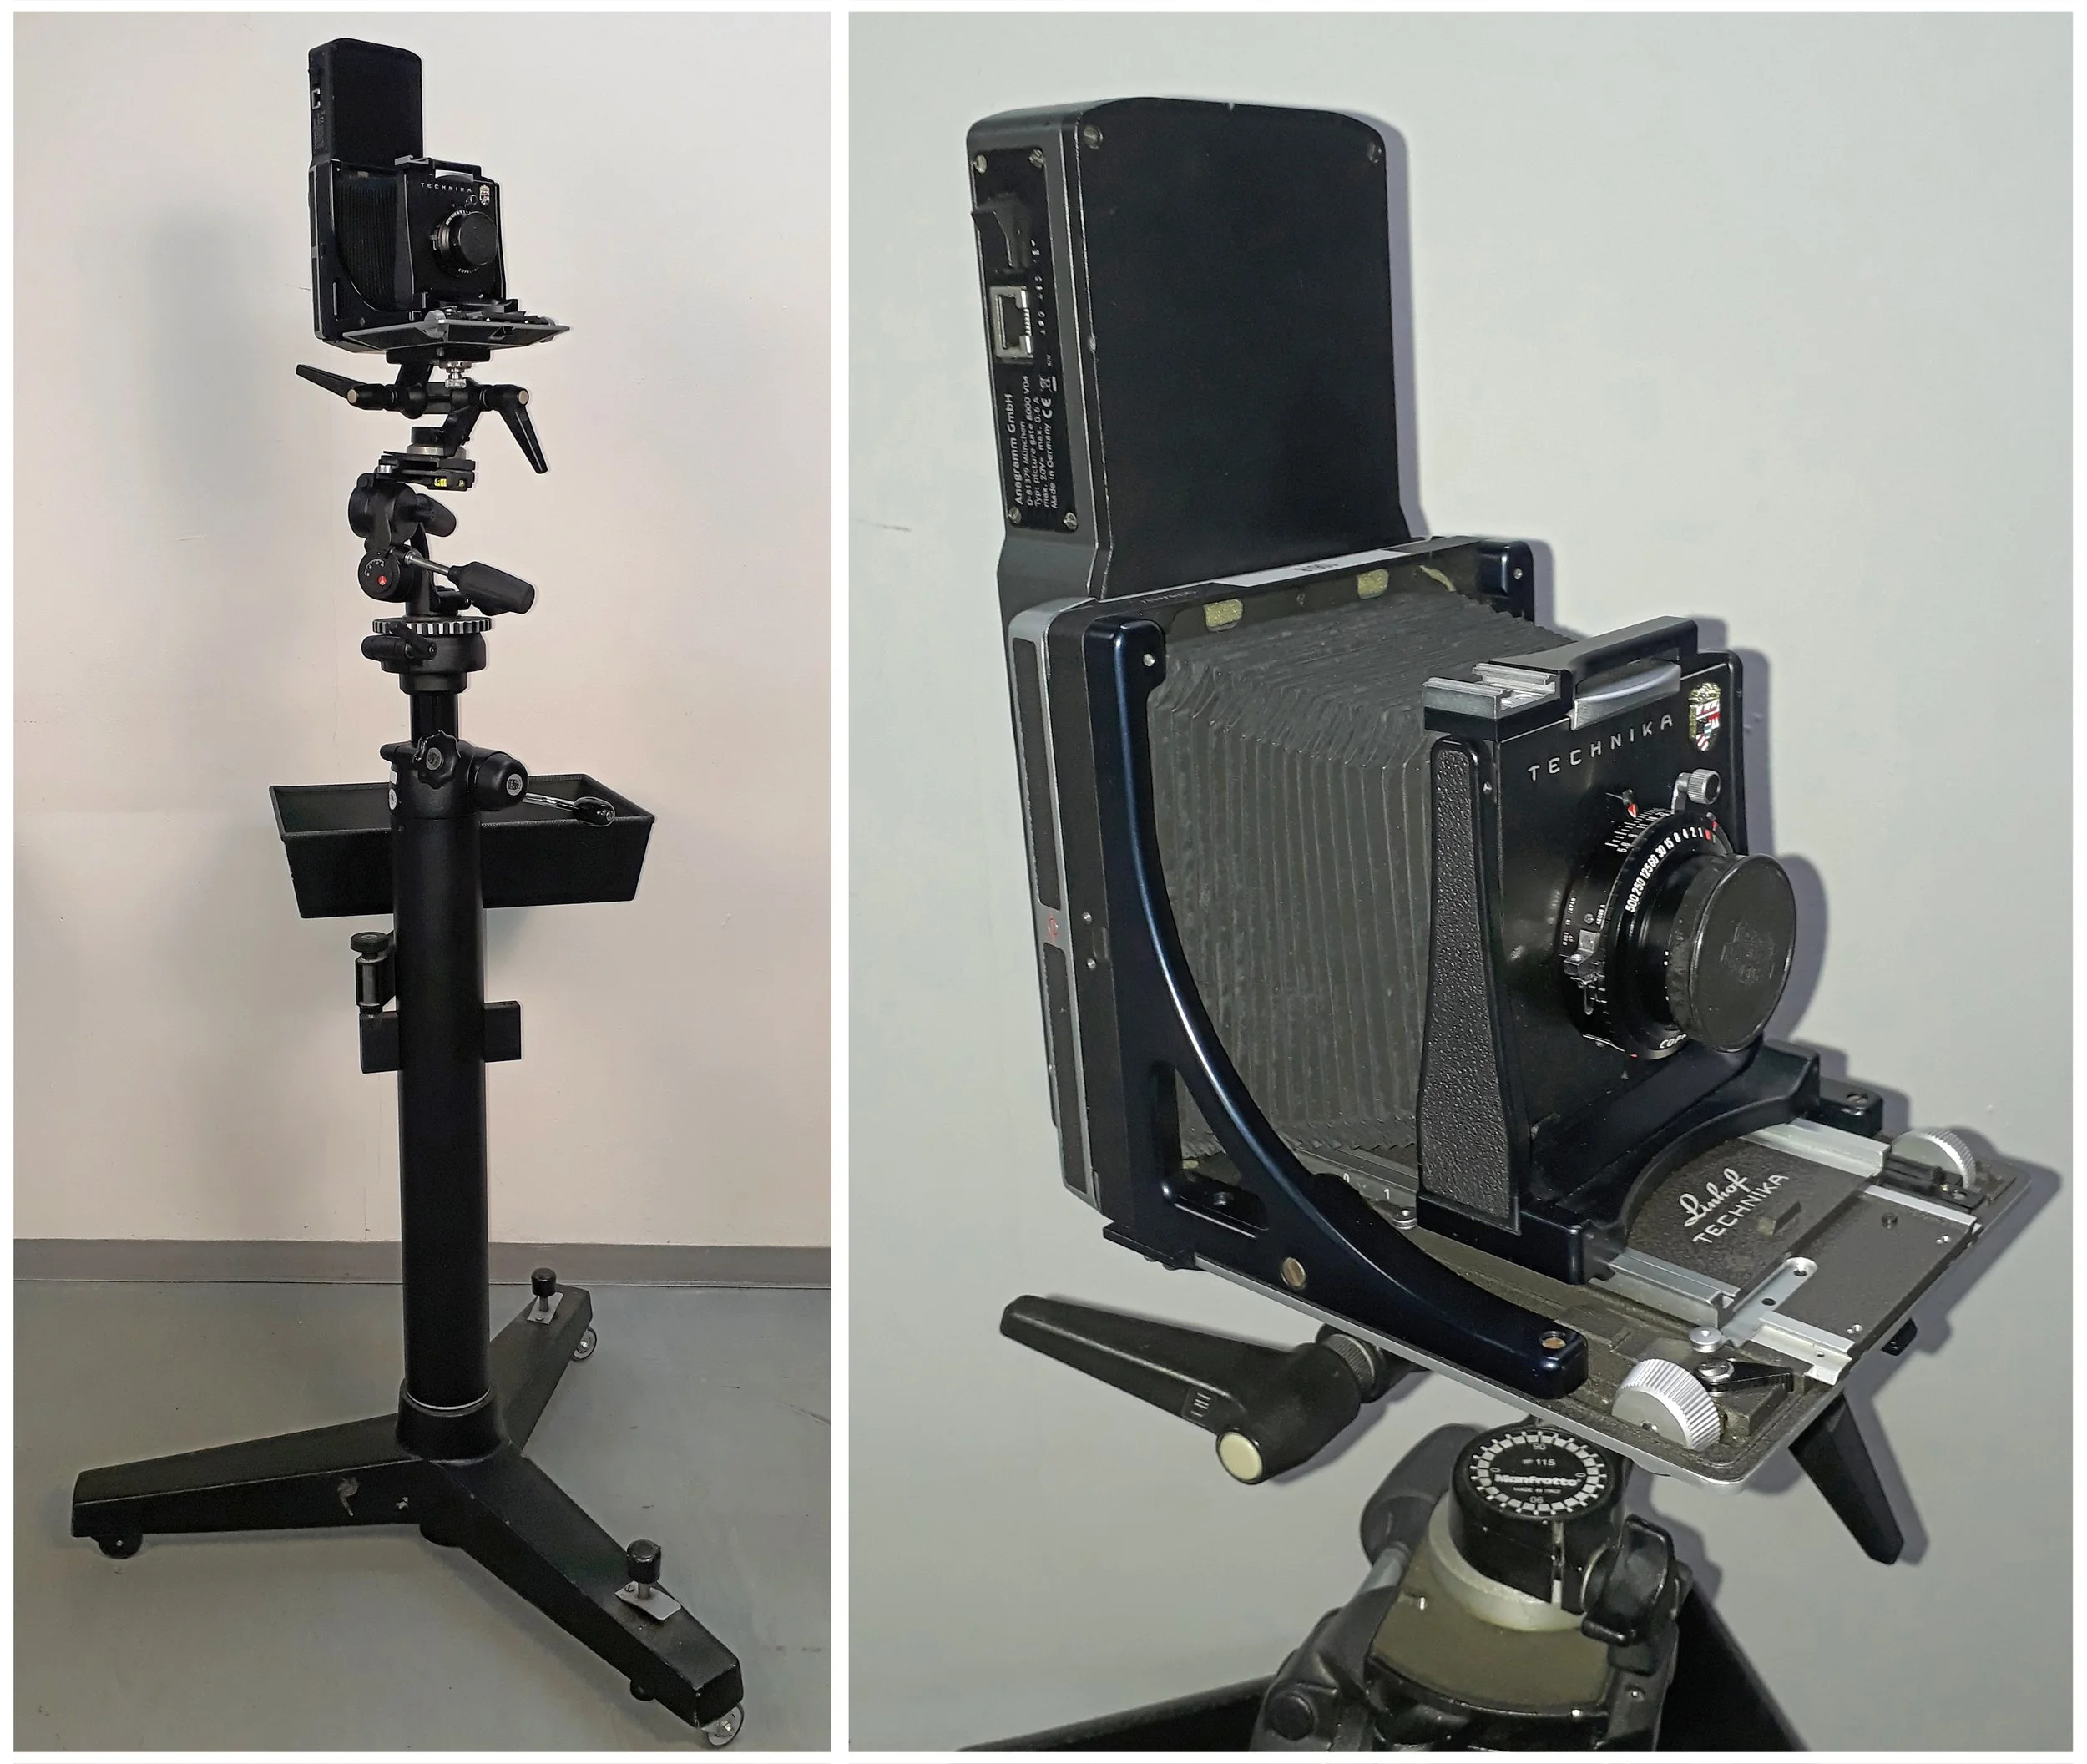
1. Selecting digitization equipment: Archive Scanback Rencay, horizontal stand/tripod and Rodenstock 90mm f/5.6 HR Diagron-W objective. [Ill 7] Scanning software: Renview made for Rencay Scanback.
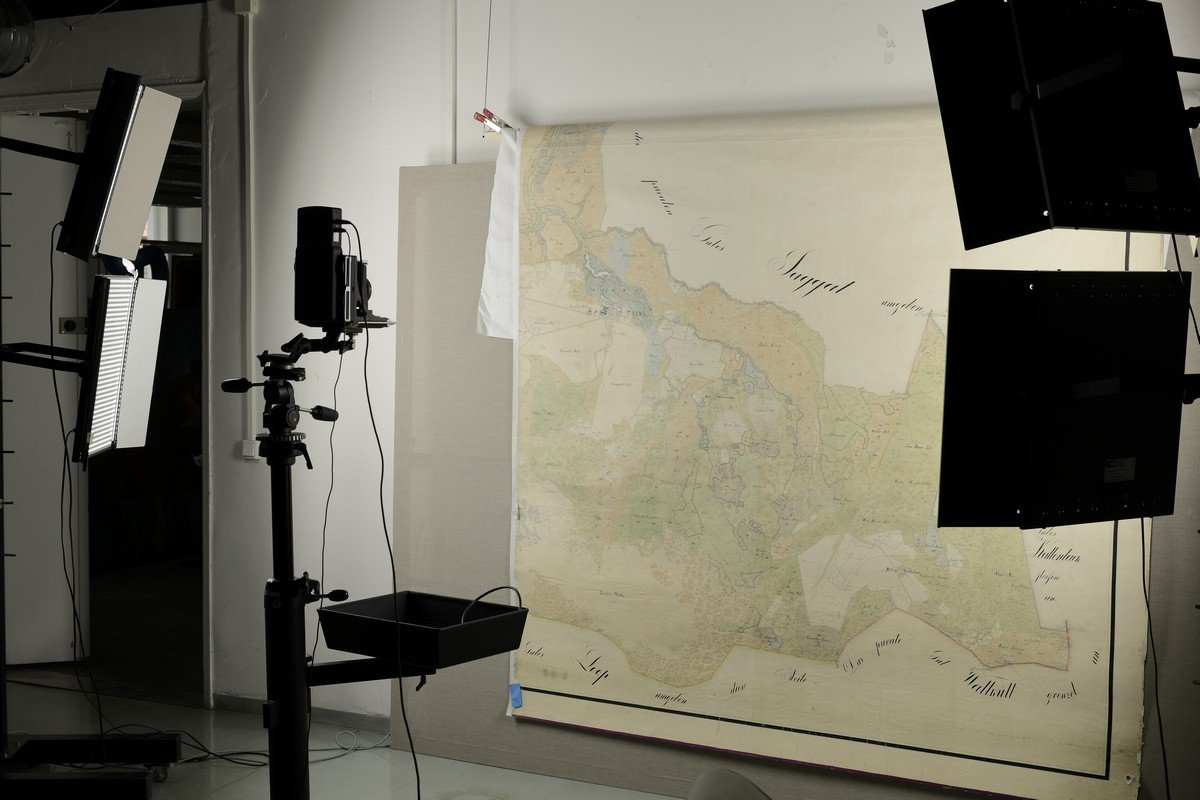
2. Guaranteeing even lighting and preparations for the shadow correction profile necessiated separate scanning from uniform/equable white surface, backing material. Colour coherence and distortions were tested (target scanning). Object scanning. [Ill 8], [Ill 9], [Ill 10]
3. Colour profile and colour space. Scanning software makes it possible to include calibrated or standardised colour profile (file extension ice – abbreviation of the term International Color Consortium) that would provide precision of digitised data in addition to the physical auxiliary devices in the studio.
4. Lamps: LED Light Typ4, 5.000 Kelvin, 150W, daylight.
5. Take and format. One-off gauge: 1300mm x 2100mm. Digital file container: 48bit TIFF
All in all, 8 takes/frames with overlapping to avoid losses or distortions were digitised.
Pieces were joined in image processing, edges merged.
Printing
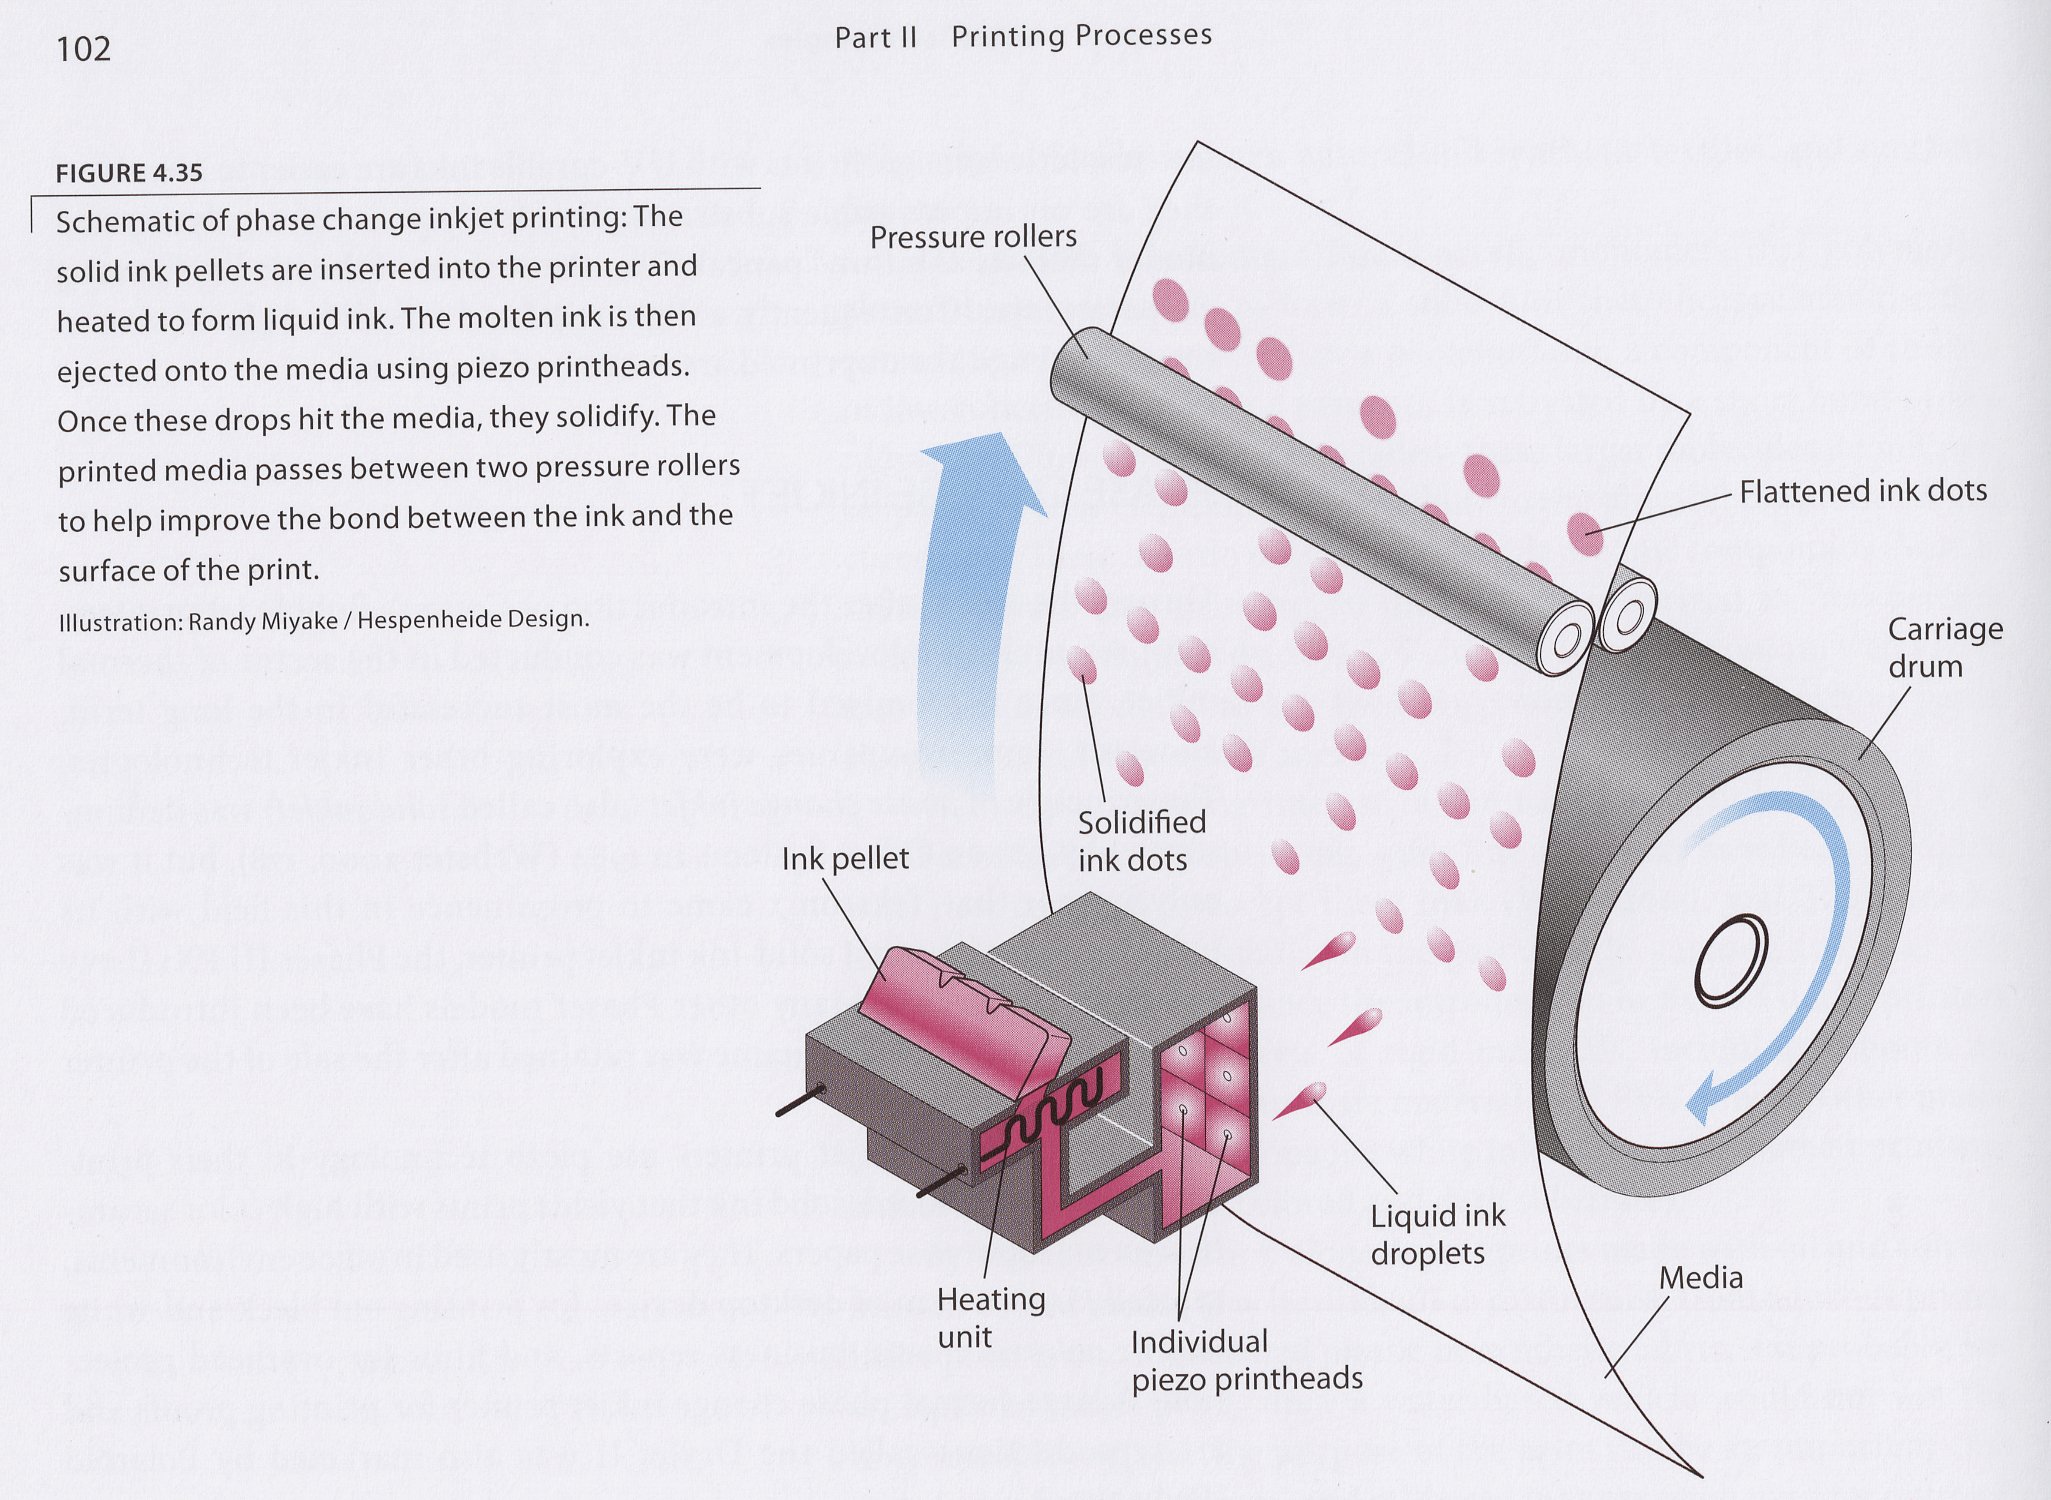
The material chosen for the map was canvas with acrylic-latex coating (Fredrix 90ISJ ) and the phase control inkjet printer technology was applied. [Ill 11]
The test-printing results were compared in different lighting conditions: in a room with checked and high CRI (colour rendering index) colour transmission [ill 12], [ill 13], in natural light [ill 14], and in the light of the automatic digital photo camera flash. [Ill 15] Quite clearly the tests made in technical light brought different results. Some of these differences were so obvious that the final decision about the colour profile had to be seriously deliberated.
The repro was printed on two canvas strips in order to imitate also the torn middle part. [Ill 16]
Earlier digitization and applications of the Palmse map
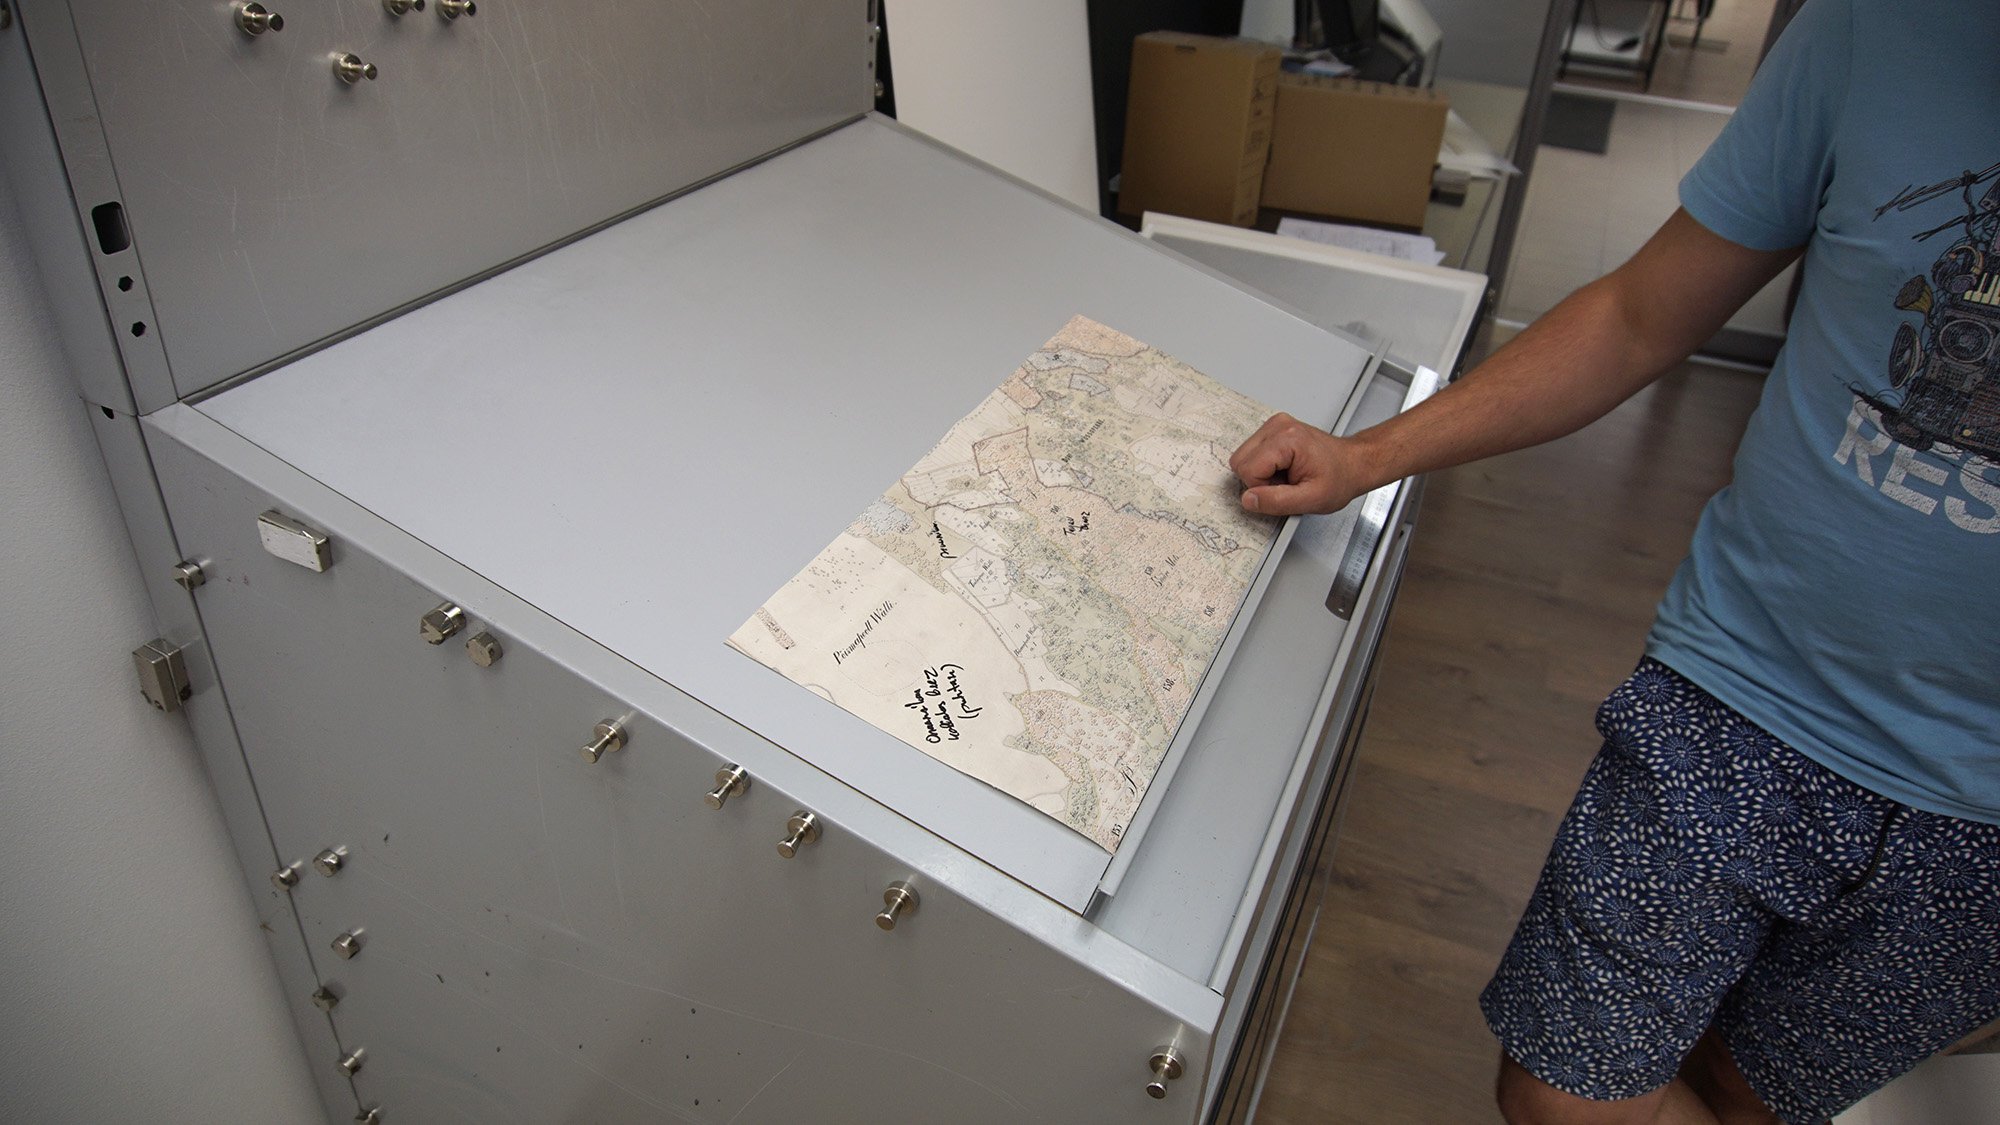
The project of the Palmse map digitisation was a noteworthy achievement in another way as well. The guarantee copies make it possible to examine the map better and present it differently sparing the original. Displaying the original map after its conservation was not recommended, the quality of the digital copy should be enough to suffice for investigations. The resolution of the files digitised in the Kanut was 266dpi, this means they are detailed enough to allow research with little loss of detail.
However, the map had been digitised already before its conservation. The digitised version (photo camera Canon EOS 5D, Mark II, 50mm objective) of Christof Nichterlein, cartography student at Karlsruhe University of Applied Sciences was qualified enough for making geo-reference observations in electronic medium in comparison with other layers of the map. Nichterlein focused on two phases in his research: viide6 ⁽⁶⁾ a) digitising the map as precisely as possible for the web applications; b) creating a historical map layer with the help of the open-source map processing programmes Mapbox and QGIS. As Nichterlein mentioned in his research the files created in this programme can be downloaded in the geographical information system as vector-files. In the map-programme they are displayed as vectors but as a map-layer the application downloads them according to image files (map-style, photos). Nichterlein took 54 shots in all that were automatically assembled by the map-browsing programme’s raster layer application/tool/implement.
Our illustrations show what Nichterlein managed to digitize the map with his own camera in the manor in 2016 and what is the result as a map-application layer. It goes without saying that the strict limits set by the museum administrators influenced the digitization process and its results considerably. Owing to that the image has uneven lighting and colour-balance is not right, as the photos had to be taken in daylight (the museum did not allow the flashlight). [Ill 17]
The version digitised at the Kanut photo-laboratory (mainly for the repro) may still be used as a digital copy, too. The digital copy allows the details of the image to be enlarged considerably. [Ill 18], [ill 19]
Digitising a large object in high resolution and big bit-depth unavoidably increases the file size. The TIFF background layer of the whole Palmse map is 3.4 GB in size. Every new layer created when processing this background multiples the file size. For example – the additional layers created in the Adobe Photoshop thus need powerful computers to work. Processing the Palmse map for printing the file size was nearly 17 GB.
A version of the map (a back-up copy) should be made every time fulfilling the criteria necessary for the museum or research. Exporting the digitized map into a JPEG file would allow all computers to display the digital copies of the Palmse map. Preliminary work for that would have to be done in a graphics workstation, in other words, a computer specialized for image rendering processes.
Viited
Leis, Joel. Sissejuhatus digiteerimise põhimõistete juurde, Renovatum Anno 2015 –
https://renovatum.ee/autor/sissejuhatus-digiteerimise-pohimoistete-juurde ↩︎Jürgens, Martin C. The Digital Print: Identification and Preservation. Thames & Hudson, 2009. ↩︎
About combining benchmarks for testing larger planes see: https://www.univarsaltesttarget.com/download/UTT%20technical%20specs%20v1.1.pdf ↩︎
The estate map of Palmse Manor is a large (3800mm x 4212mm), extremely detailed, hand-painted,
topographic map, compiled by Carl August Jürgens in 1859-1864. Its initial scale is 1:4200. The front side – the averse – is made of paper. The back – the reverse – is of textile that makes the surface of the map tougher and canvas-like. ↩︎Allik, Maris. Suuremõõtmelise käsitsi maalitud kaardi konserveerimise lõputa lugu (An Incomplete Story About the Conservation of the Hand-painted Map of the Palmse manorial Estate), Renovatum Anno 2019/2020. ↩︎
Nichterlein, Christof. The Estate Map of Palmse Manor. A Comparisonof Past and Today and the Way to an Open Source WMS, 2015/2016, Karlsruhe University of Applied Sciences, Faculty of Information Management and Media – https://mapanddesignspecialist.azurewebsites.net/ ↩︎