

Archangel Gabriel’s StoryConservation of the broken door in the iconostasis of the Kuriste
Autor: Maria Lillepruun
Number: Anno 2022/2023
Rubriik: Conservation
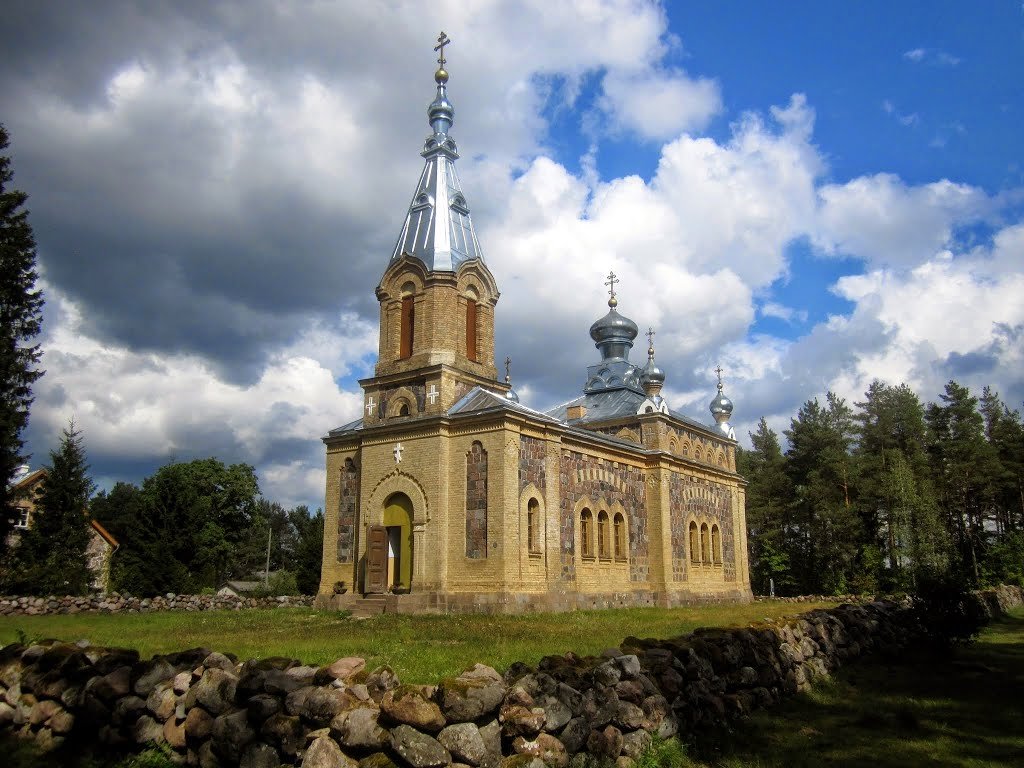

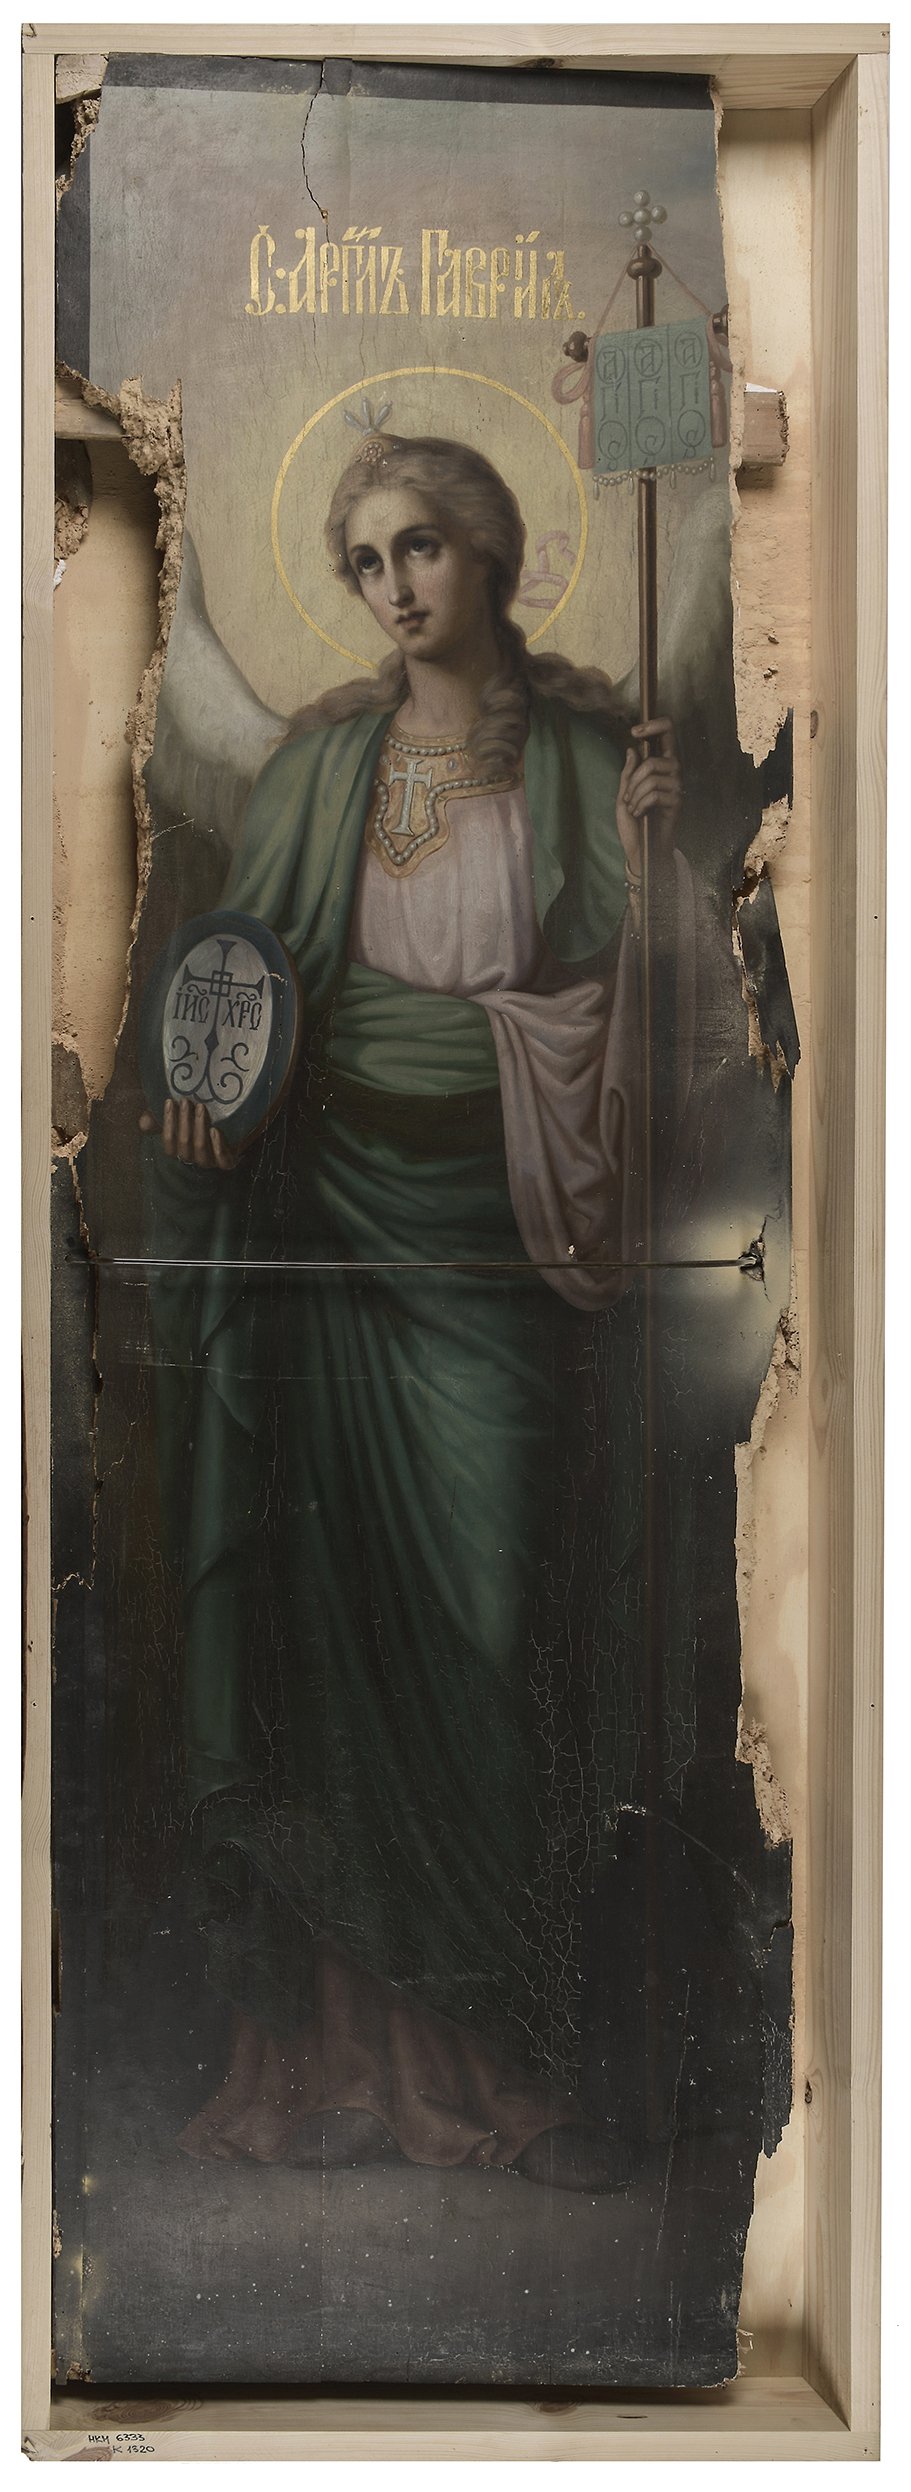

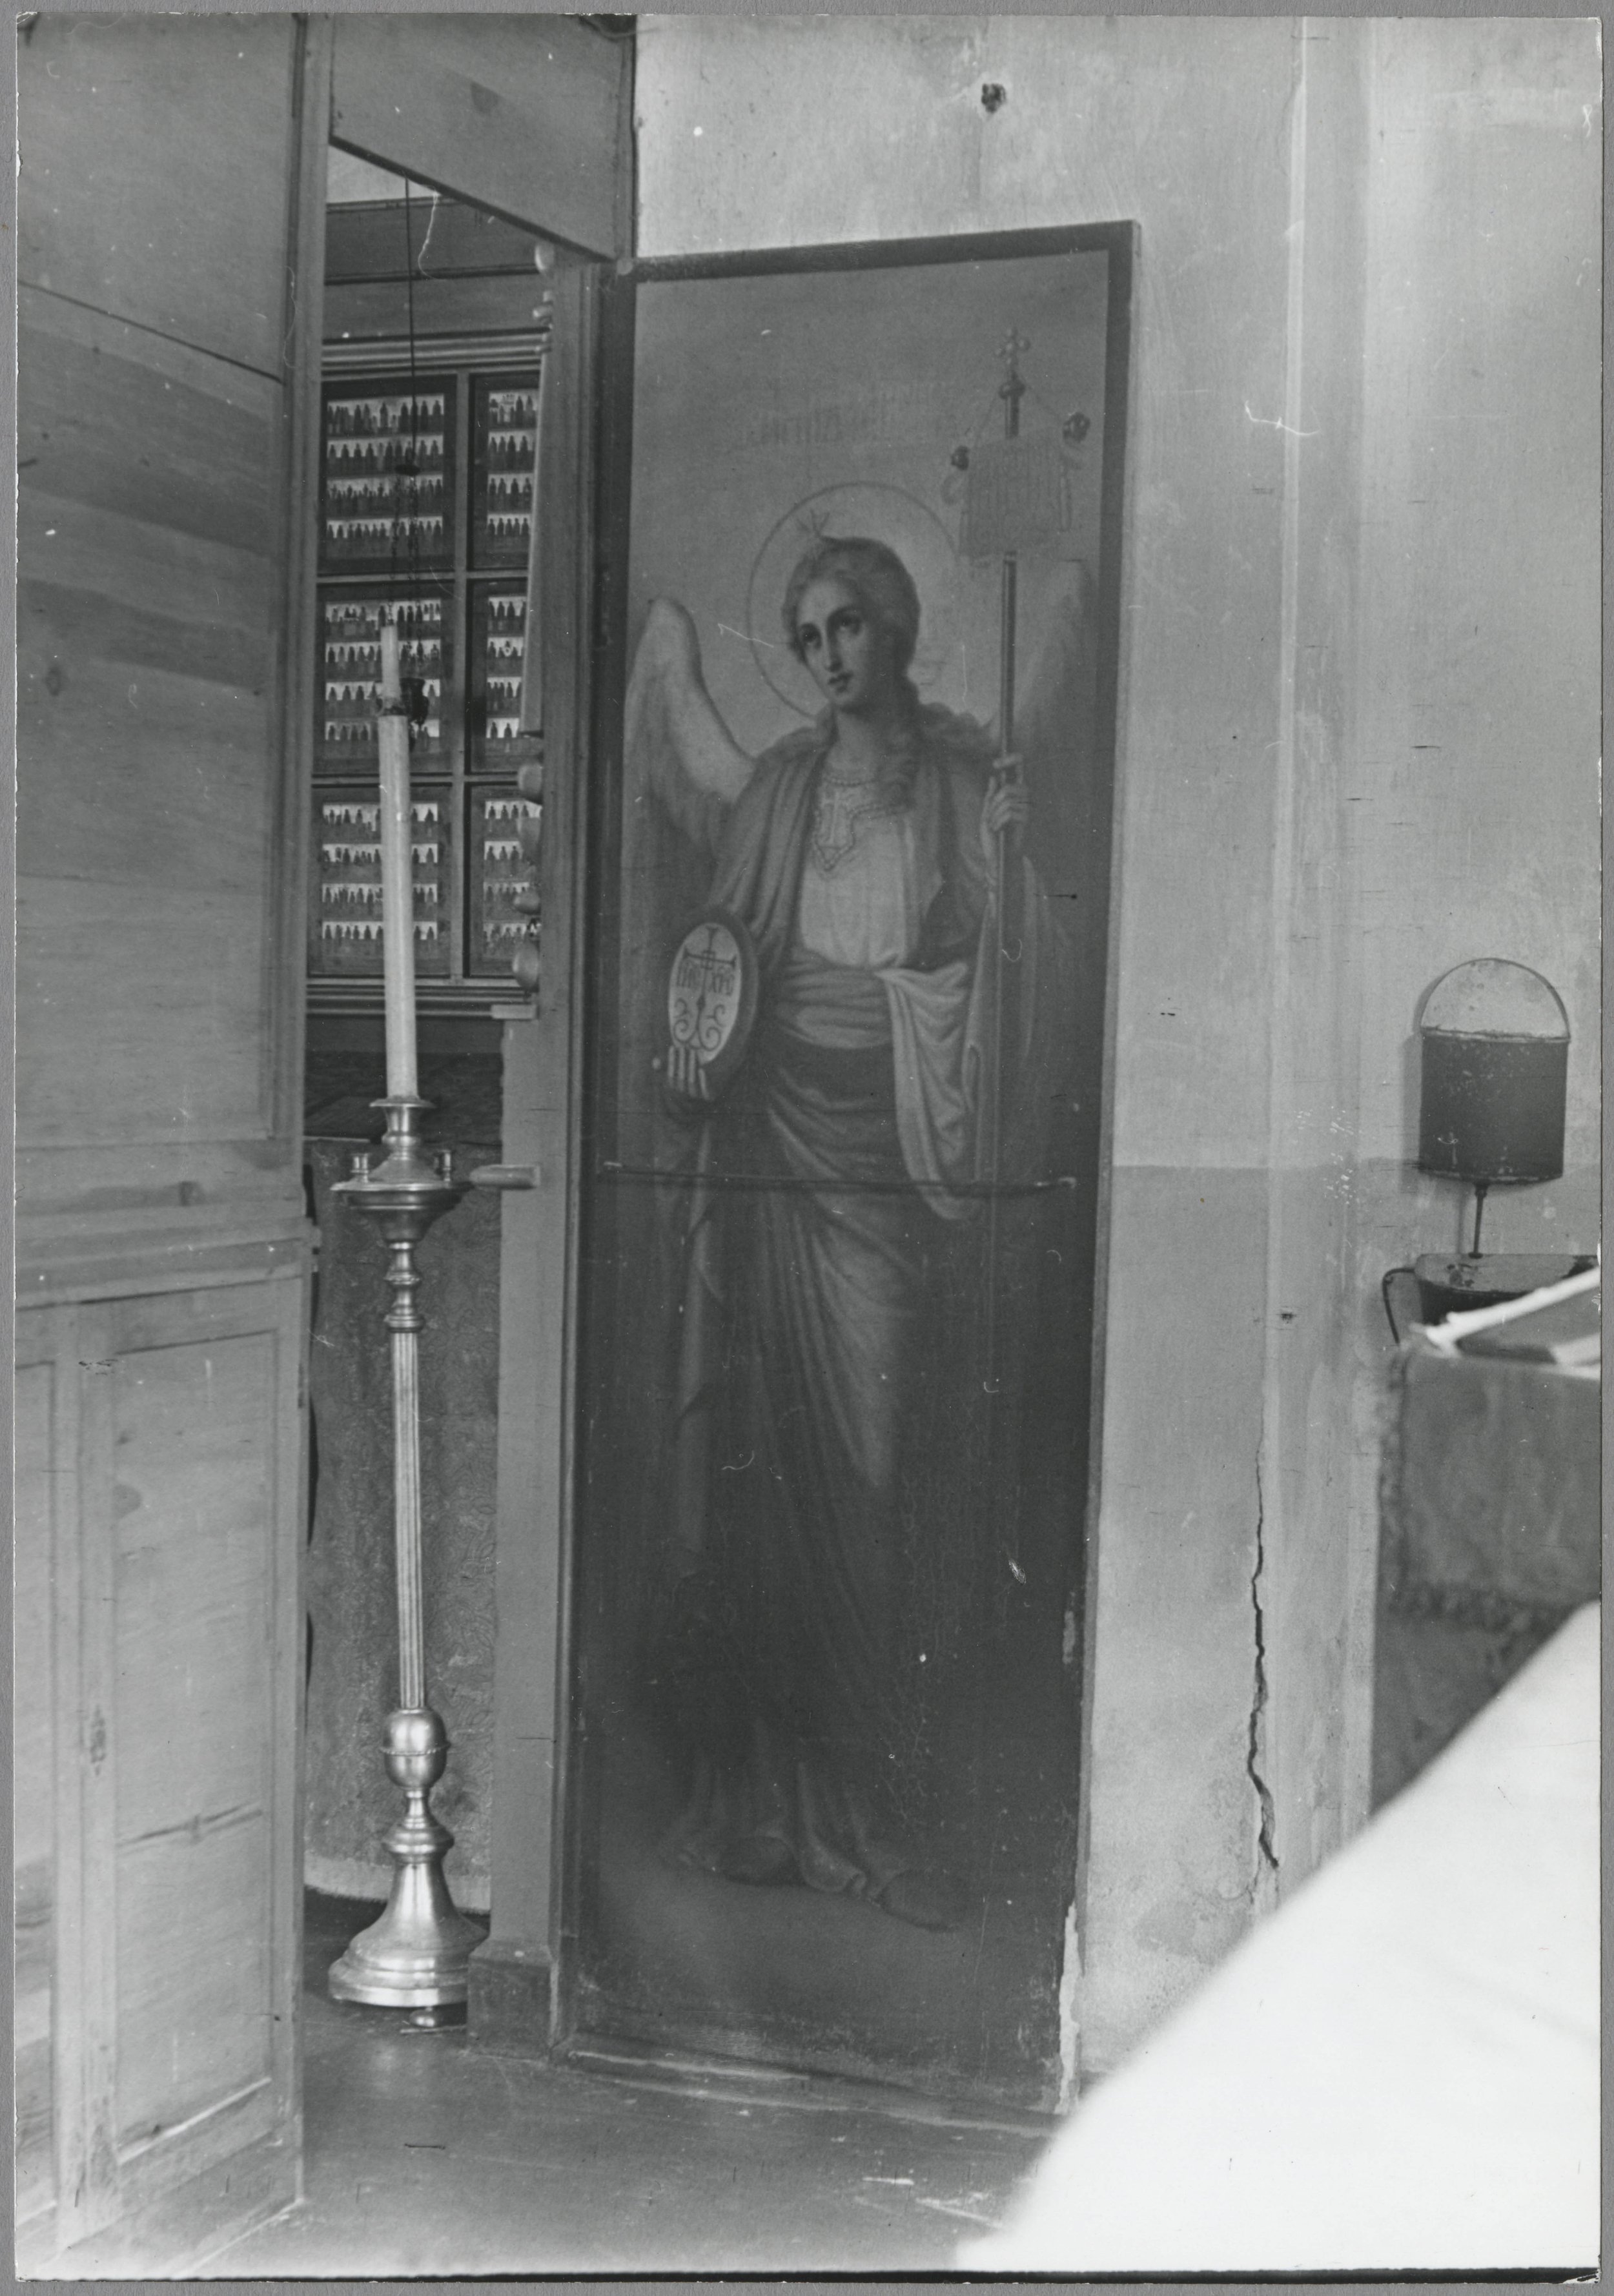

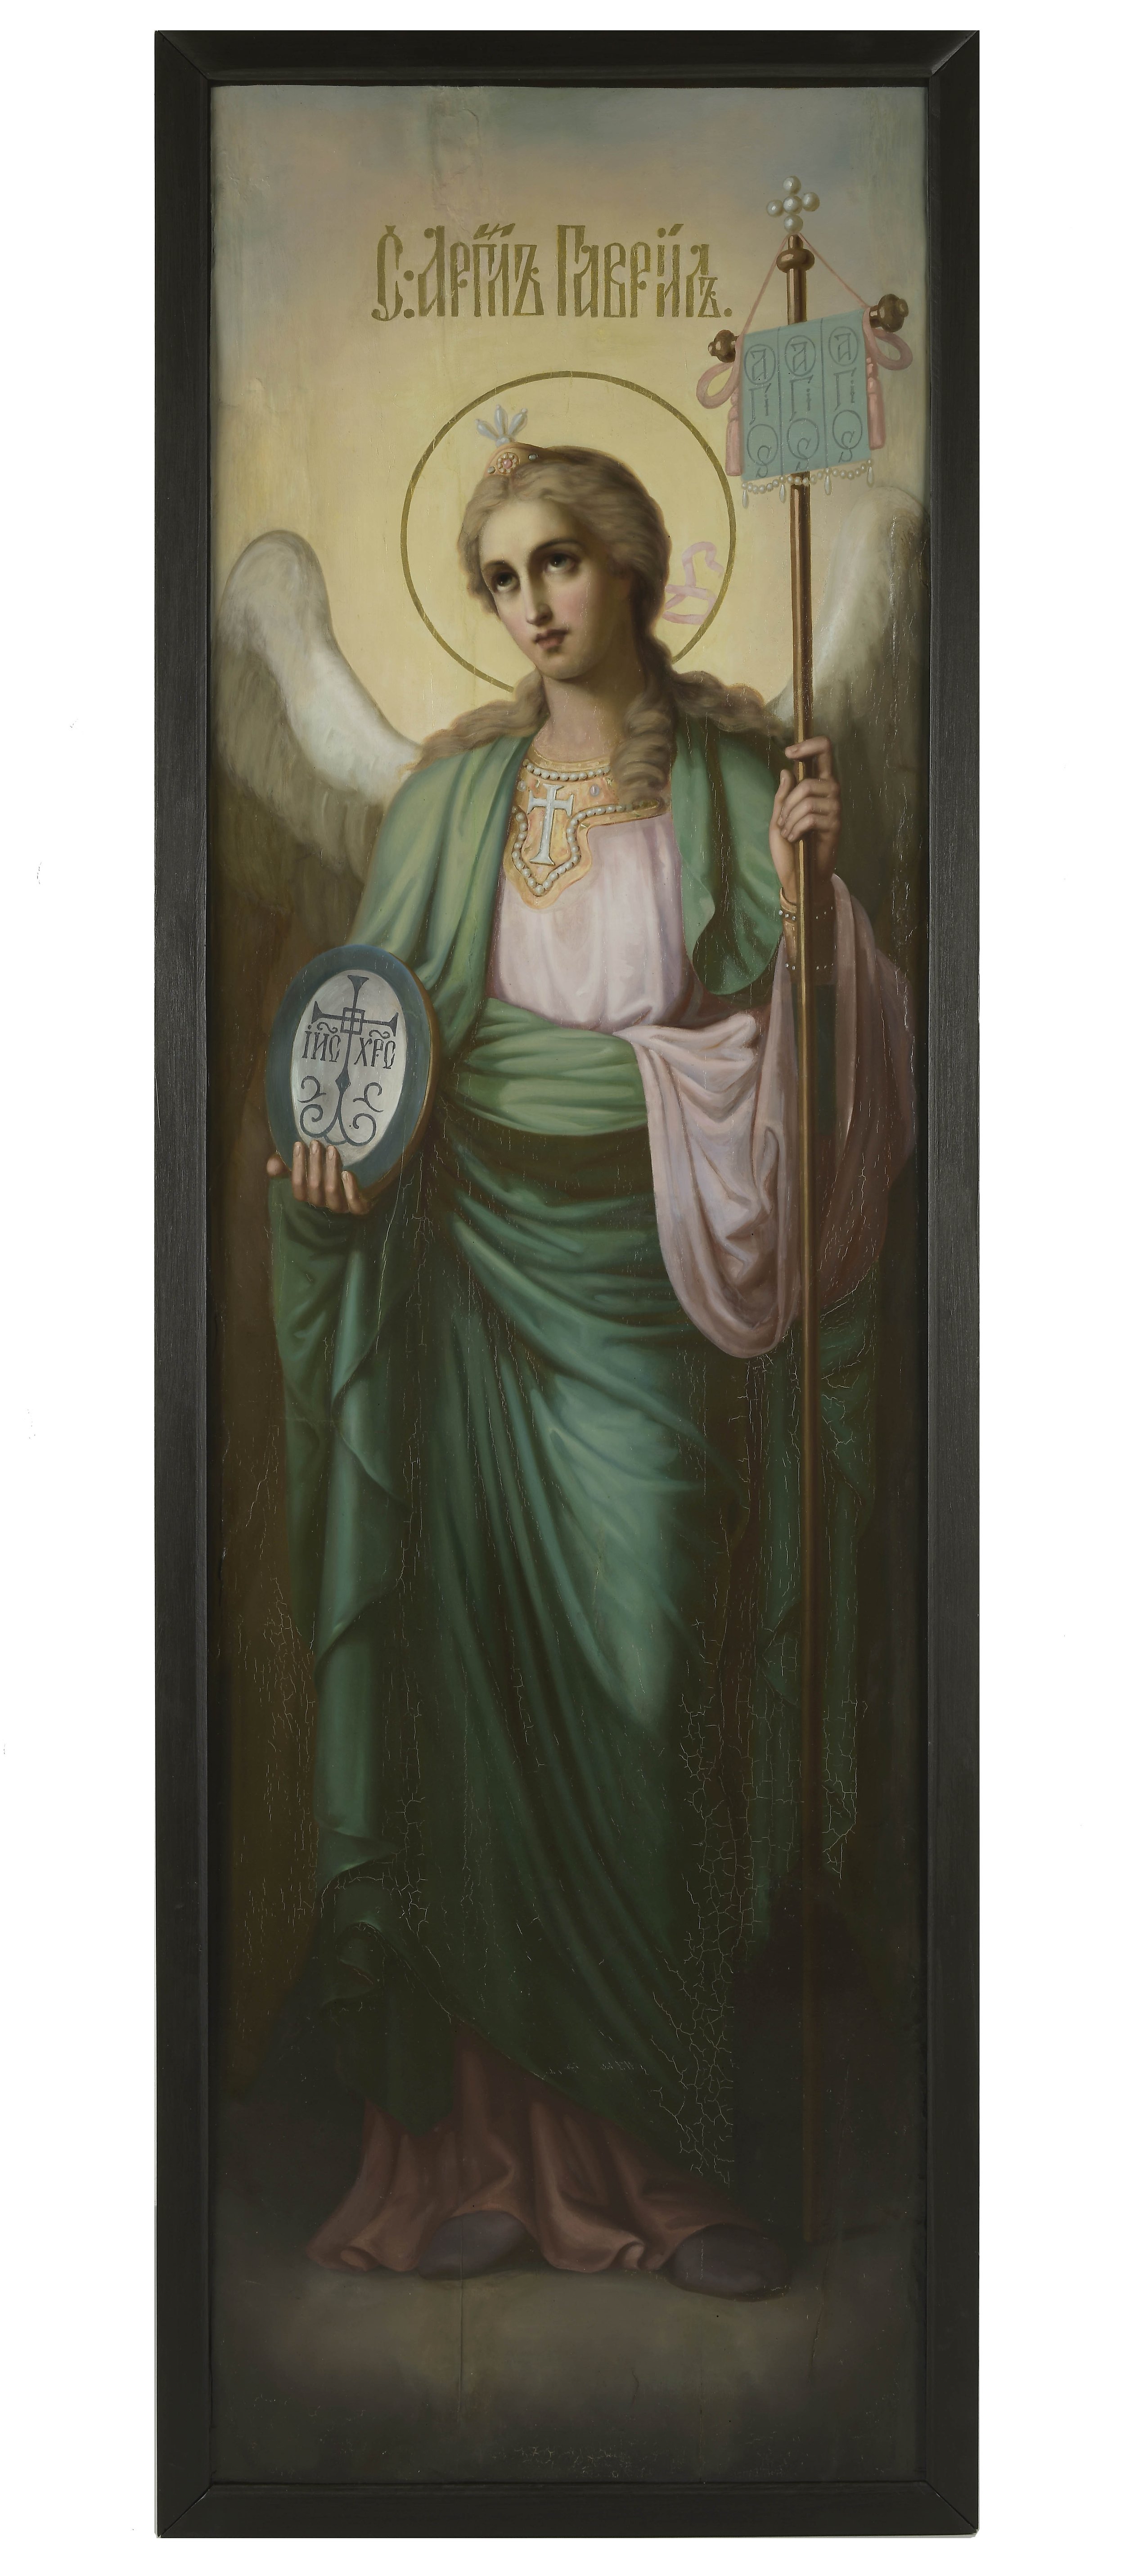
The Emmaste Apostolic Orthodox Church in Hiiumaa is also known as the Kuriste Church of the Birth of Our Lady. [ill 1] The iconostasis was evidently made in between 1900-1920. It has two diaconal doors decorated with images of archangels. The present article is focused on one of these doors, not a part of the iconostasis any longer and thus further on called icon. The icon on a wooden base Archangel Gabriel was registered in the collection of SA Hiiumaa Muuseumid as a museum piece HKM_6333 K 1320. [ill 2]
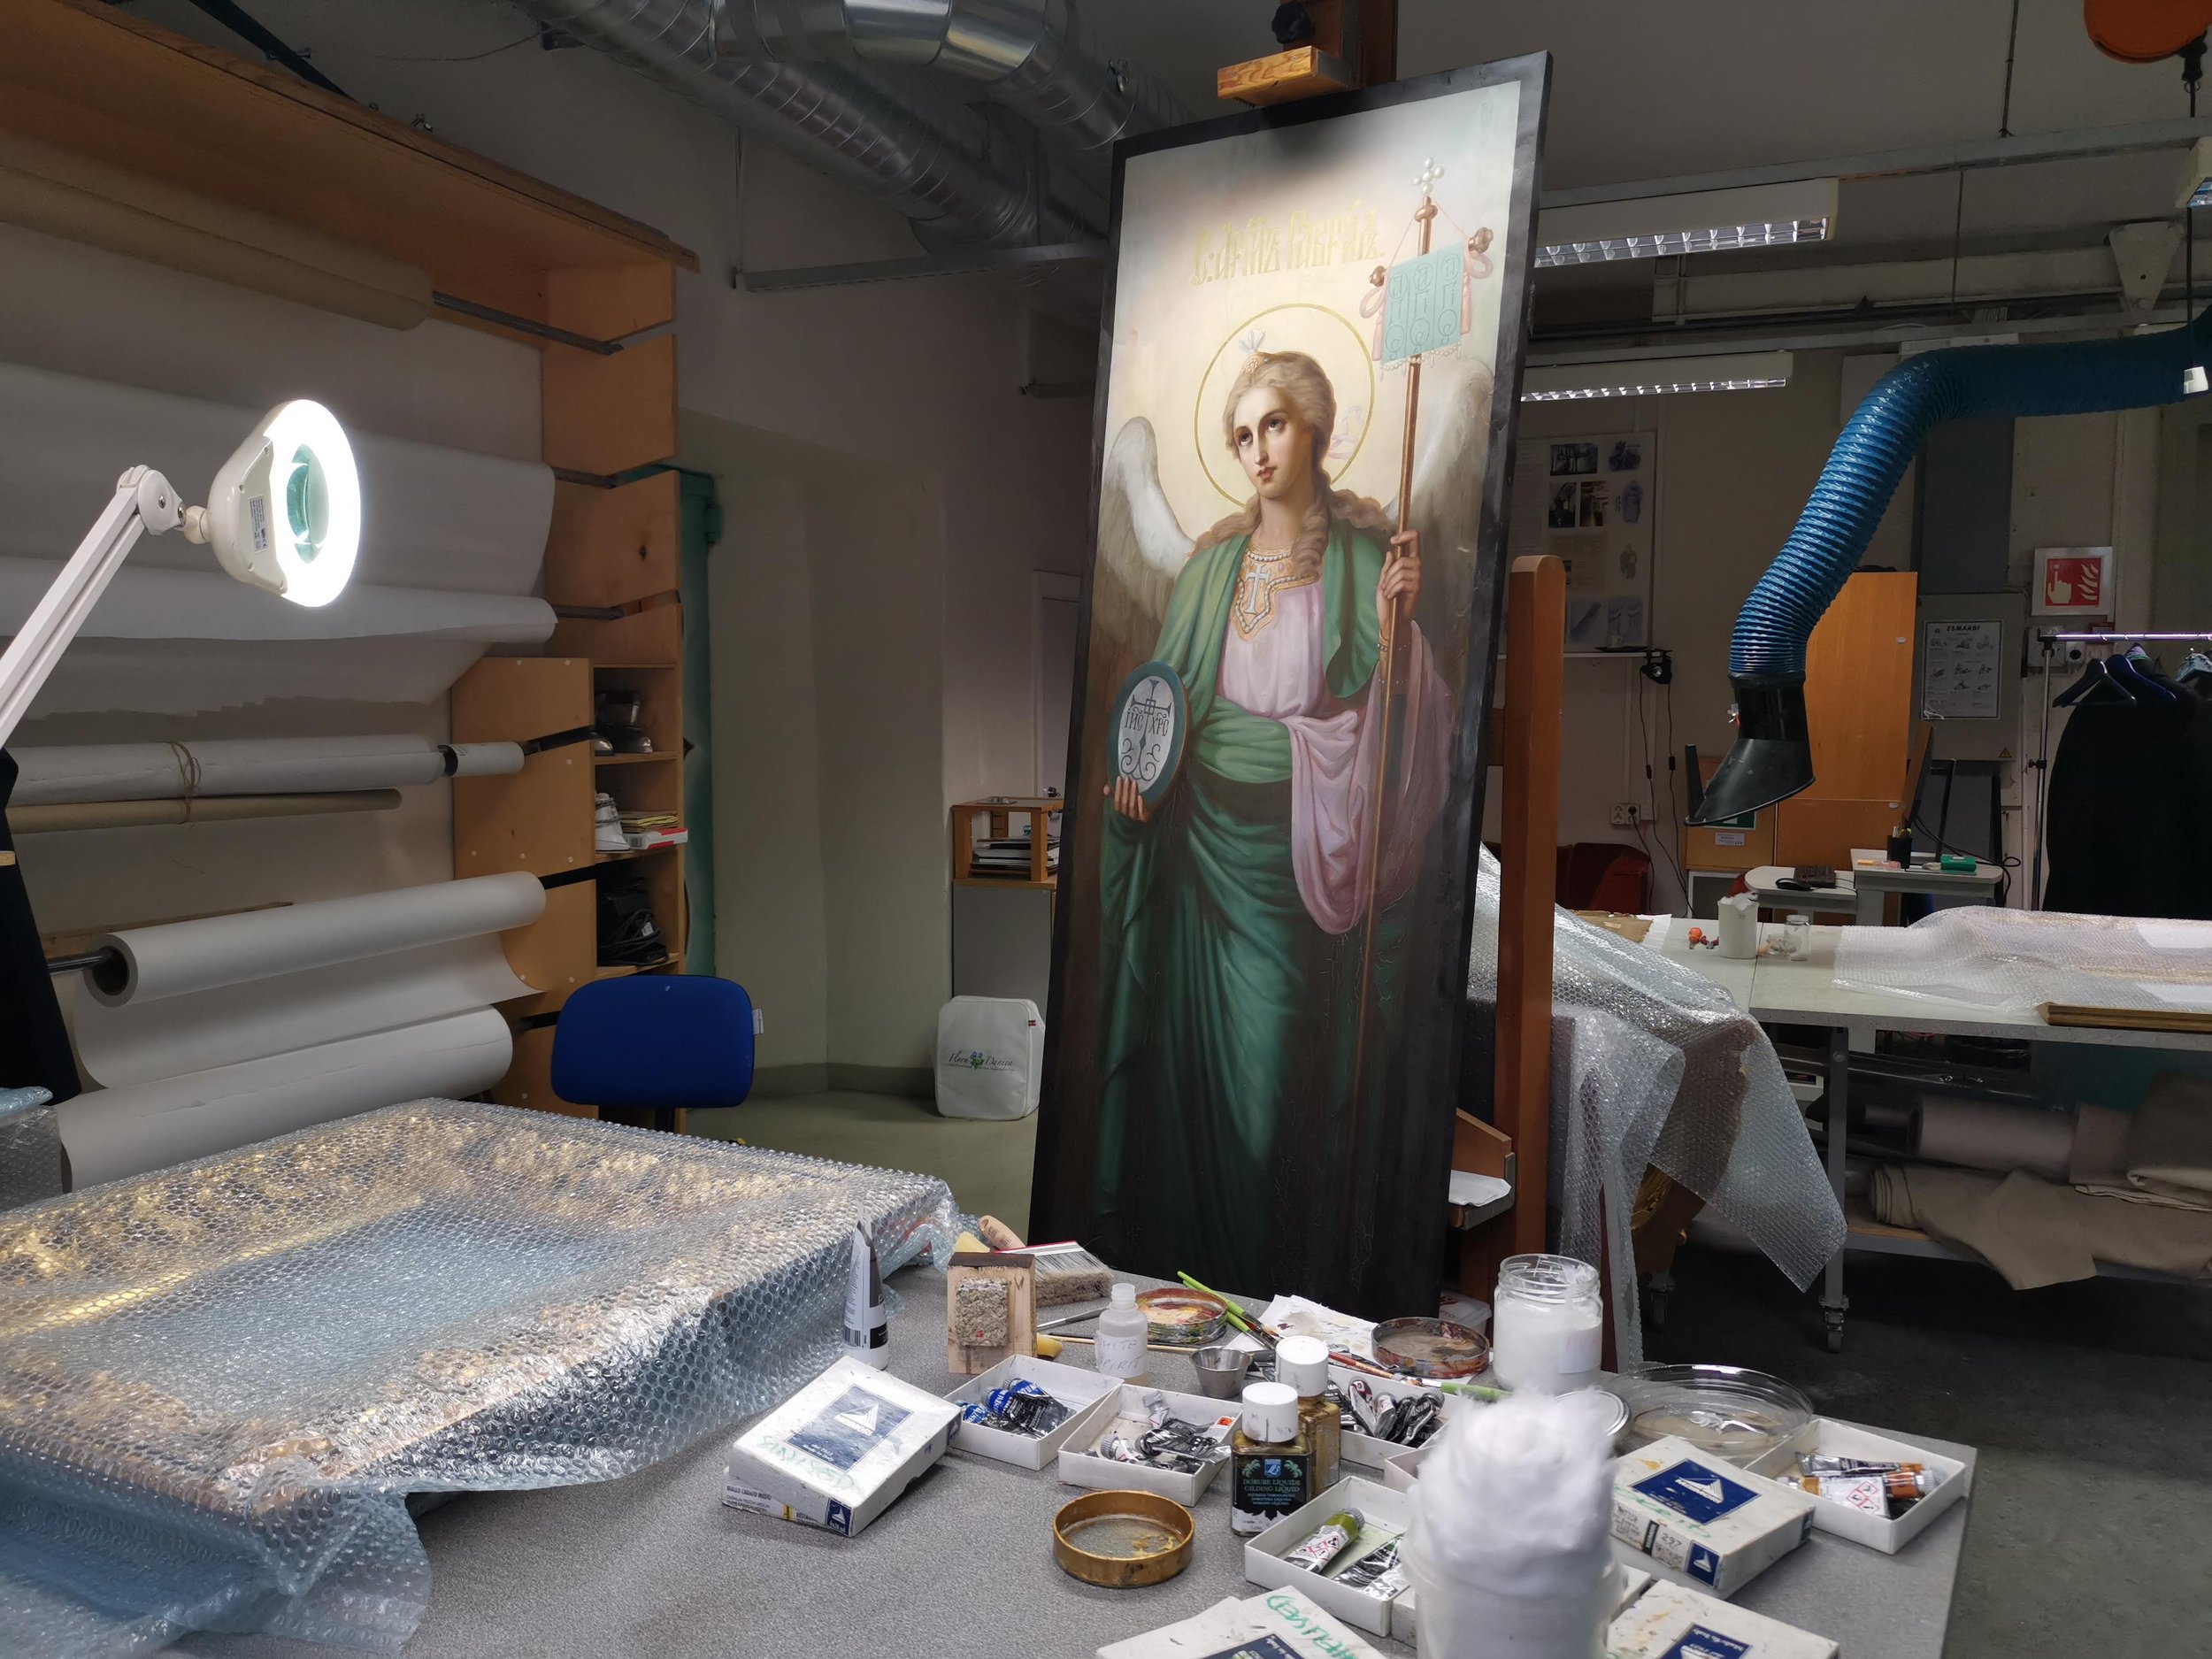
The big icon was brought at the state order to the Conservation and Digitisation Centre Kanut in June 2019. It was in a very poor condition and its conservation turned out to be labour-consuming indeed. Several interesting solutions, though, were worked out when preparing the icon for exhibiting again.
Description of the icon
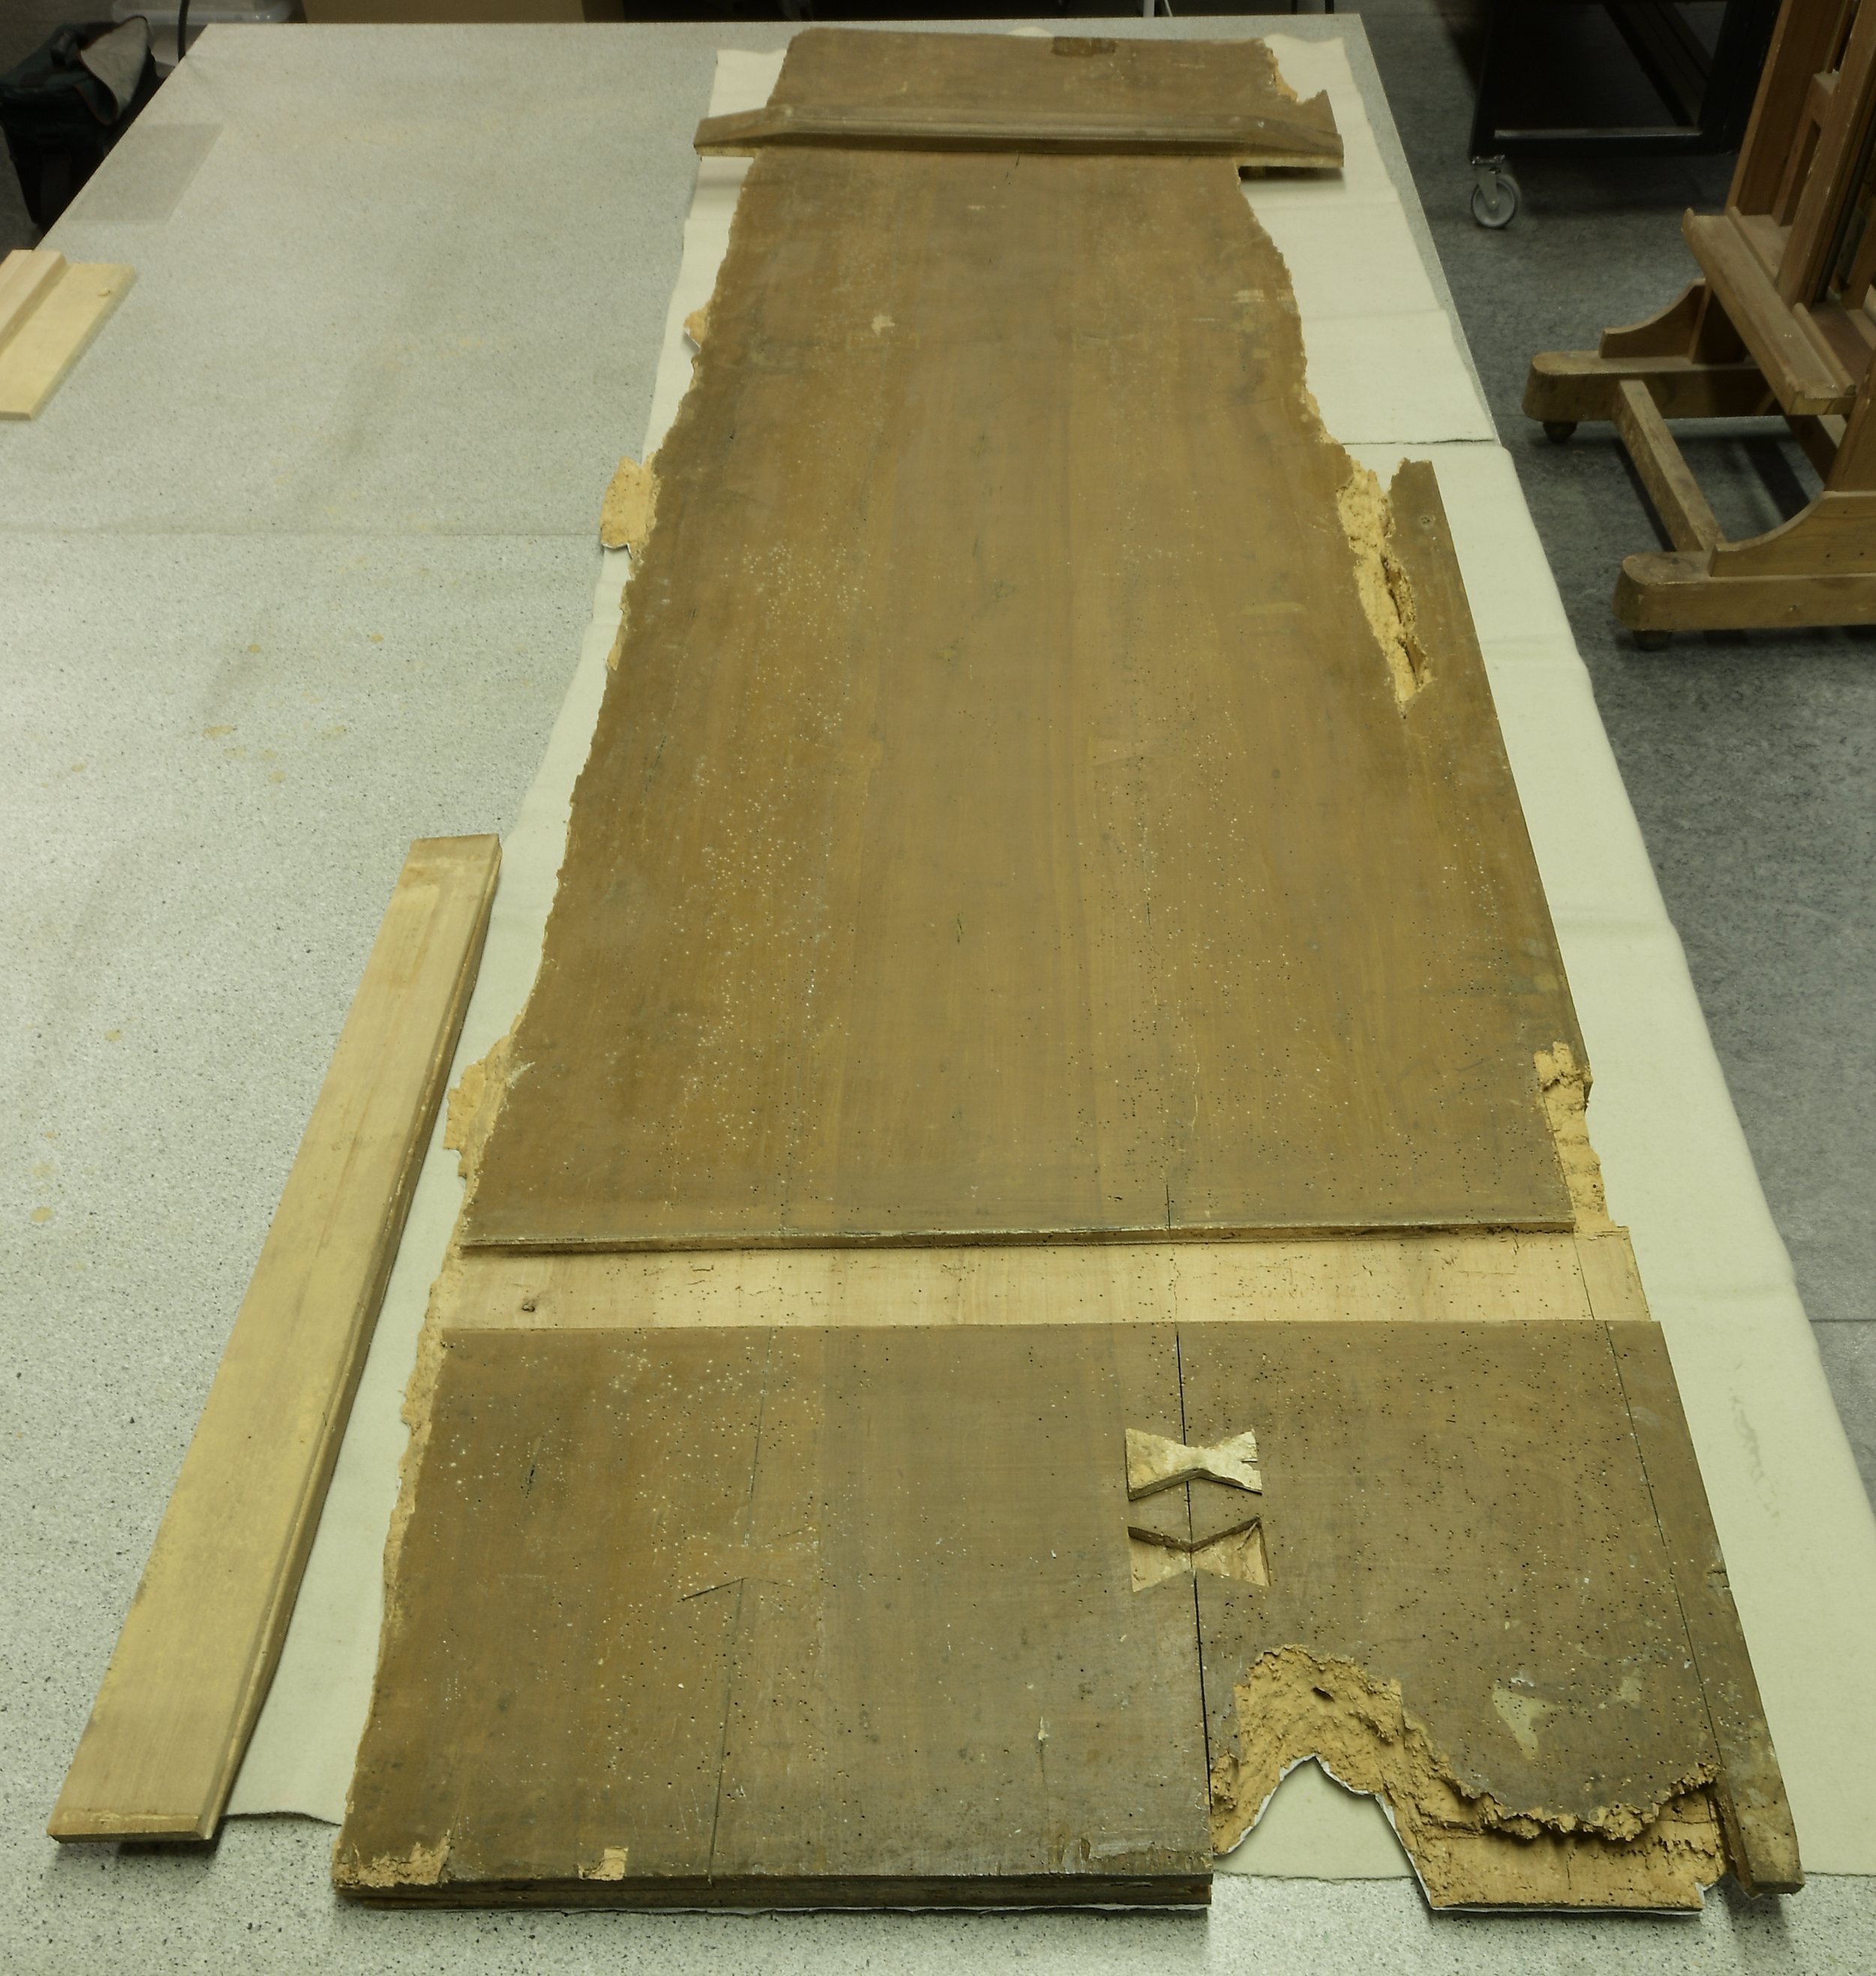
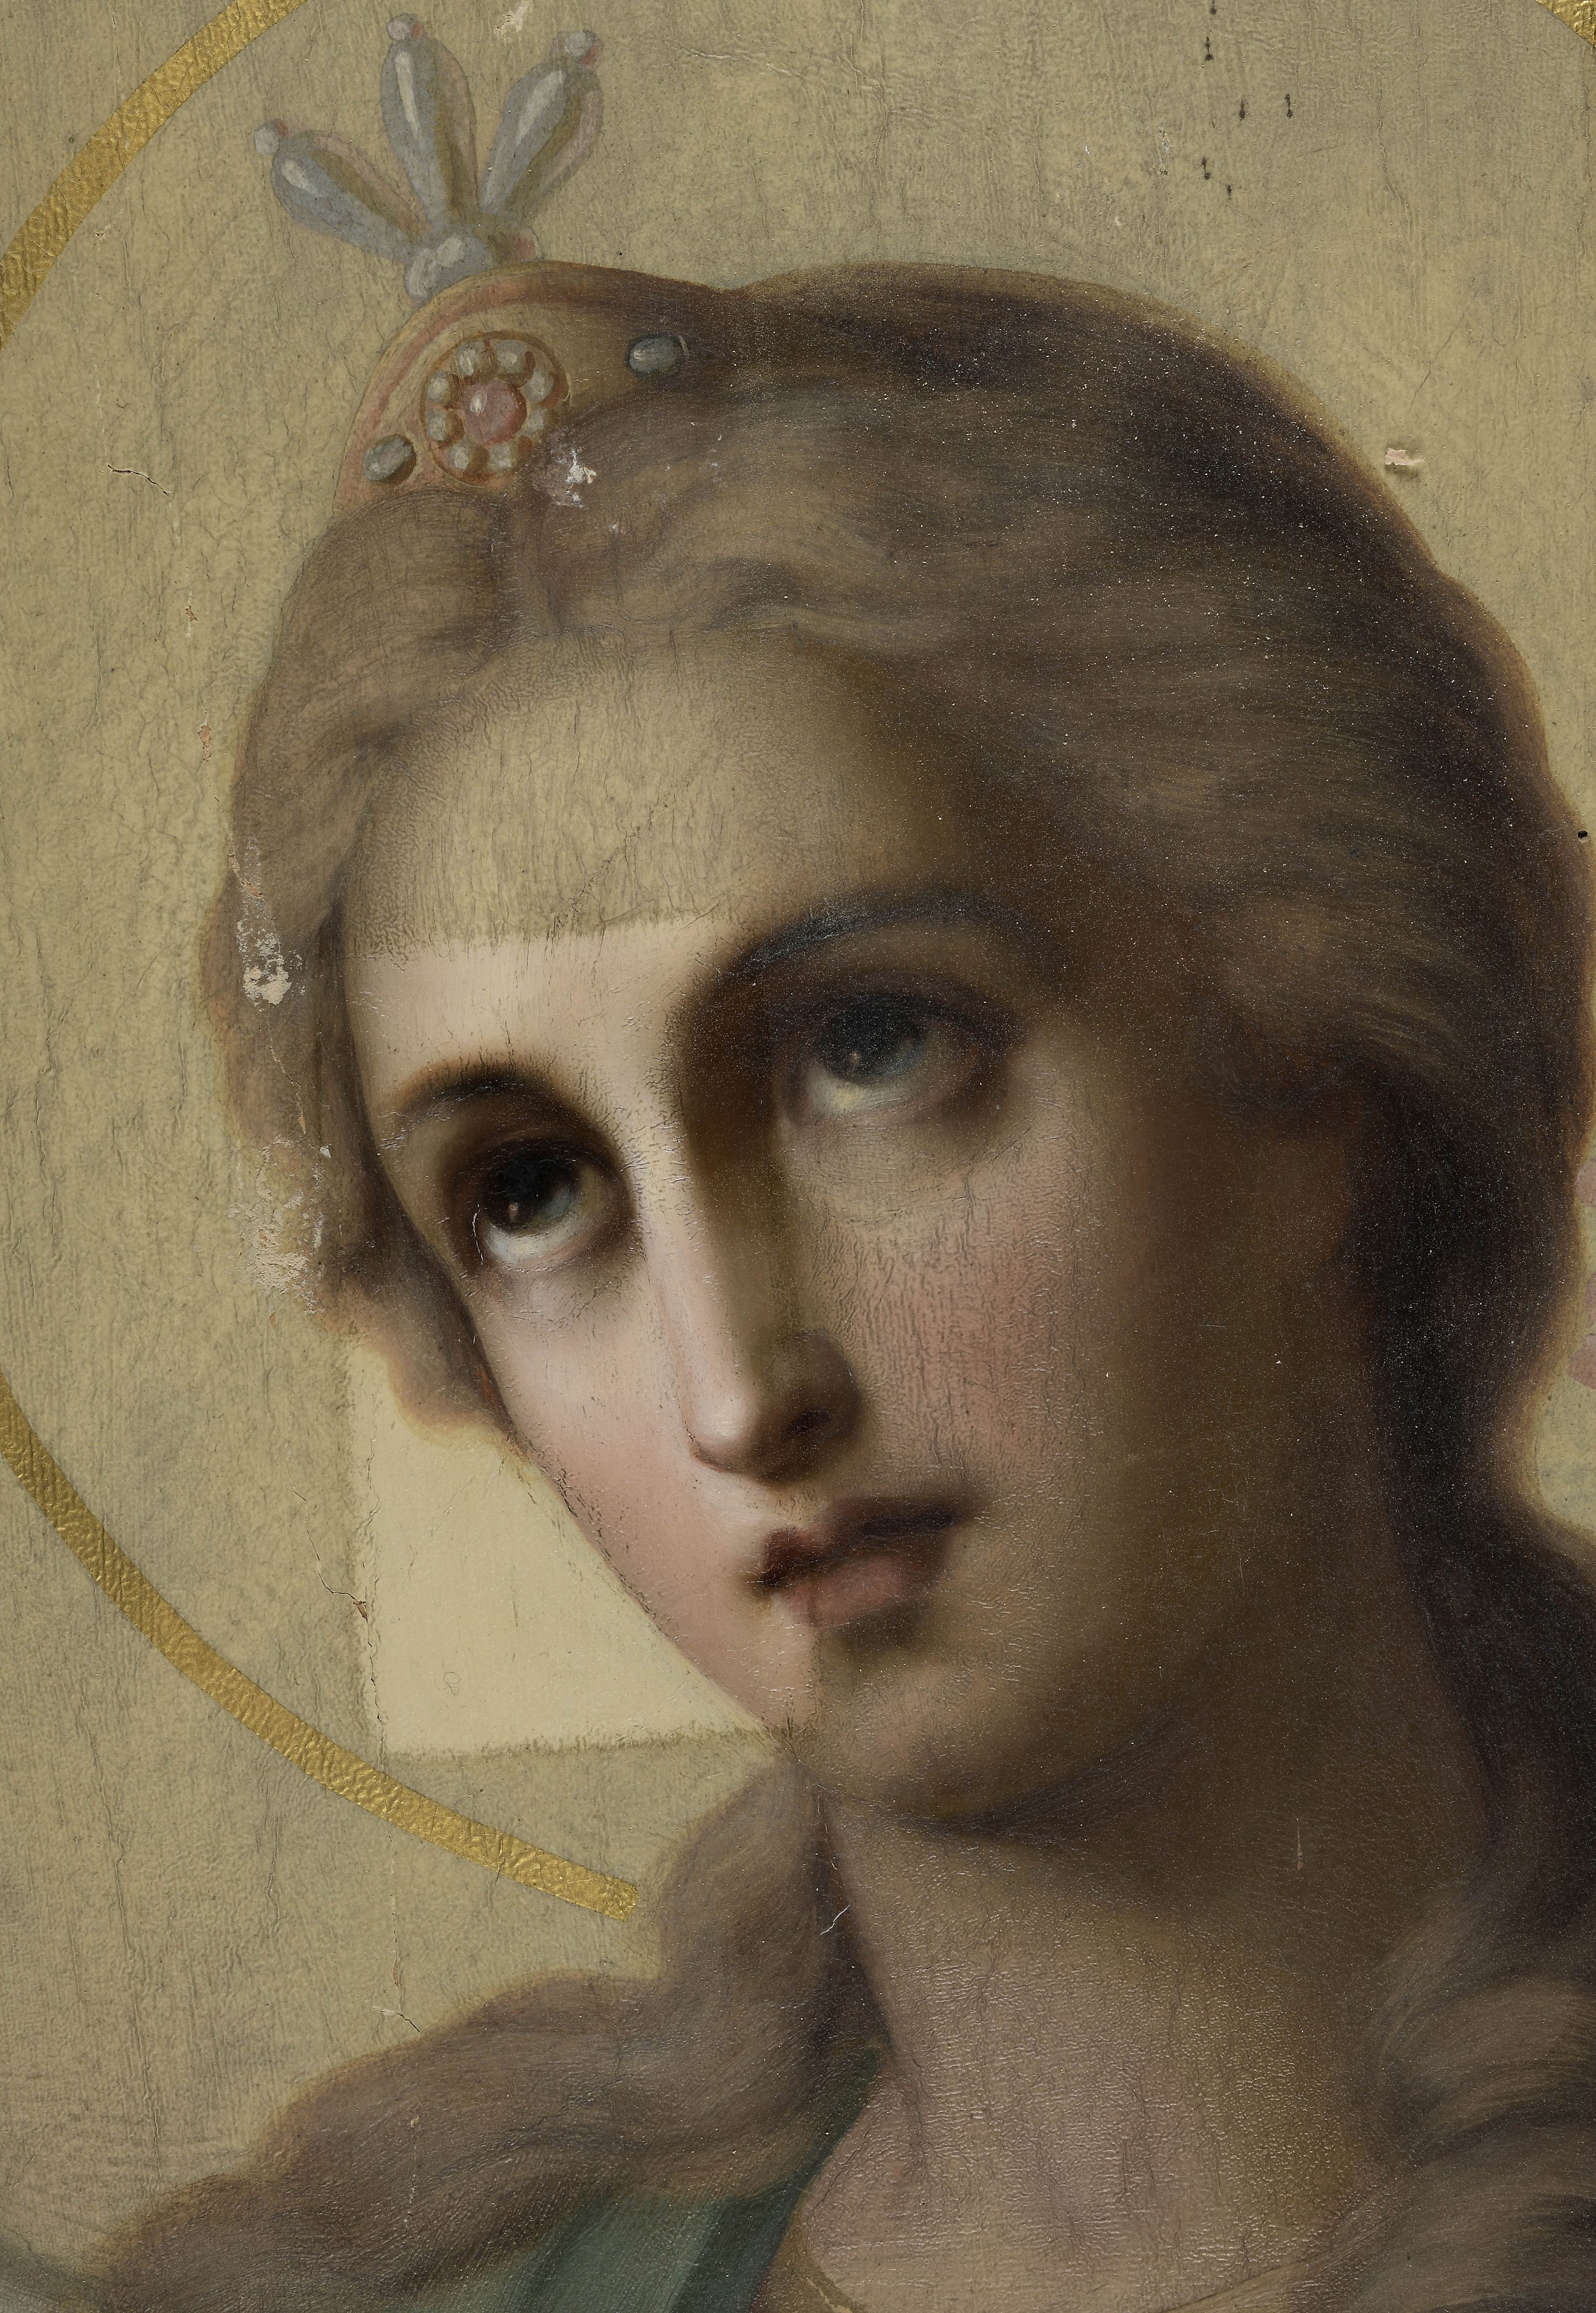
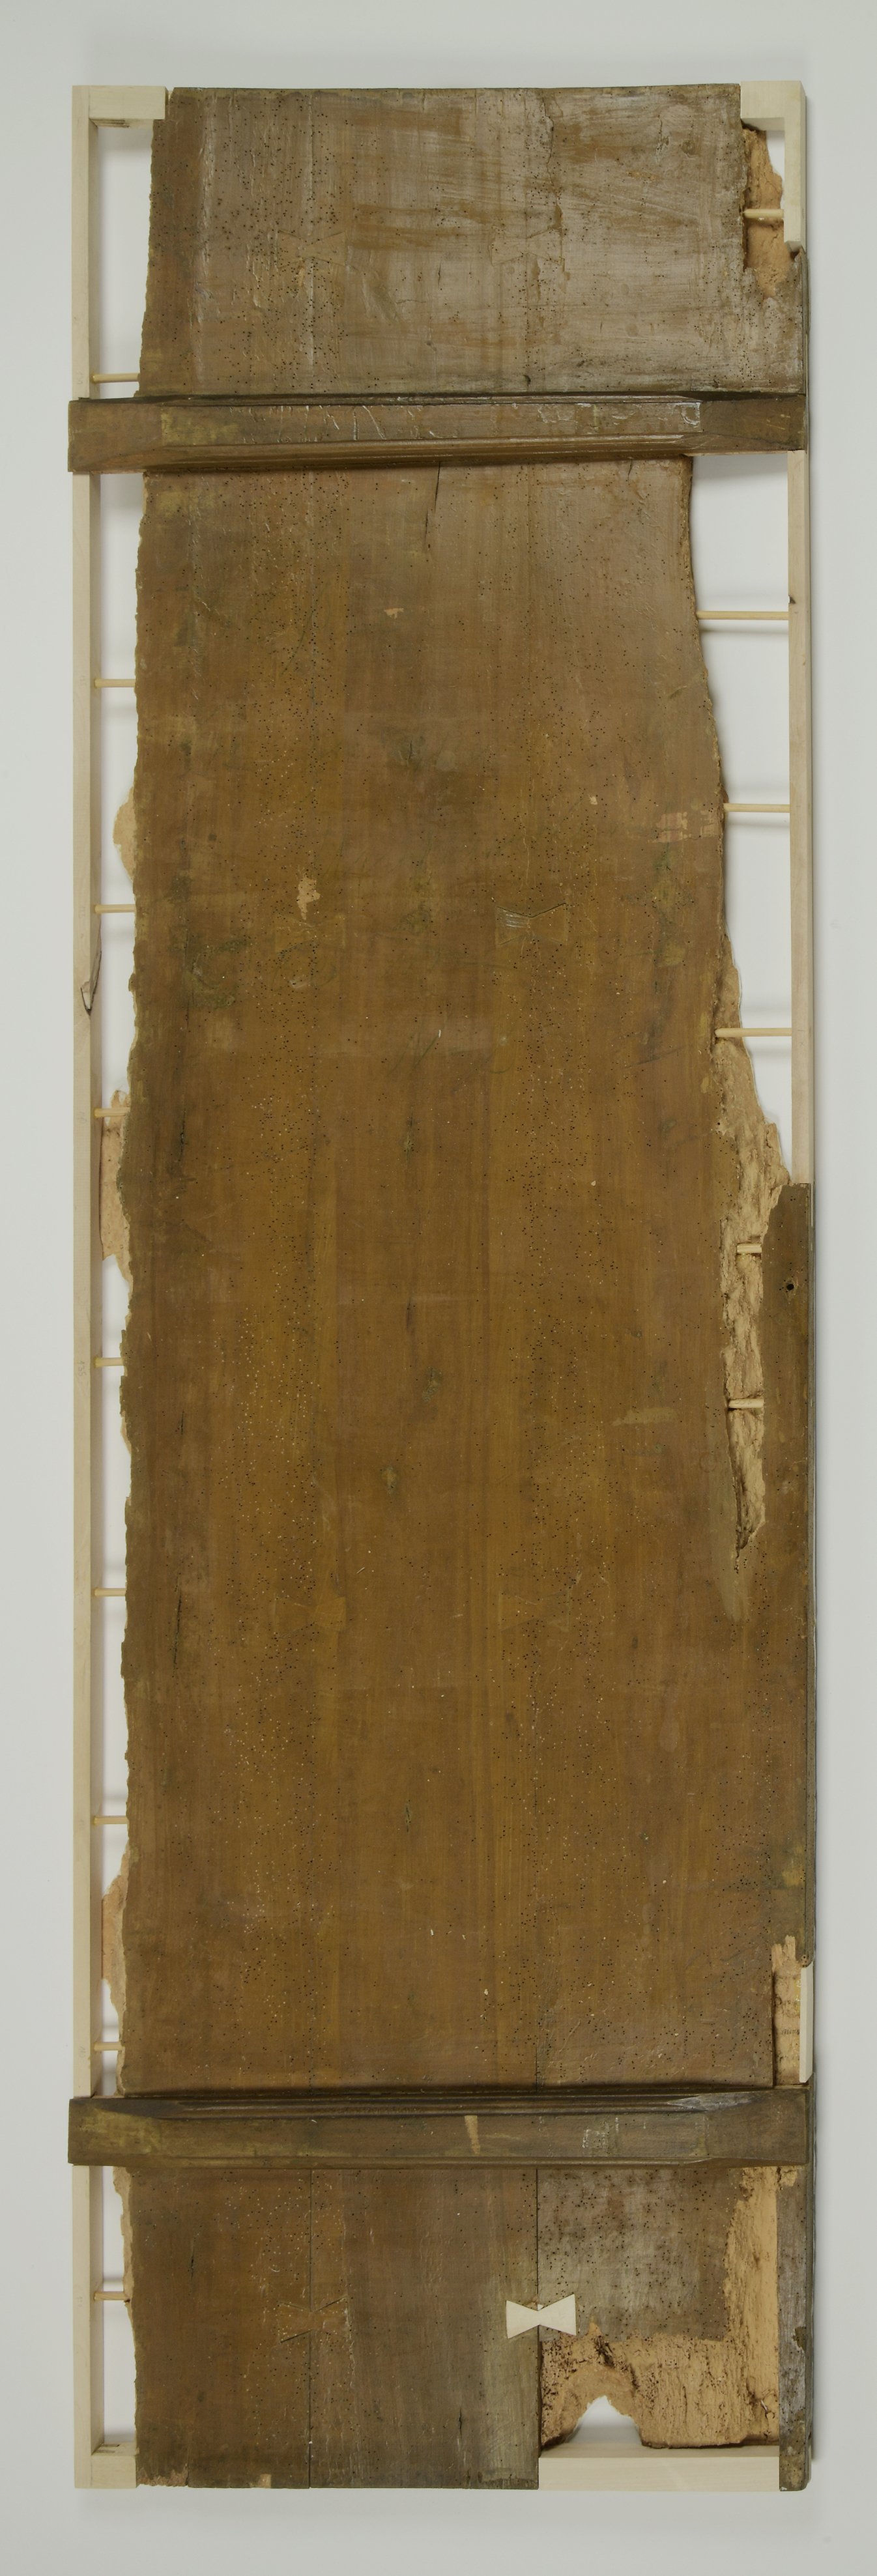
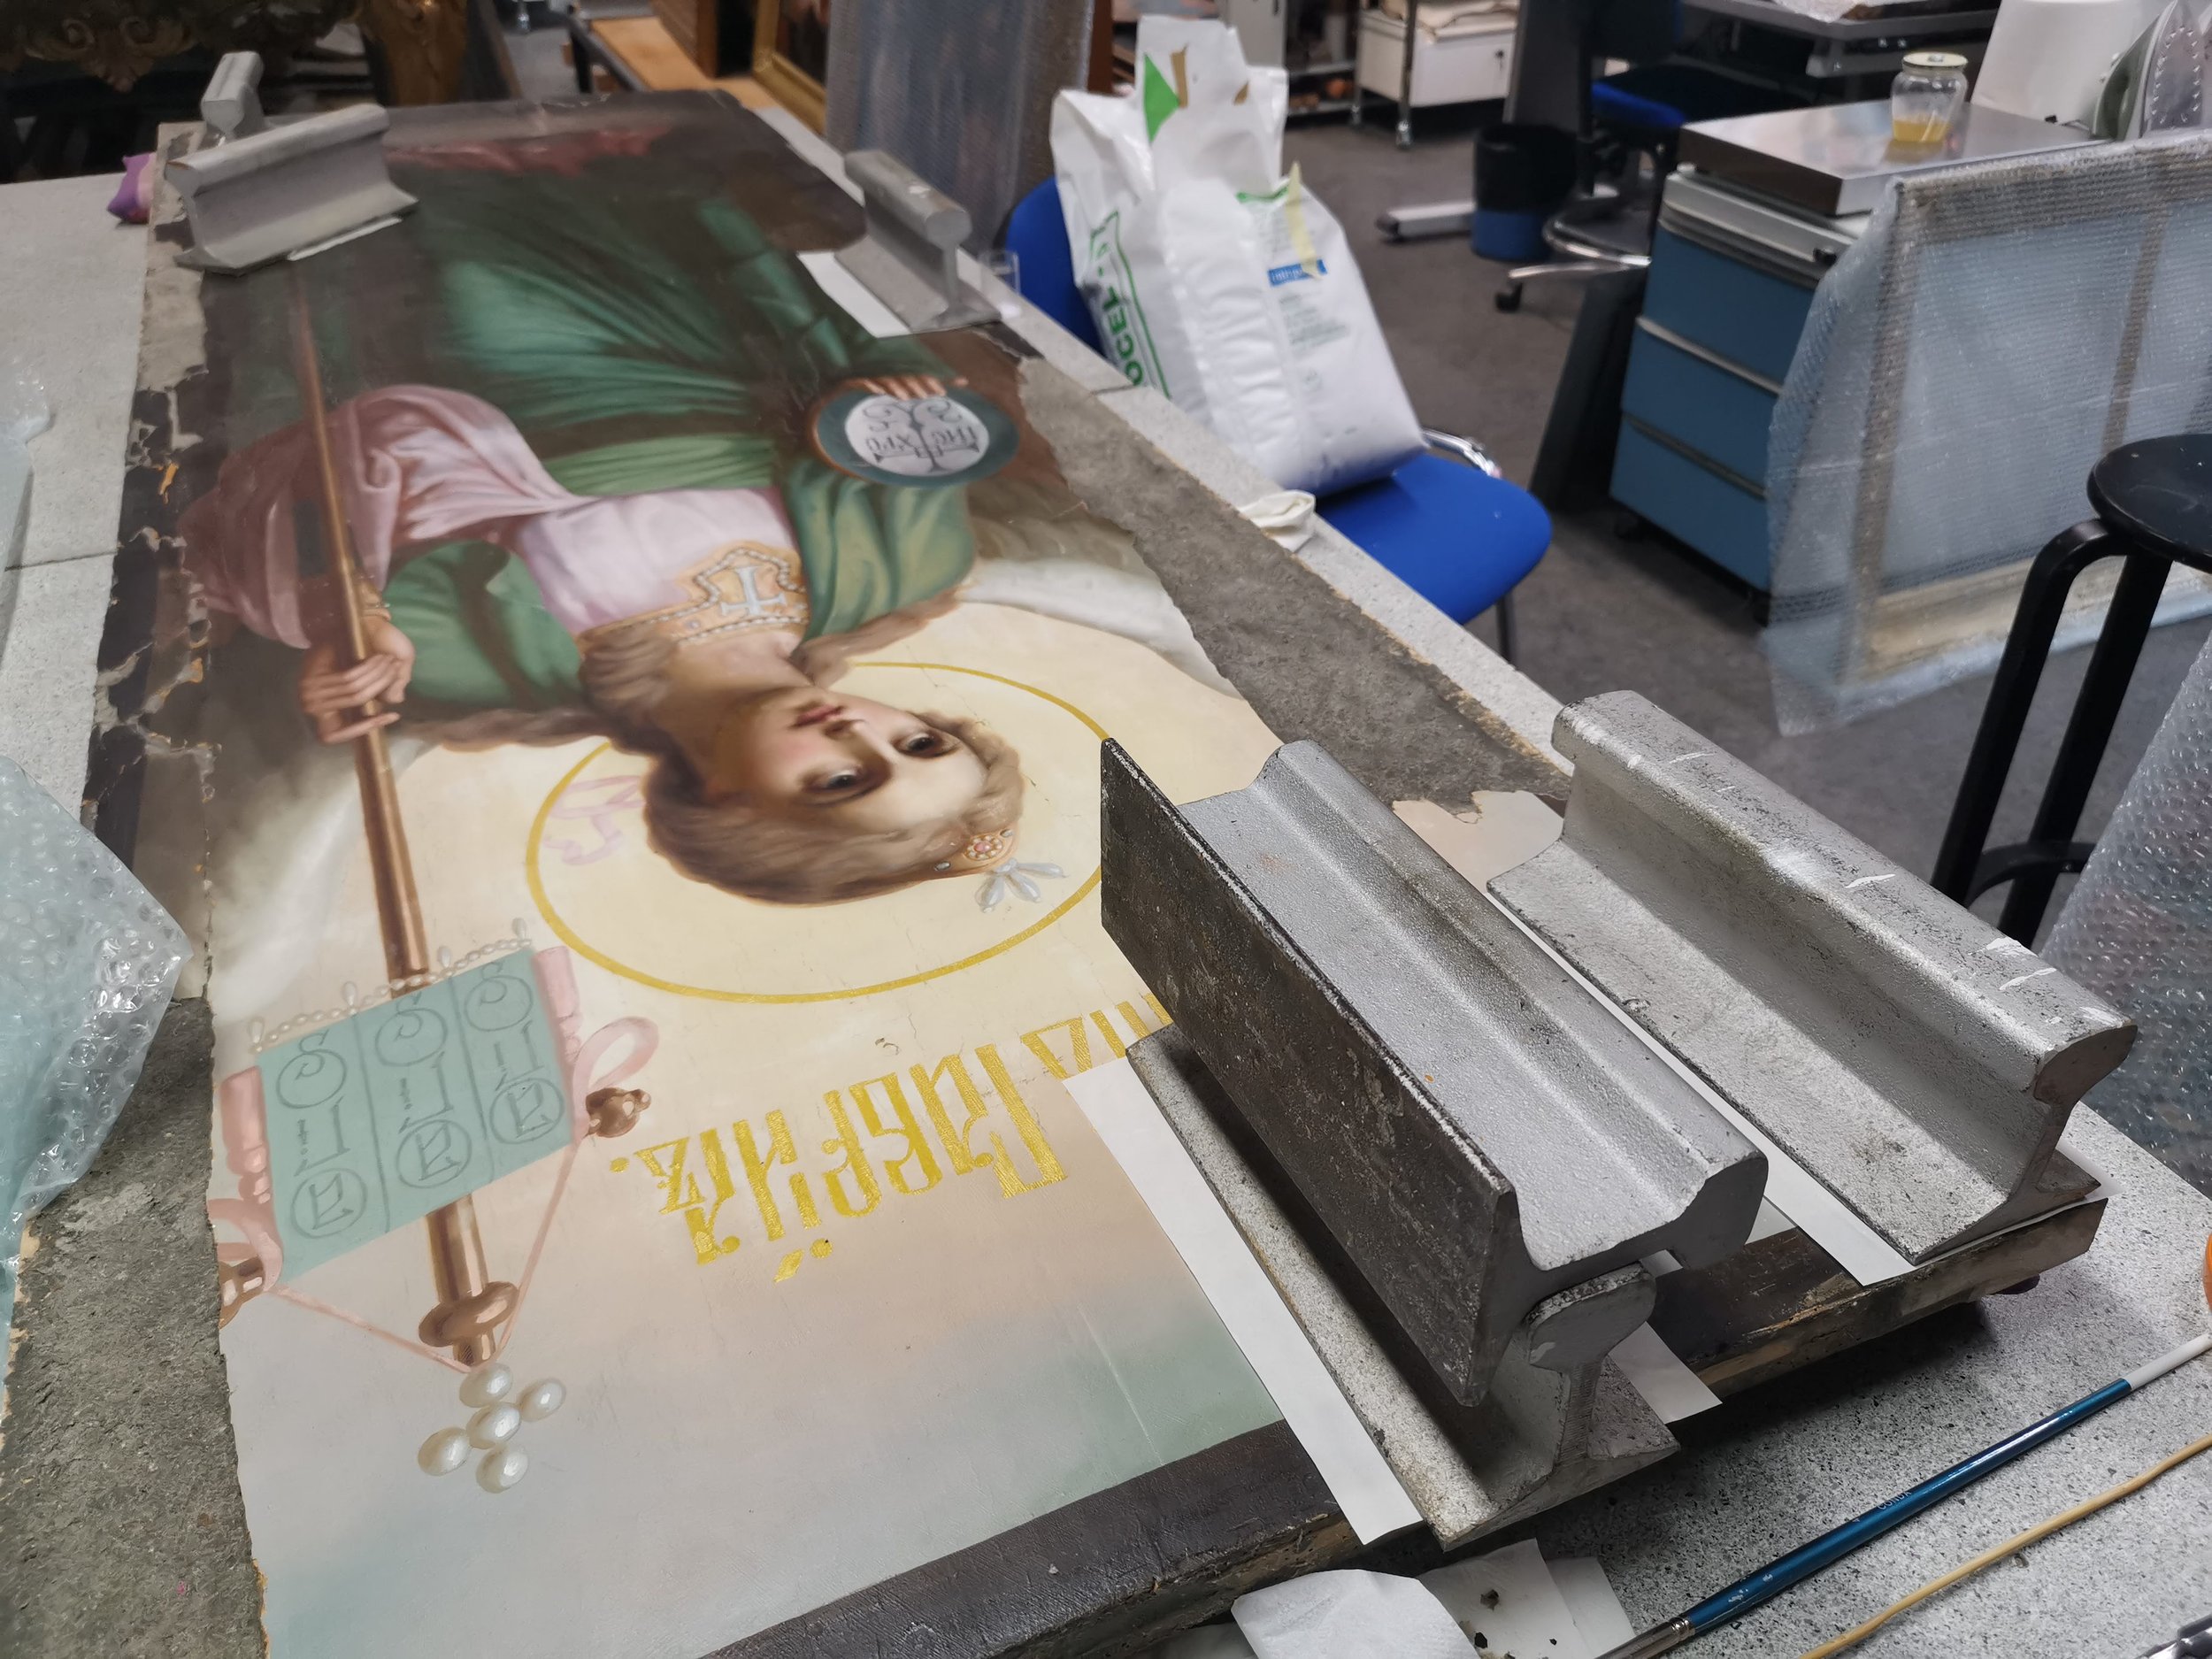
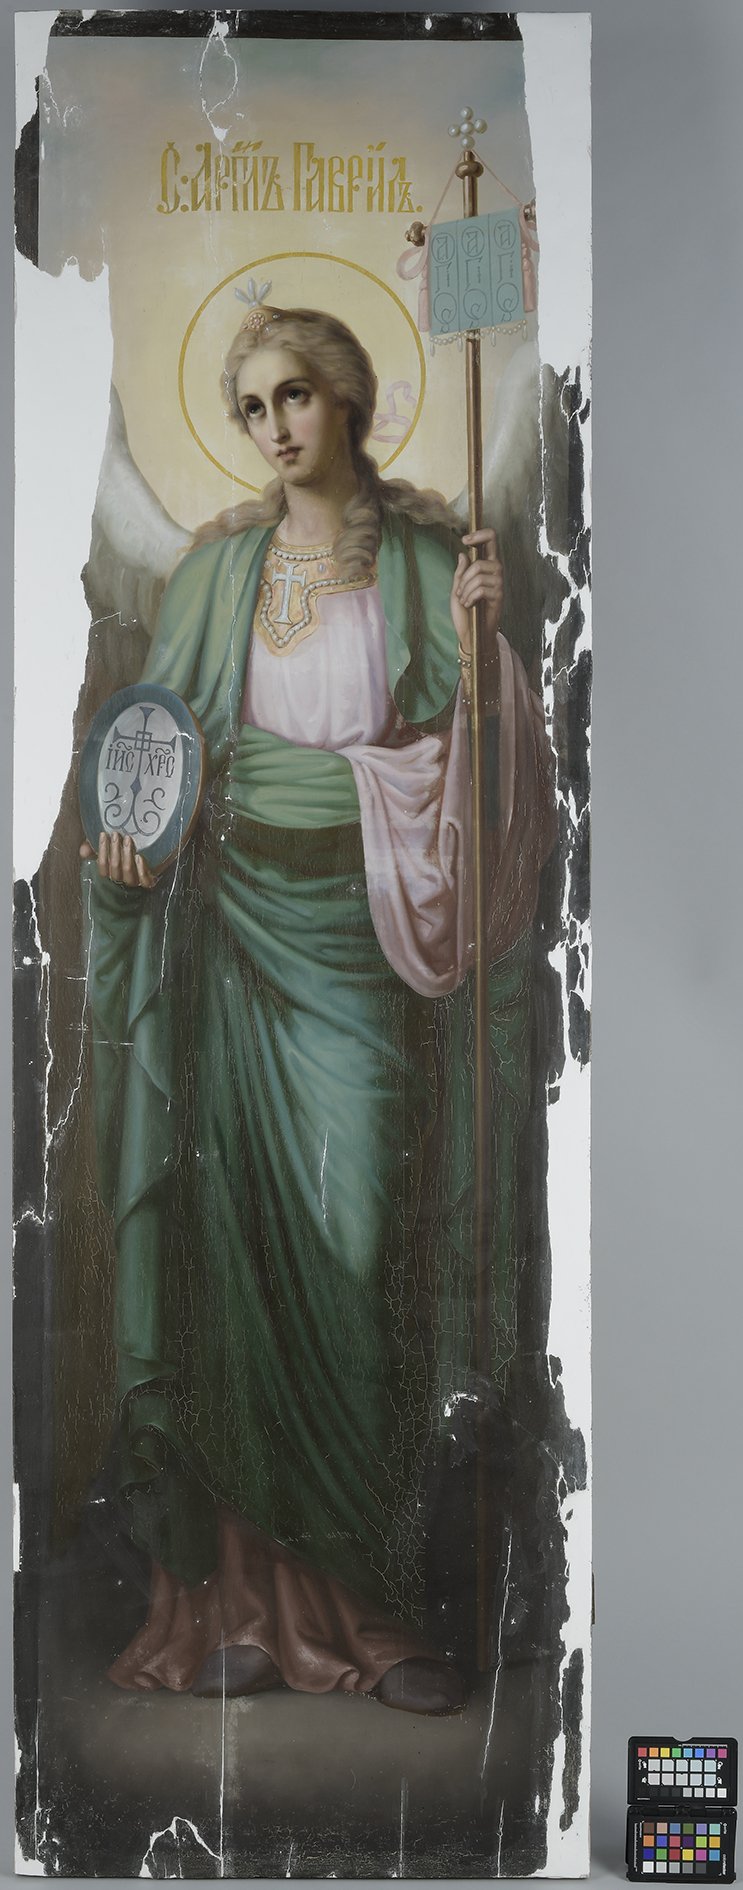
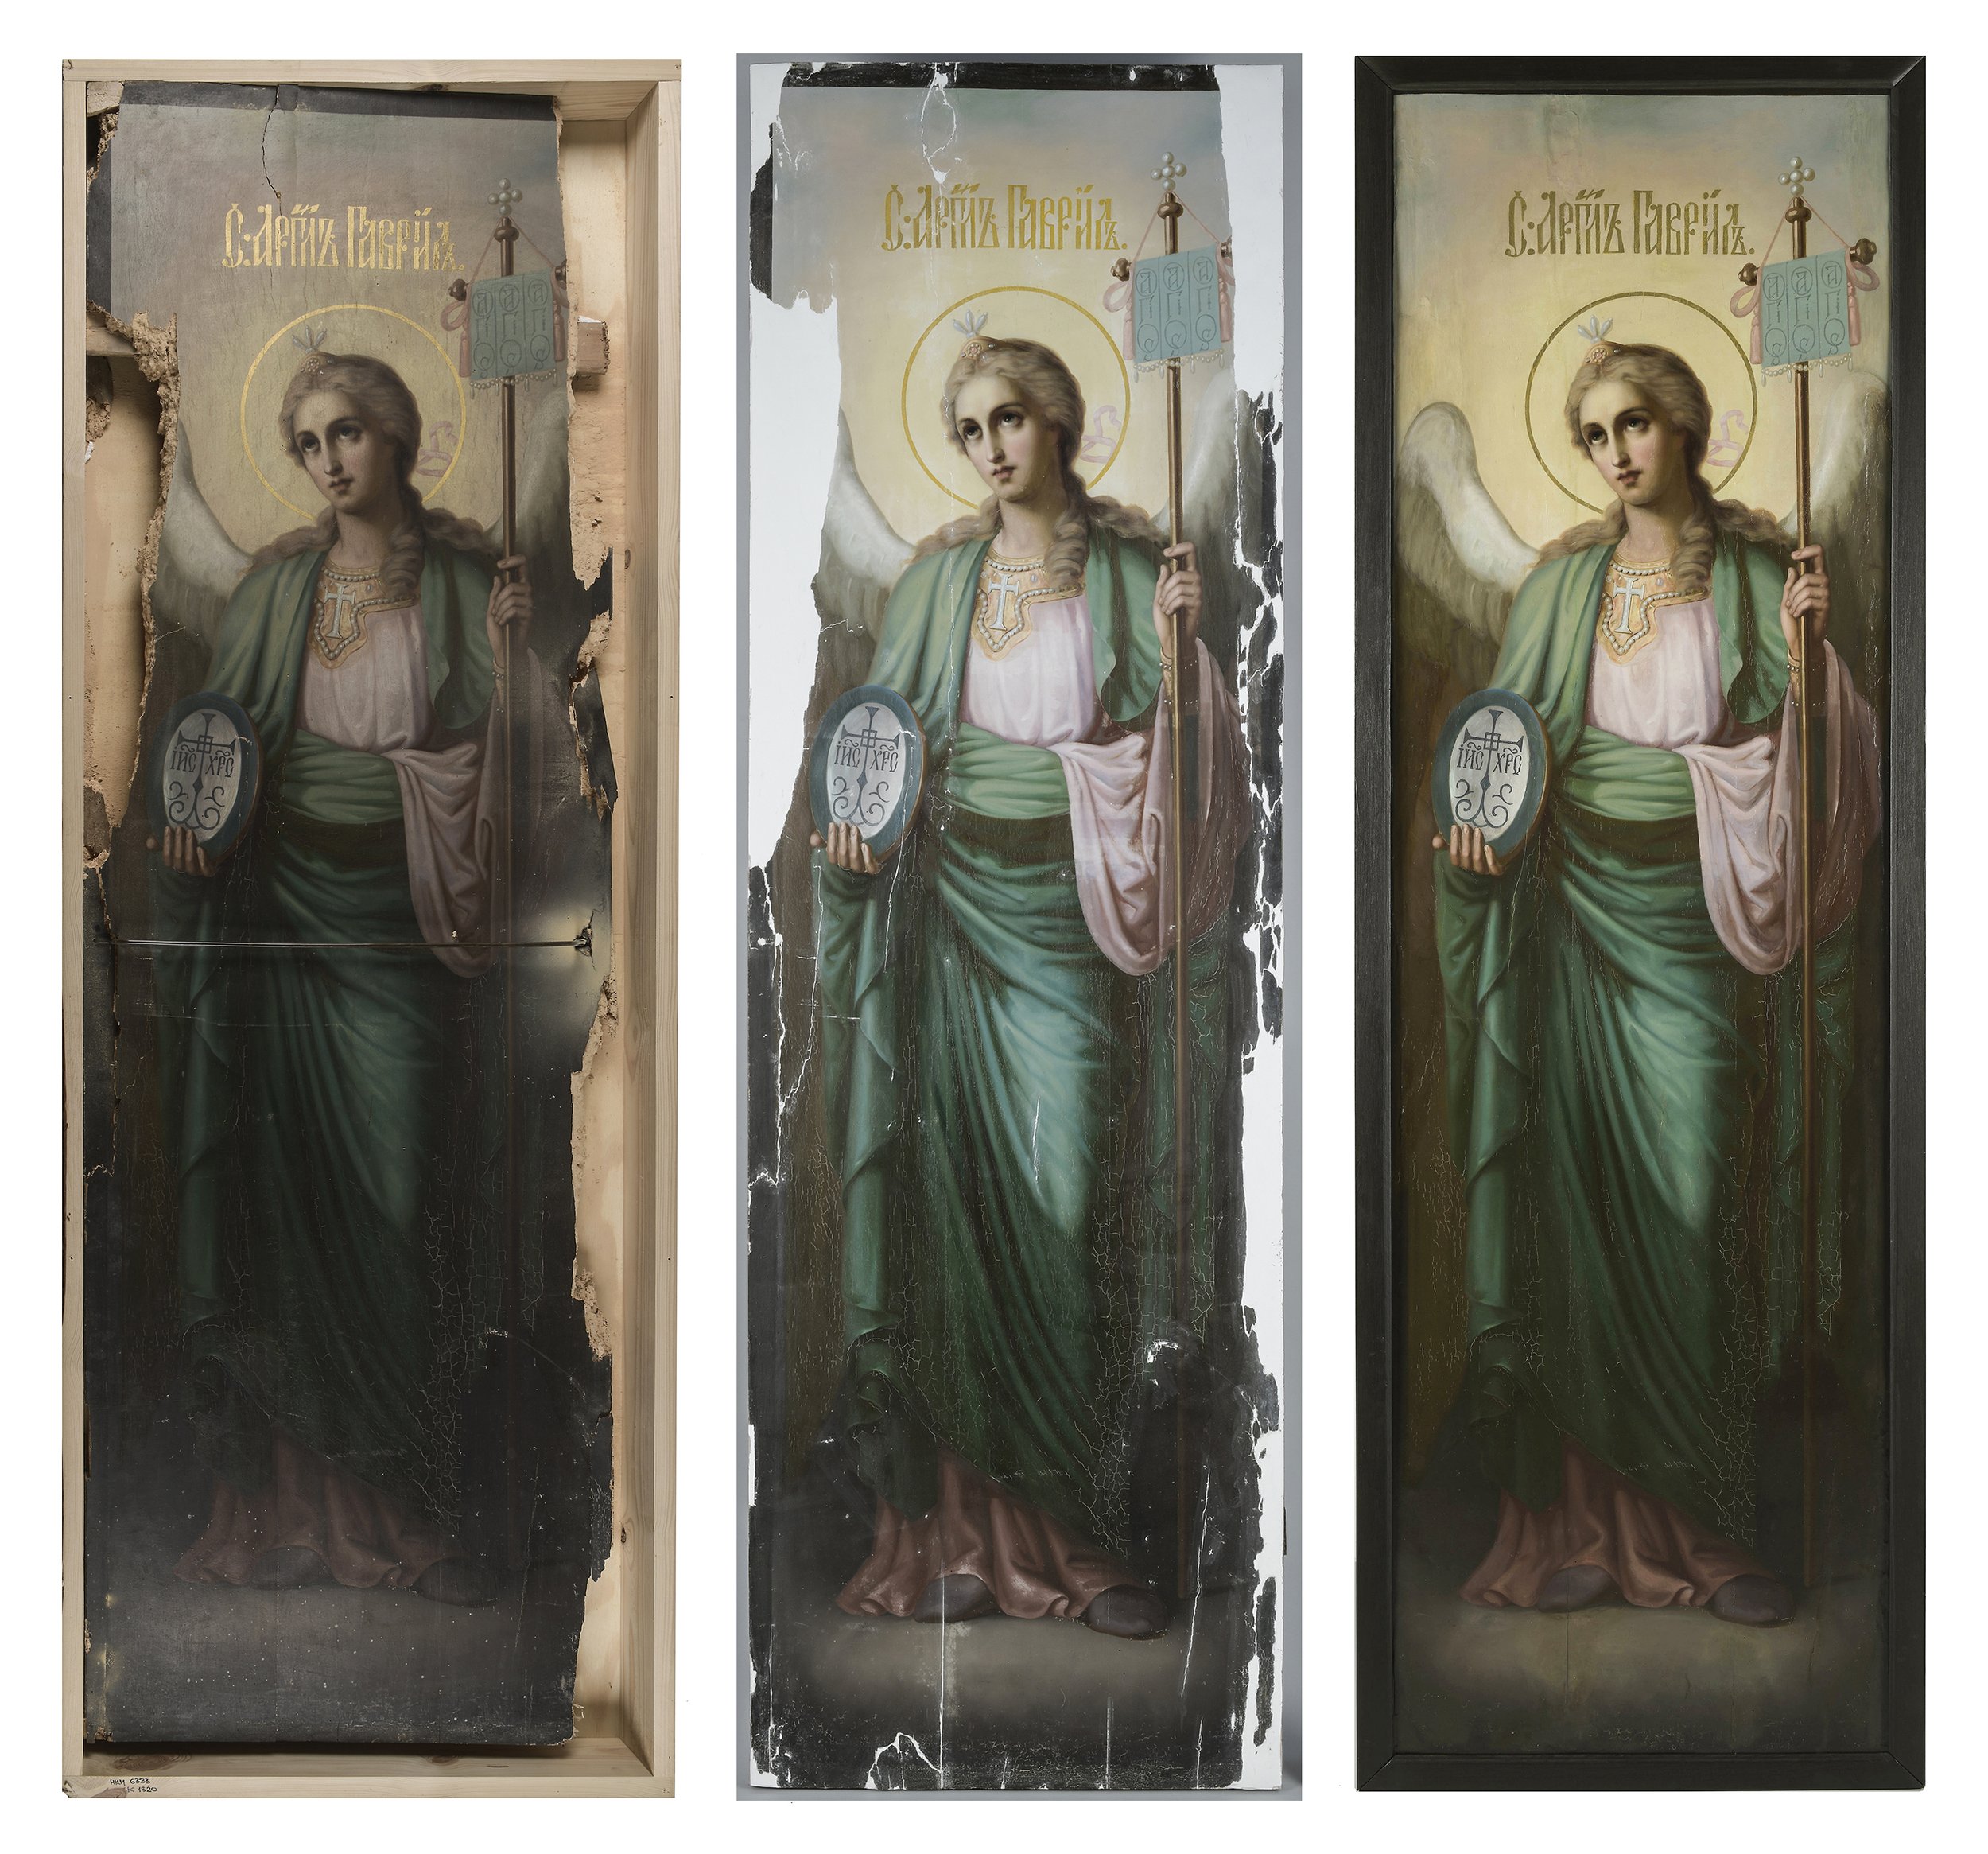
Gabriel, one of the seven archangels standing at God’s throne, is God’s messenger. Due to that post office-, telephone- and telegraph workers began to consider him their patron saint (and he was declared as such in 1921 by Benedict XV). The icon, 214cm long and 67cm wide initially served as the left-side diaconal door of the Kuriste iconostasis. Its base is made of three 3cm-thick deciduous wood boards. Two diagonal slats join the boards at the back. The icon was painted in oil on white chalk-glue ground coat. Gabriel is depicted as a romantically gentle figure, wrapped in a pink and green robe. [ill 3]
Condition of the icon
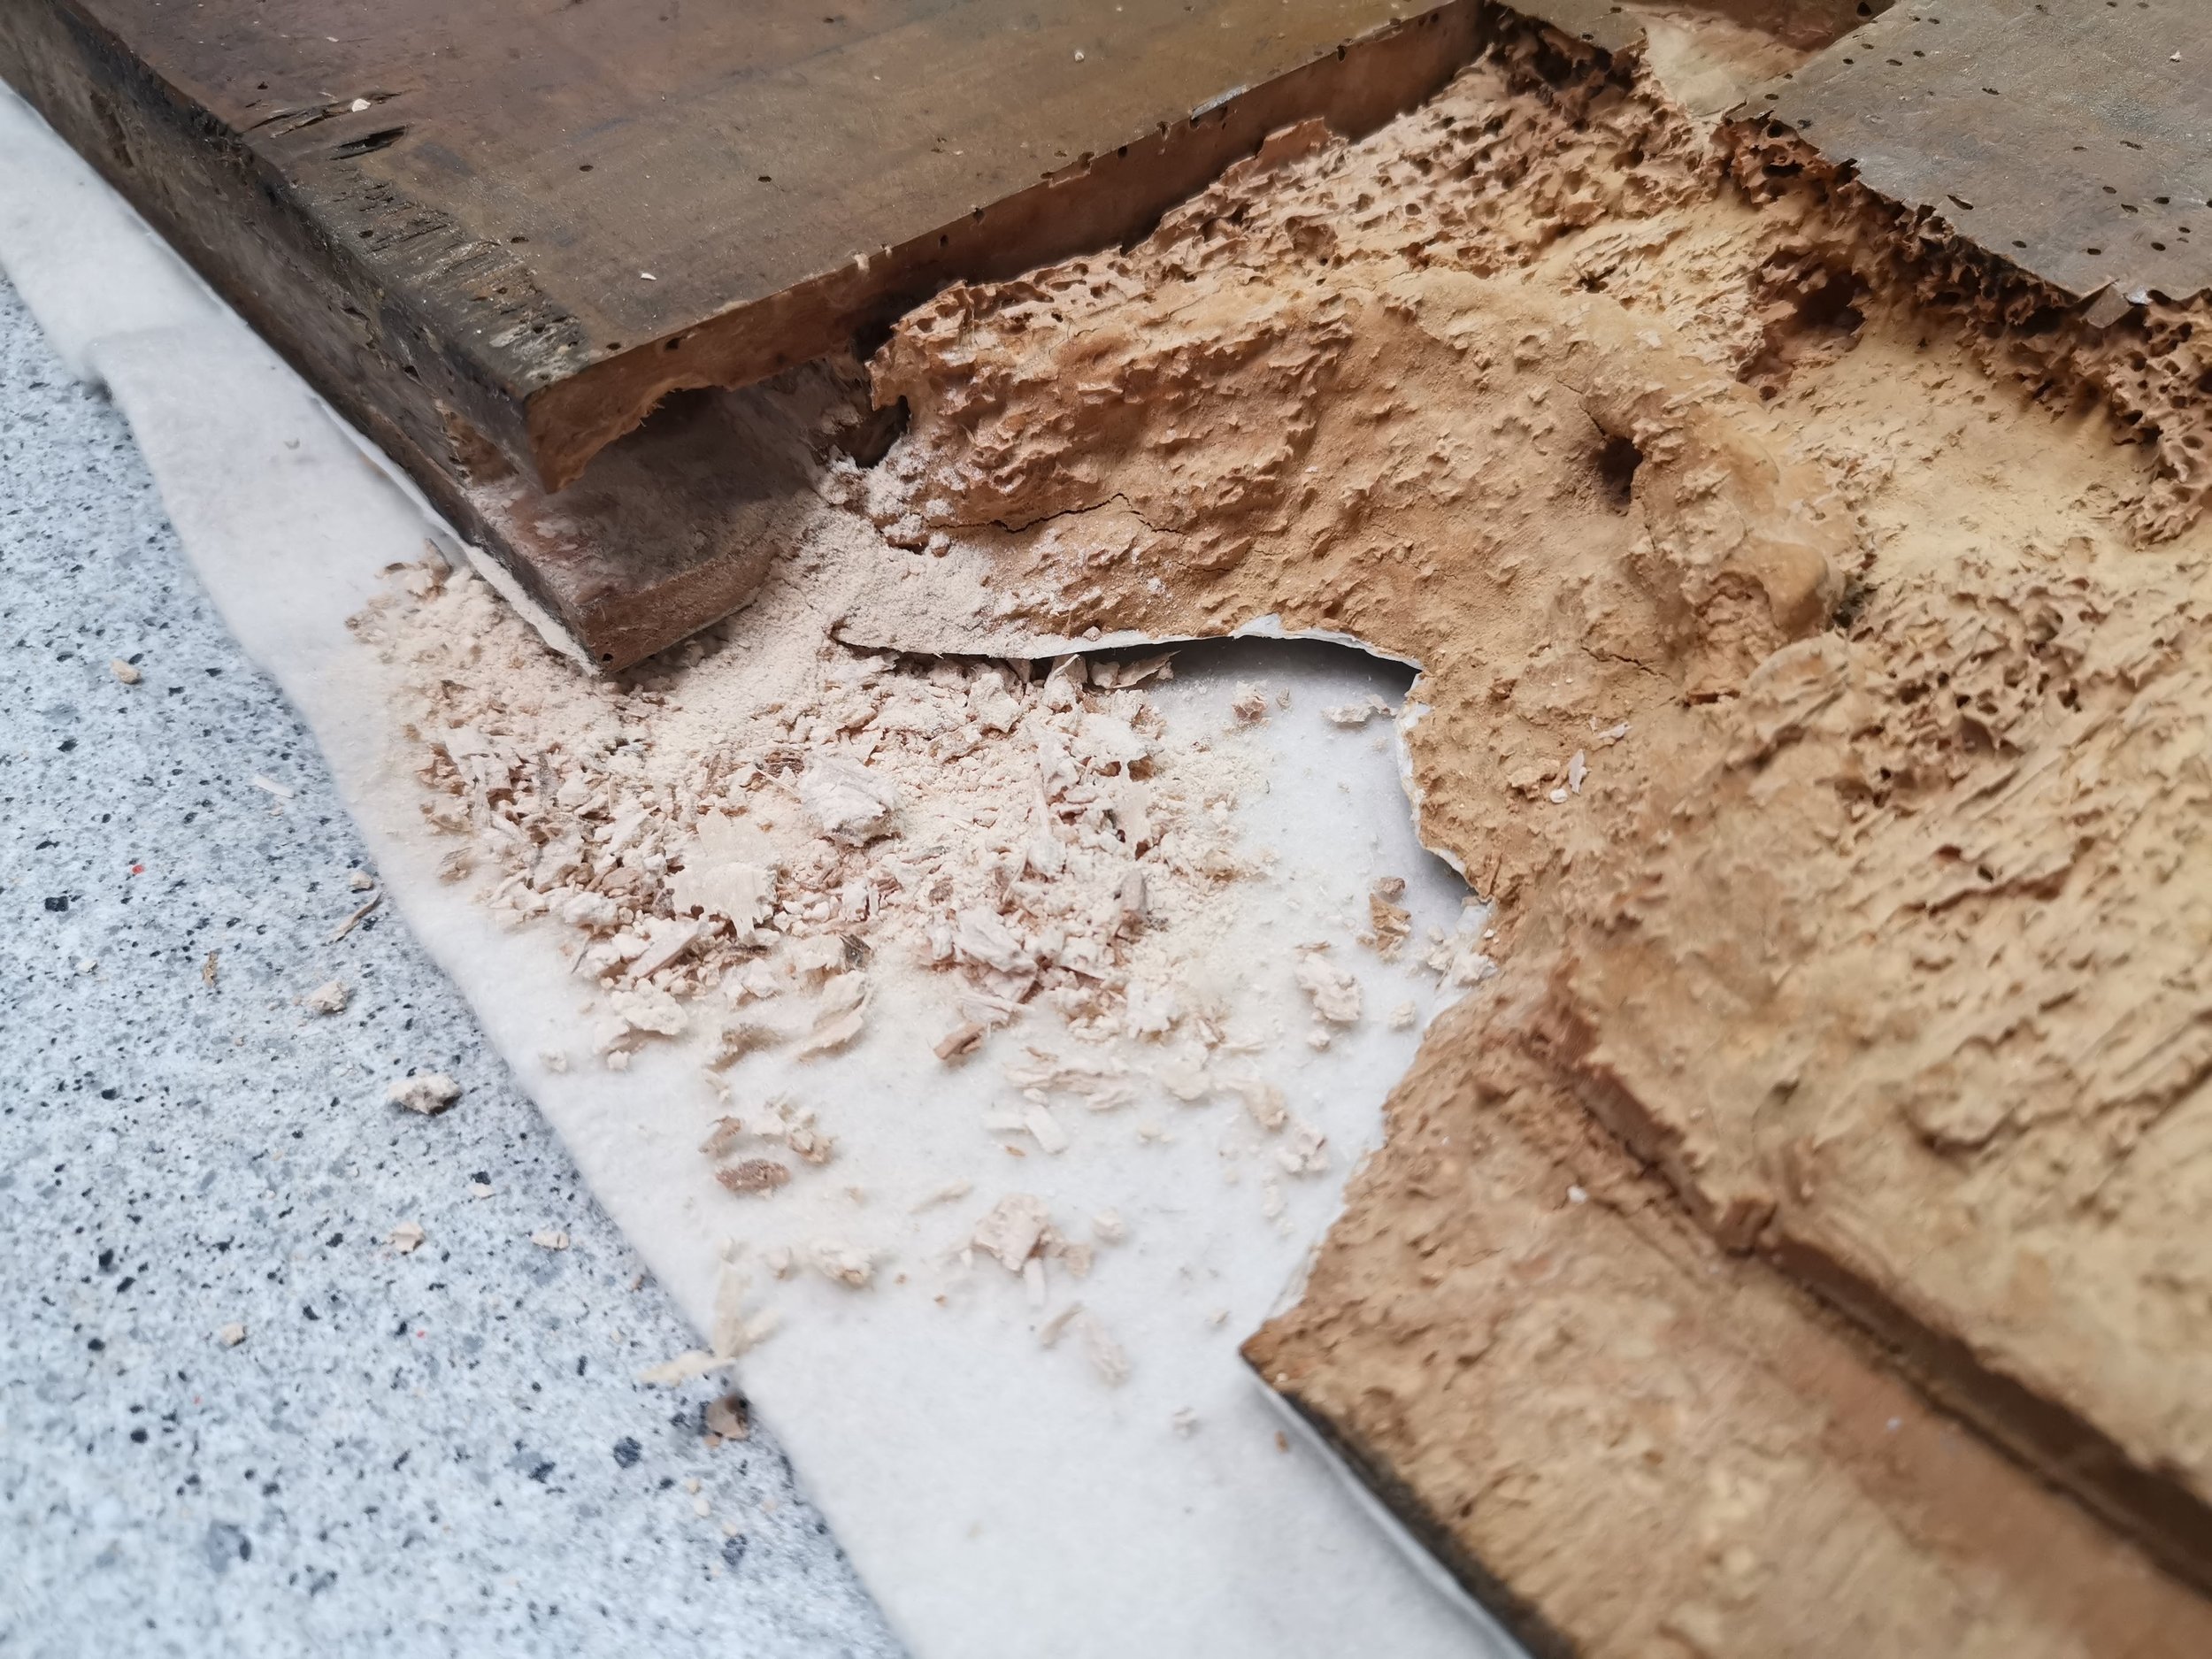
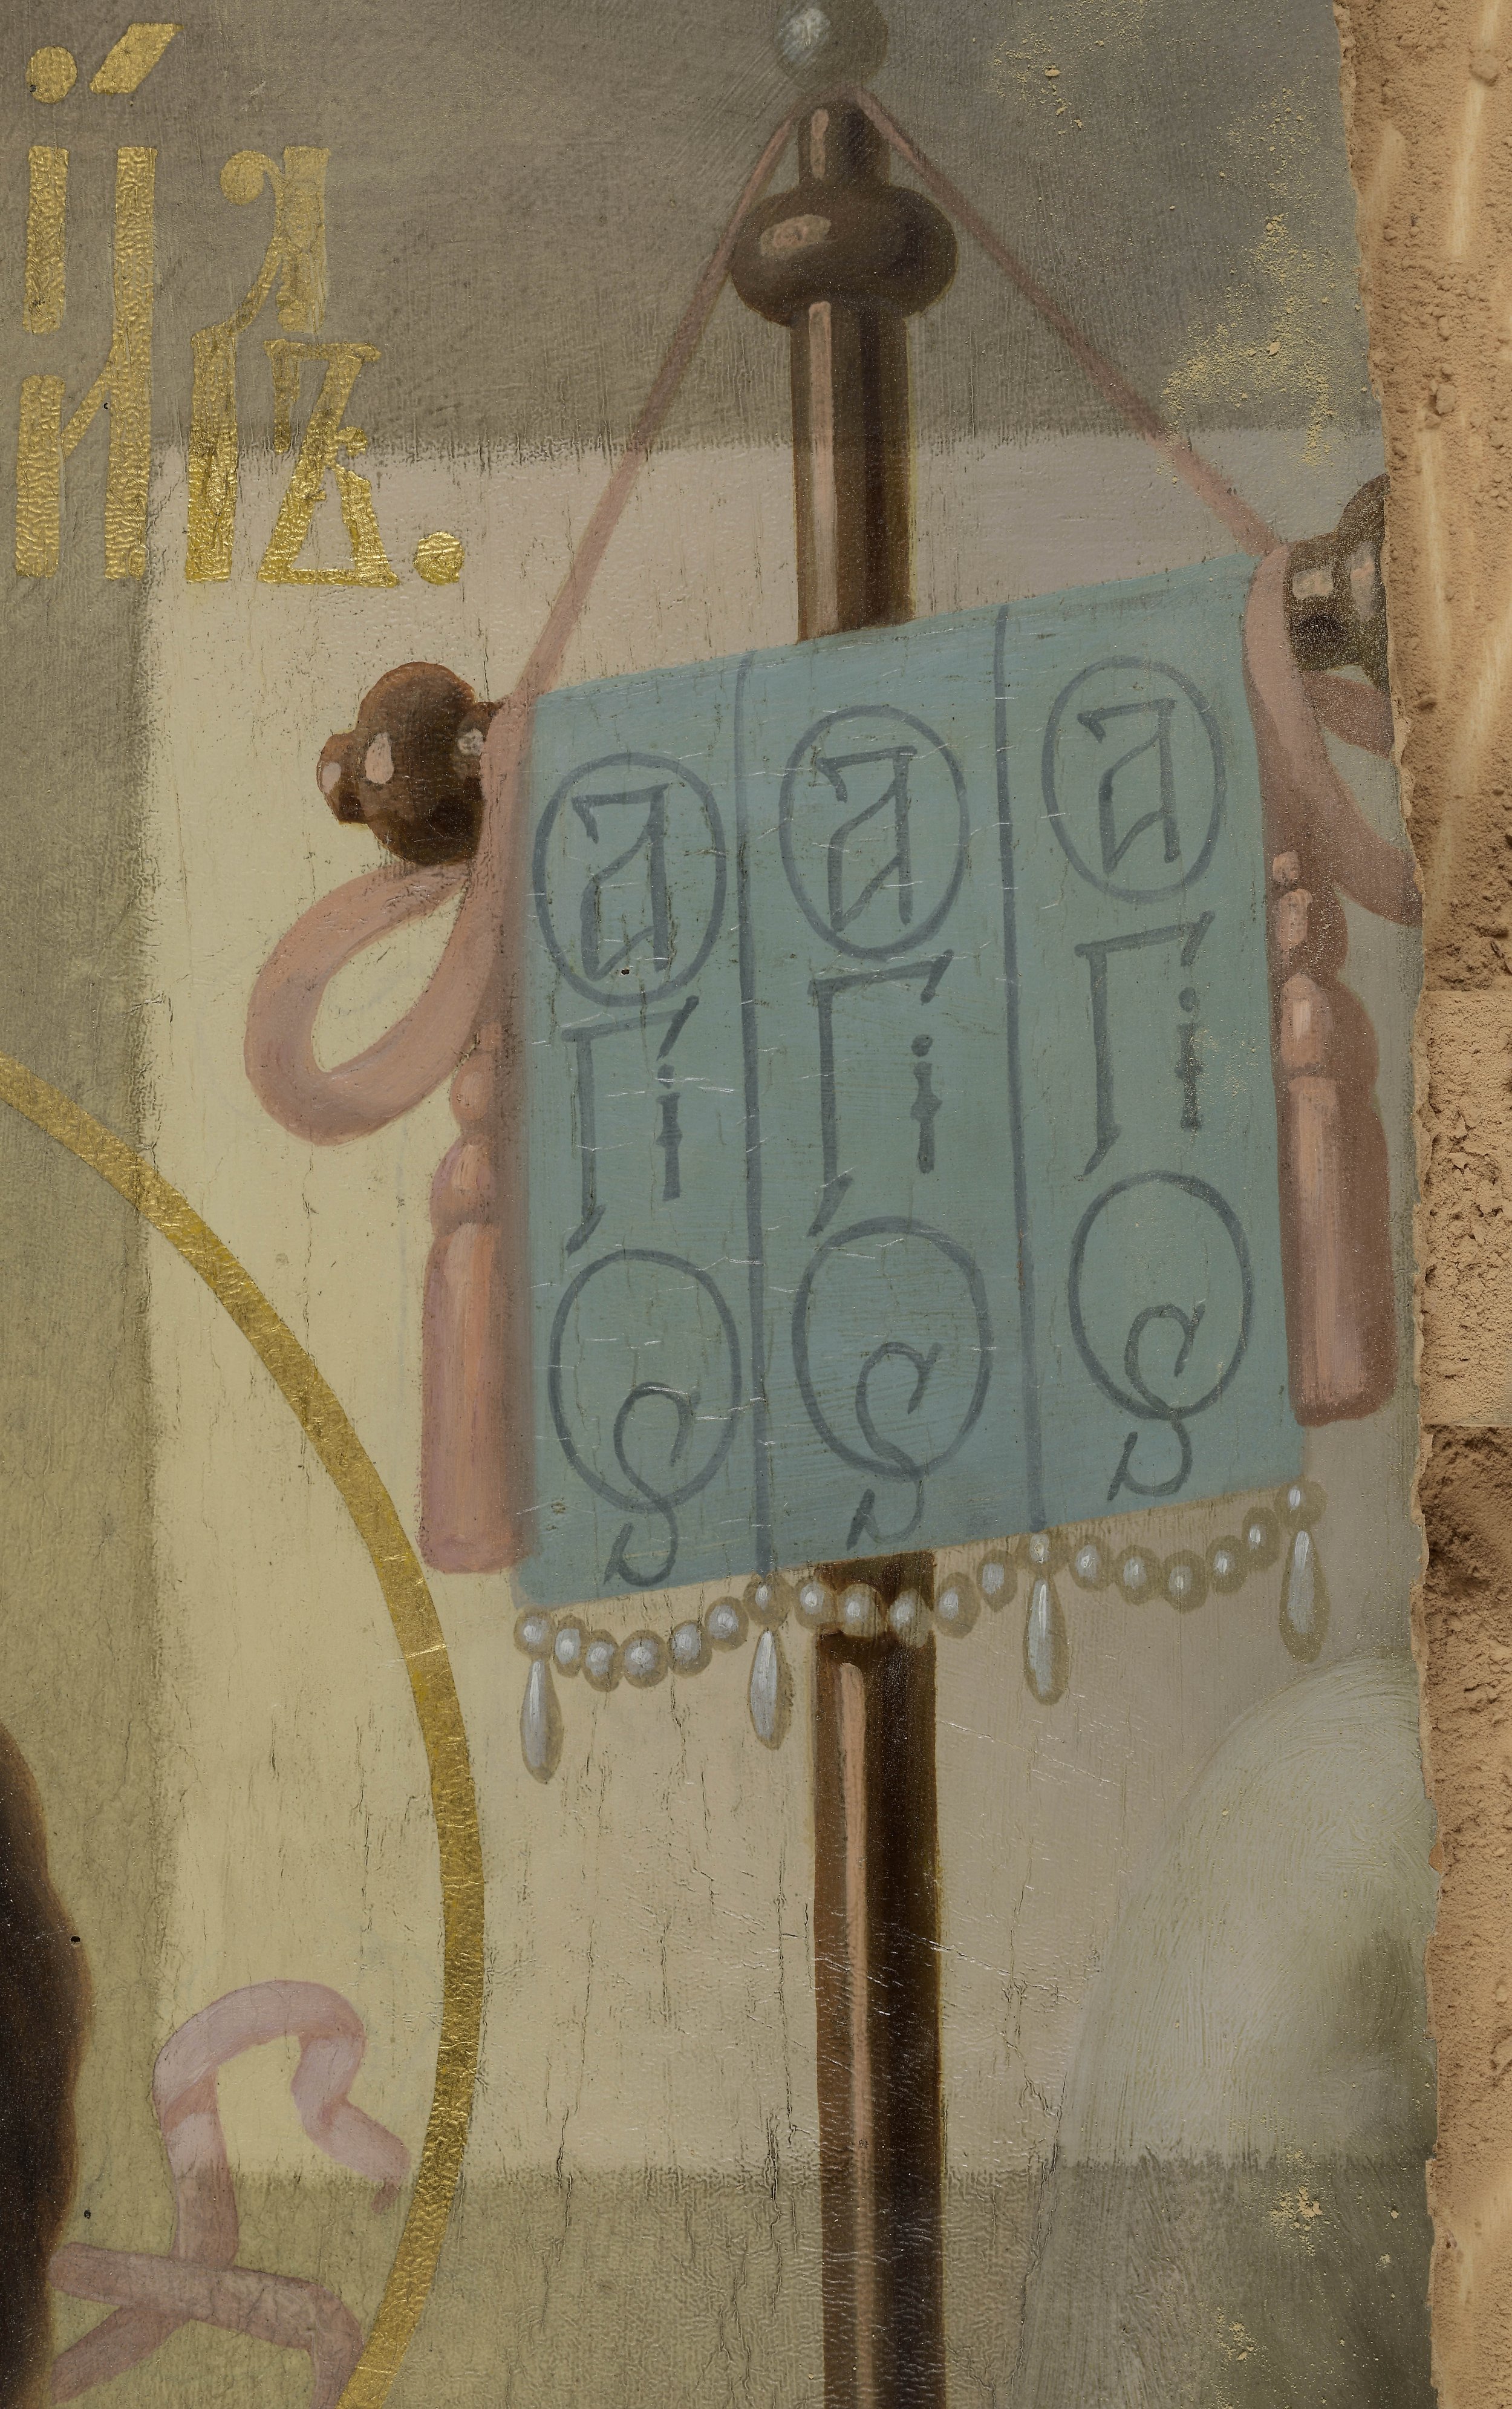
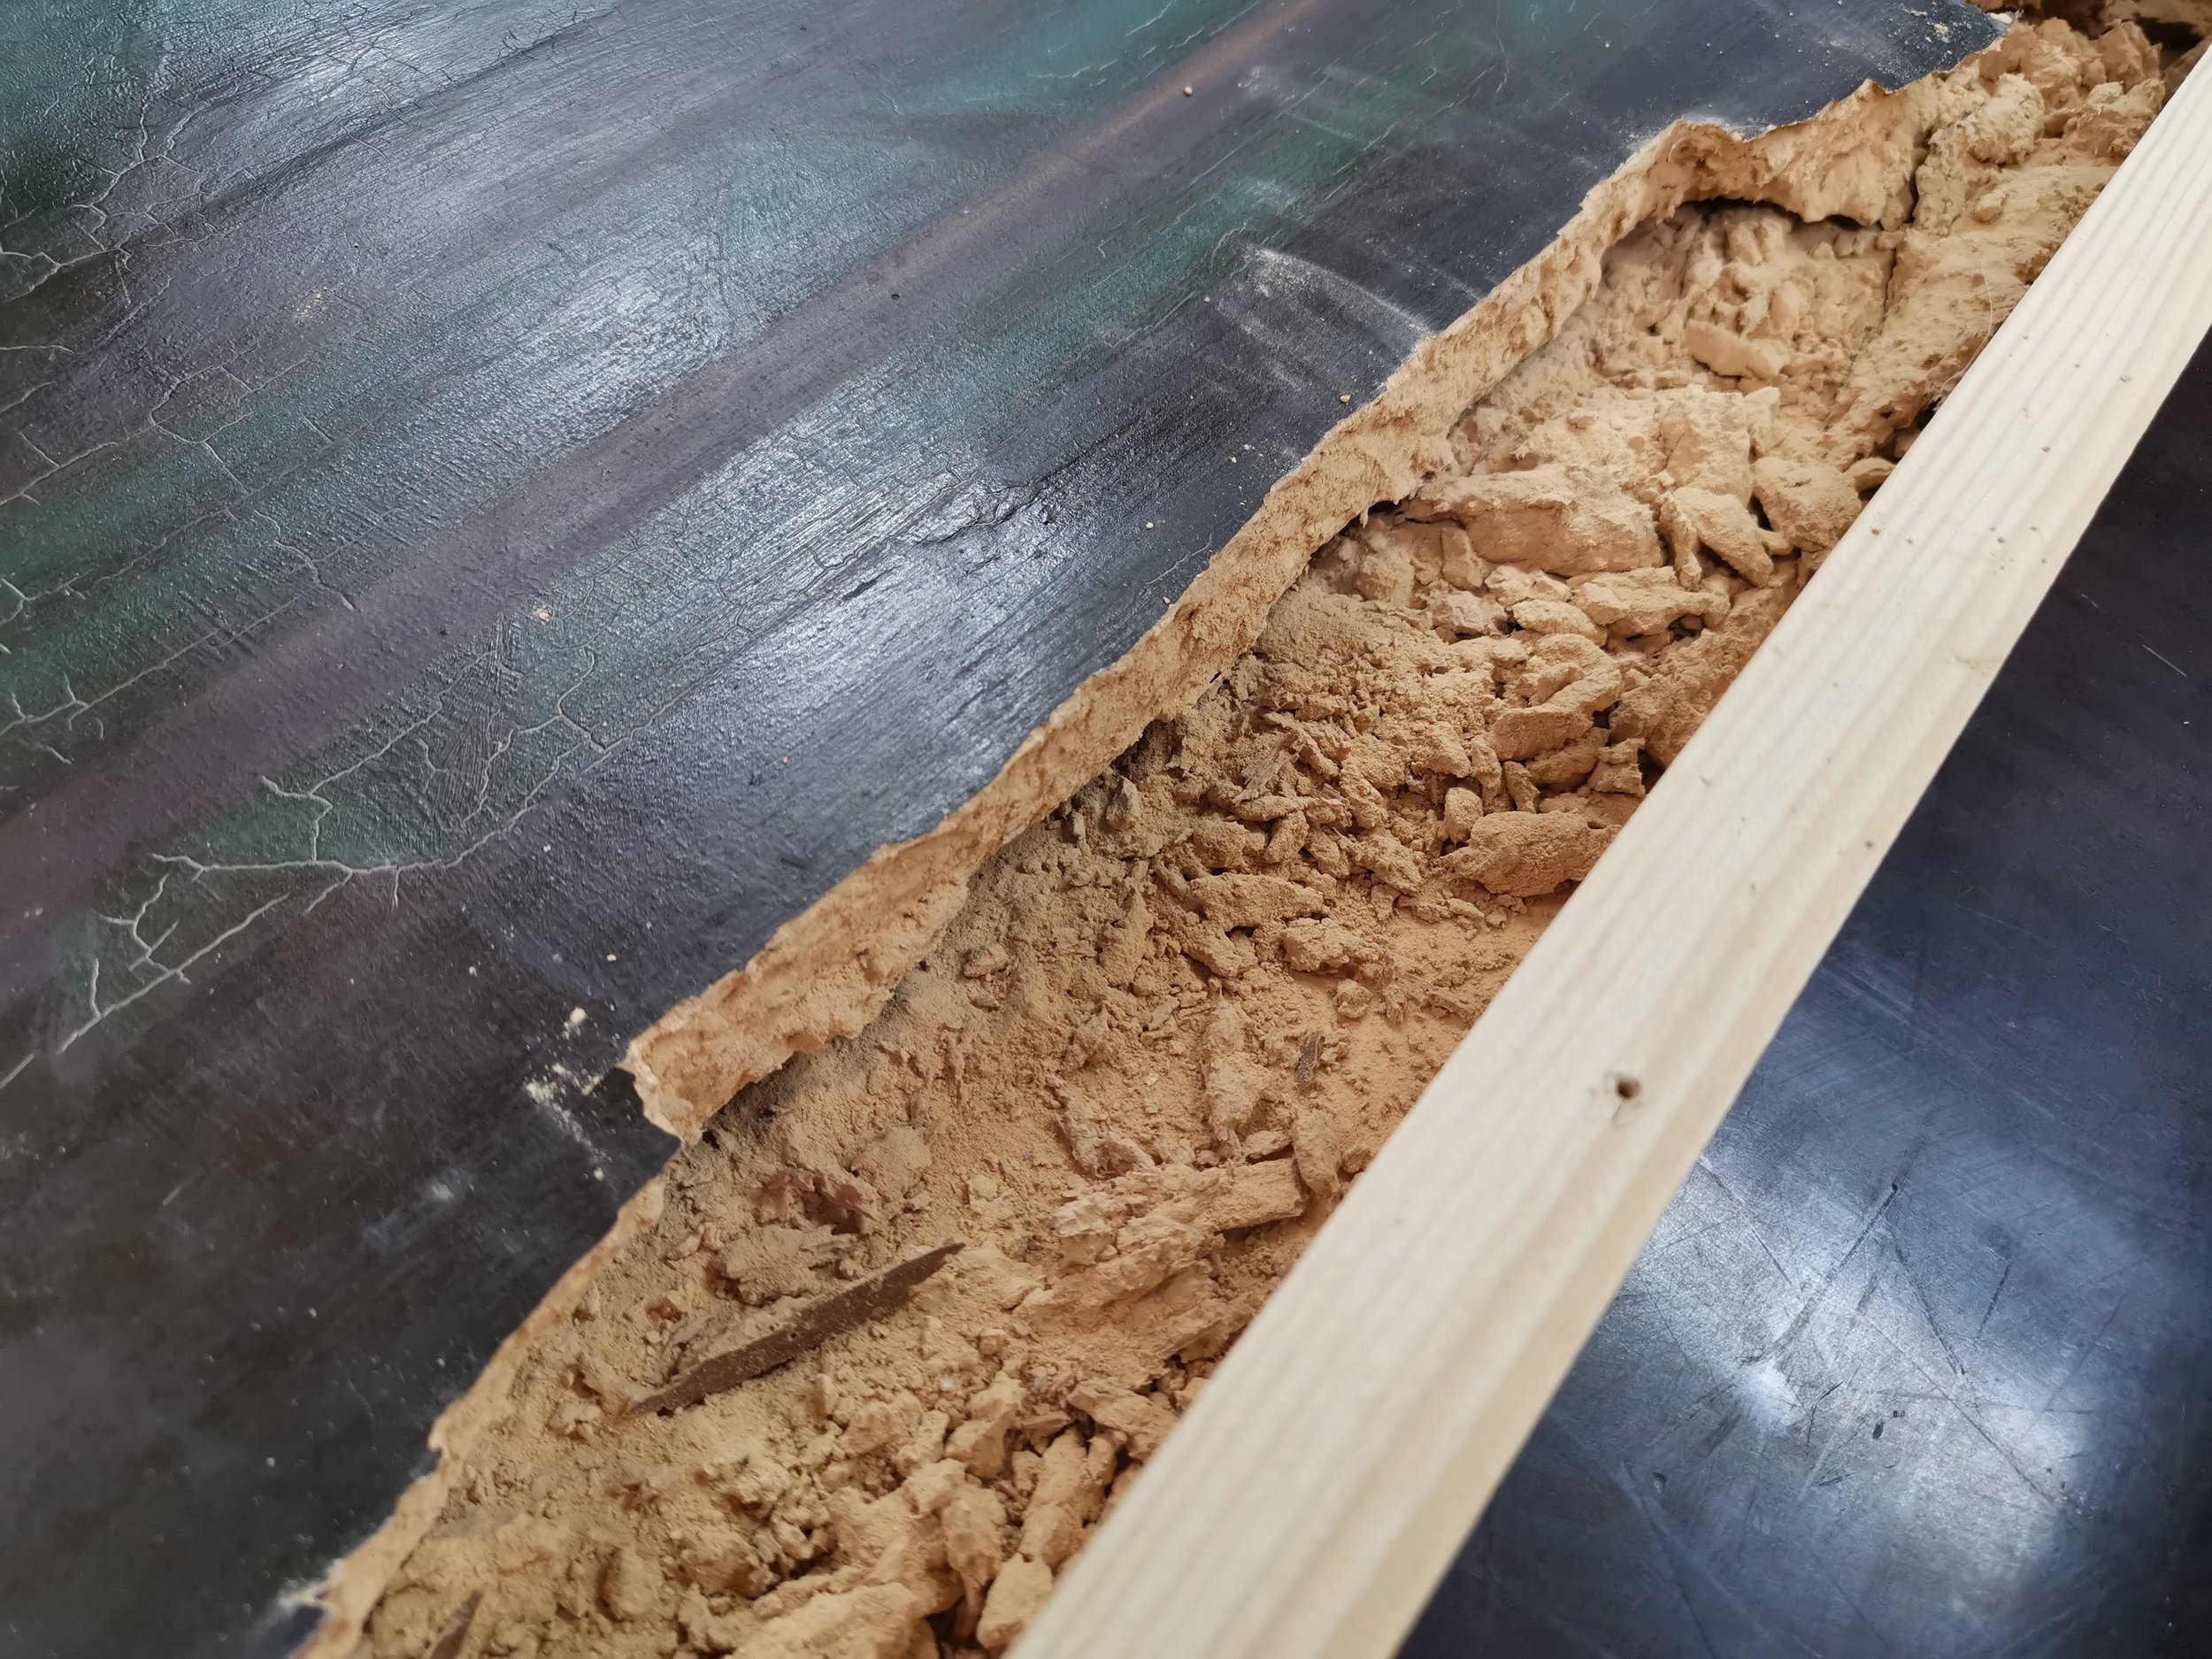
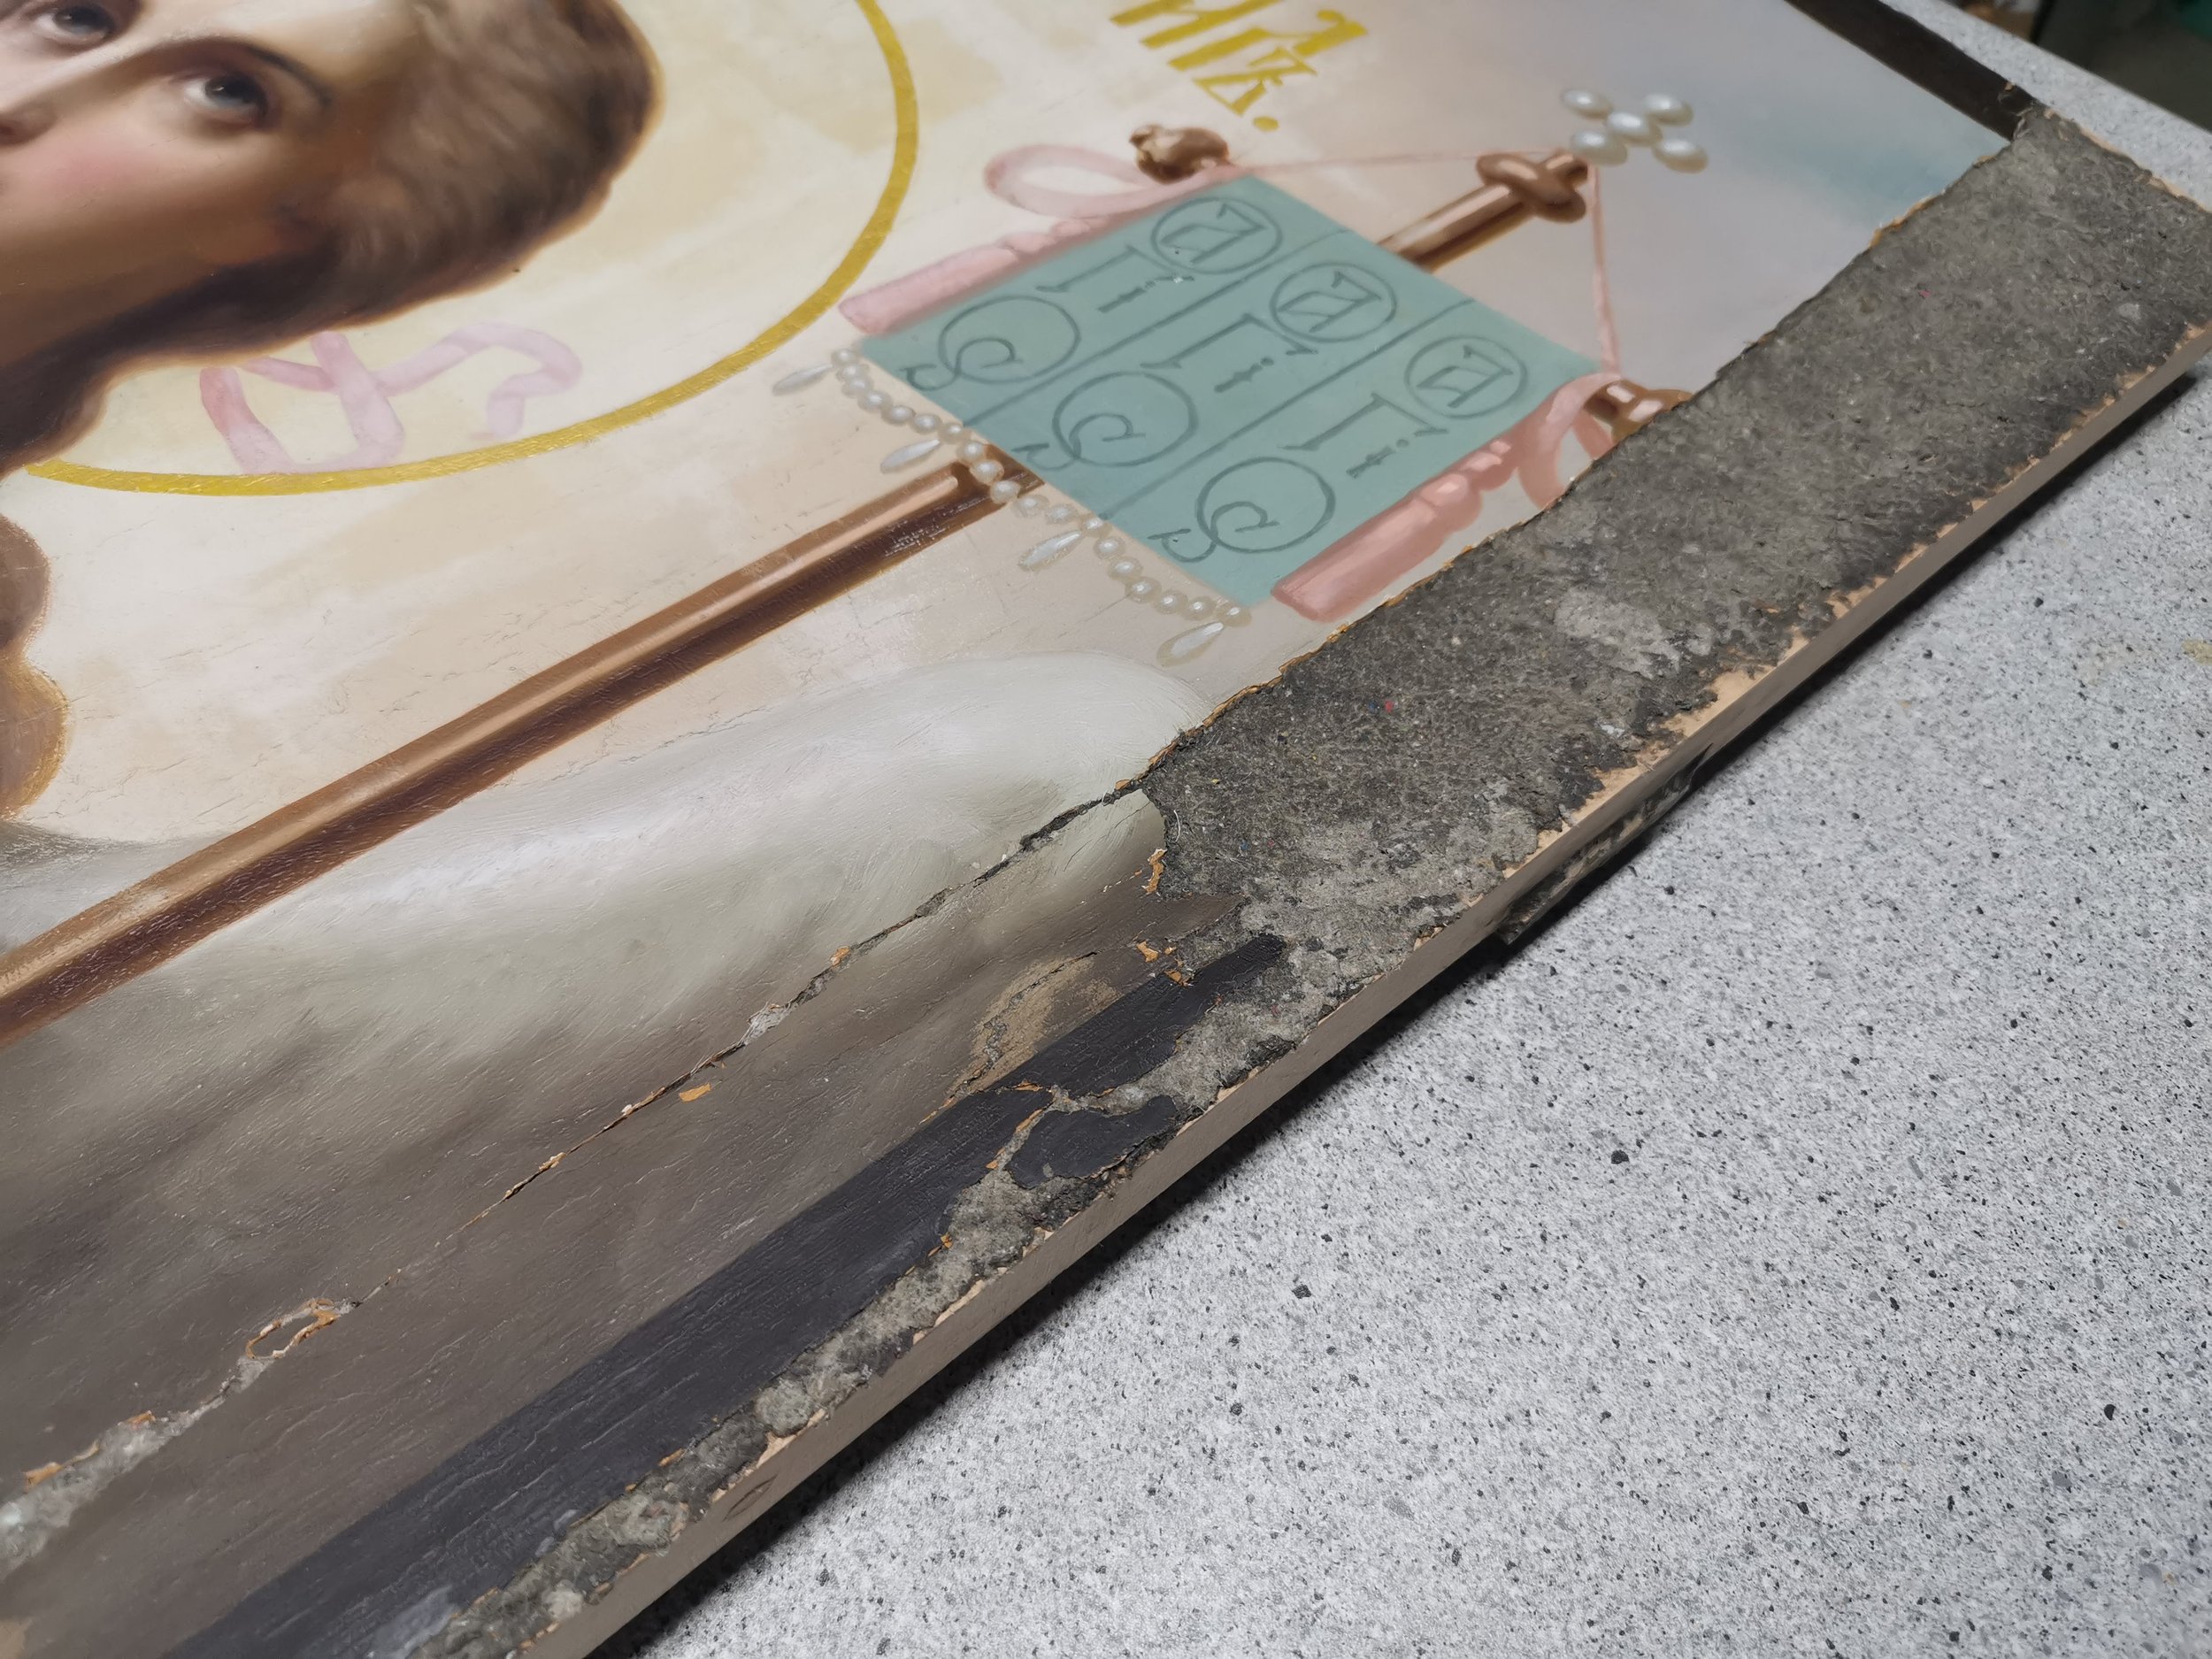
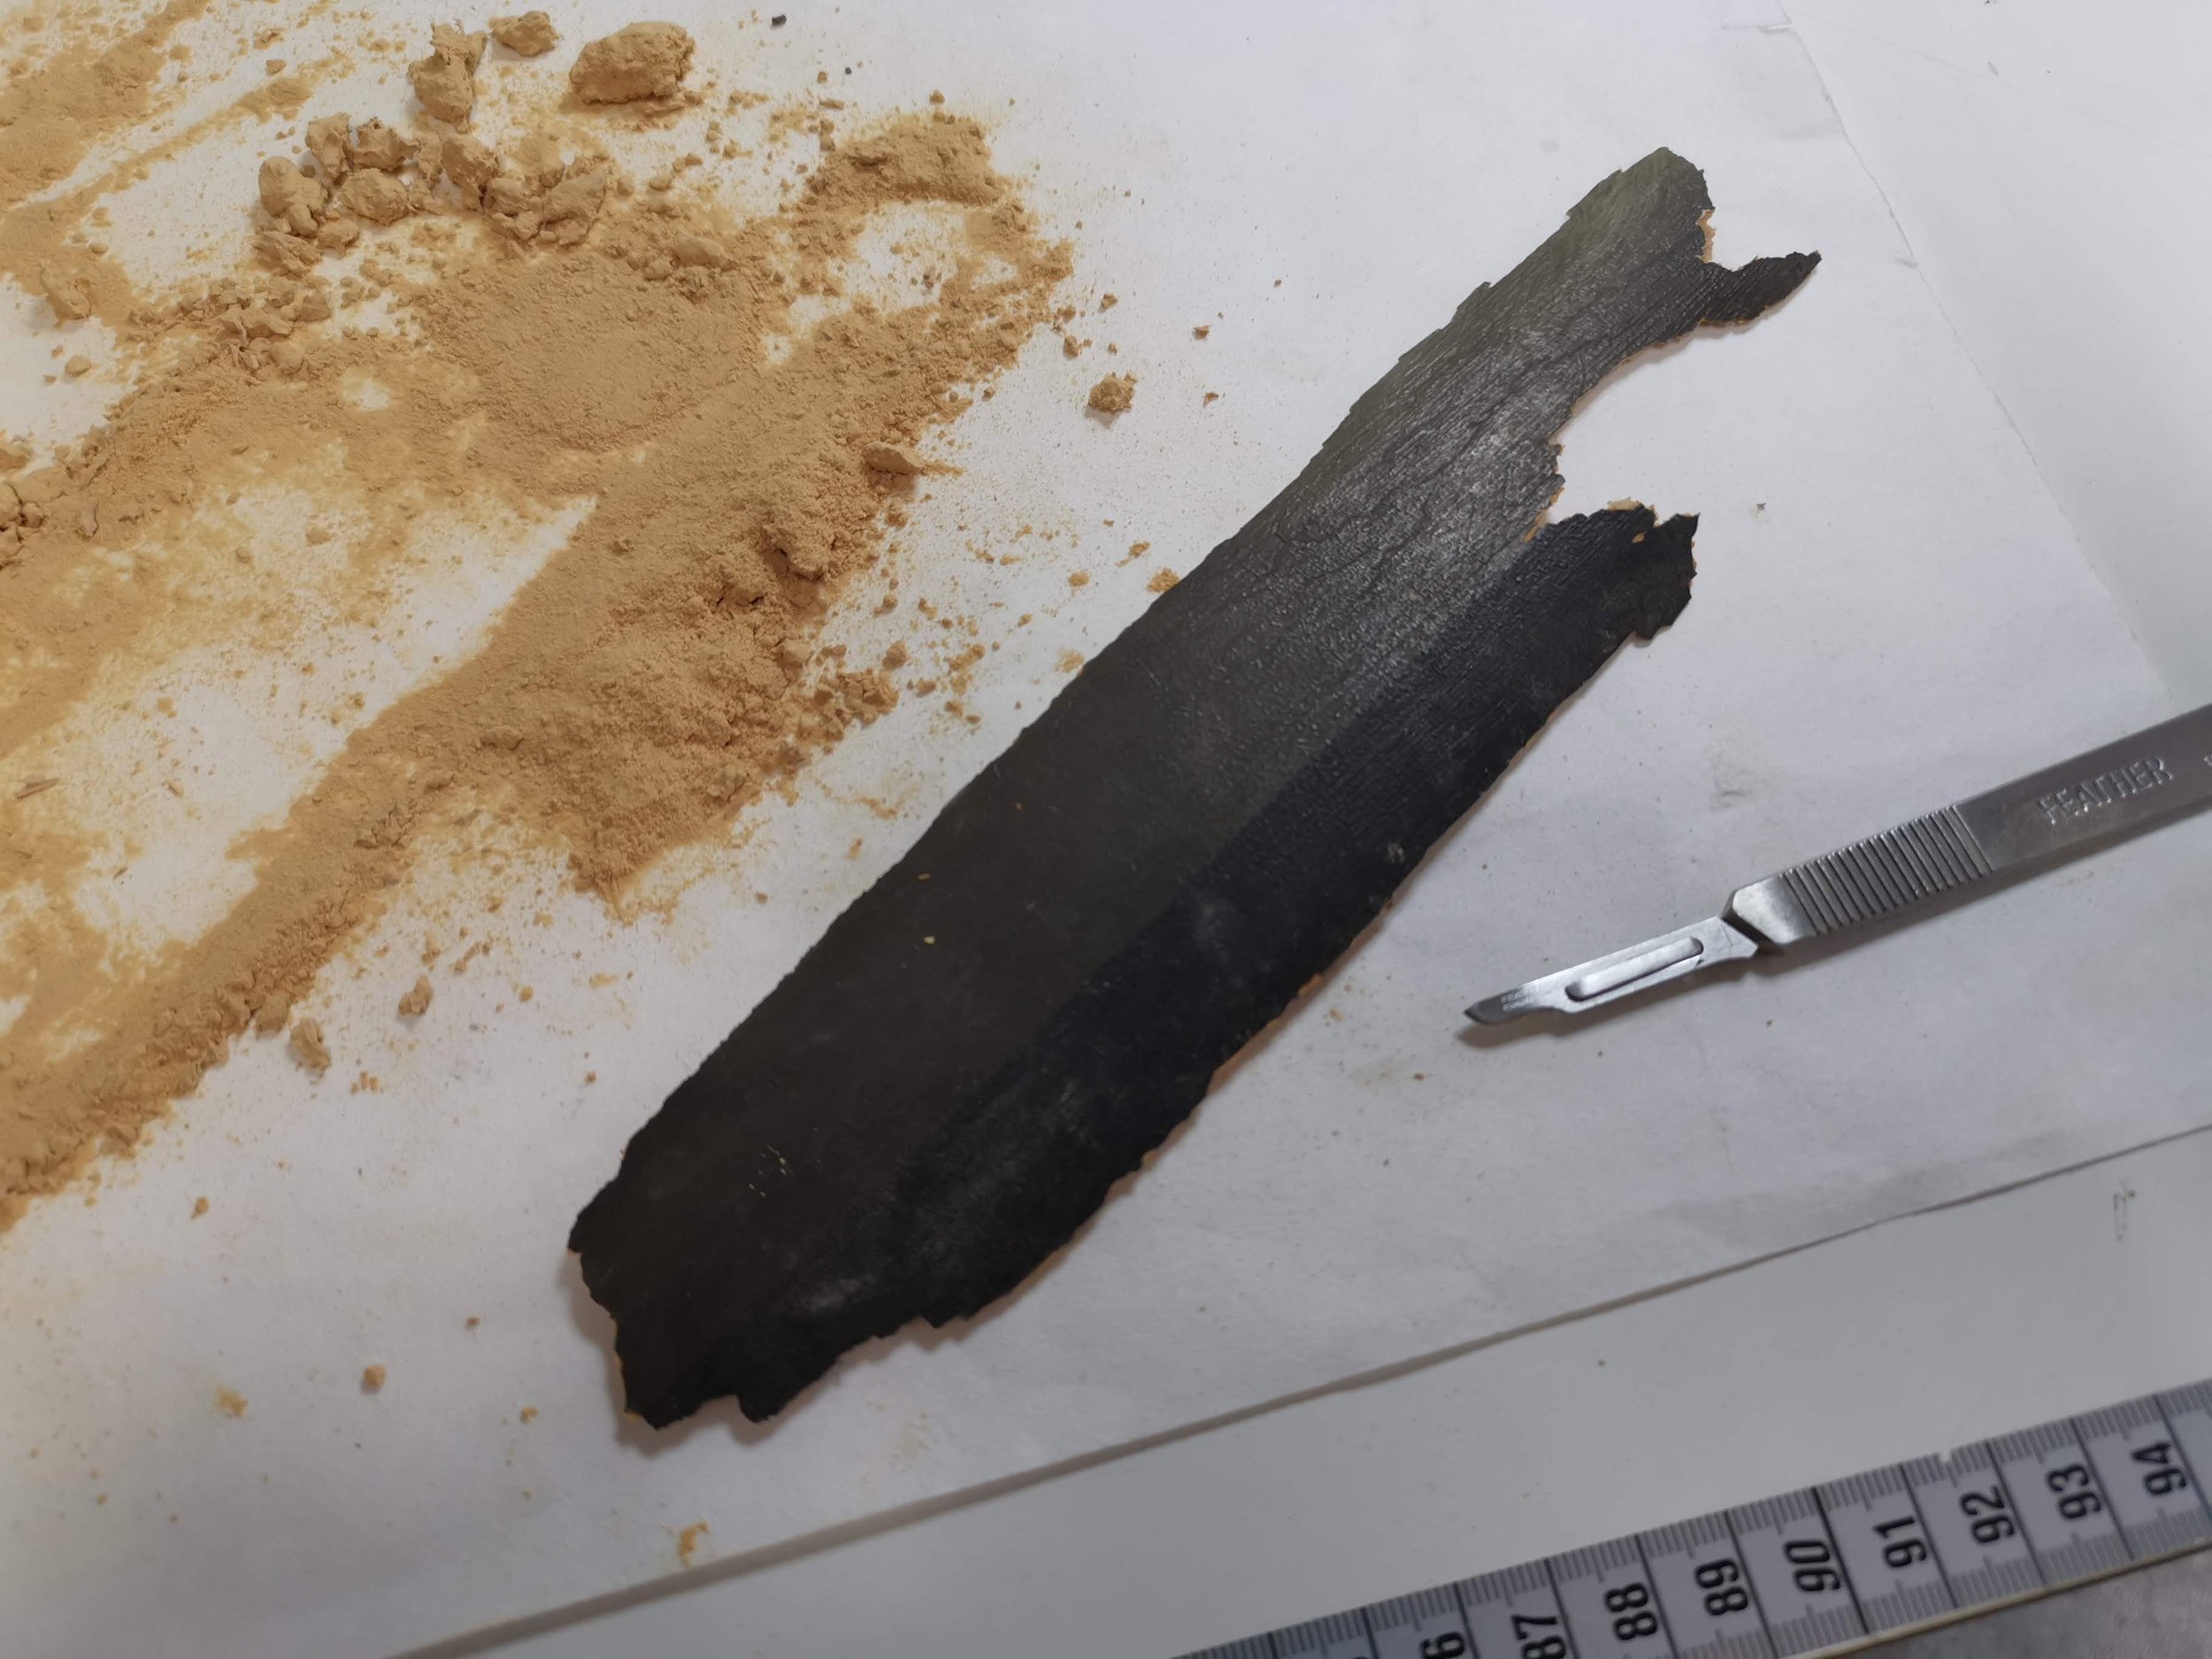
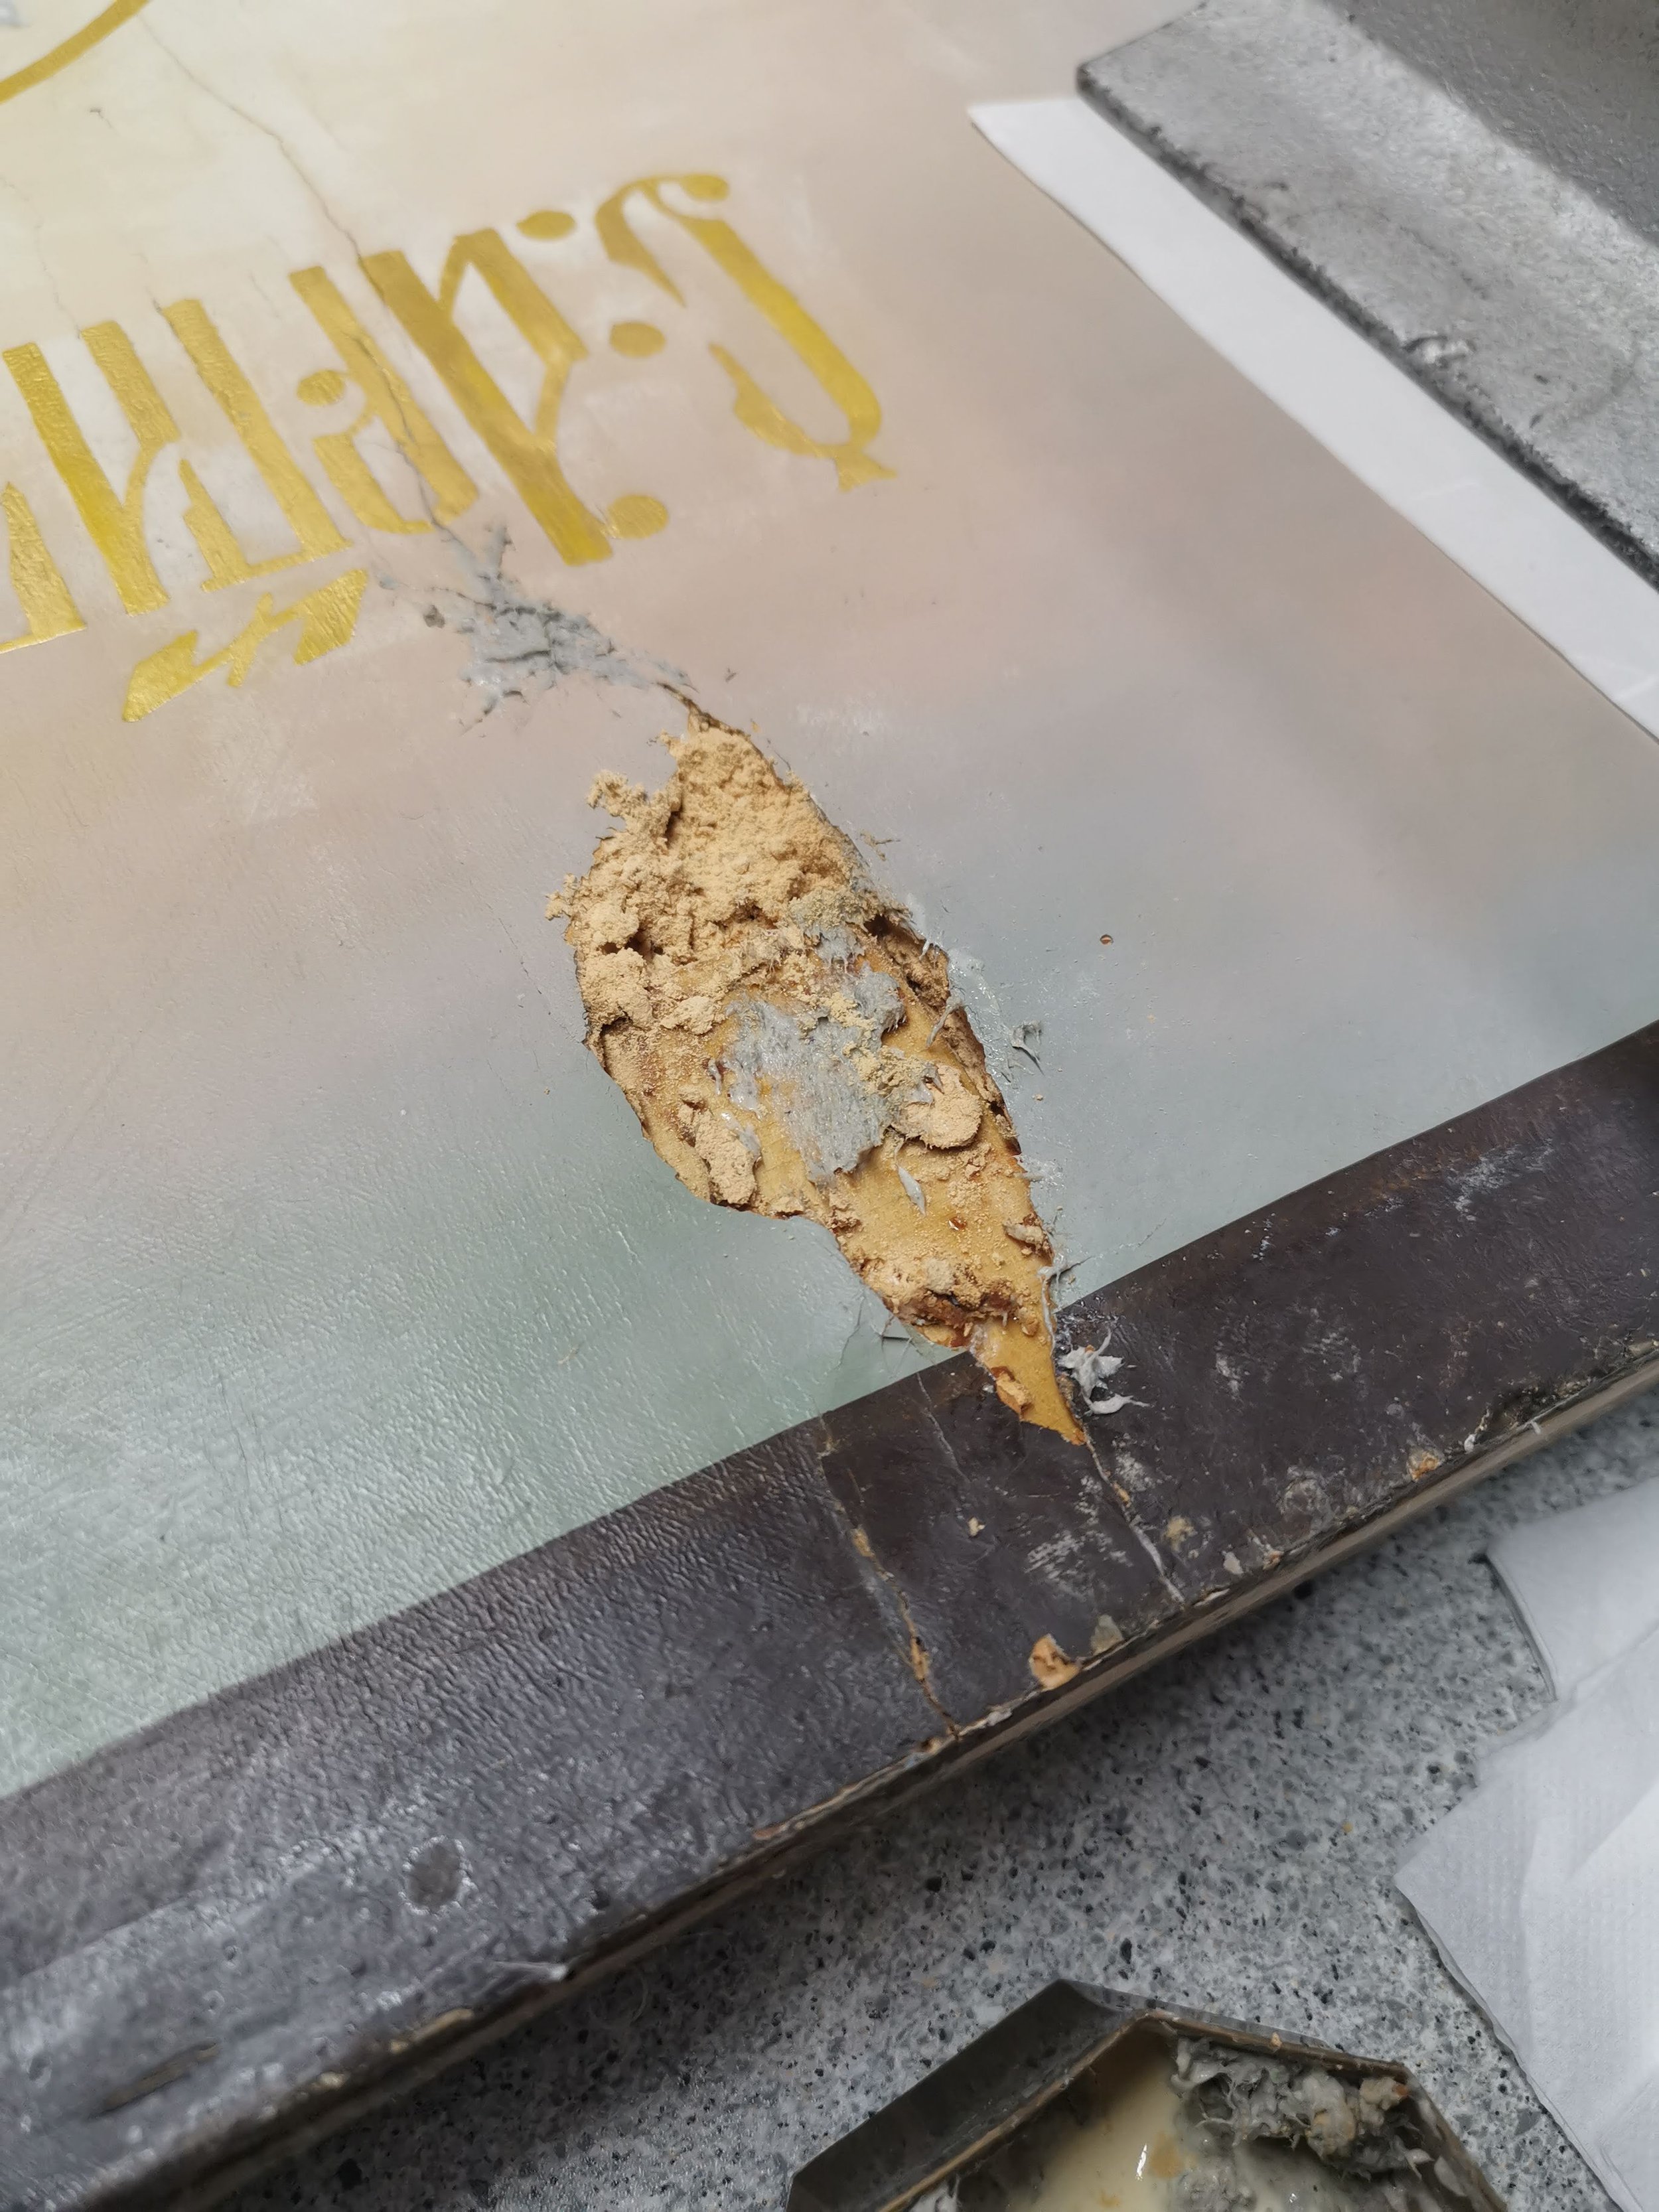
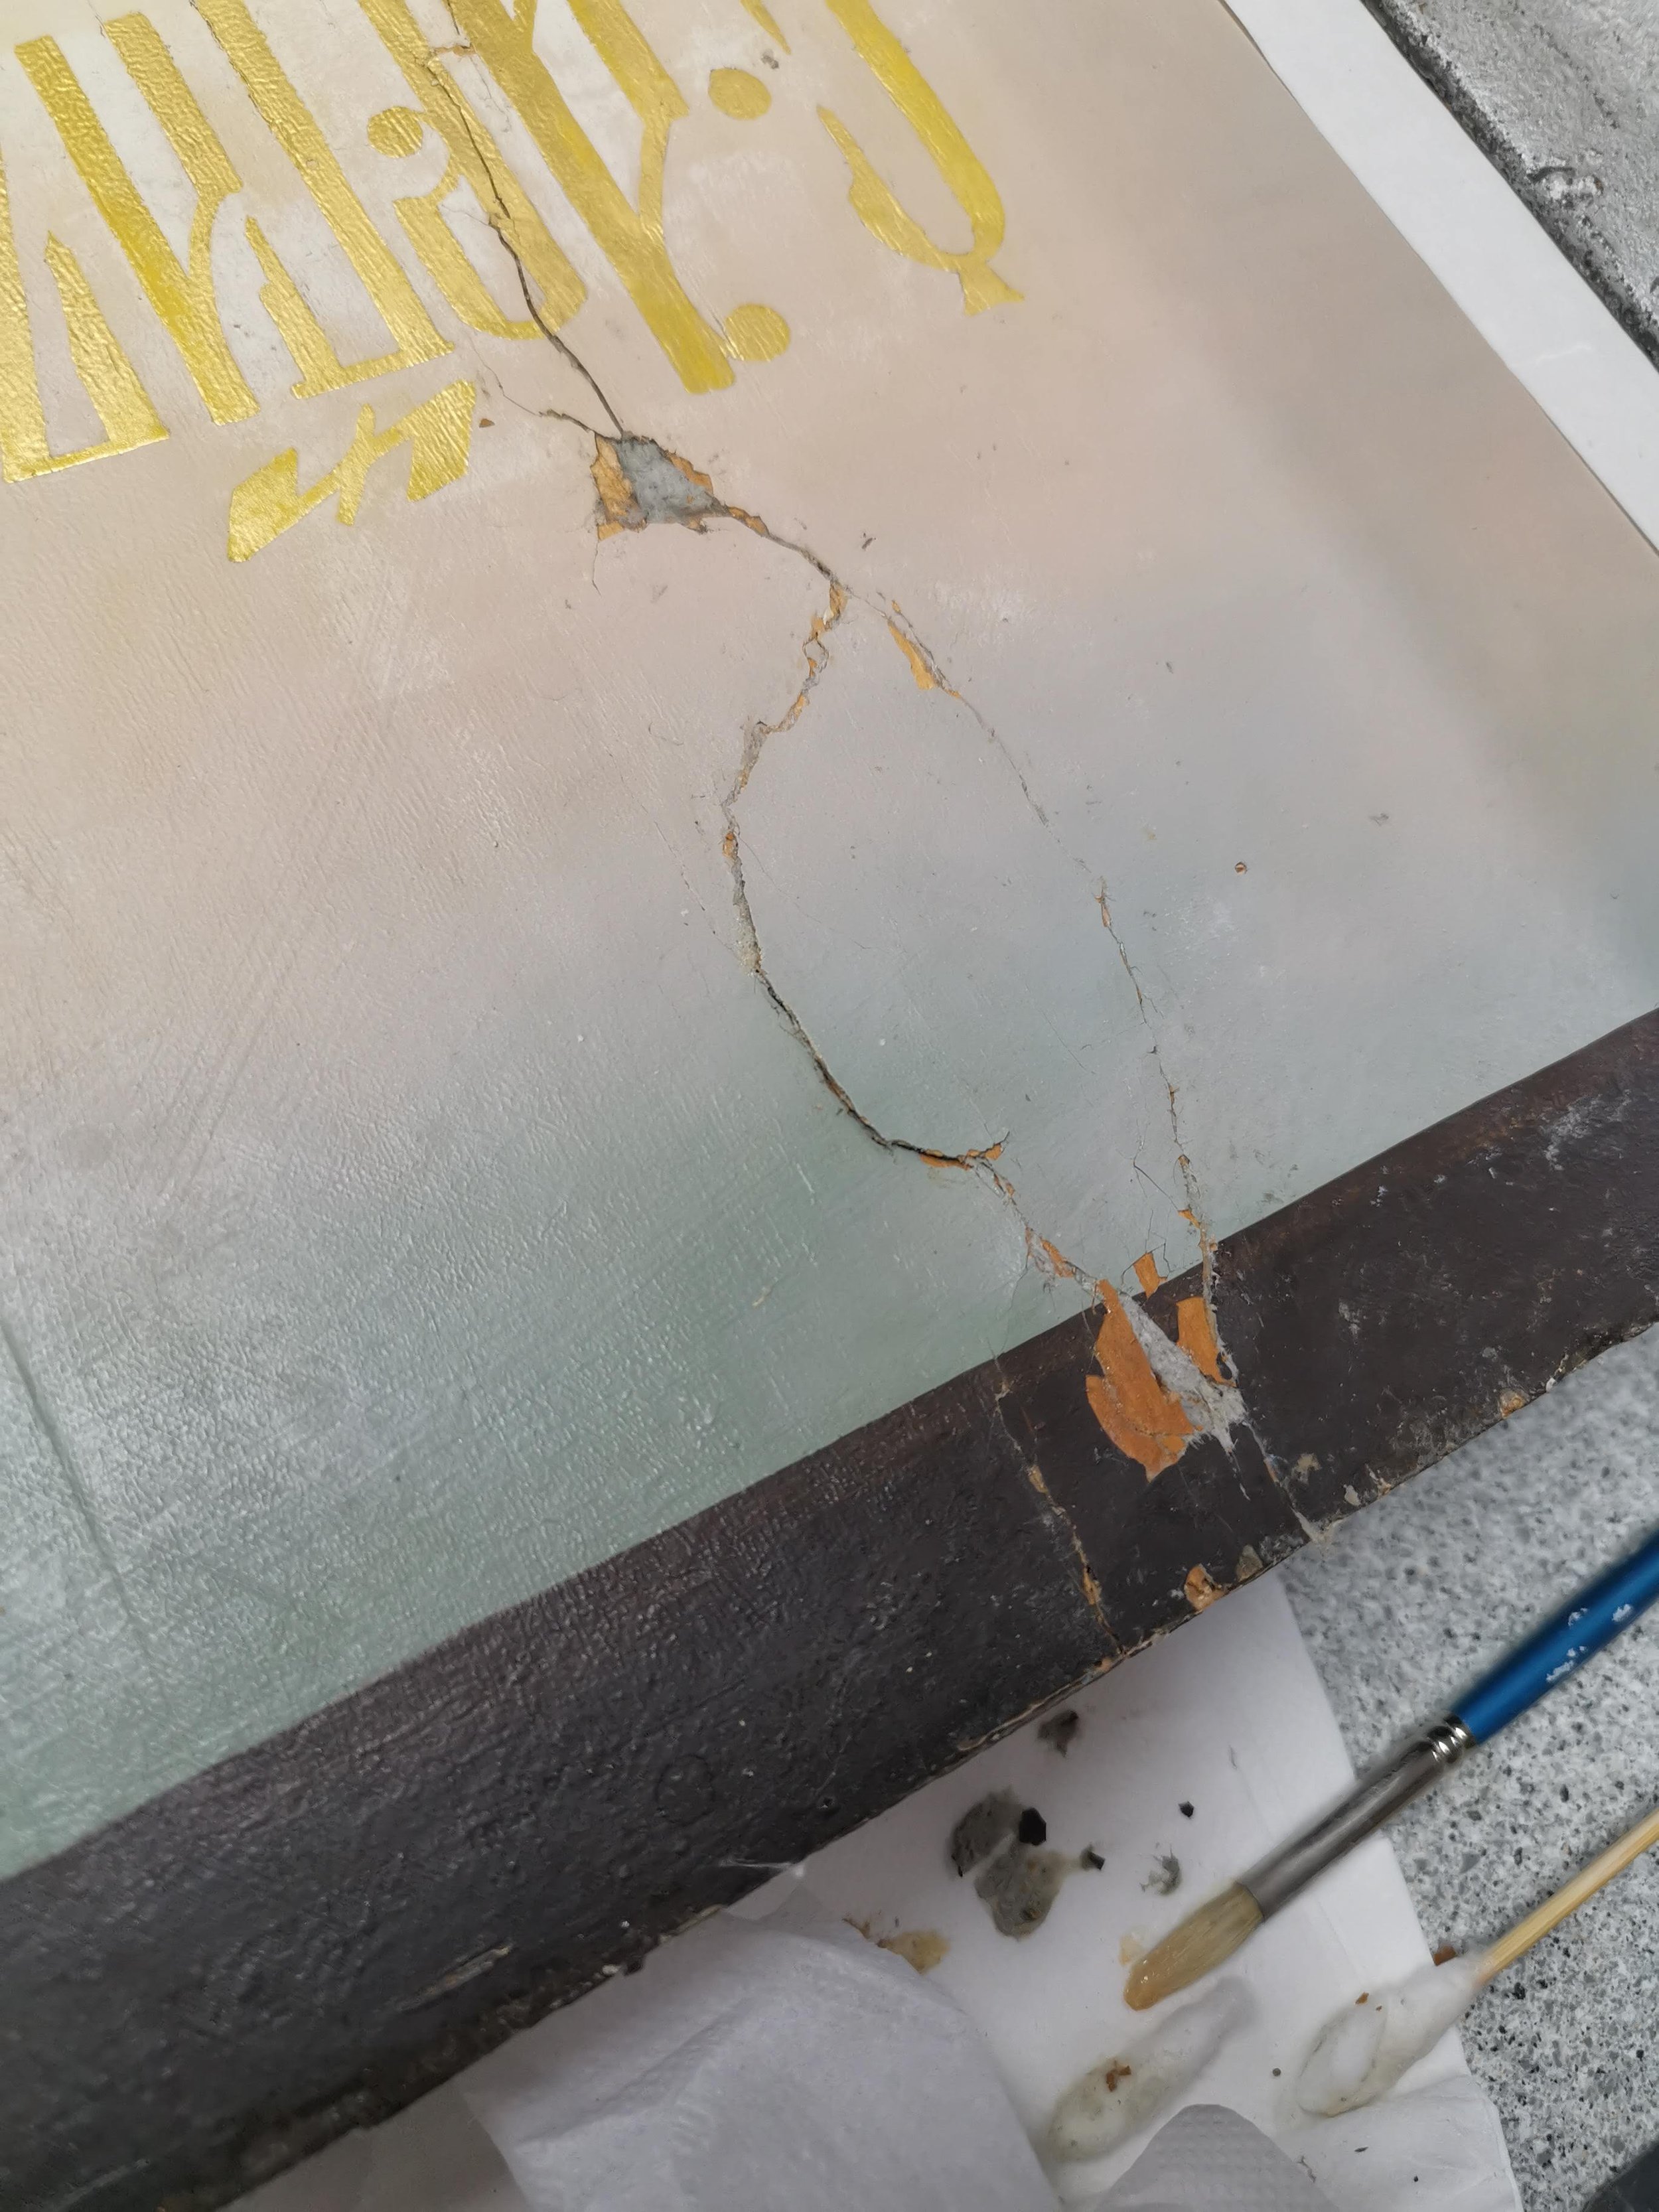
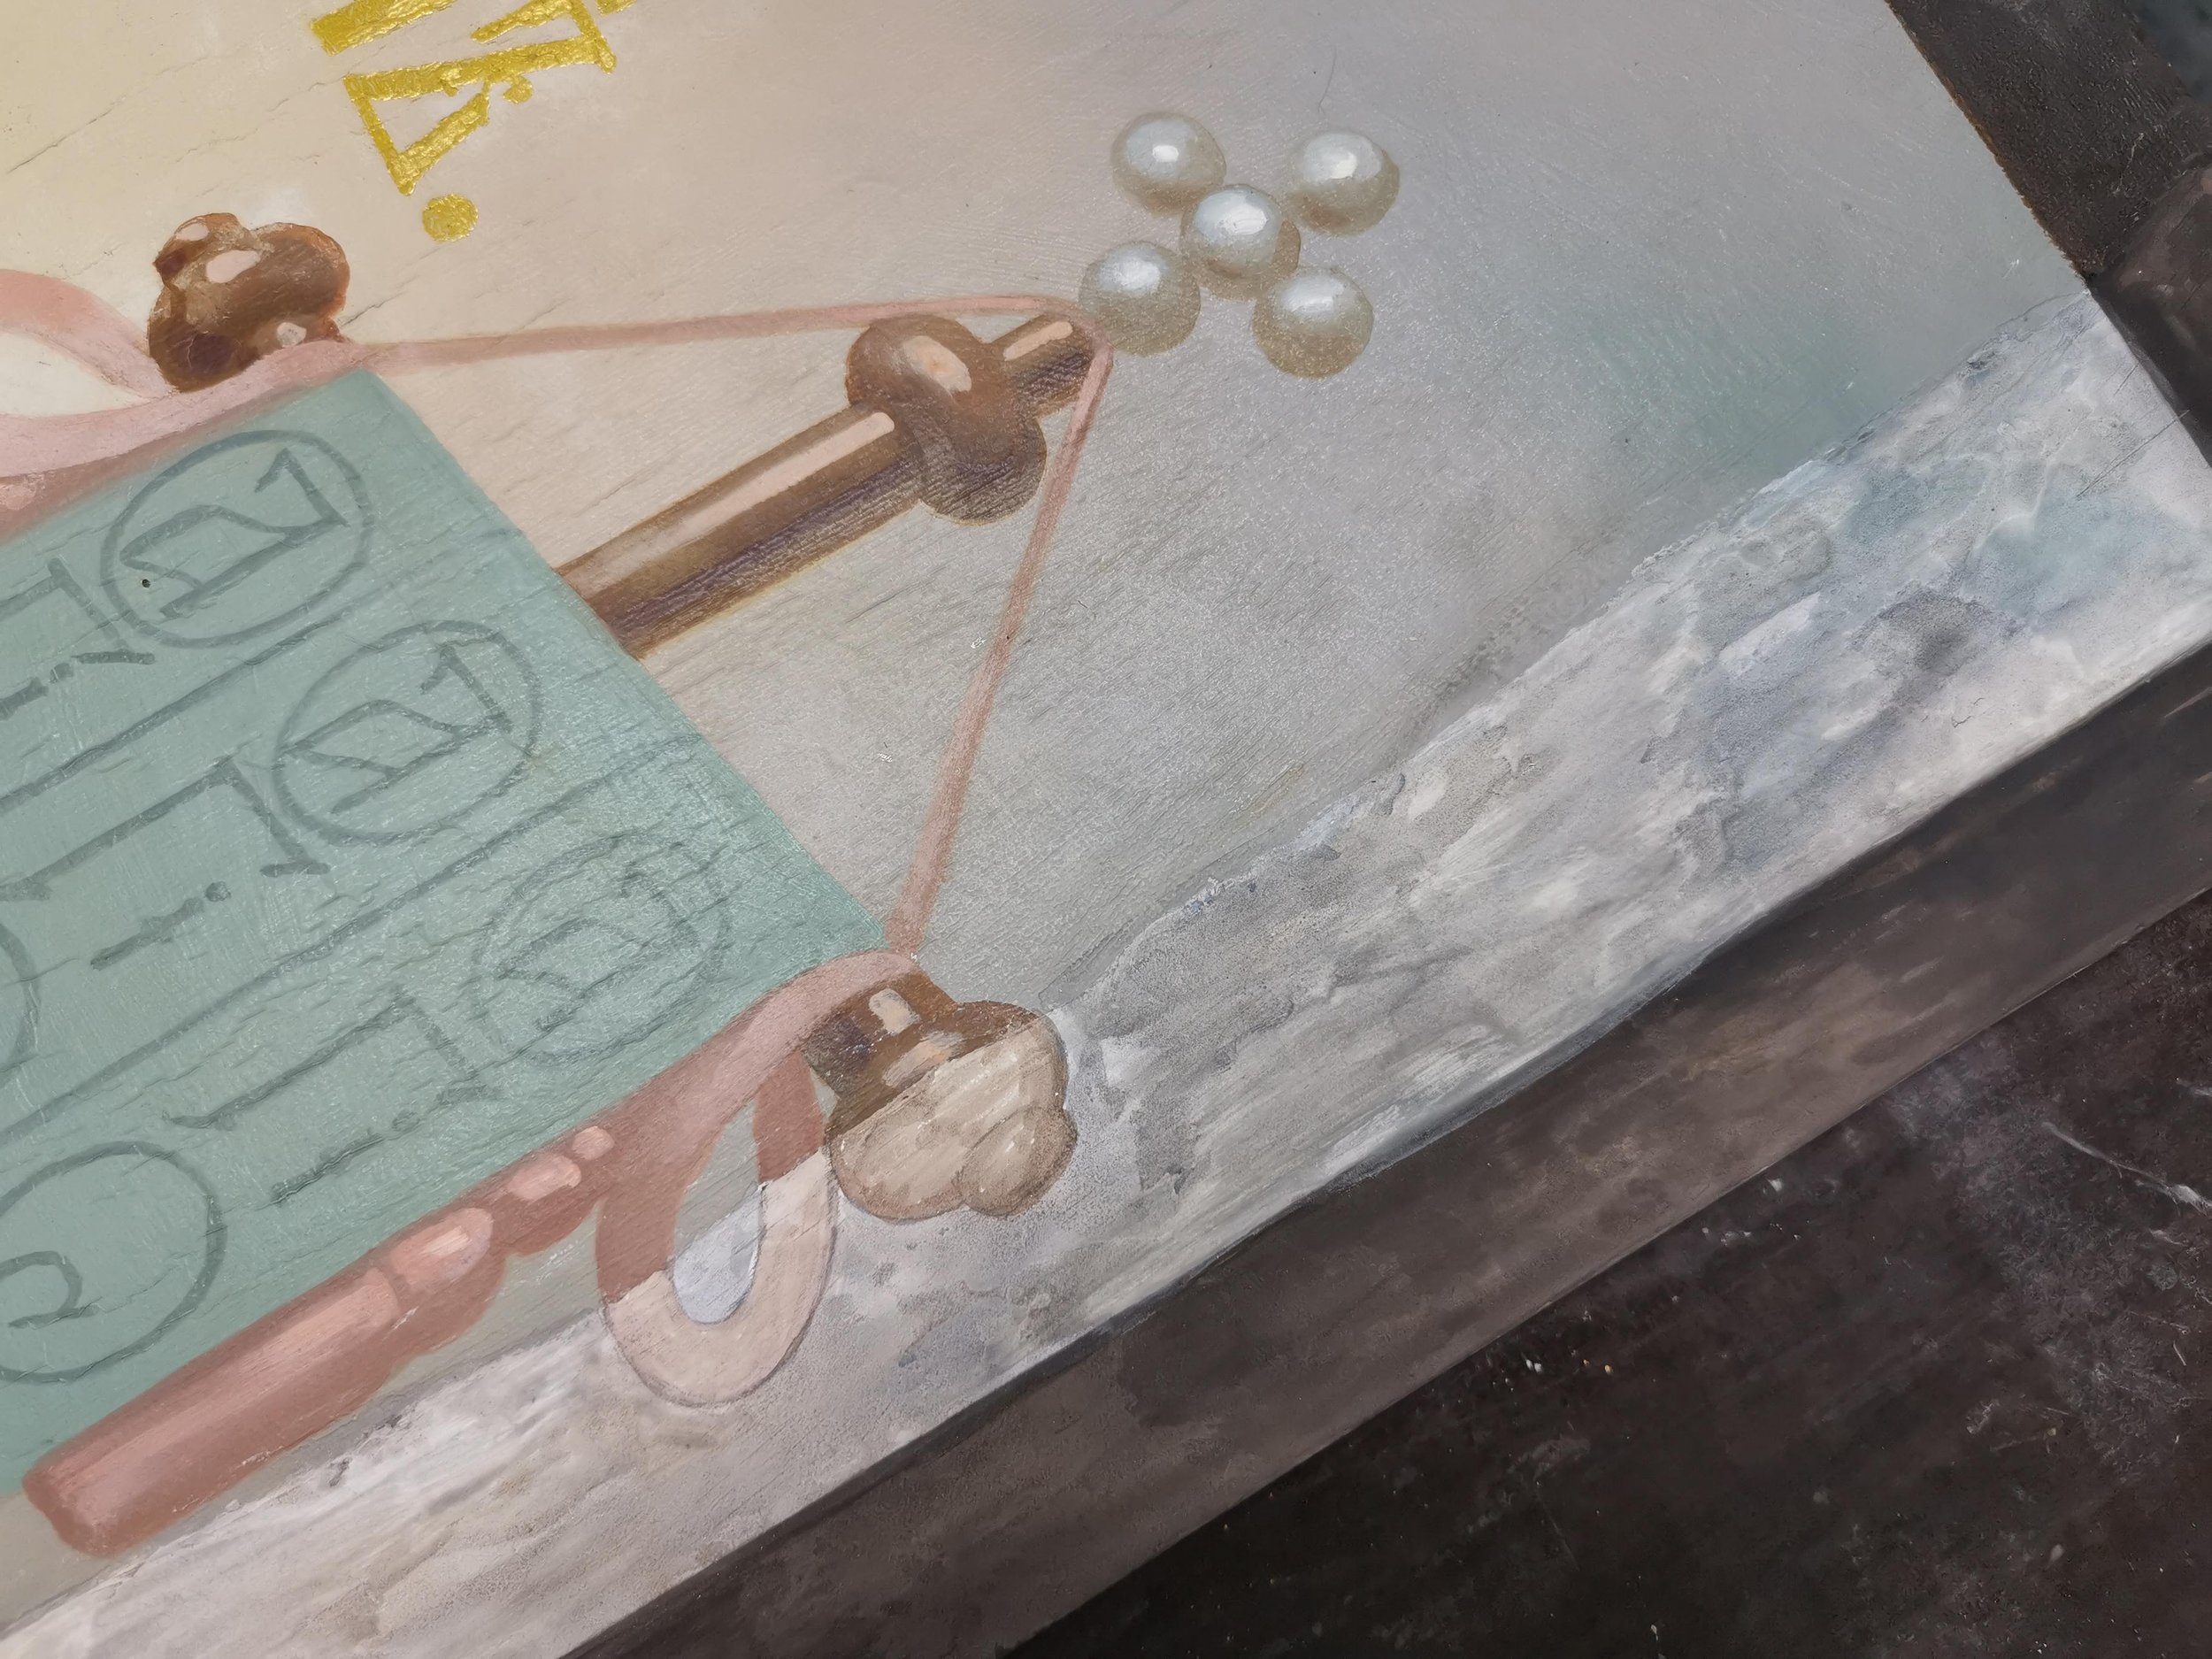
The icon arrived at the Kanut in a box, the bottom of which was covered with a thick layer of dust caused by decaying wood. [ill 4] The dust contained broken pieces from the paint layer, priming and disintegrating wood. Fortunately, the paint and priming were well connected, not considering the rather extensive paint losses especially at the borders of the icon. [ill 5] About 15% of the paint layer were missing and some big cracks were visible in the remaining part. Underneath the paint layer wood decay had brought about several gaps. When touched by hand, the paint layer could dip at places. The whole surface was unevenly covered with cracking mostly in the lower part of the icon, on the brown screening and on the angel’s green and pink robe. The paint on the yellowish sky was grated, whereas the golden gloriole (nimbus) and the angel’s initials – Saint Archangel Gabriel in ecclesiastical Slavonic – were badly damaged. The thin varnish layer had darkened.
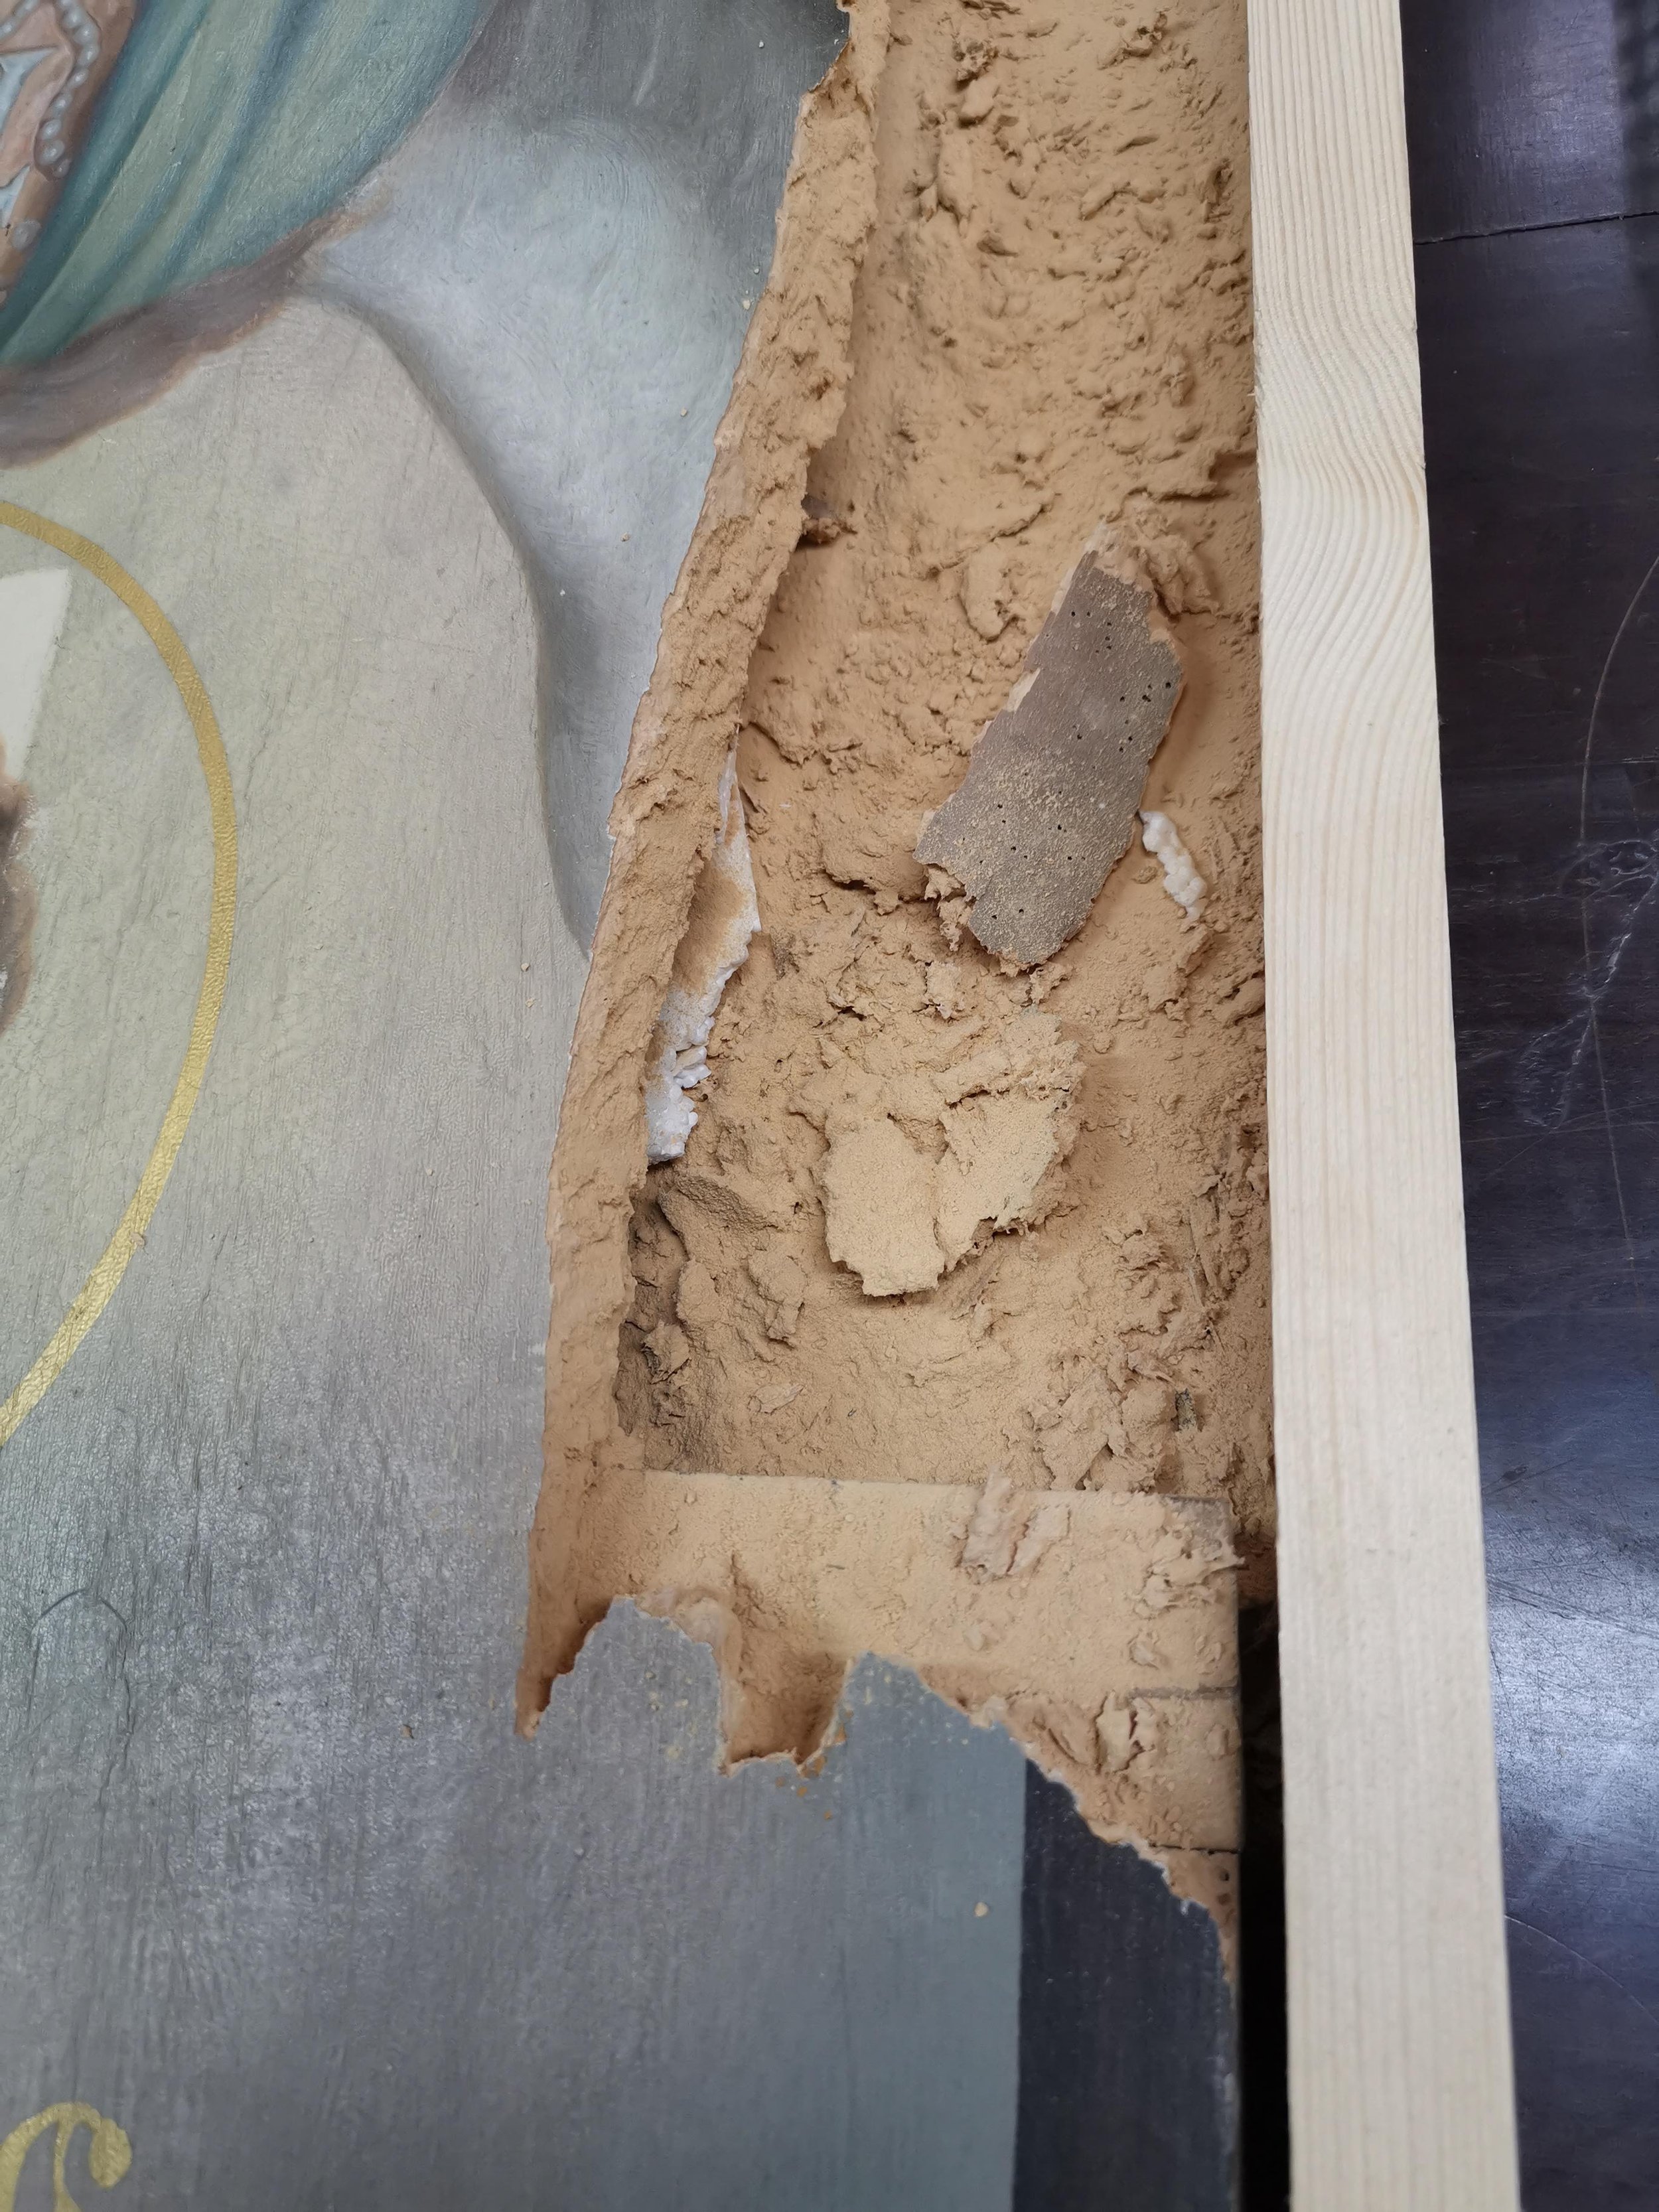
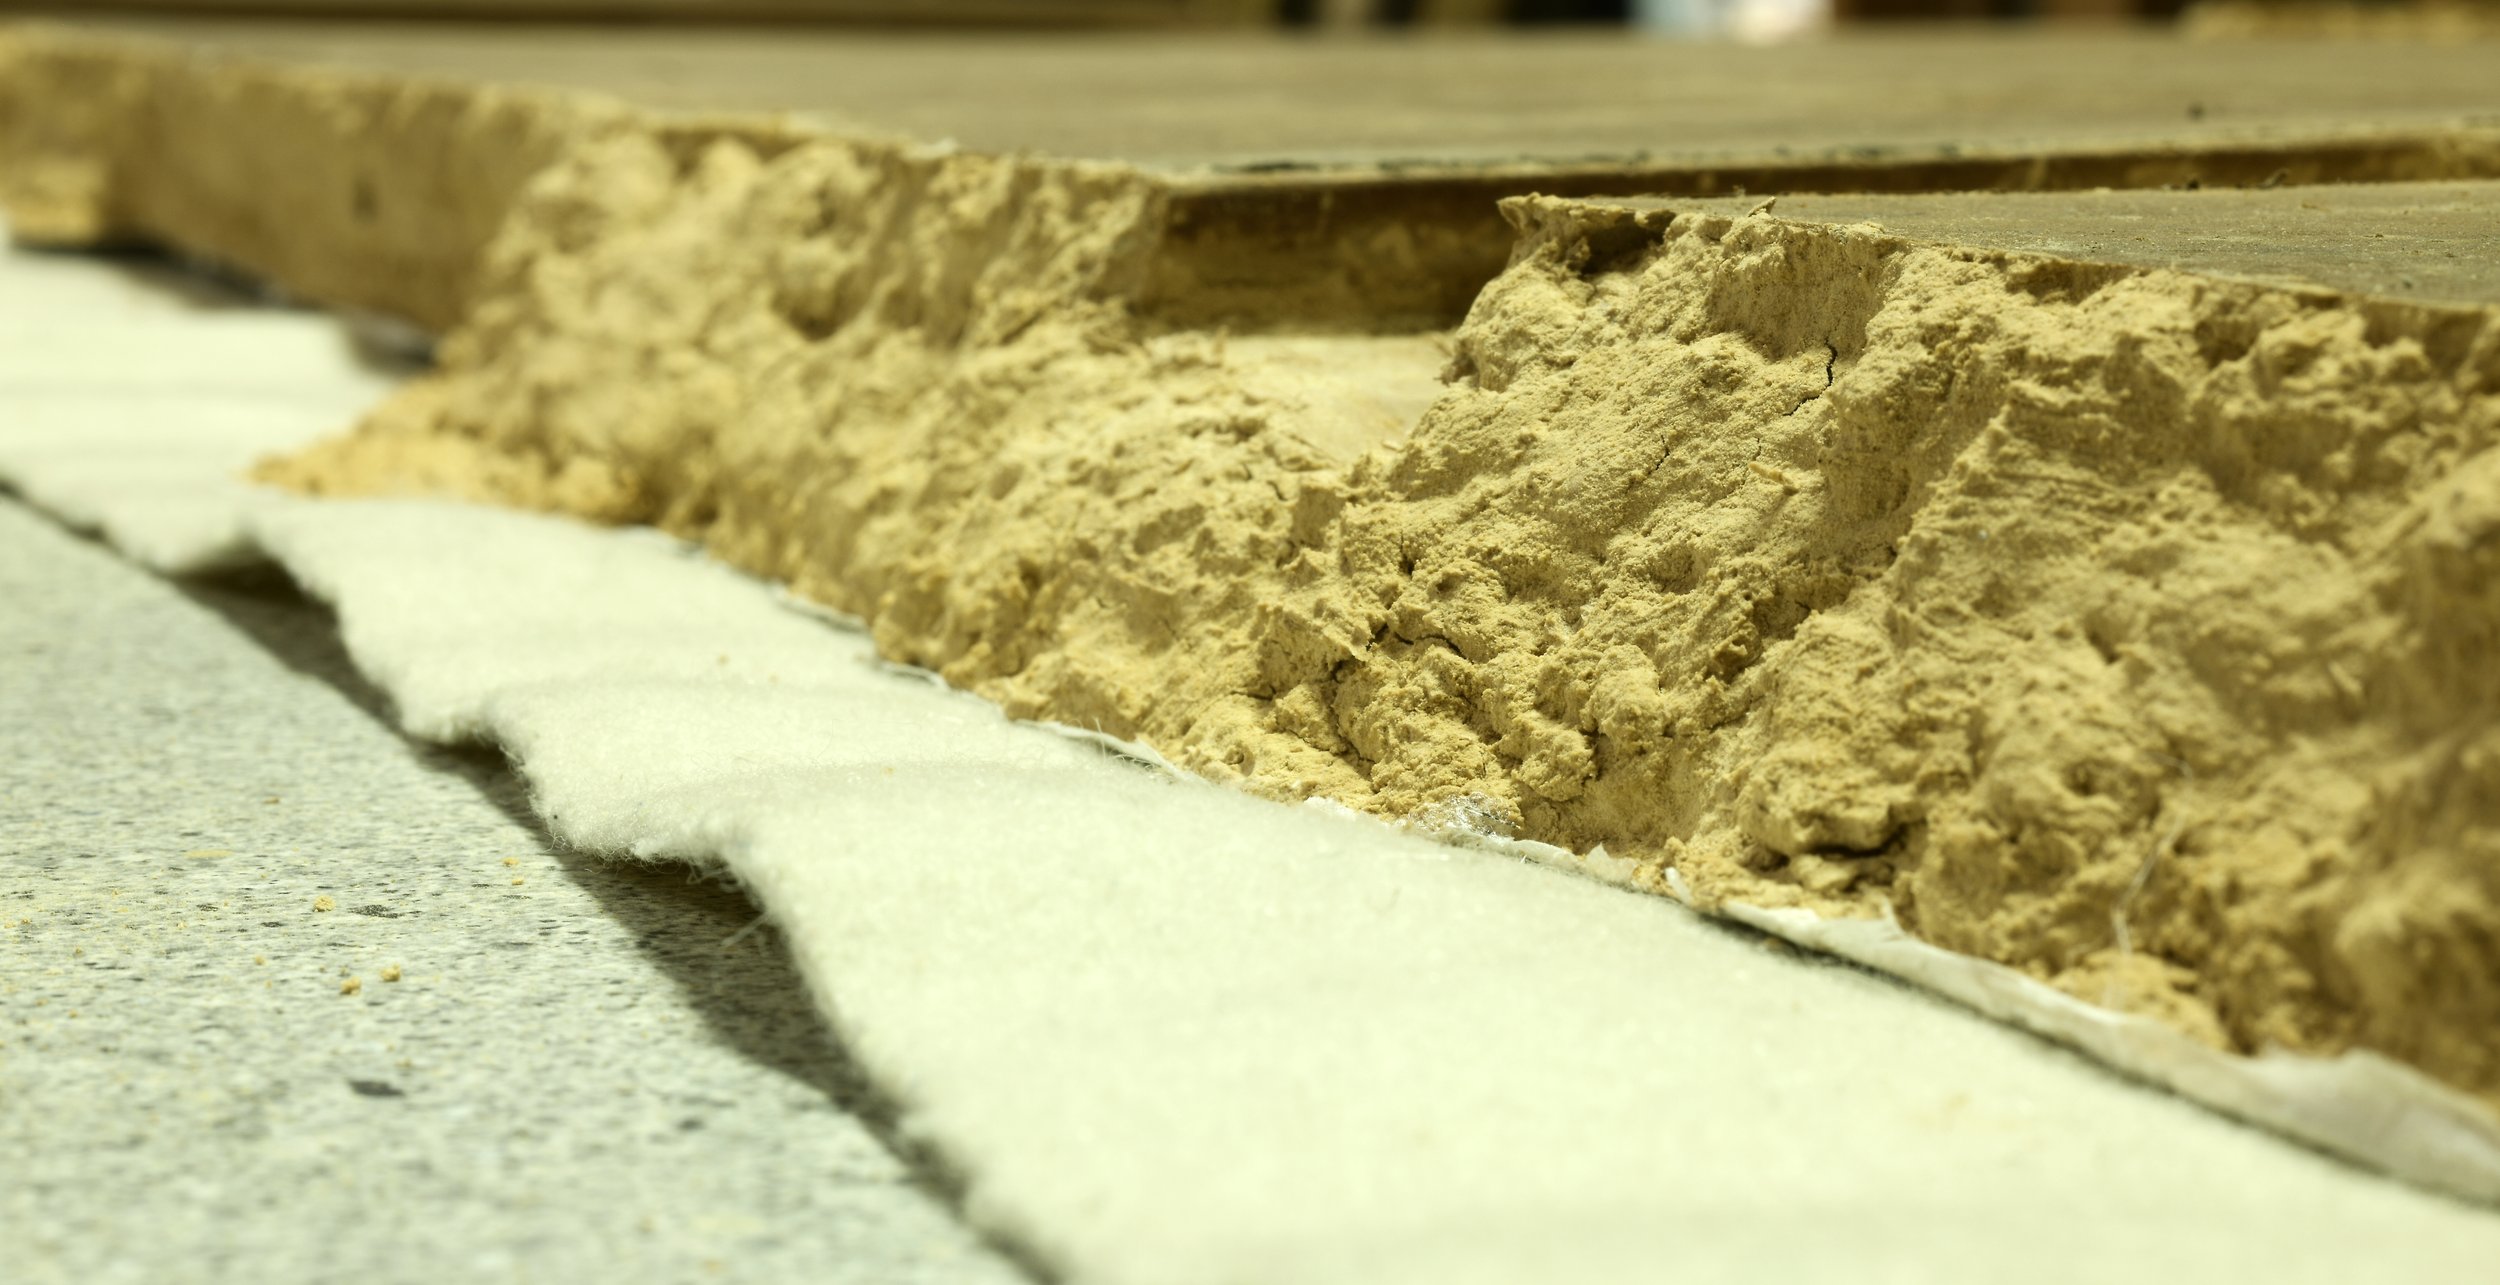
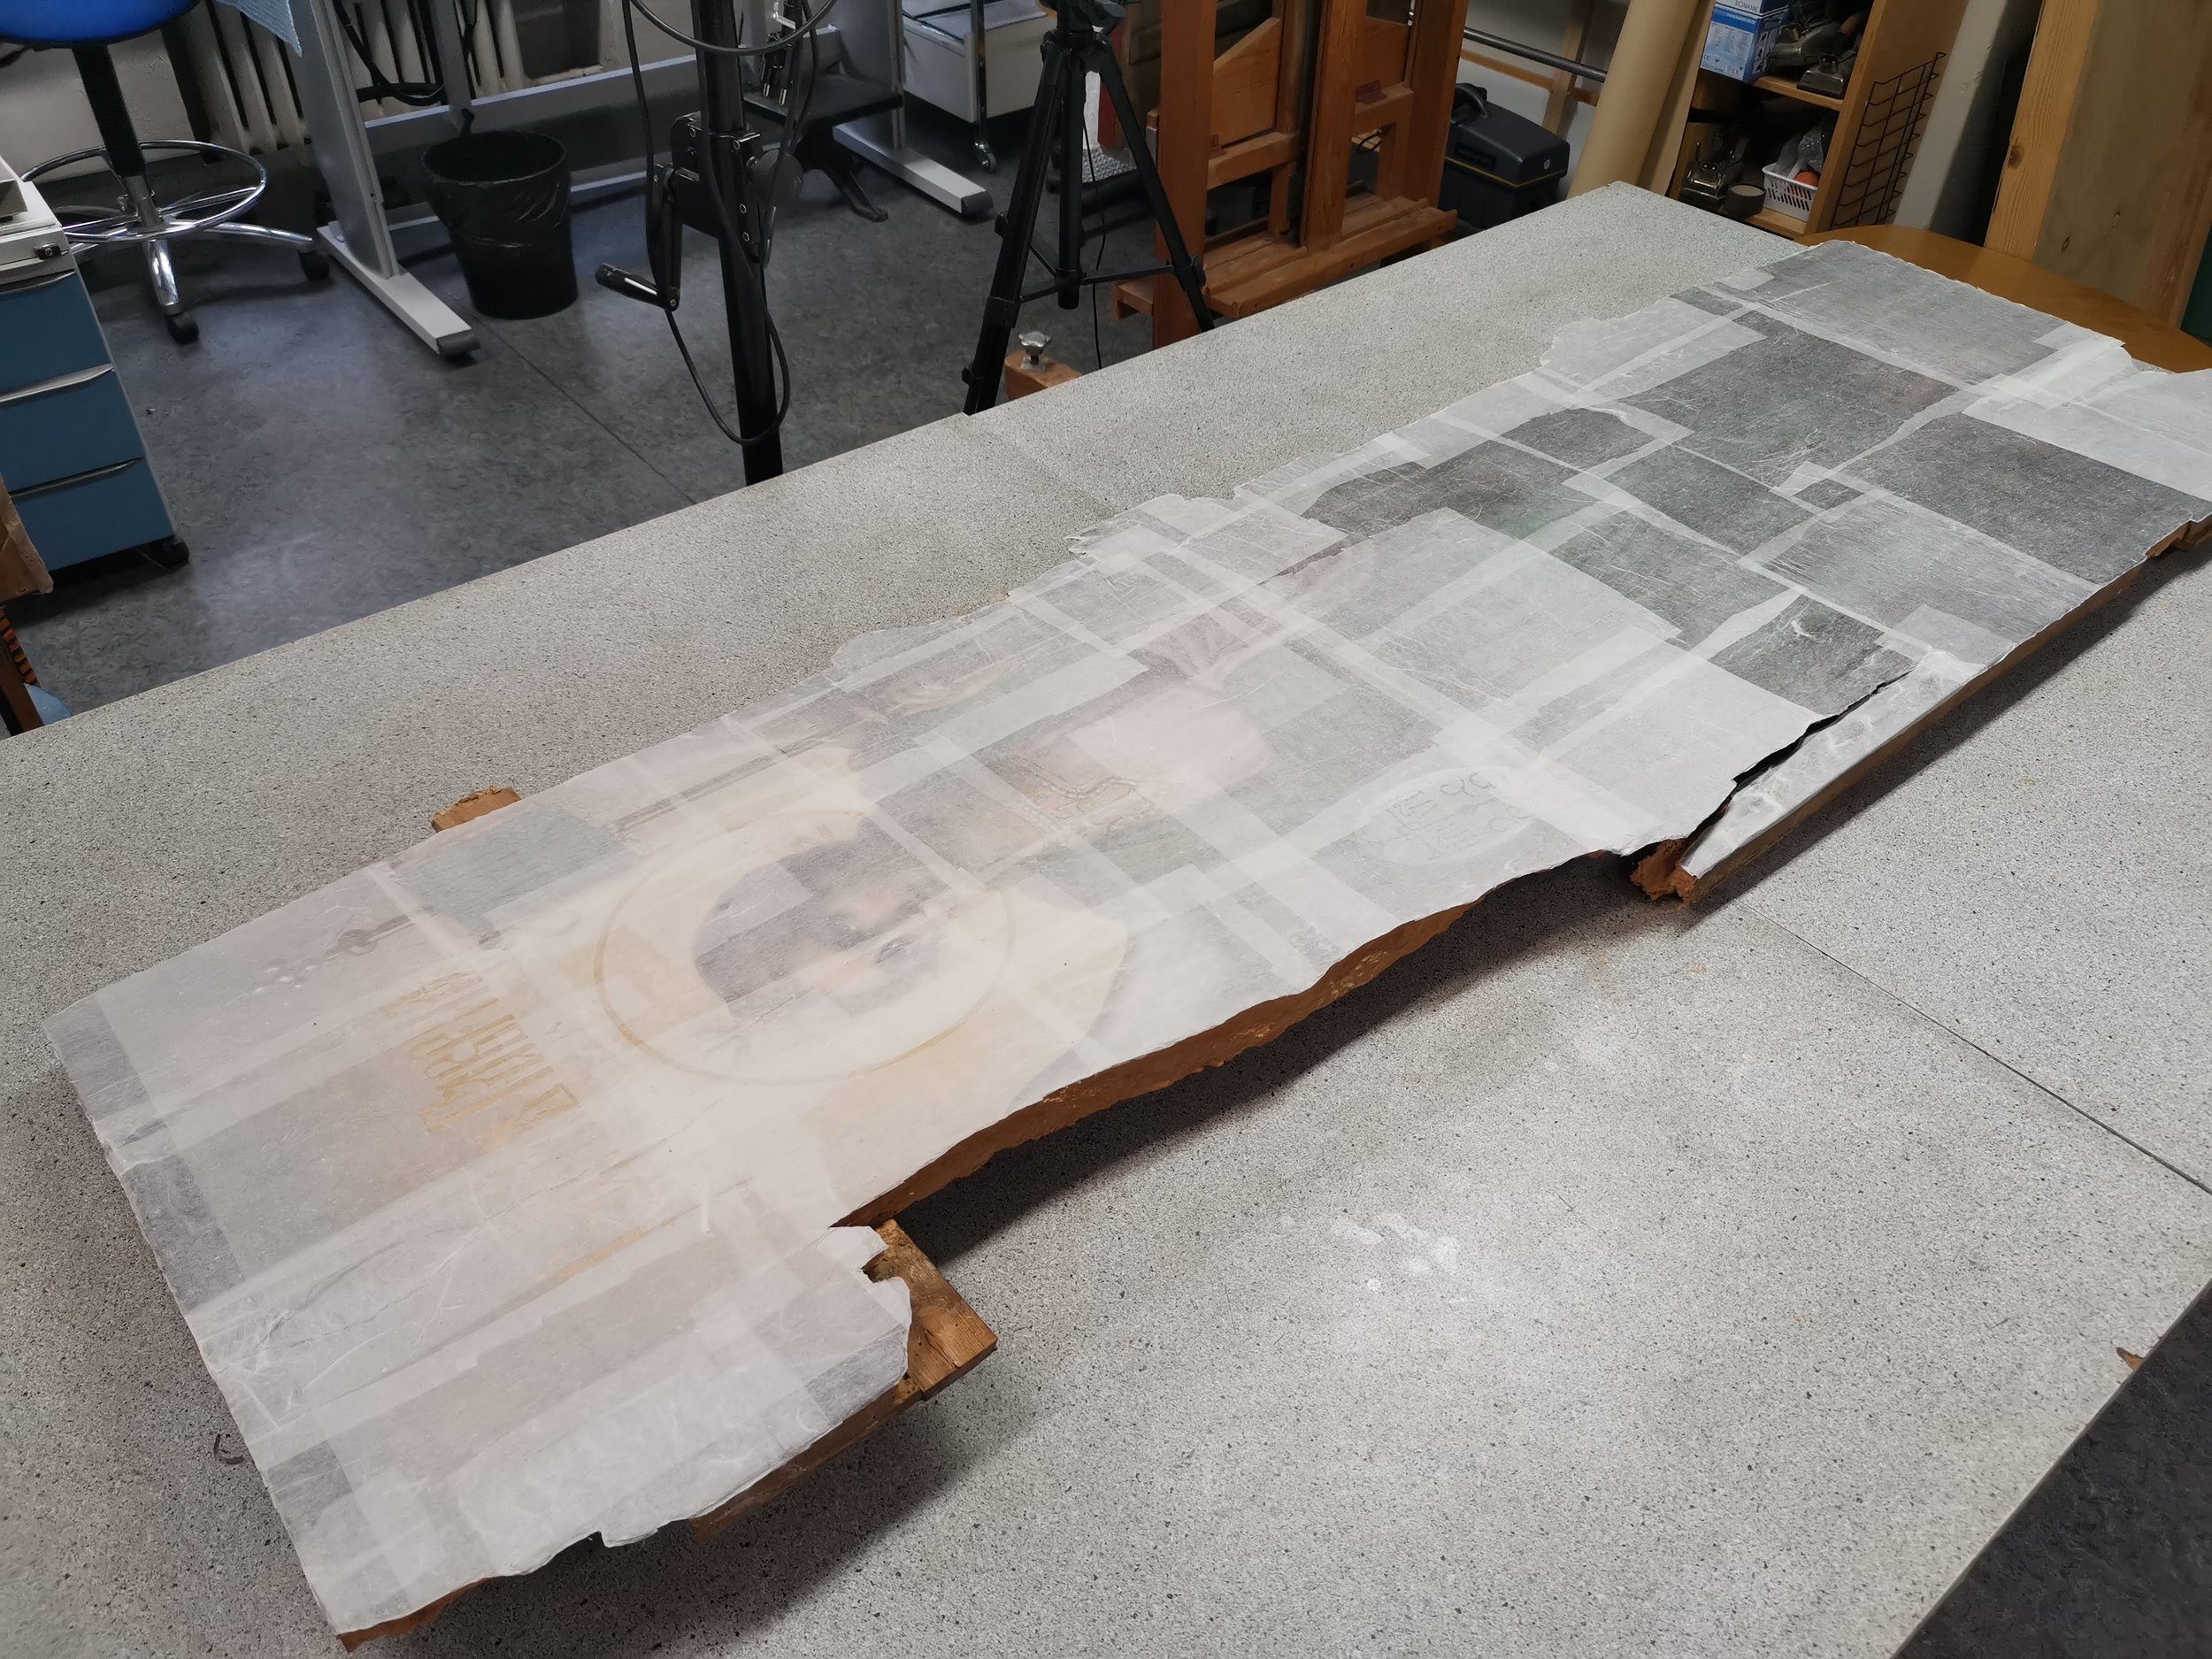
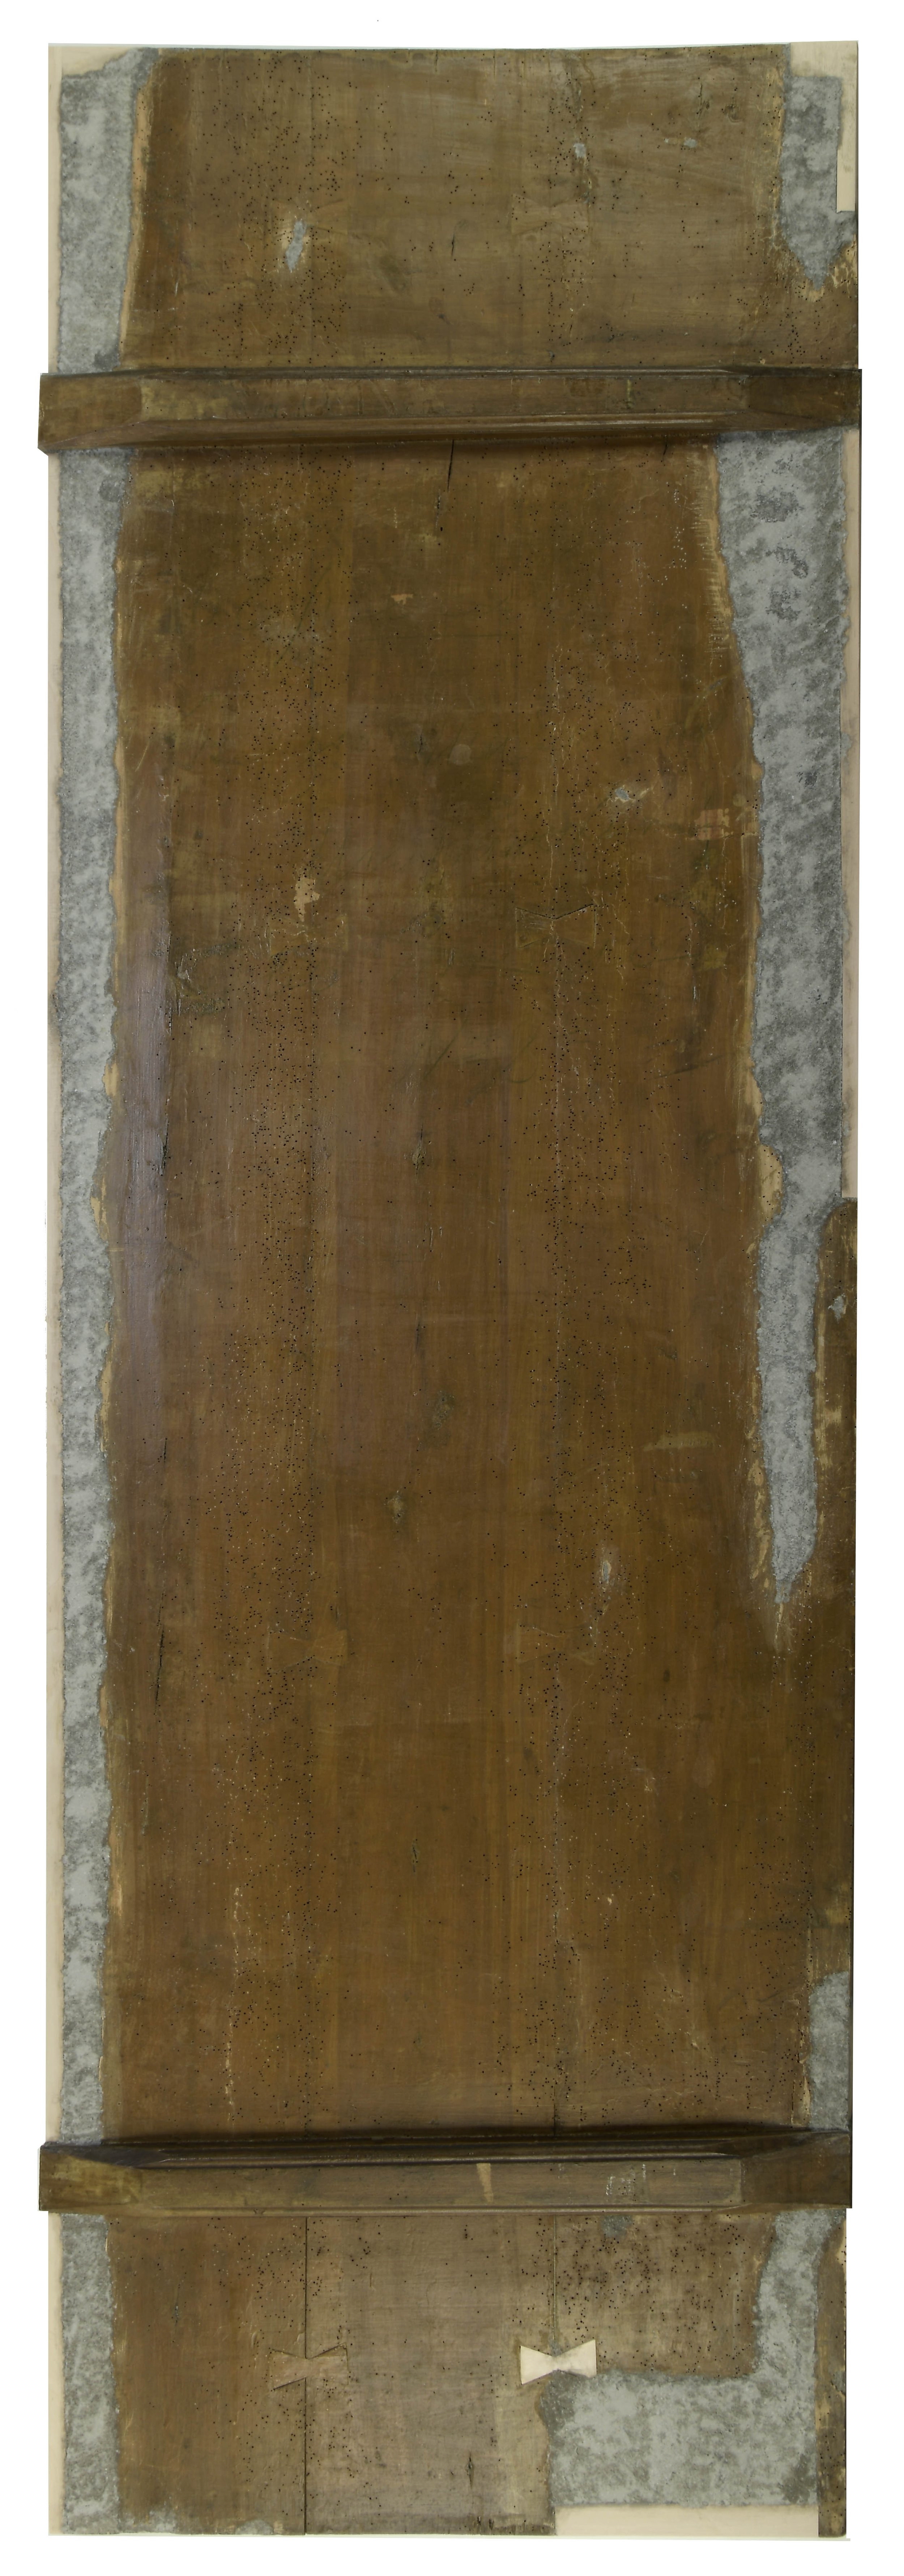
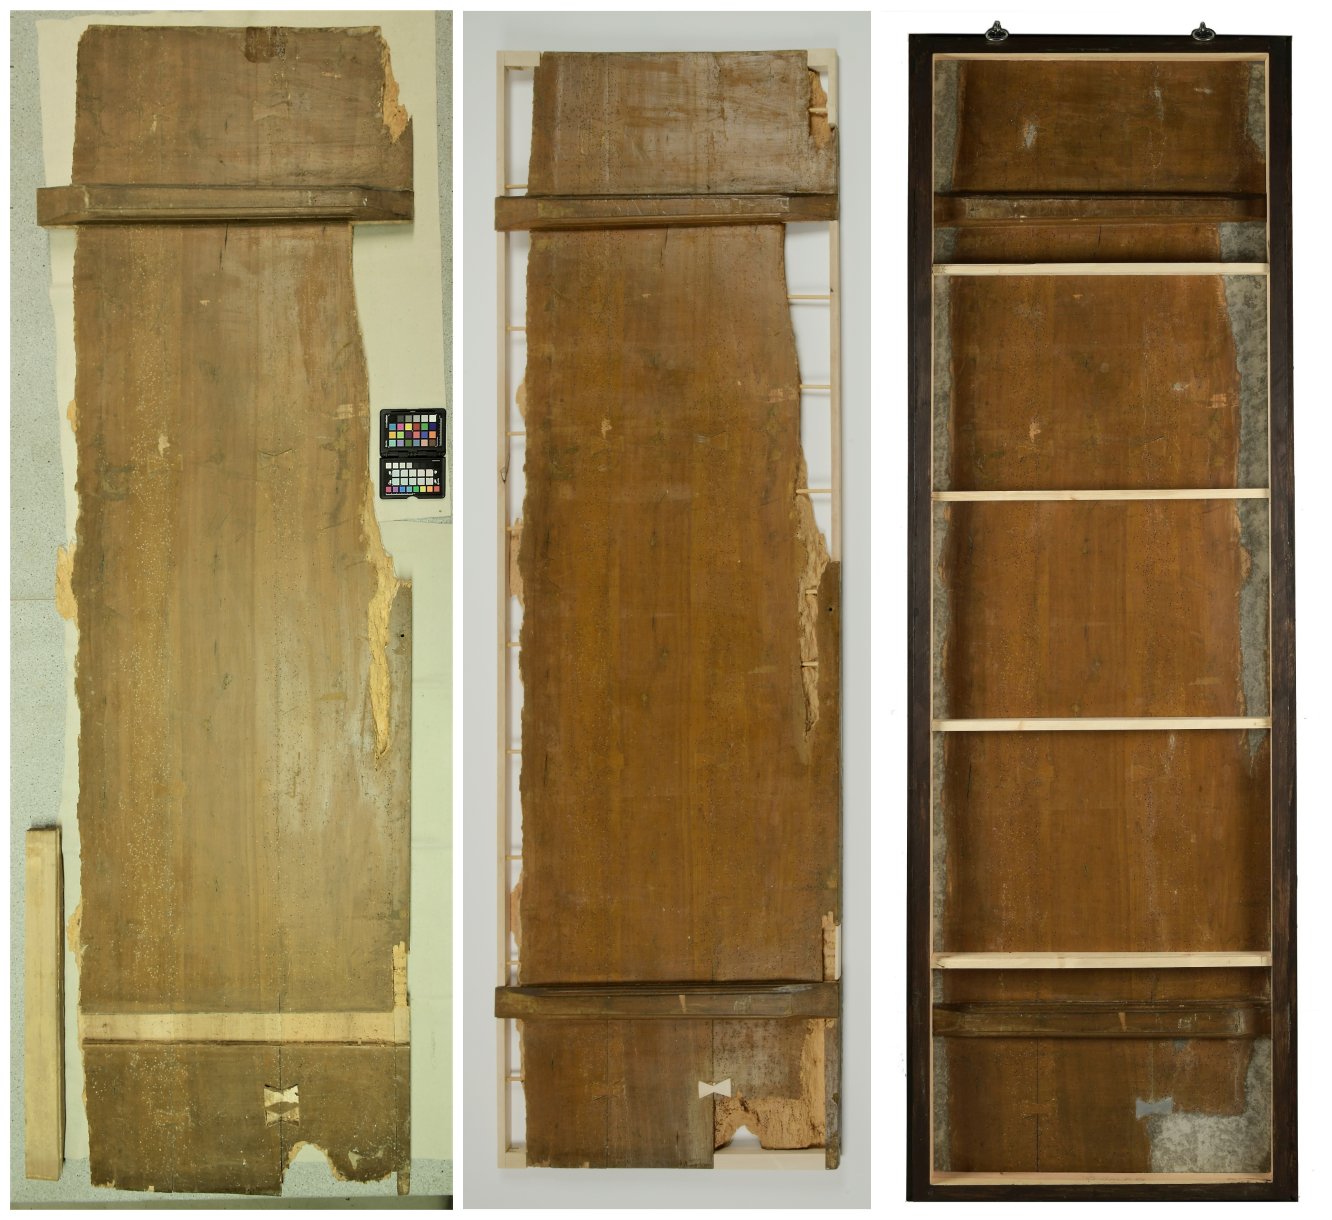
When the icon had carefully been taken out of the box, another sad truth emerged – no undamaged wood had survived in the sacral piece. The wood had become a porous, dusty mass held together by a thin crust: layer of paint in front and an extremely thin layer of wood at the back. [ill 6] Later probing and moulding viide1⁽¹⁾, however, showed some spots that were thicker underneath the paint layer.
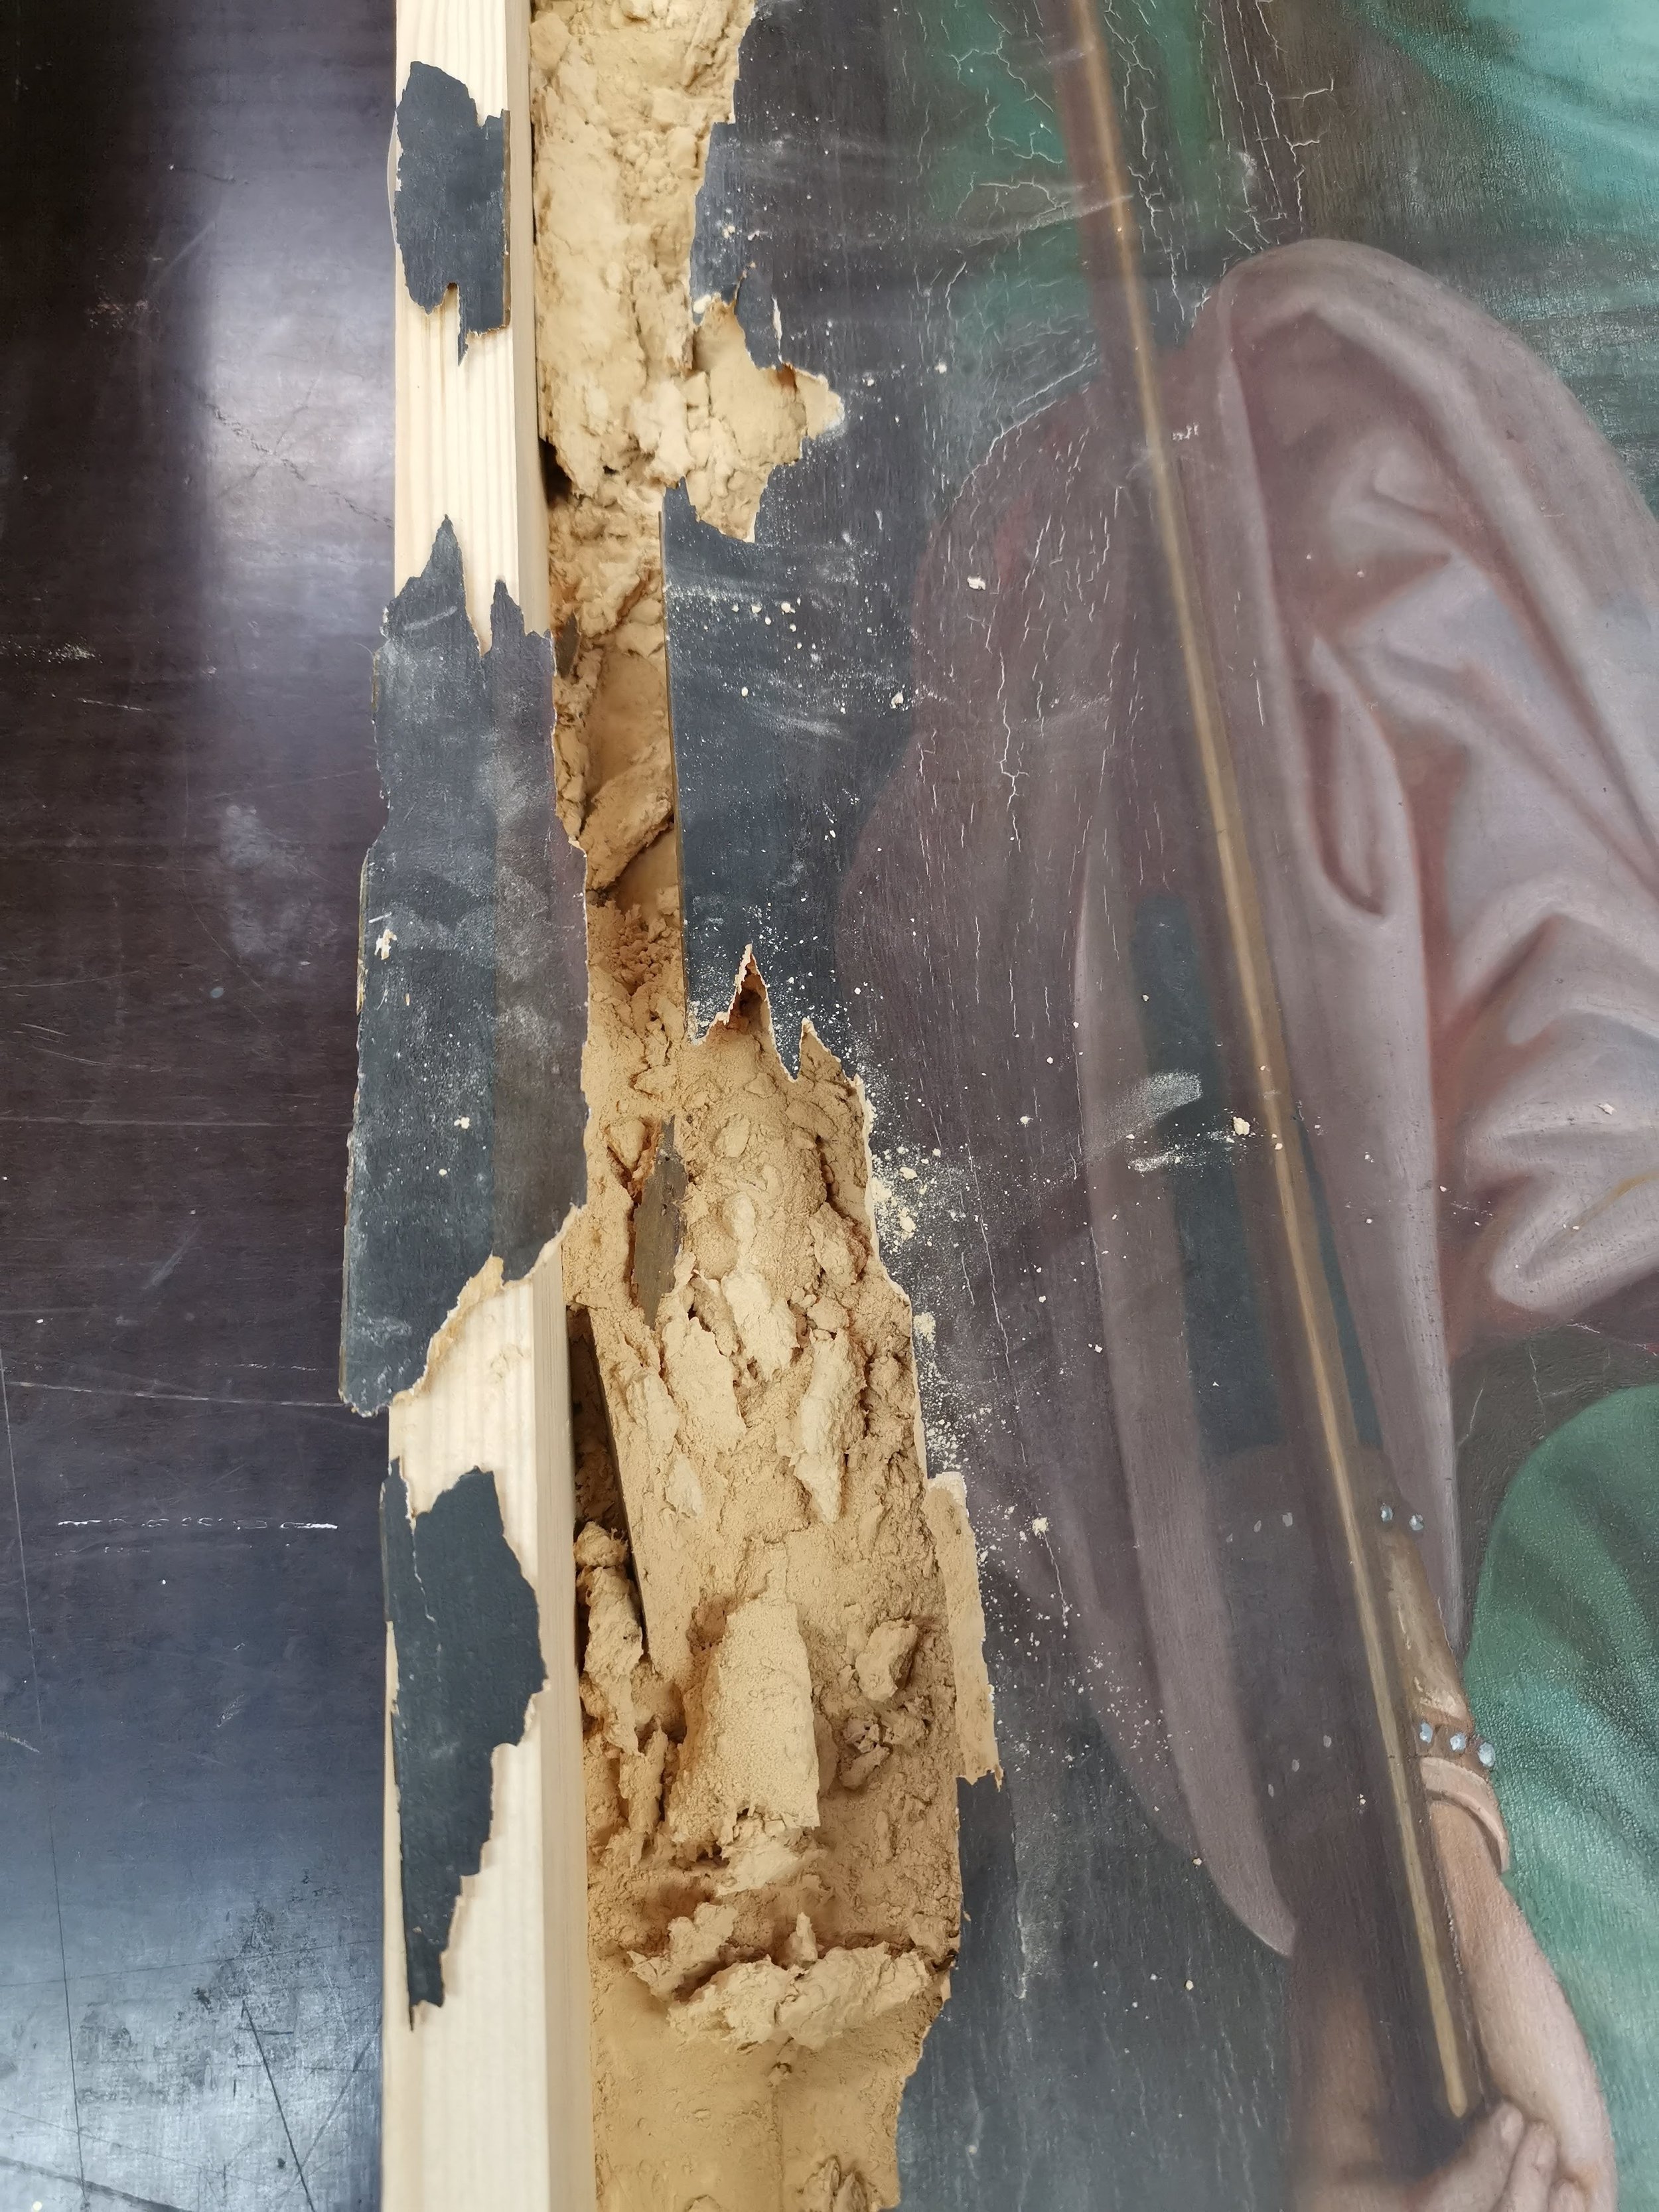
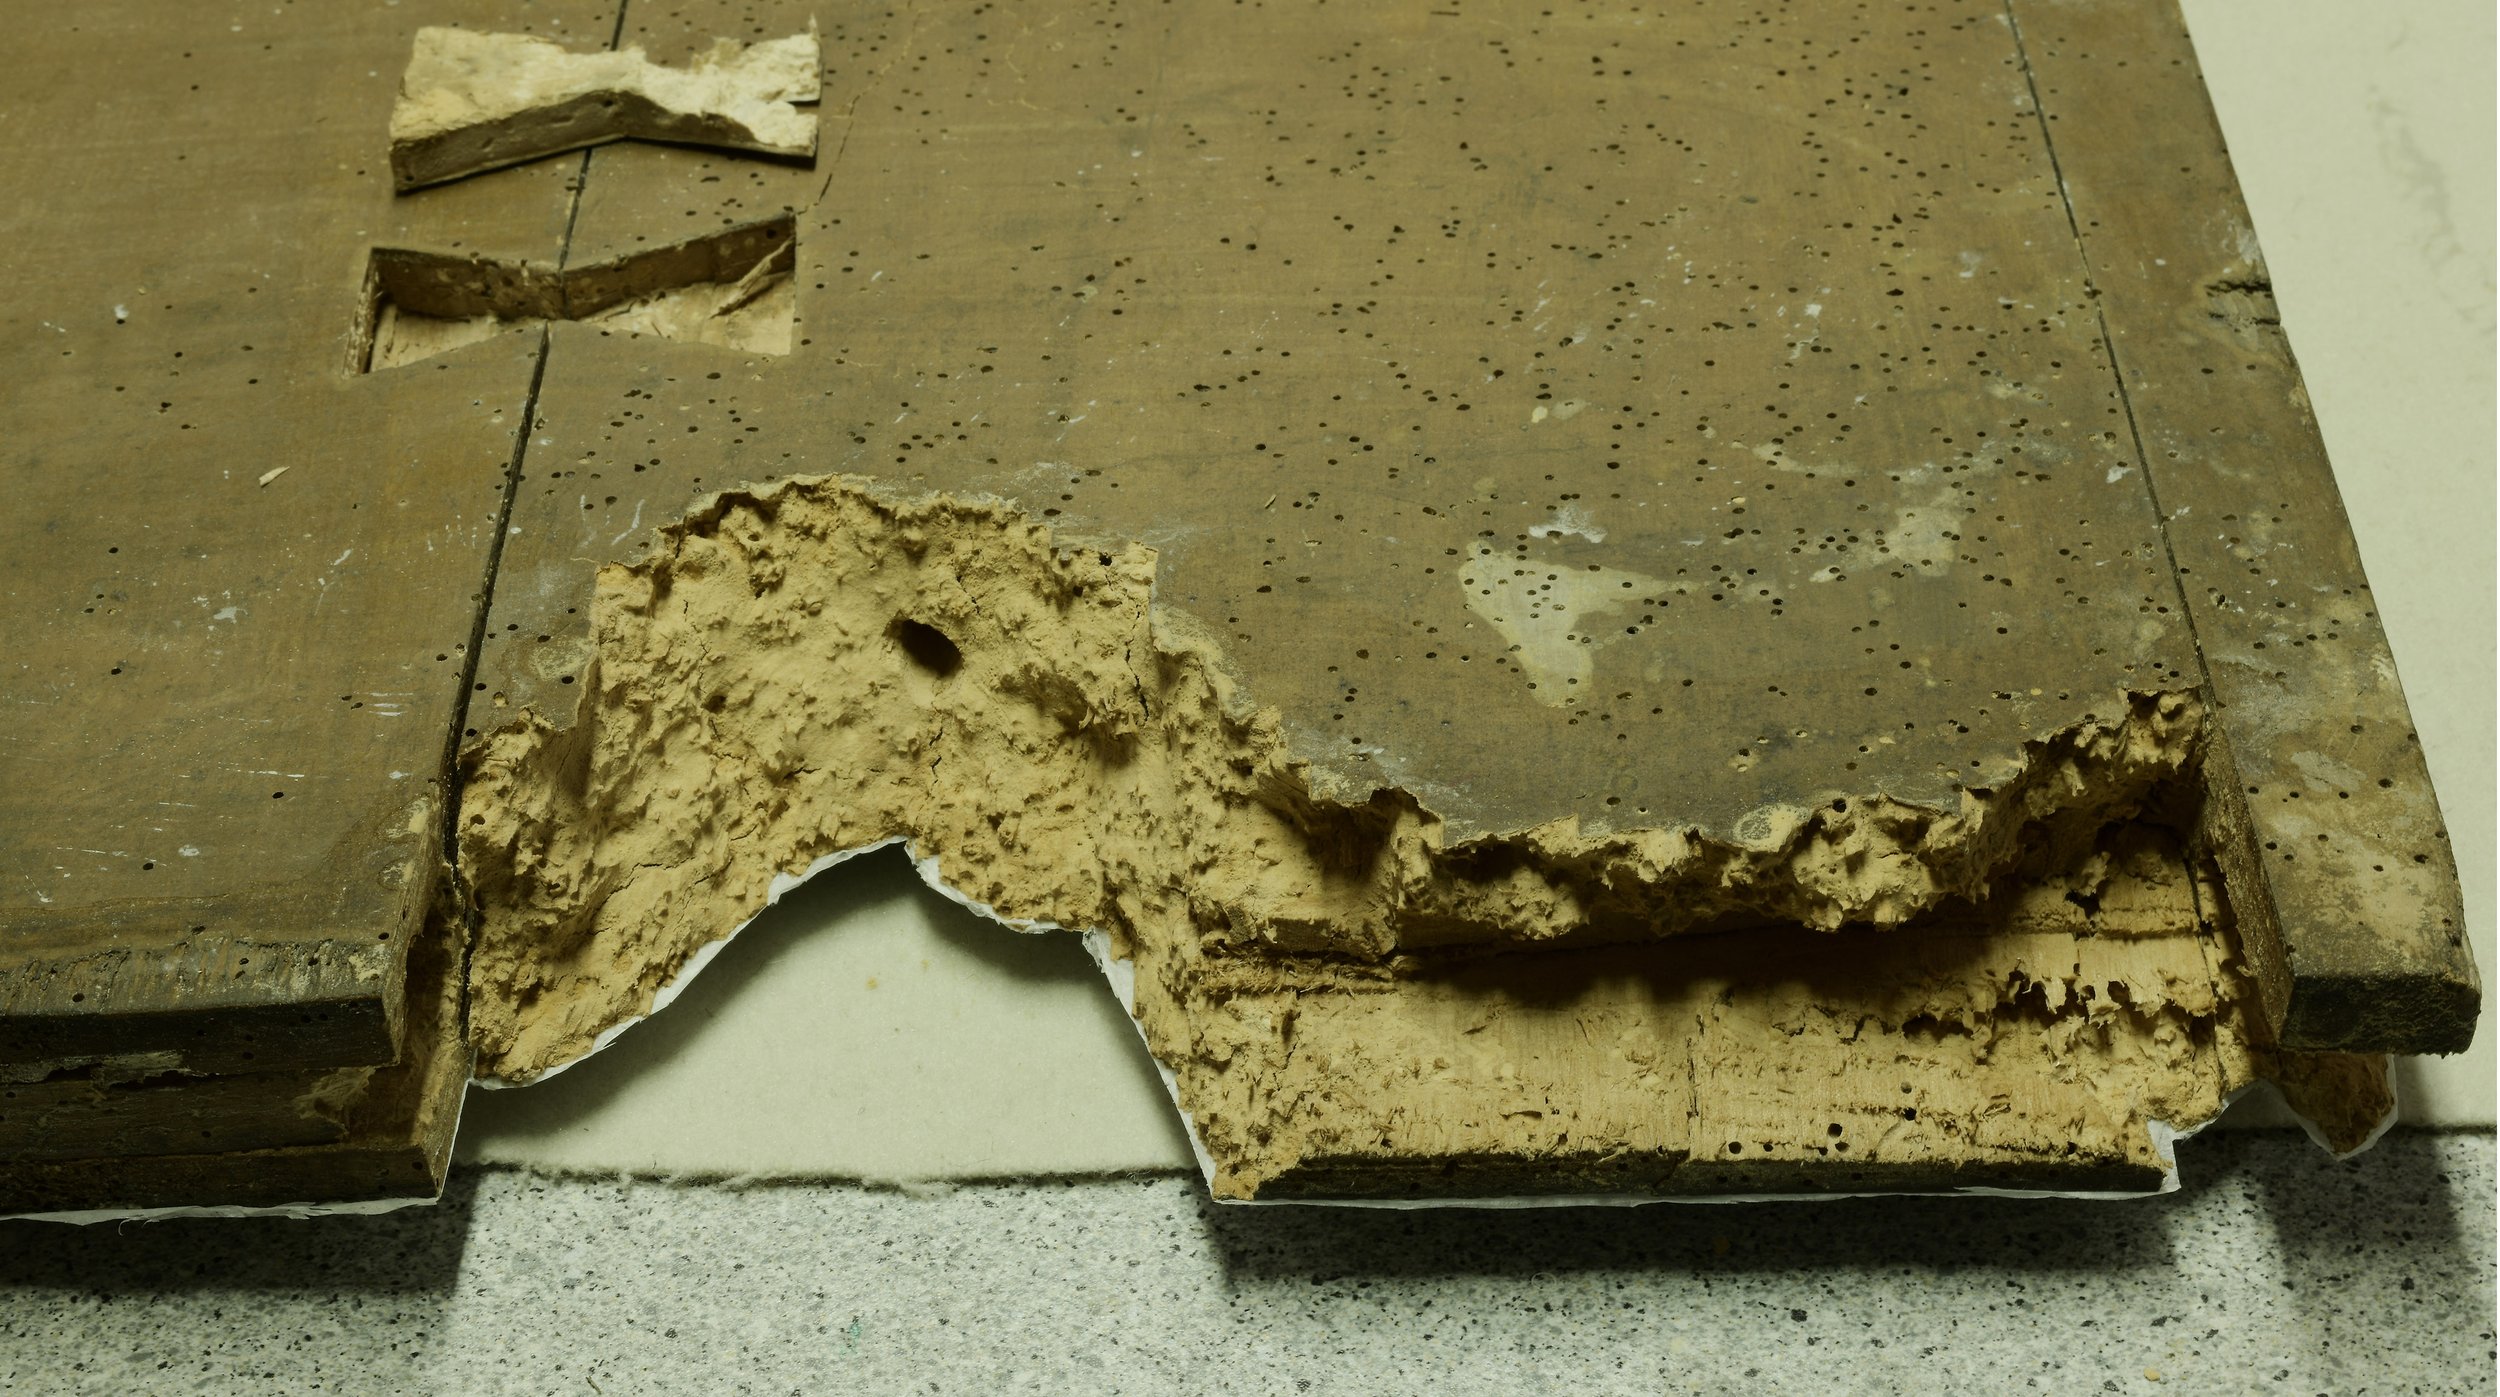
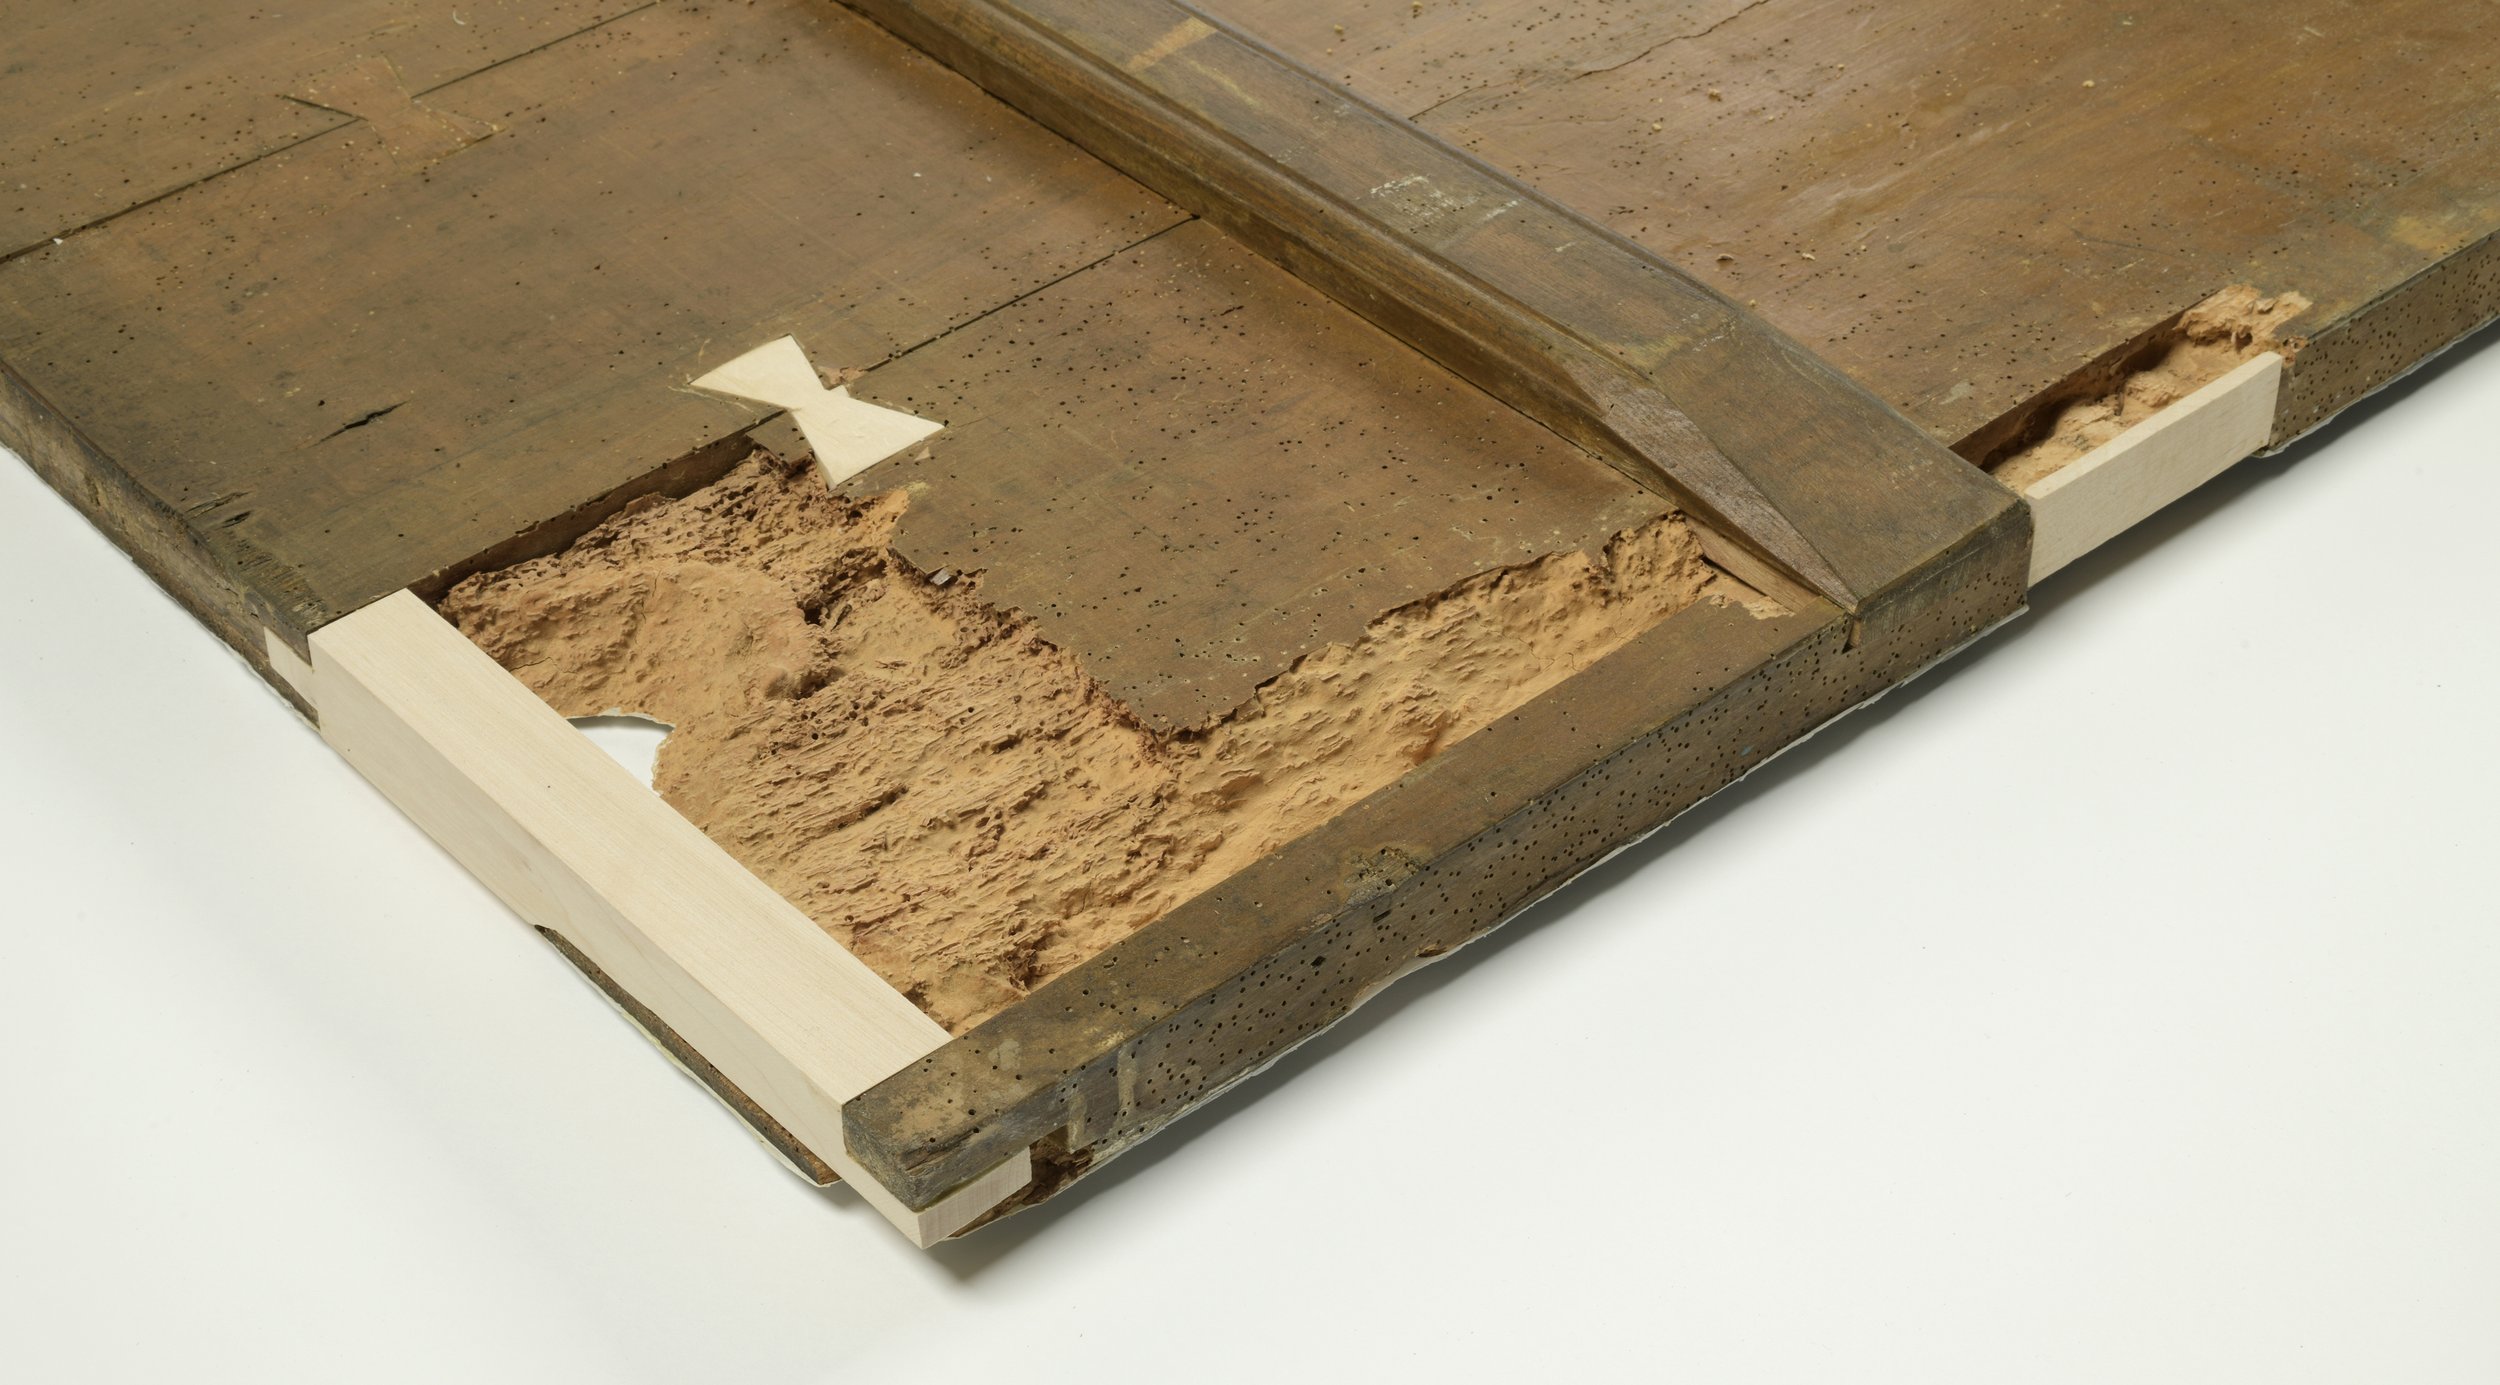
Thus, the uneven wood-layer made handling the object complicated. The deformation of the object was irreversible. The wooden base had screwed up so that on one edge the depth of the icon was 3cm, on the other 7cm. One of the cross-slats at the back had loosened. [ill 7] The handle of the door that had been fixed in the centre of the icon had been mutilating the fragile wood even more, so it was decided to remove it.
Elaborating the conservation concept
It was full of problems and really time-consuming. The surface had to be preserved and the initial image of the icon restored. The Kanut had encountered the same kind of problems before, but up to then the methods depending on the extent of the damage had been different. Simultaneously with the work on the Kuriste icon, work was continuing on the icon-triptych Mother of God, Christ the Allmighty and John the Baptist, the wooden panels of which had extensive insect damage and crumbled at handling. The triptych allowed more traditional handling due to the size of its panels and the extent of damage. With that the whole damaged wood was detached and the icons were fitted with new one viide2 ⁽²⁾.
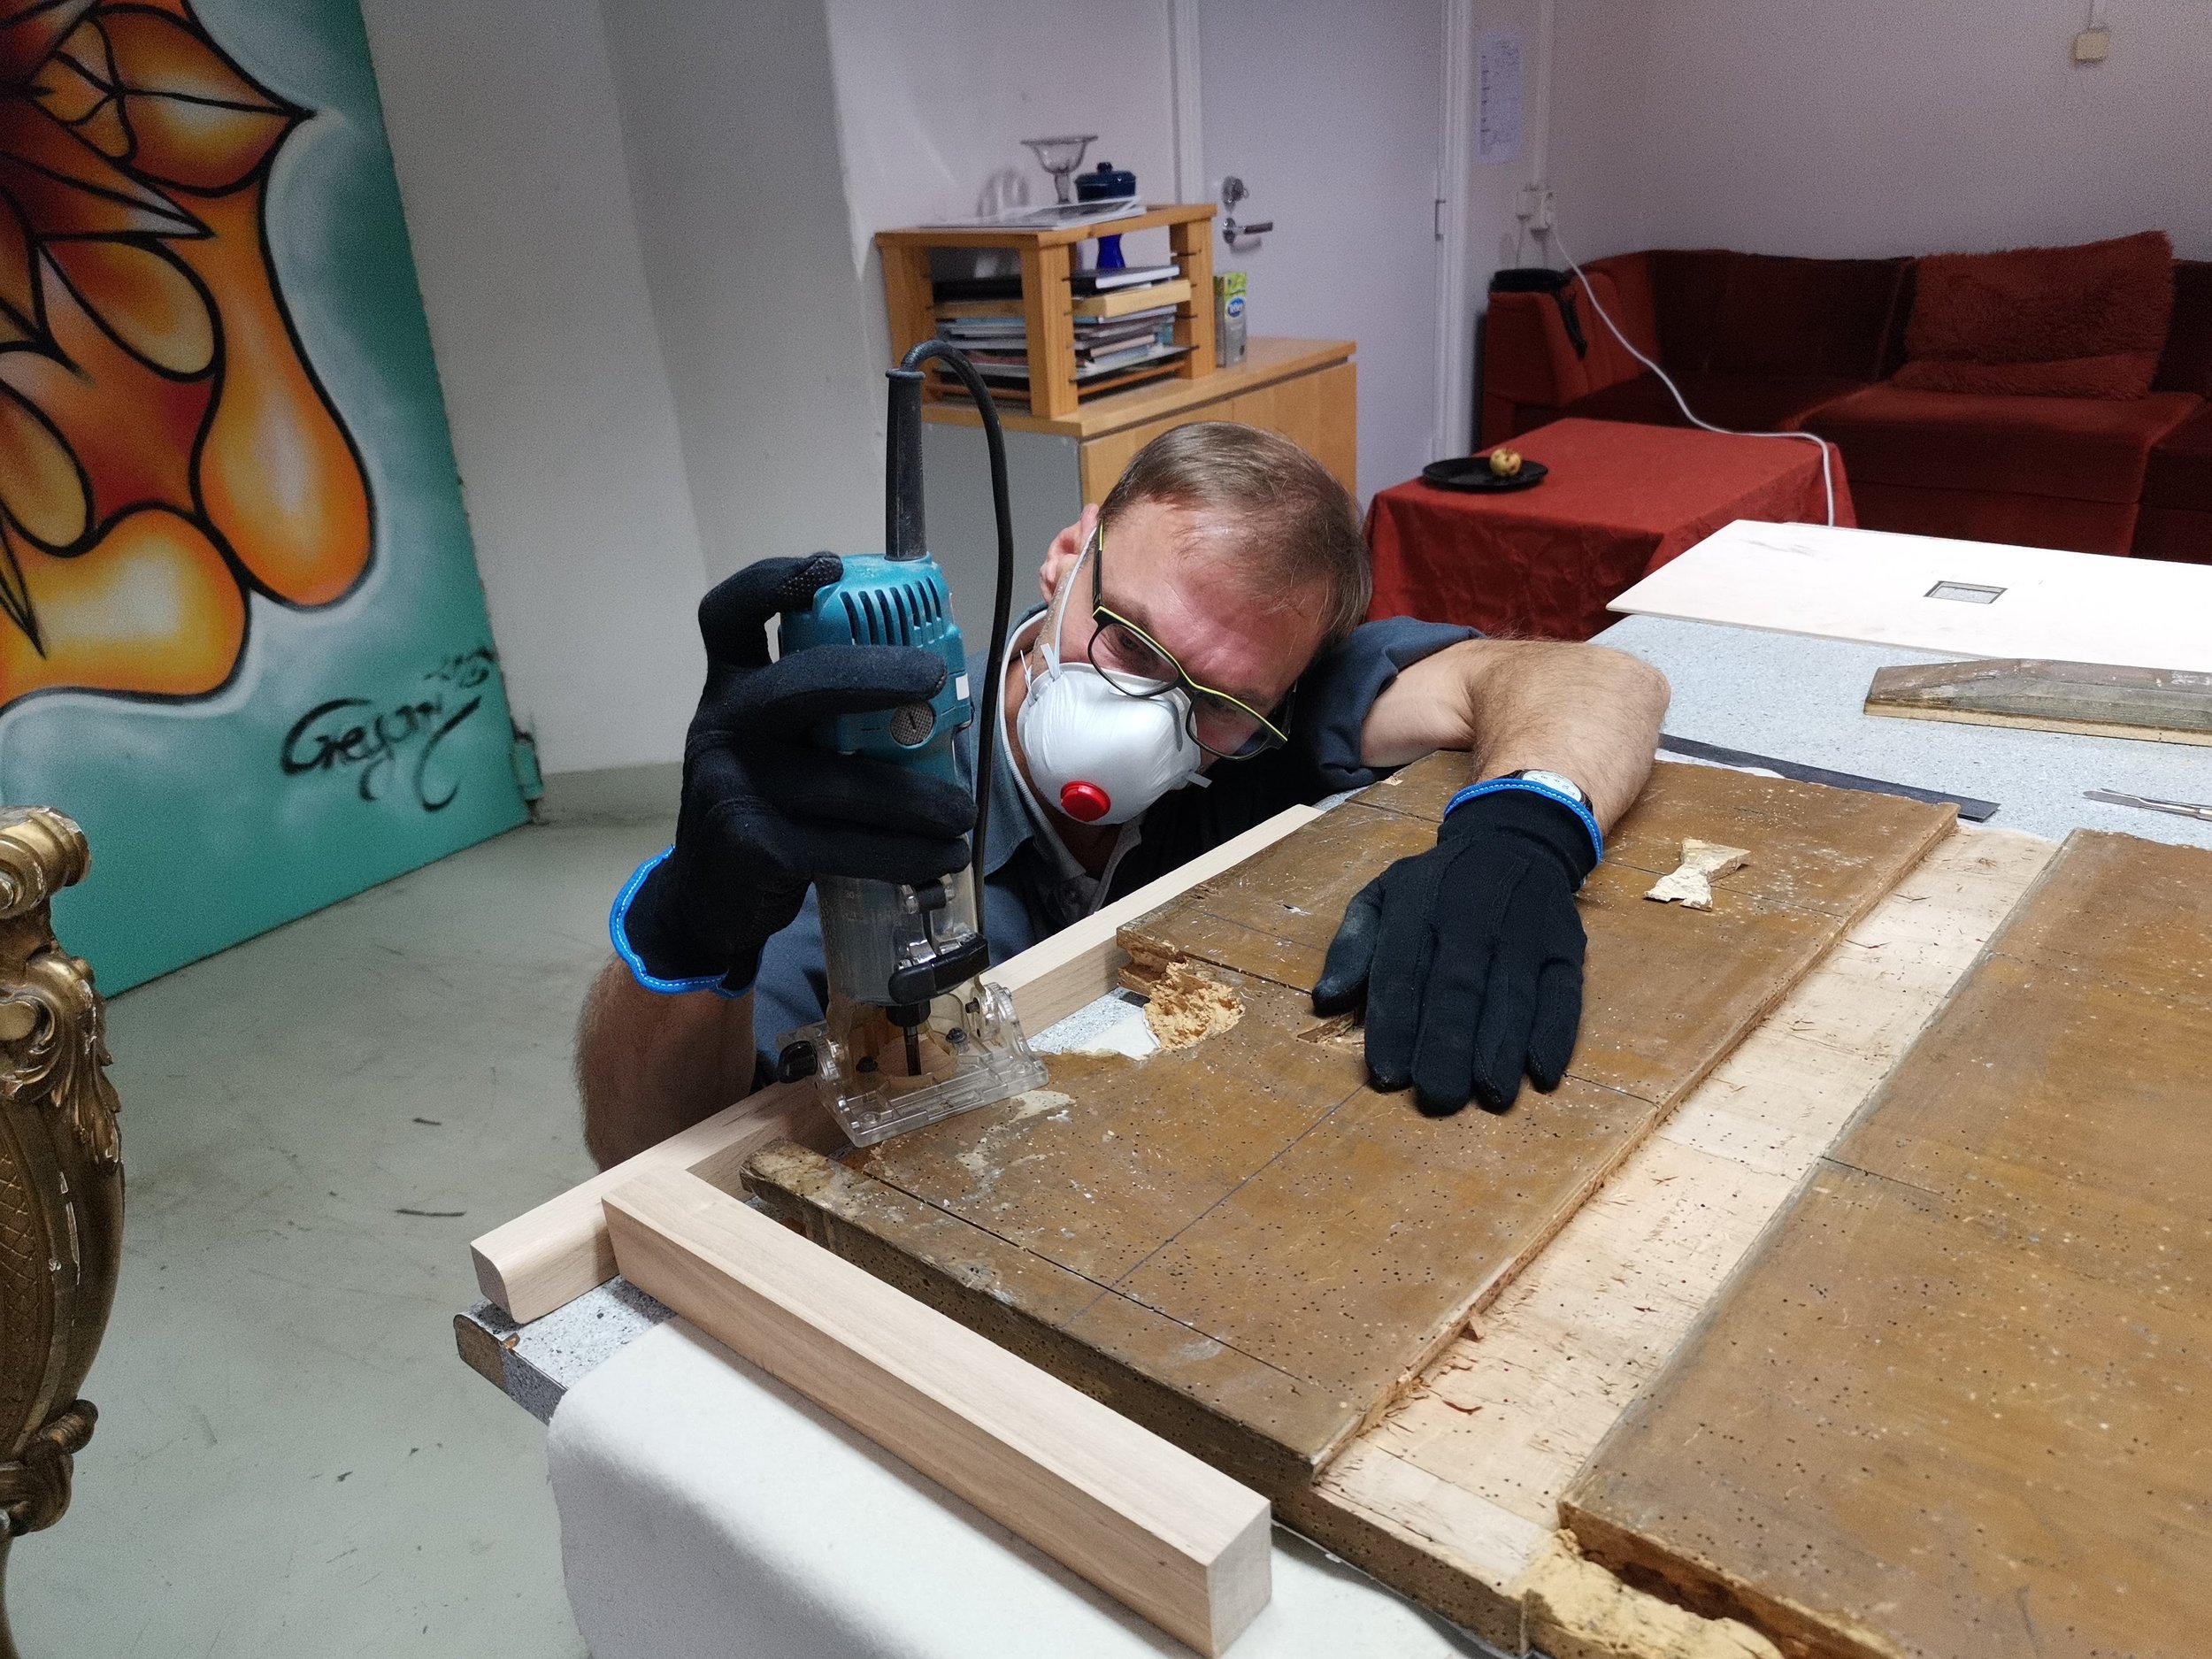
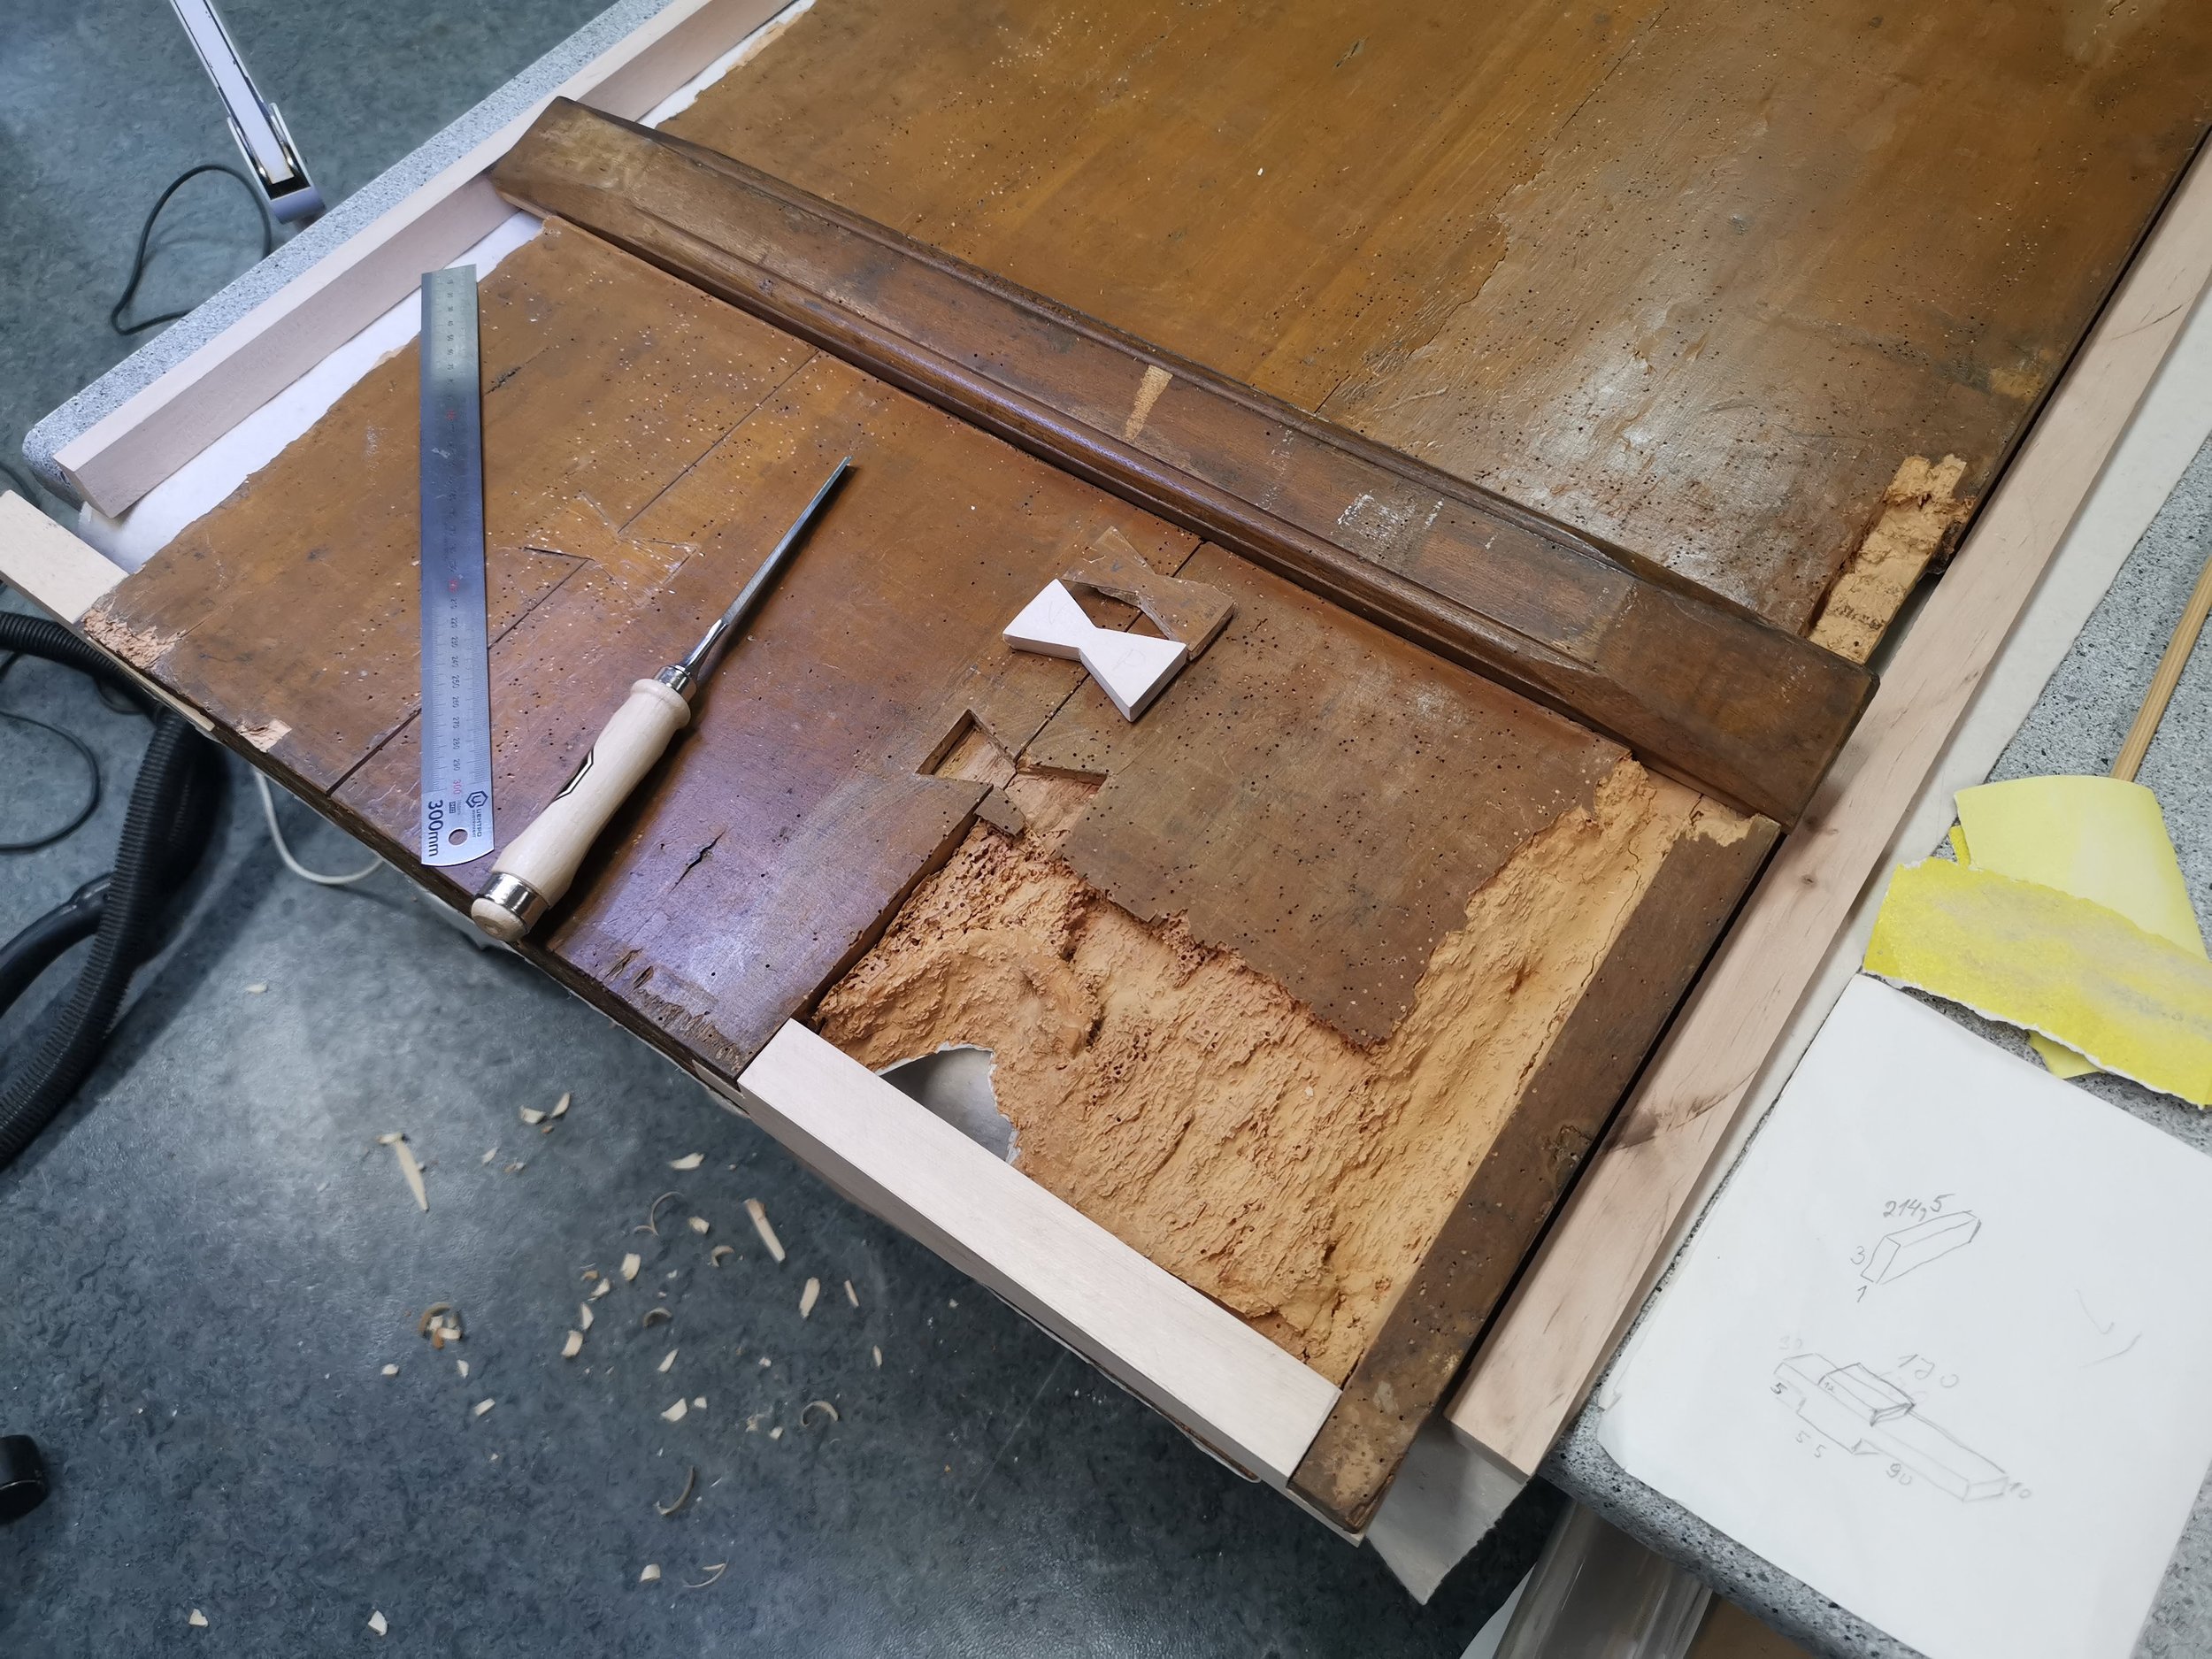
The Hiiumaa icon was too big for the earlier-practised methods and that is why it was discussed whether or not it should be transferred to a new wooden or canvas base. Several tests followed. The damaged wood at the back was shredded and chiselled. [ill 8] [ill 9] It was still too dangerous, as vibration would have been more harmful to the surface, causing crackling first and then possible breaking. As the more important details of the painting (the angel’s face, breast and robe) had preserved surprisingly well the risk was not justified.
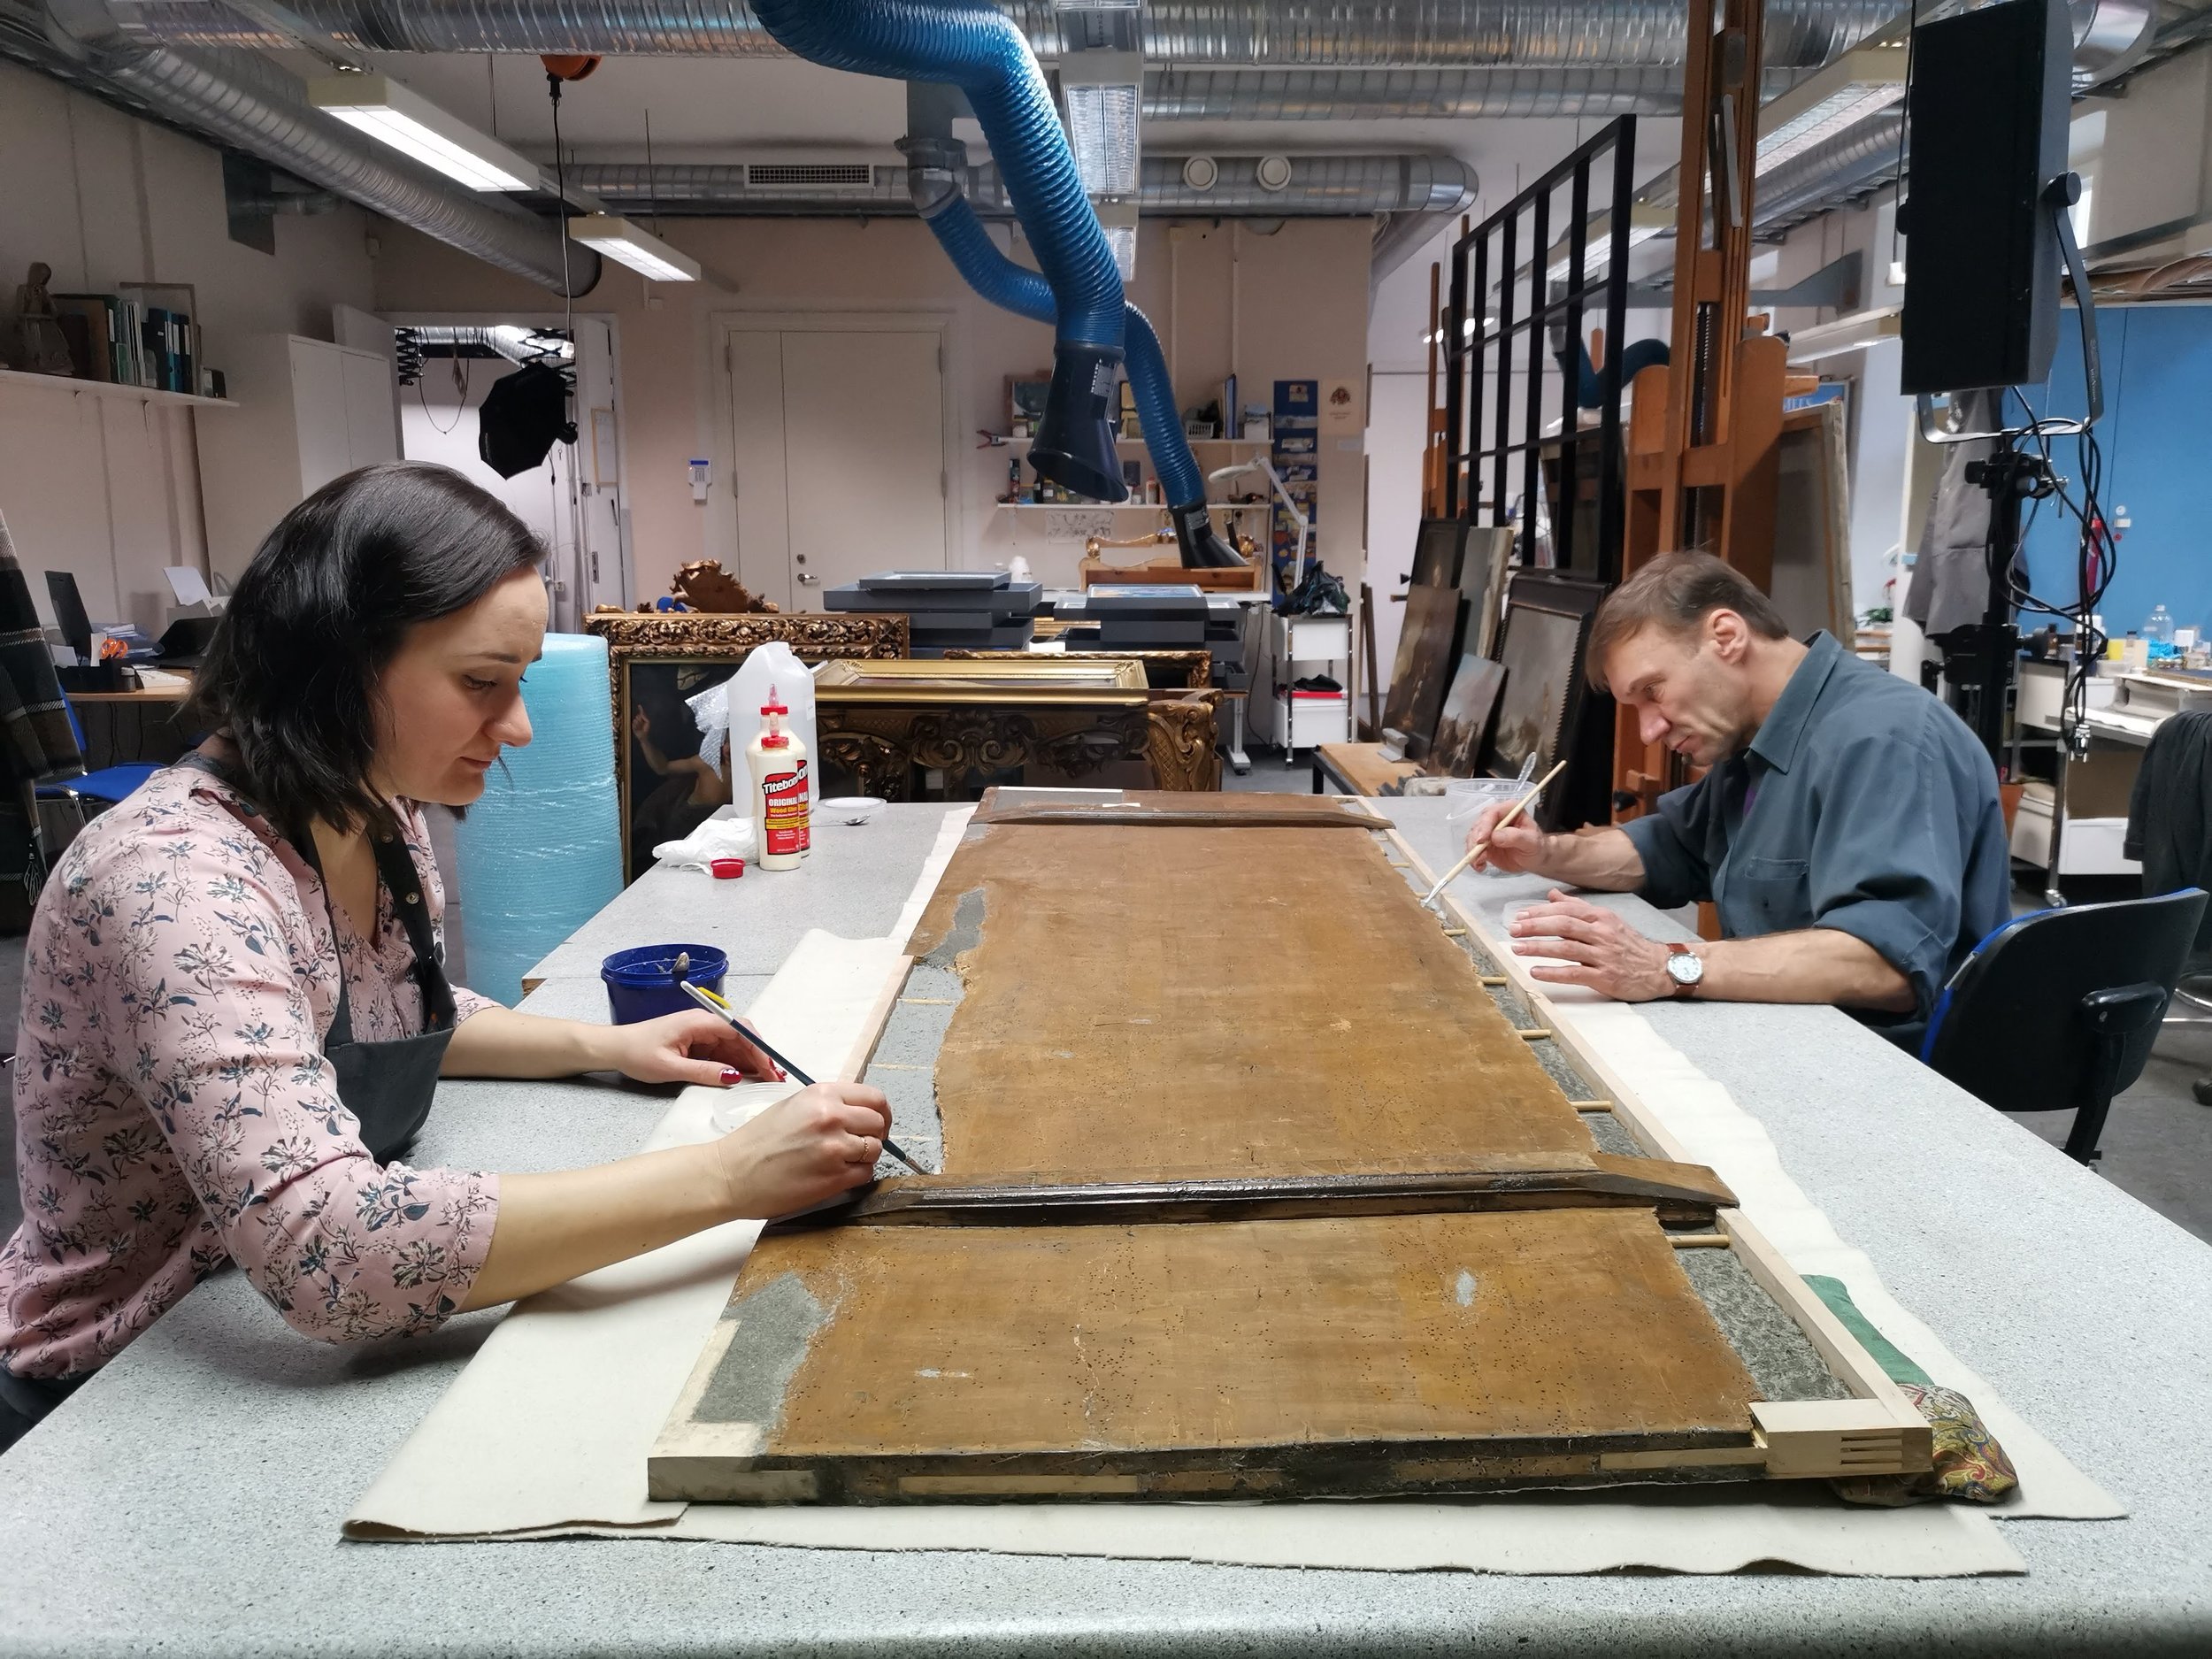
Conservators Maria Lillepruun and Harle Poomann from the Estonian Open Air Museum worked out a new conservation concept – a method combining materials and mode that required stabilisation of the wooden base and building up the decayed borders layer by layer. As far as we know this method has never been used in Estonian conservation before. That is why the practice was preceded by a thorough study of materials. Numerous documented tests and prepared replicas helped to find out which components in which proportion a proper filling for reconstruction the borders should contain.
Testing materials and conservation
Surface-processing on the icon
For removing the layer of varnish several solutions had to be tested. We tested enzyme cleansing (saliva) and tri-ammonium-citrate aquatic solution and the traditional painting-varnish – ethanol: turpentine (1:1). The last-mentioned one was quite effective, removing the varnish and leaving the paint layers untouched. [ill 10] [ill 11]
One had to be especially careful with the paint layer that had cracks and gaps in it. The biggest crack ran from the upper edge passing the angel’s face down to the right shoulder. When touched the paint layer dipped, so the risky gaps had to be processed for stabilisation. Smaller gaps and cracks were syringe-filled with 5% Polaroid B-72 solution. Most of these problematic spots, however, were too porous and the glue solution alone did not make the wood harder. Thus, we needed a special filling mass for the gaps and cracks. As restoring the borders required diligent proceeding with filler, the icon was carefully turned over and tests for a suitable preservative material were accomplished on the reverse side of the icon.
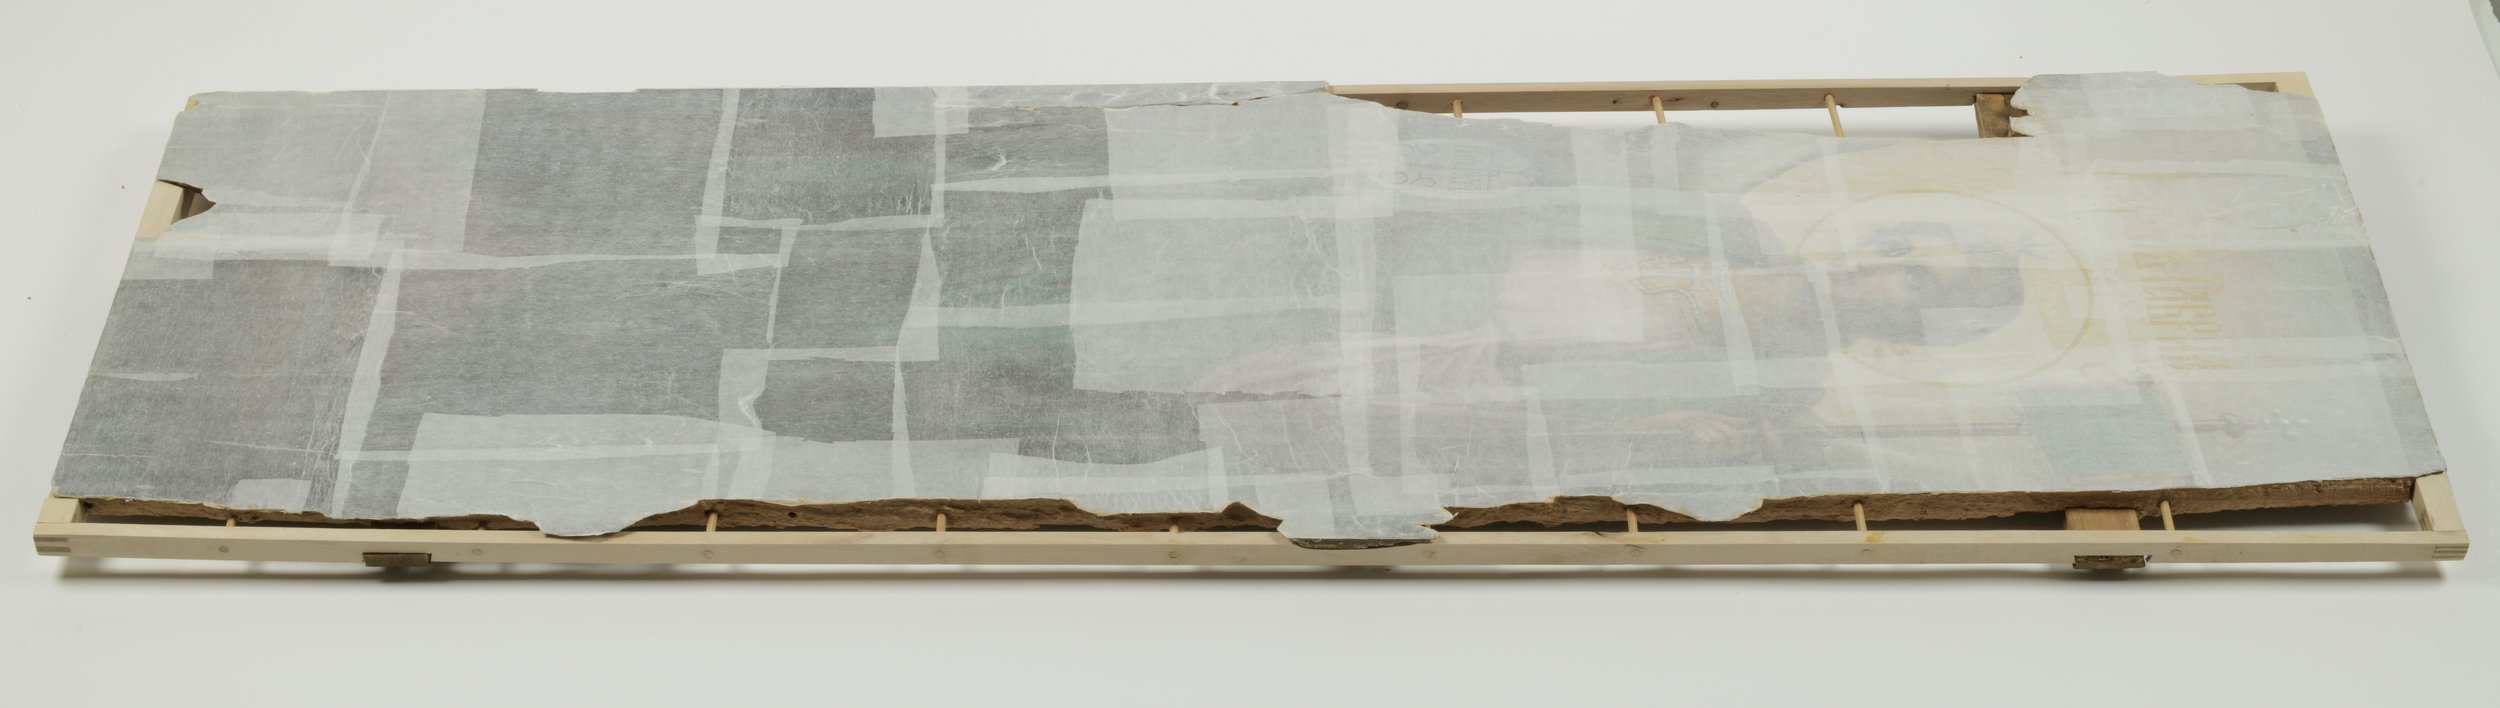
First we had to cover the cleaned surface with a substantial prophylactic inset. [ill 12] This was to cover the whole painting in order to prevent the cracks from deepening and making the lifting and turning of the icon possible. The plan required keeping the icon in a ‘face-down position’ further on for a longer period thus proper safeguarding the surface was essential.
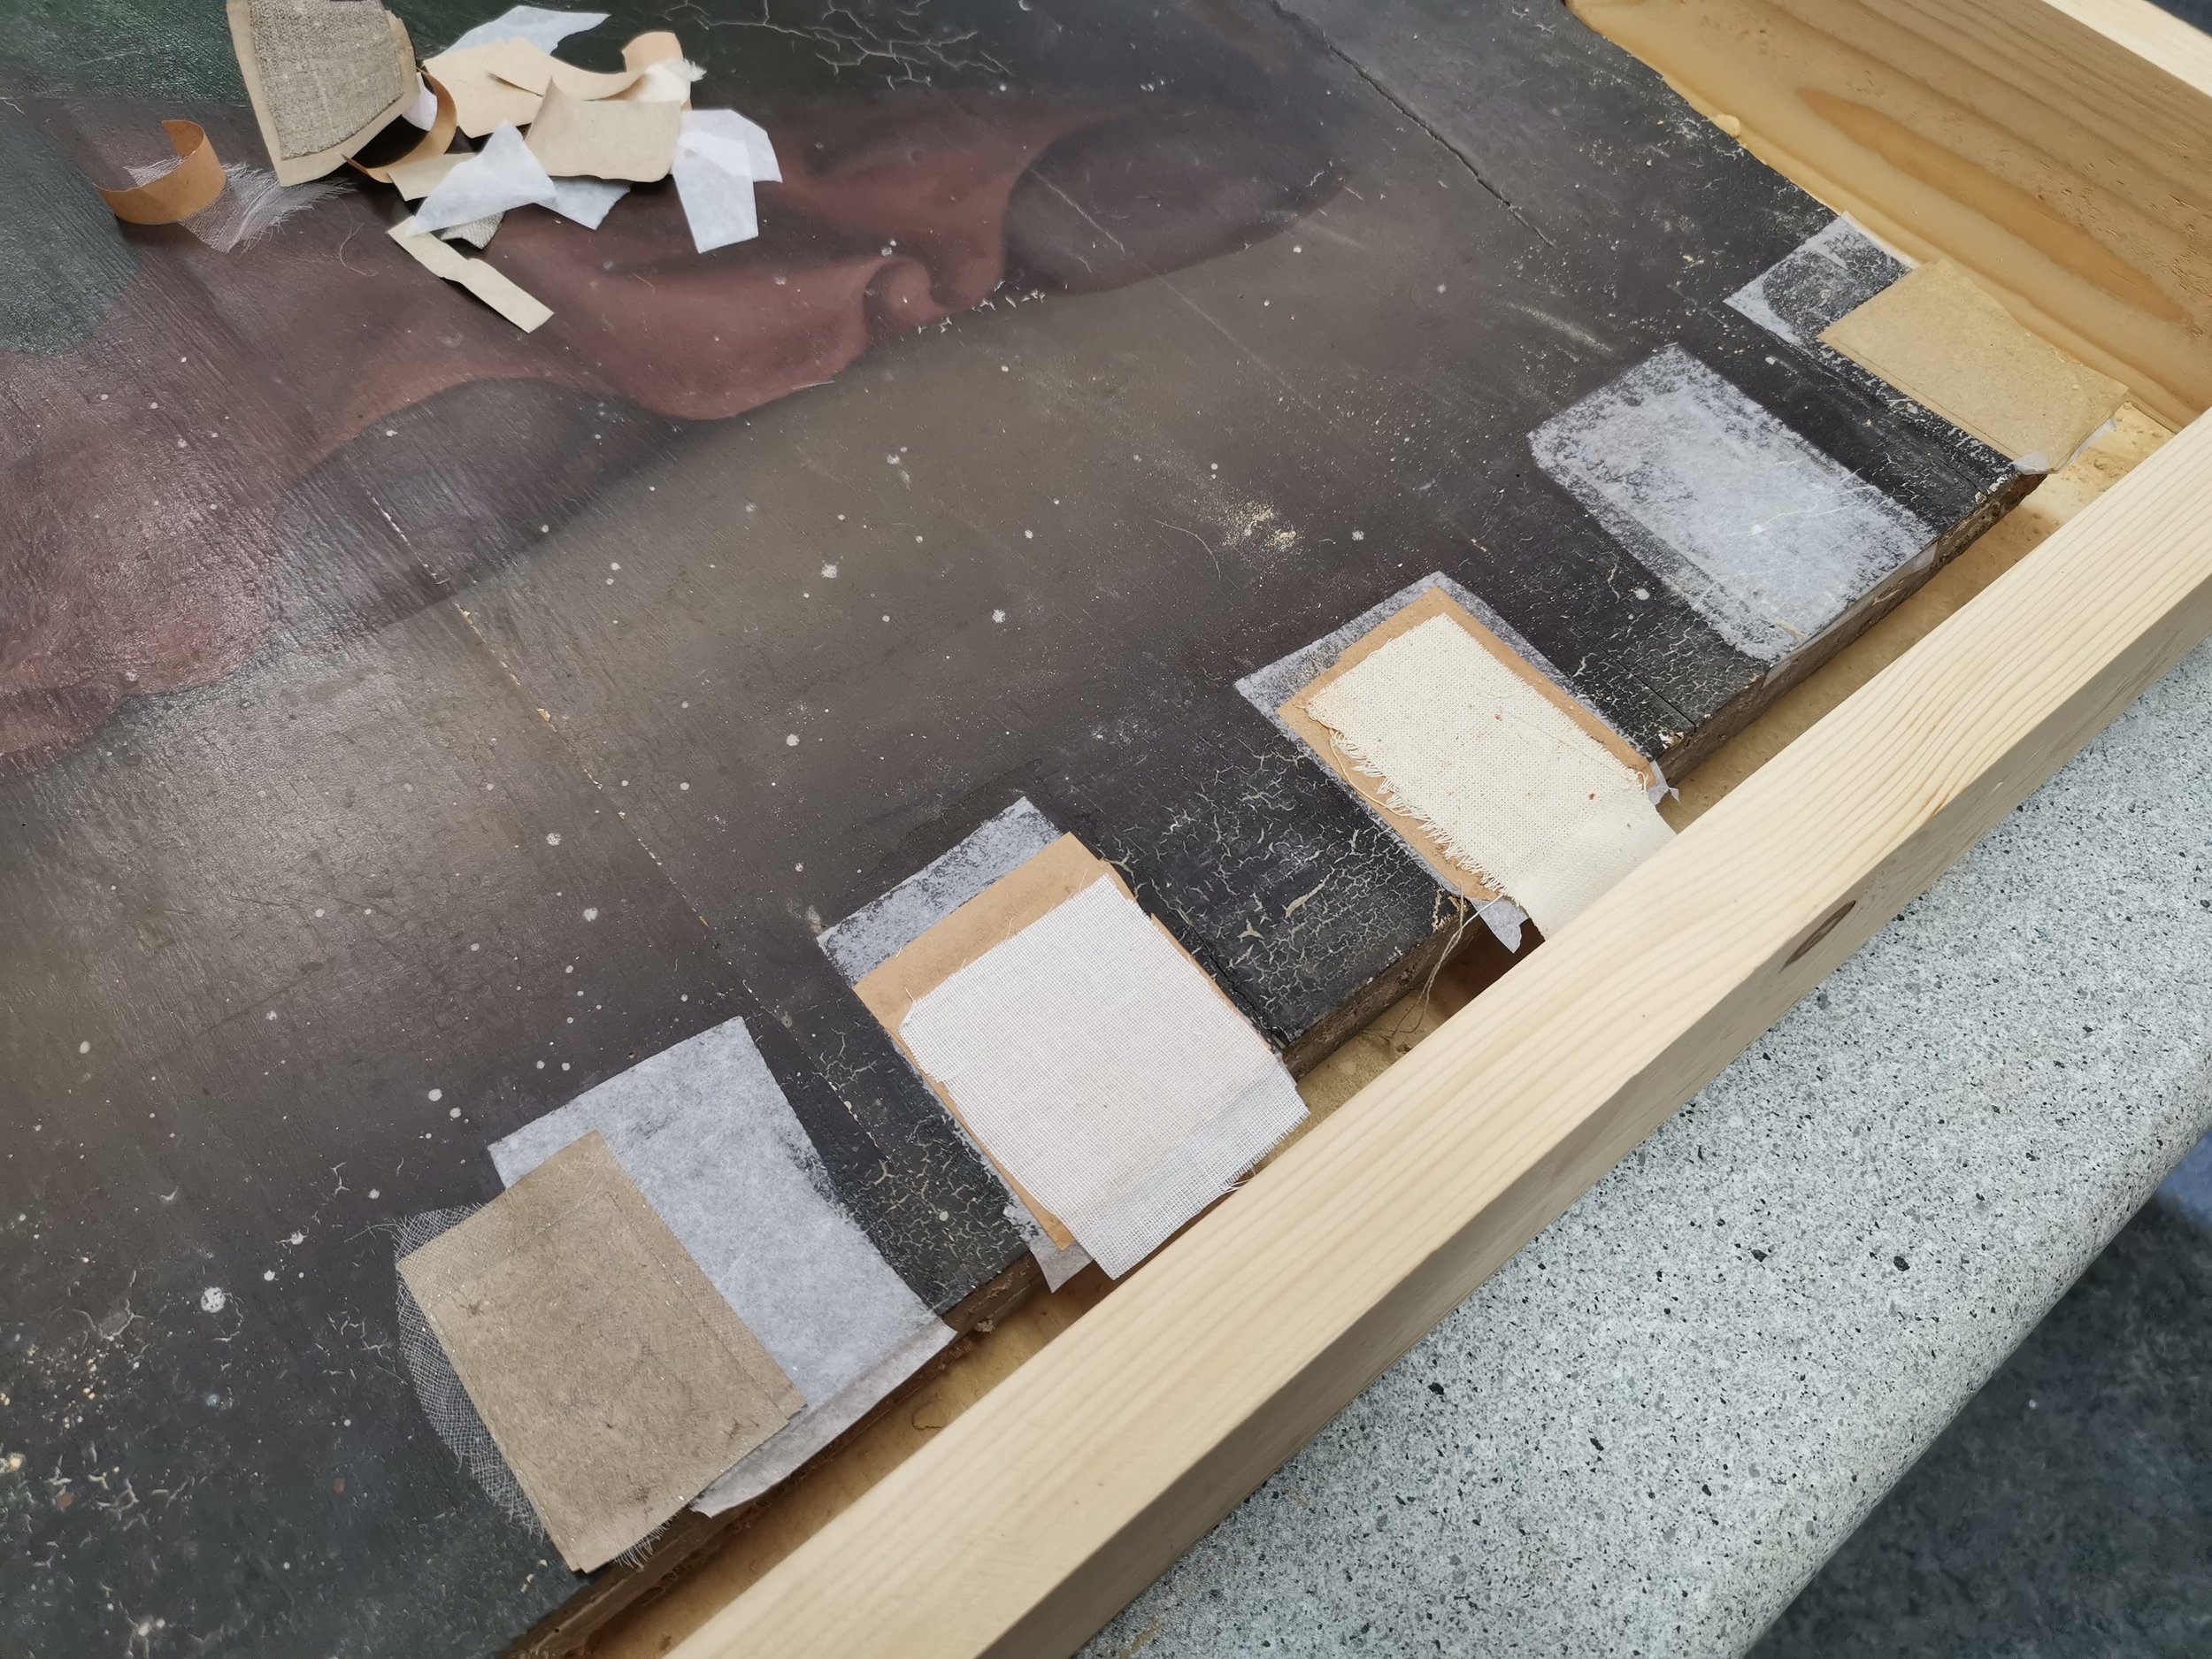
Mikalent paper, Japanese paper (80g/m2) and kraft paper, gauze and cheesecloth were tested in different combinations on the lower border of the icon, fixing them with 5% sturgeon-glue. [ill 13] The mikalent viide3 ⁽³⁾ paper was decided to be the best choice. Two layers of paper were used for the inset, in case of big cracks three layers were needed. The inset stabilised the cracks and prevented the glue on the reverse side from penetrating onto the front.
When the prophylactic inset was dry, the icon could be turned over and its reverse side was cleaned. First cleaning was with a brush and a vacuum cleaner, then 5% tri-ammonium-citrate aquatic solution and distilled water followed.
Strengthen the wood
First the borders of the icon were cleaned from loose dirt and wood-dust. [ill 14] All the loose specks of wood were removed. As it had been decided to restore the borders in their original shape retaining the loose particles was pointless. They might have only weakened the reconstructed details.
Next the conservators had to find the best solution for strengthening the extremely fragile wood. Earlier experience supported the choice of Paraloid B-72 viide4 ⁽⁴⁾ (further on ‘paraloid’). Impregnation is traditionally started with weaker solutions, but processing with 5% and 10% paraloid viide5 ⁽⁵⁾ proved to be insufficient. It was impossible to get the solution inside the object. Syringes filled with the solution blocked up with dust as soon as the needle touched wood. The porous wood had no preserved particles that could have been glued together and hardened.
That is why a thicker, 20% paraloid ethyl-acetate solution that would make a protective layer on the surface and avoid the occurrence of further mechanical damage was chosen. Paraloid toluene solution was also tested. It was somewhat more effective indeed, but the difference was not significant enough to compensate for the health hazard.
It was clear that for reinforcing the crumbled dusty surface repeated processing was required and so a less hazardous solution was selected. Ethanol solution was used for pre-processing and for coating the wood with preservative a brush was used.
Choosing filling material
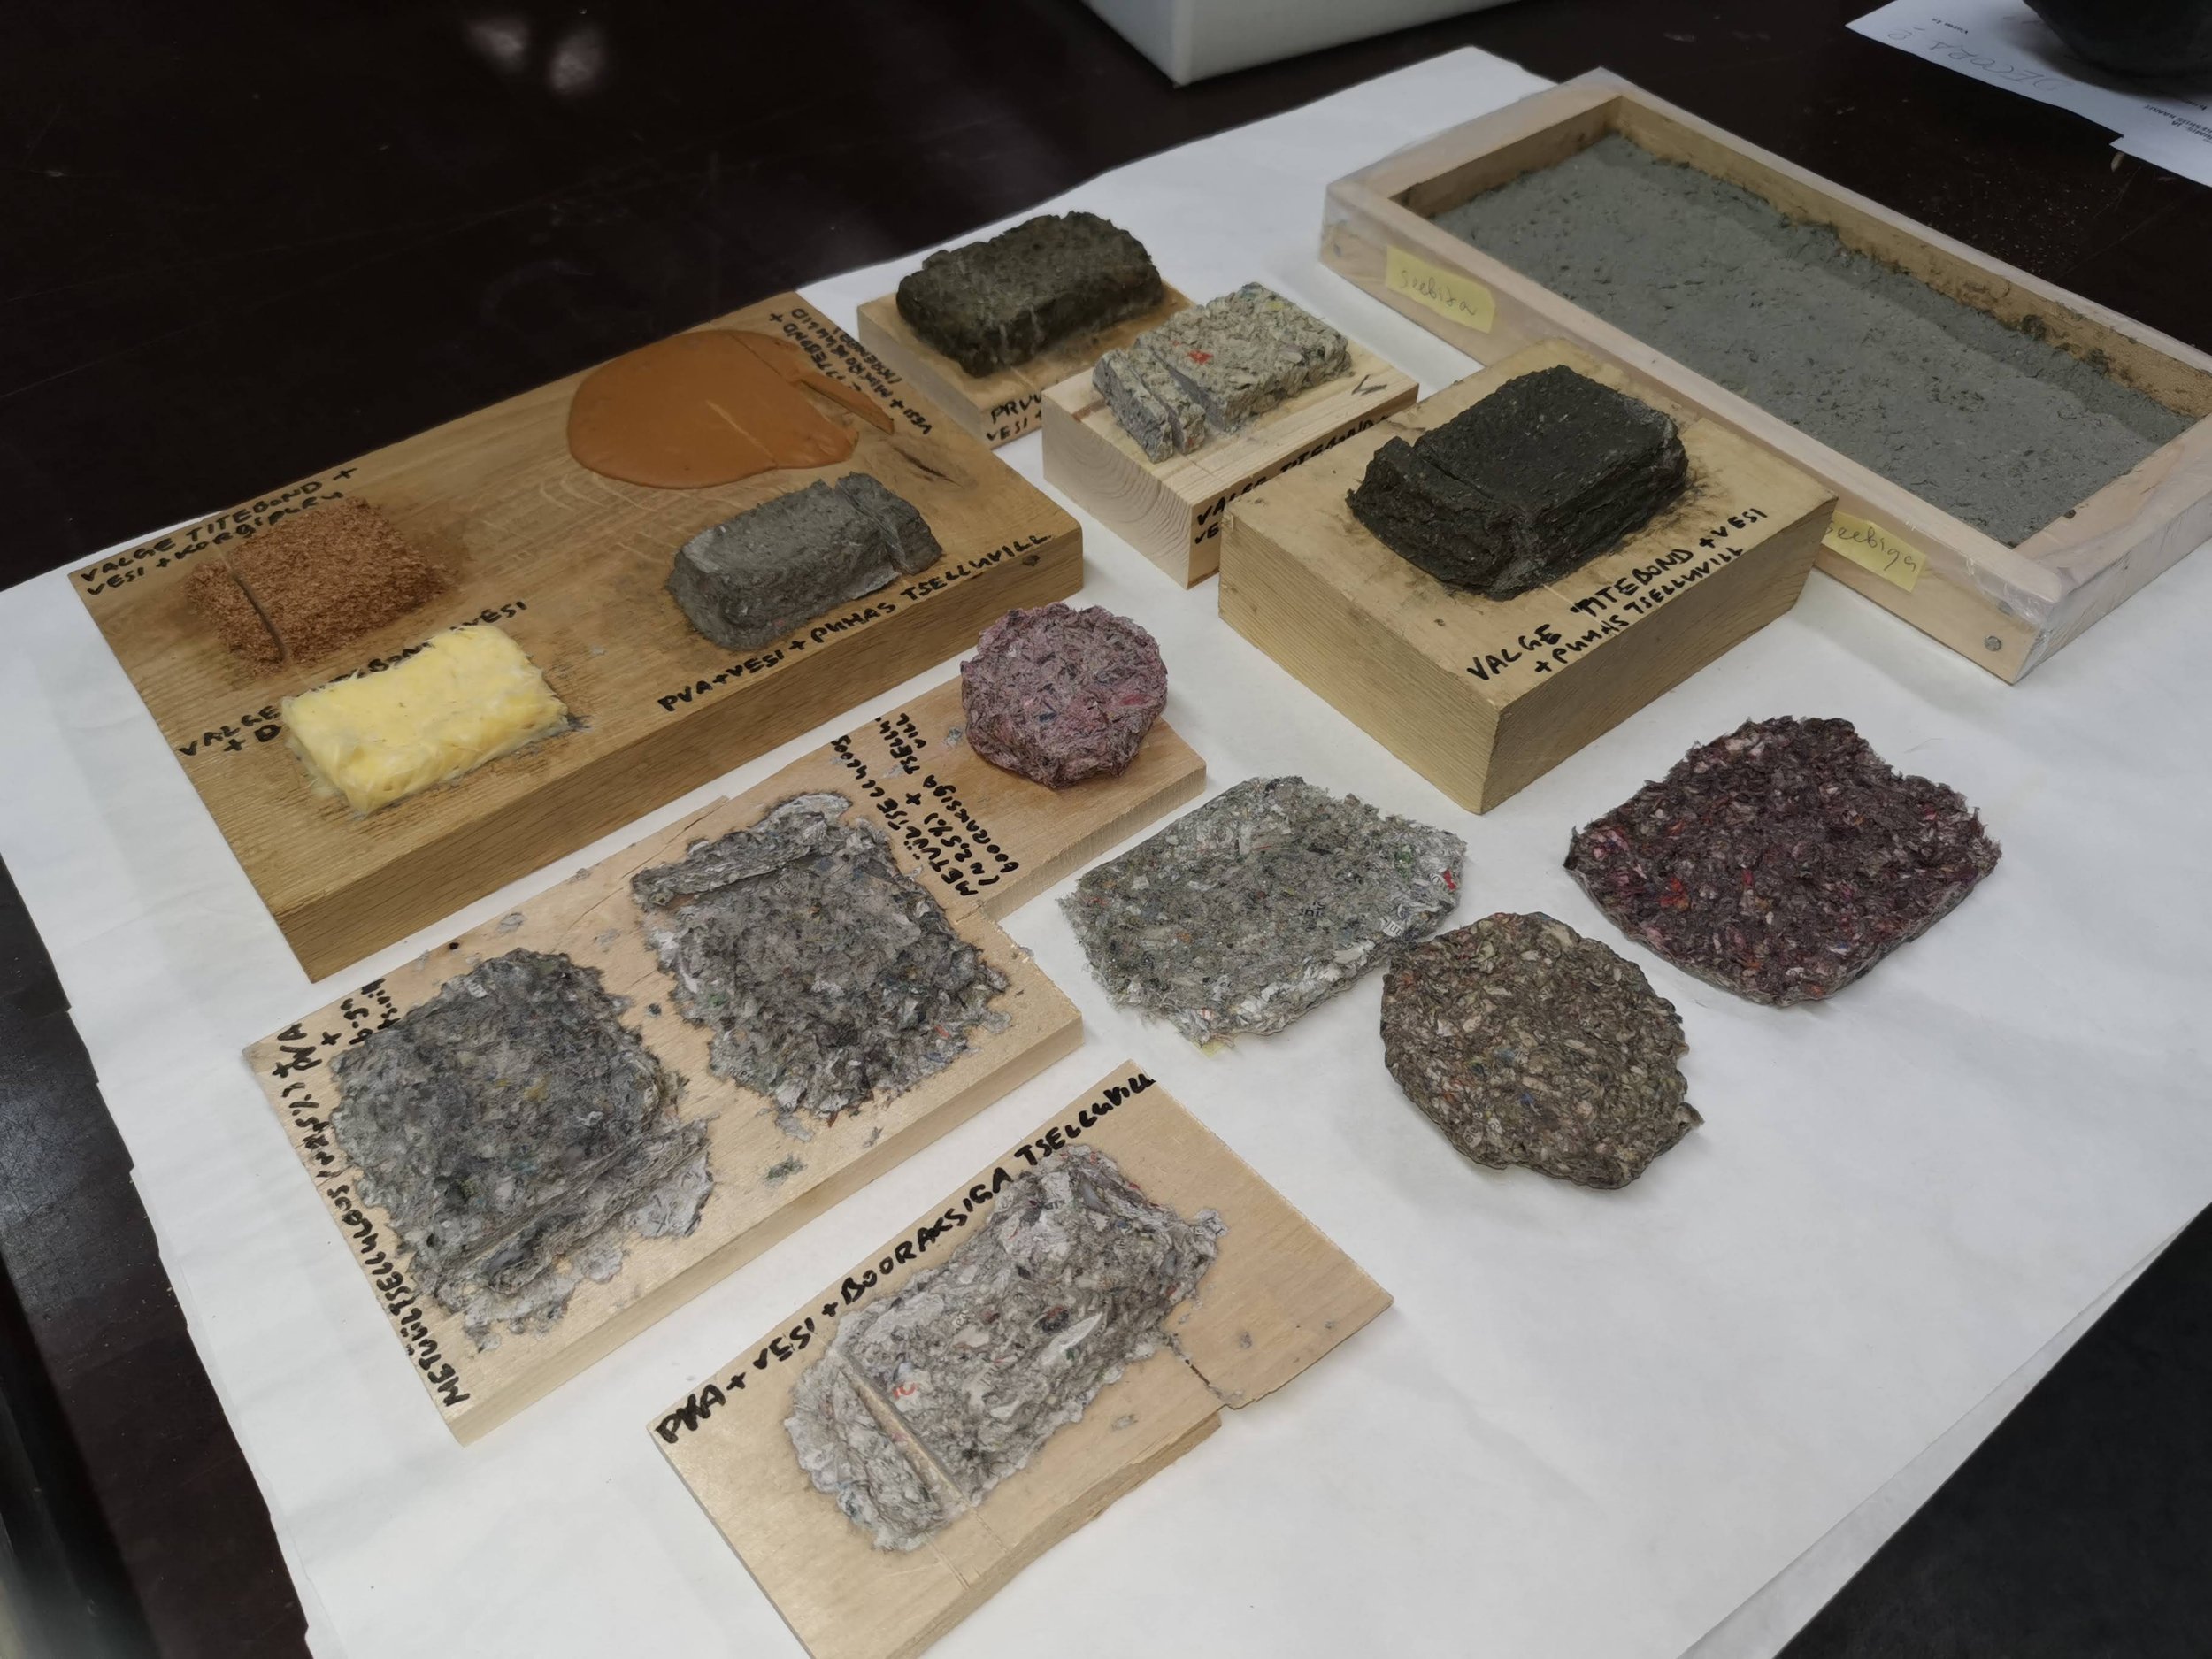
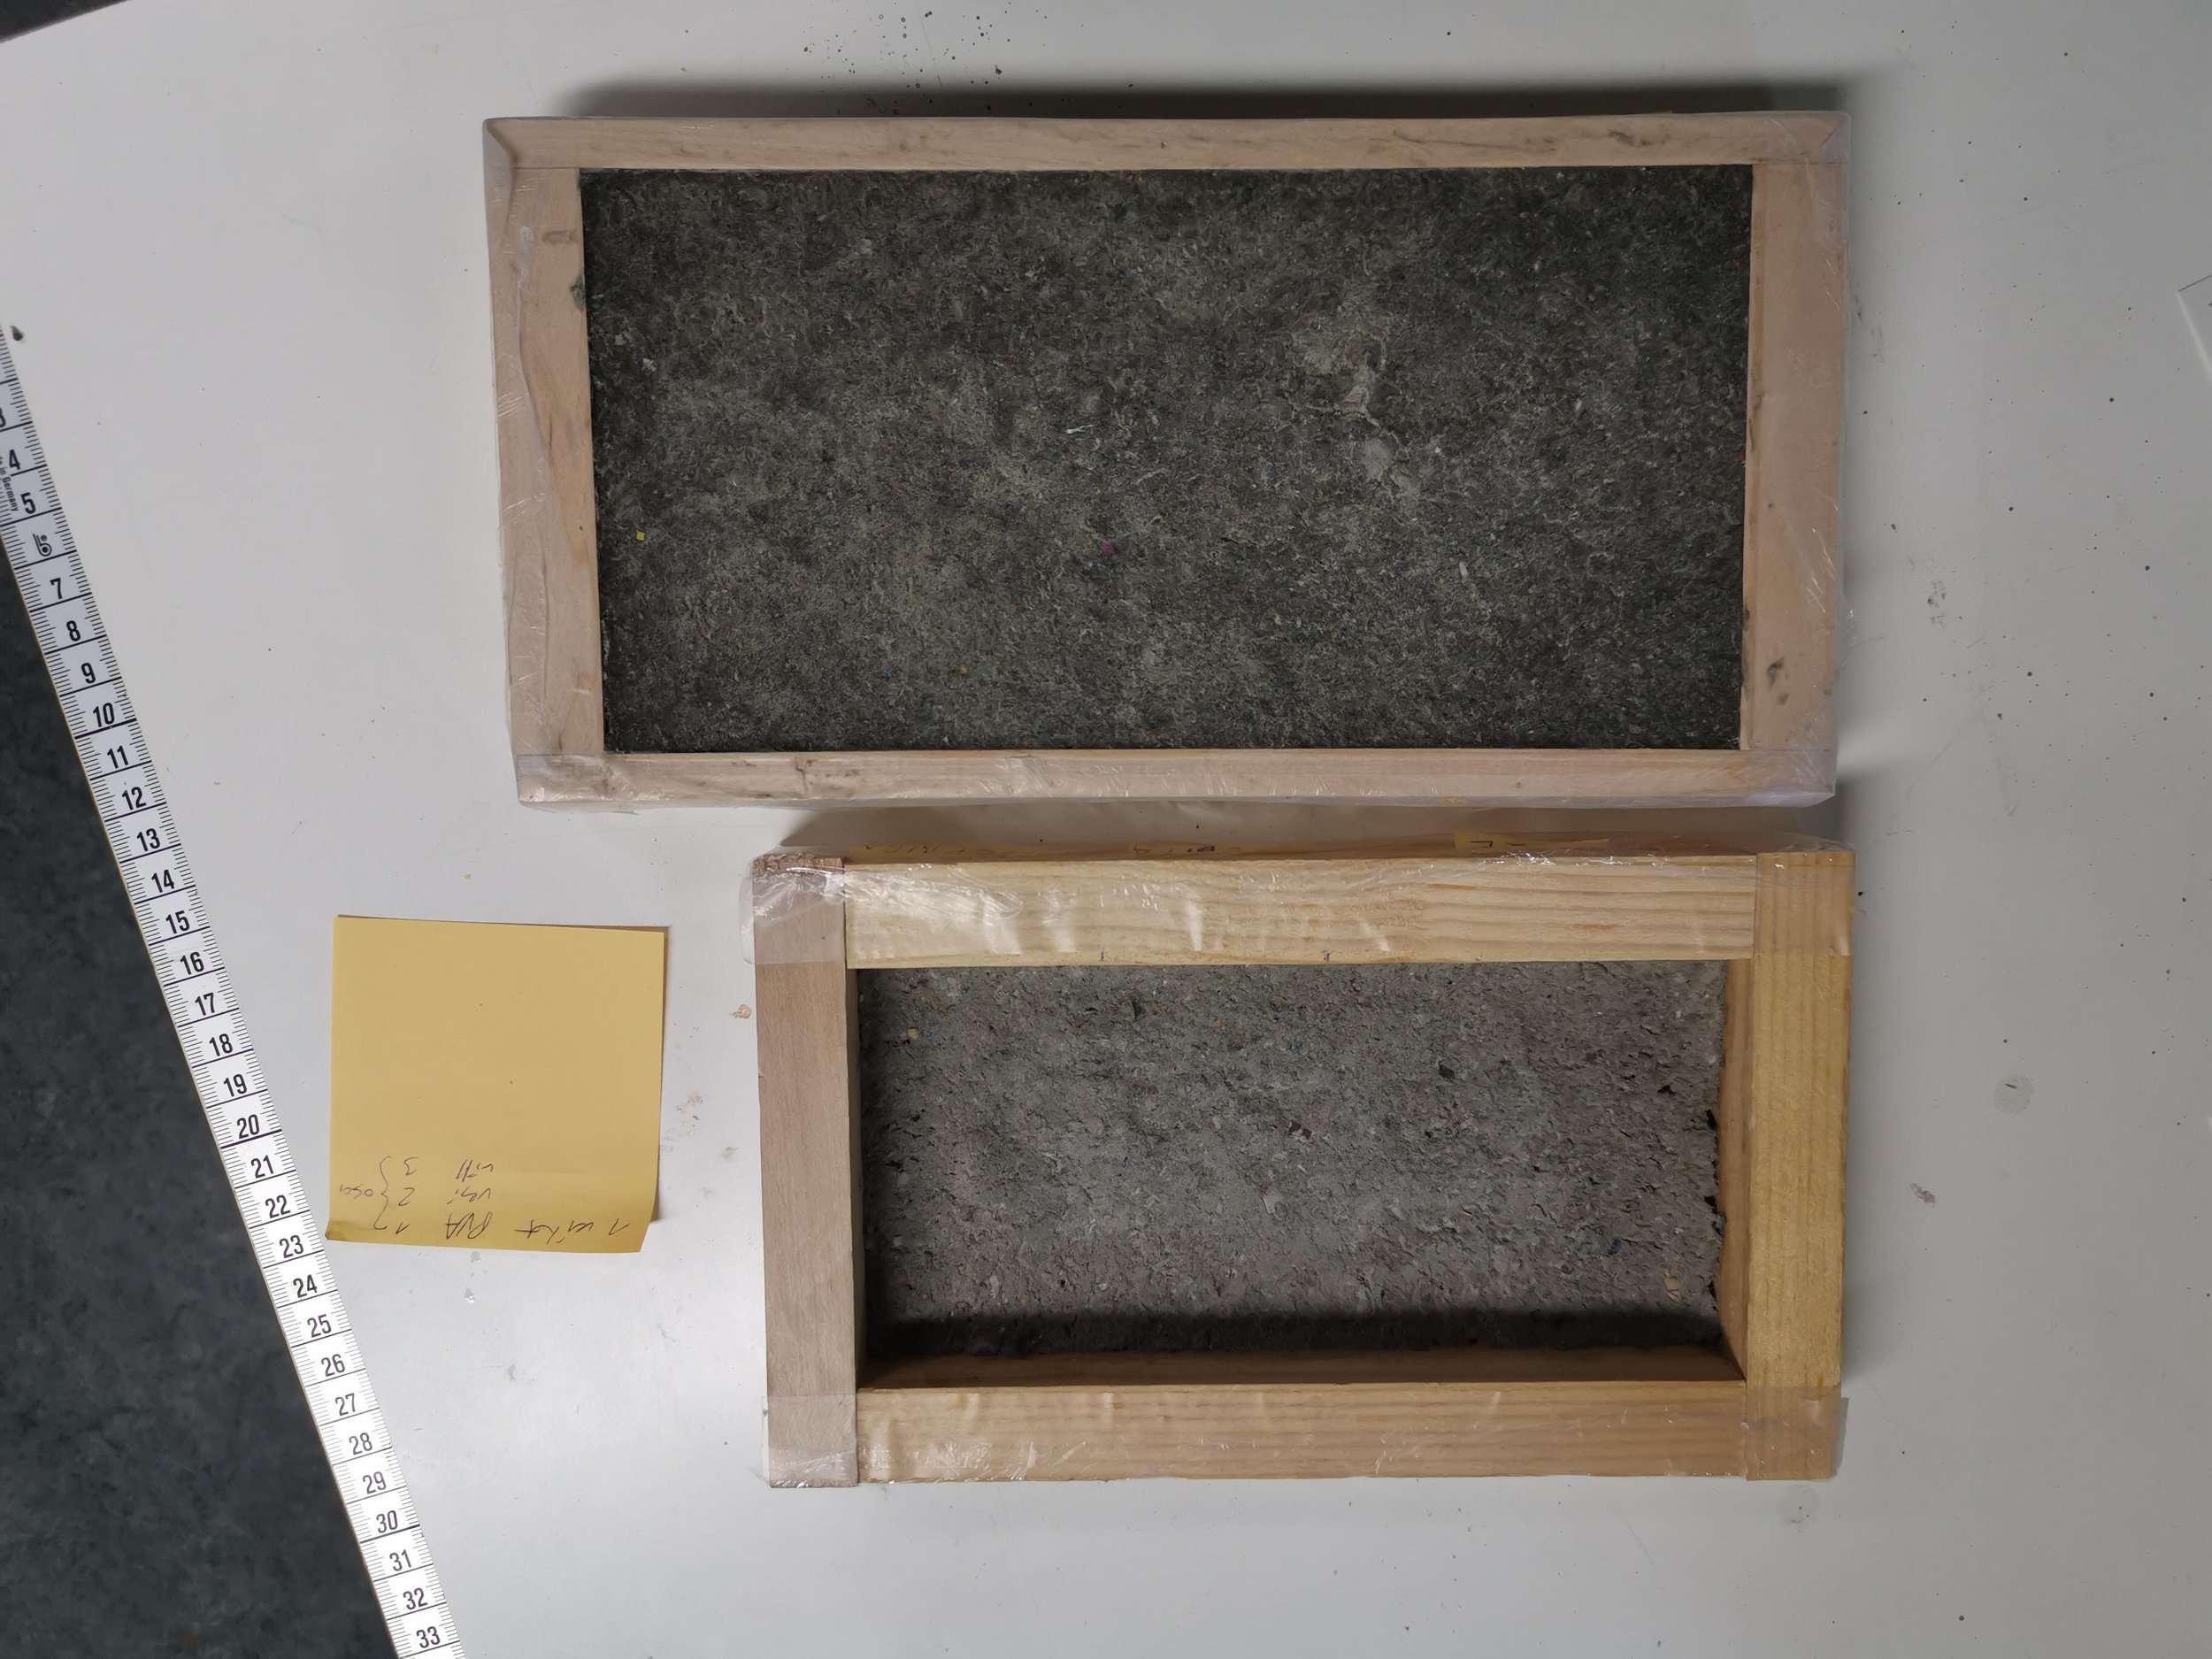
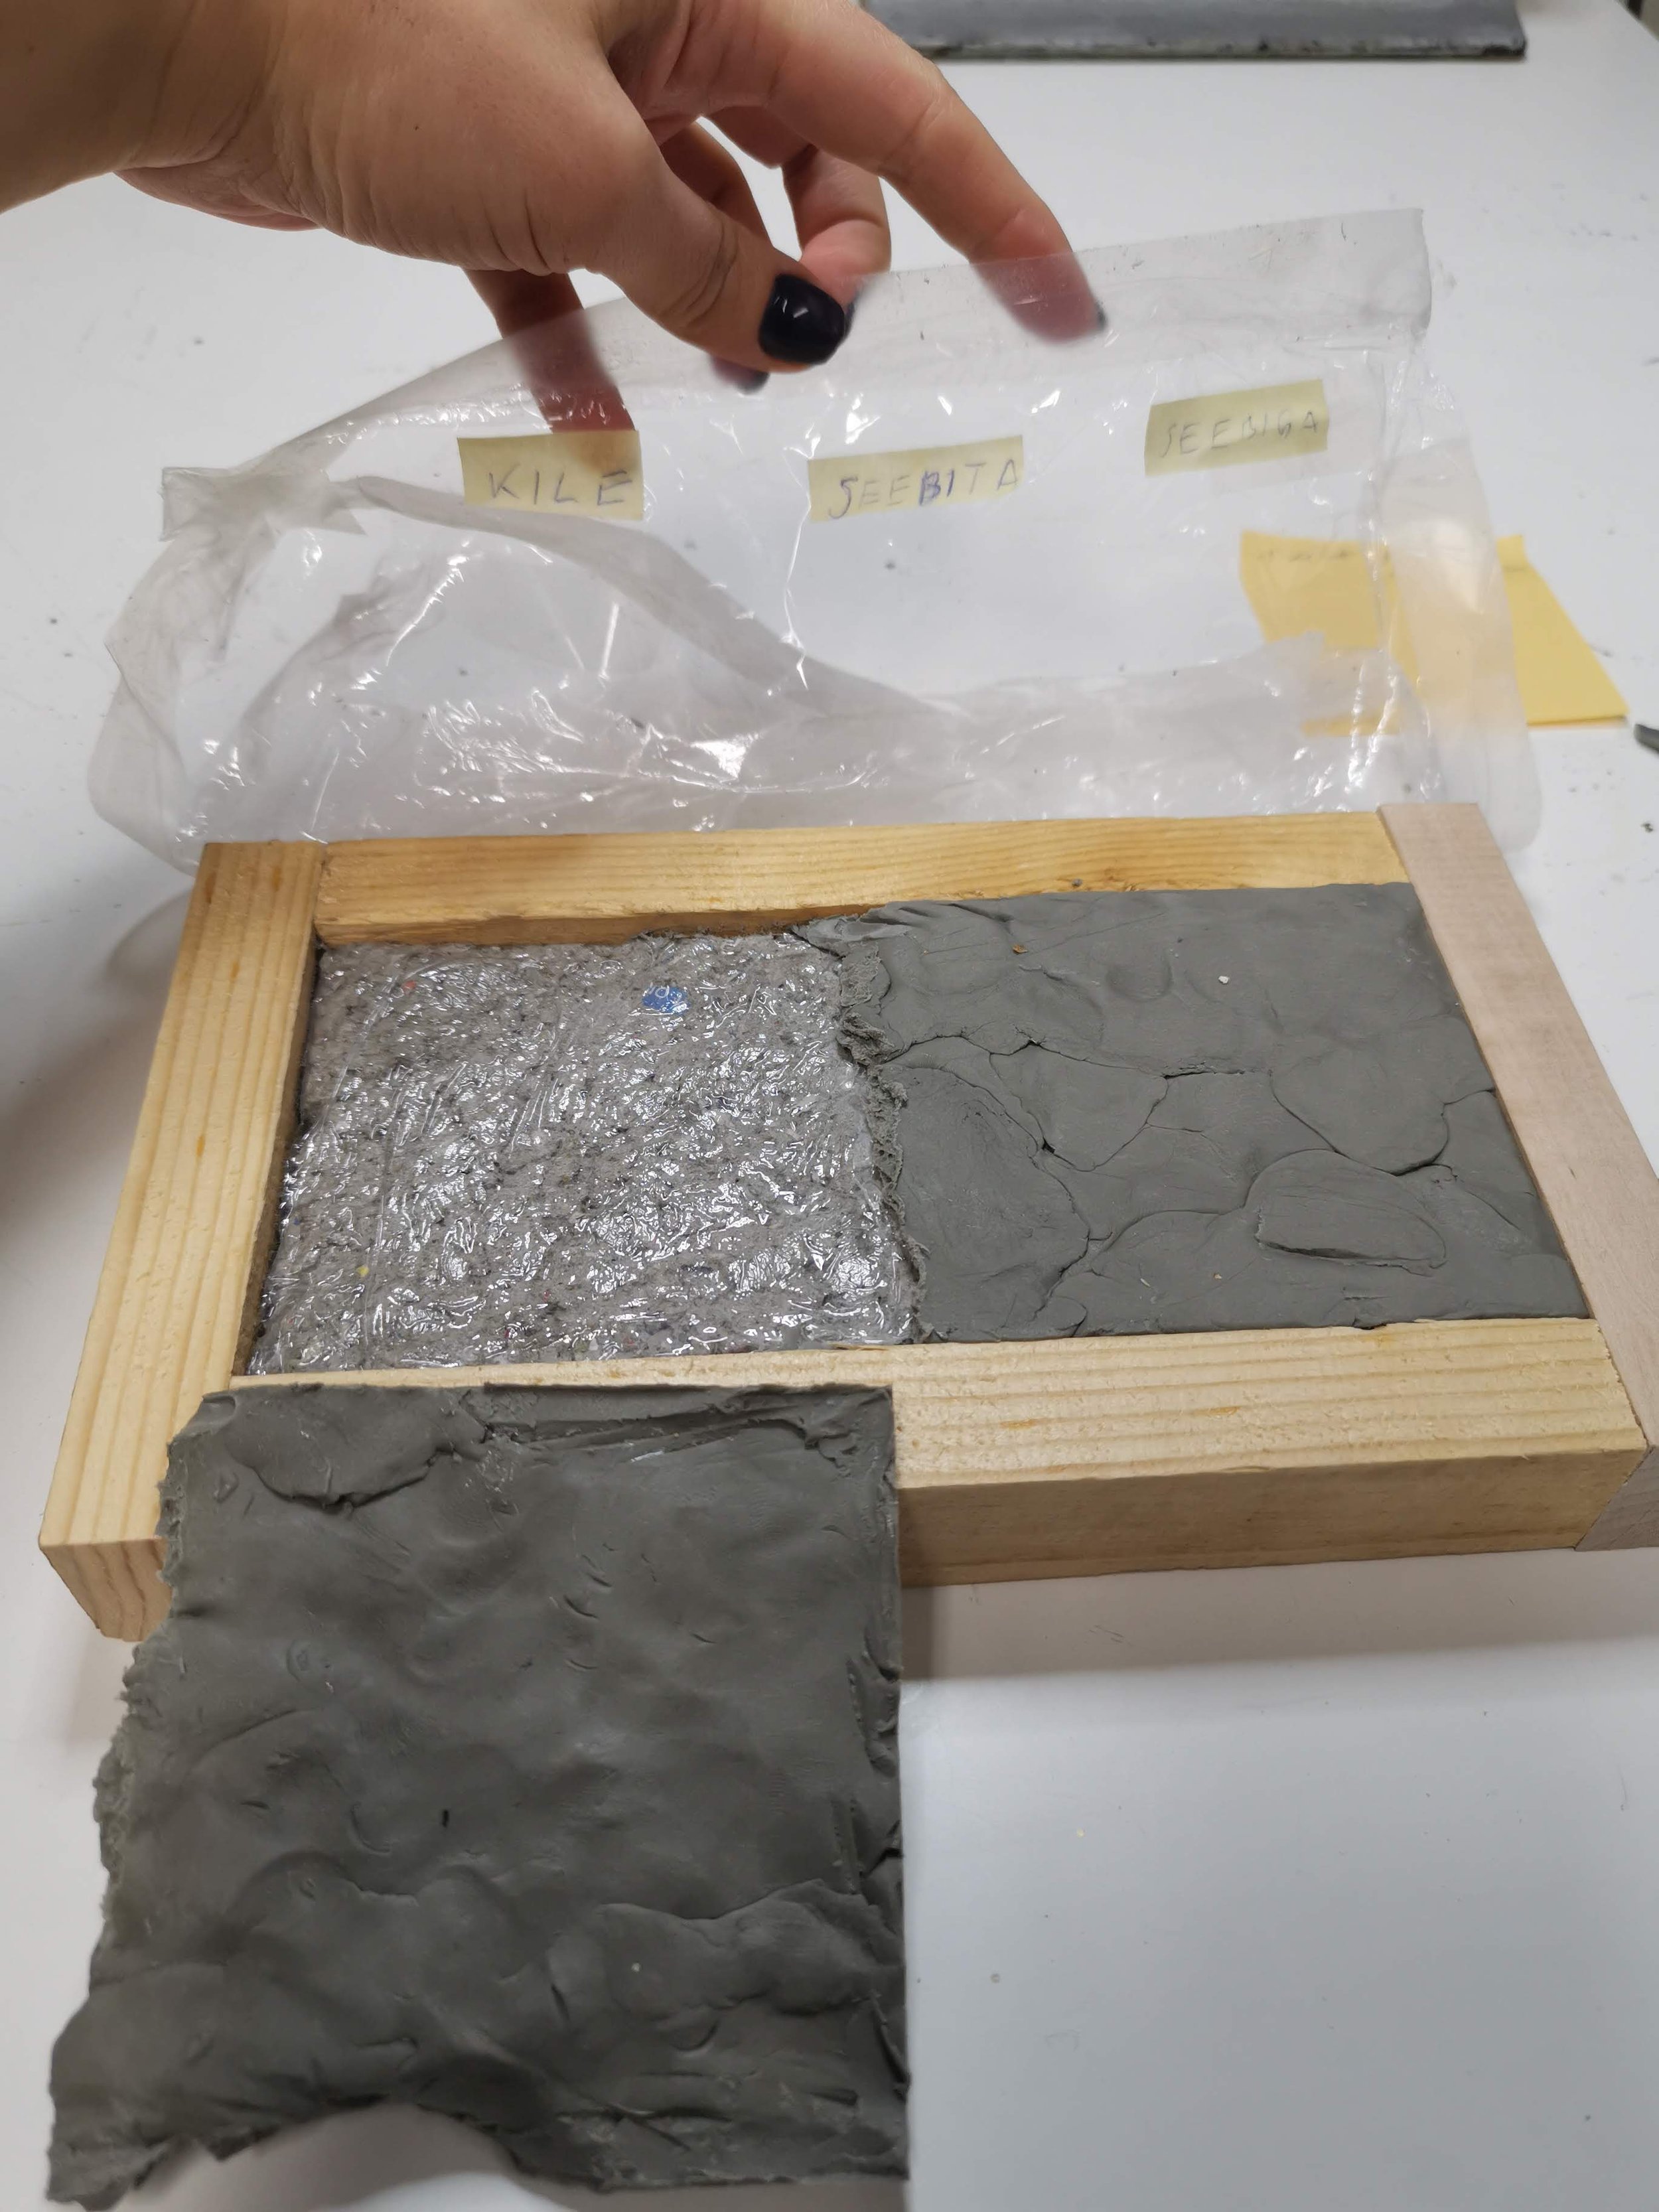
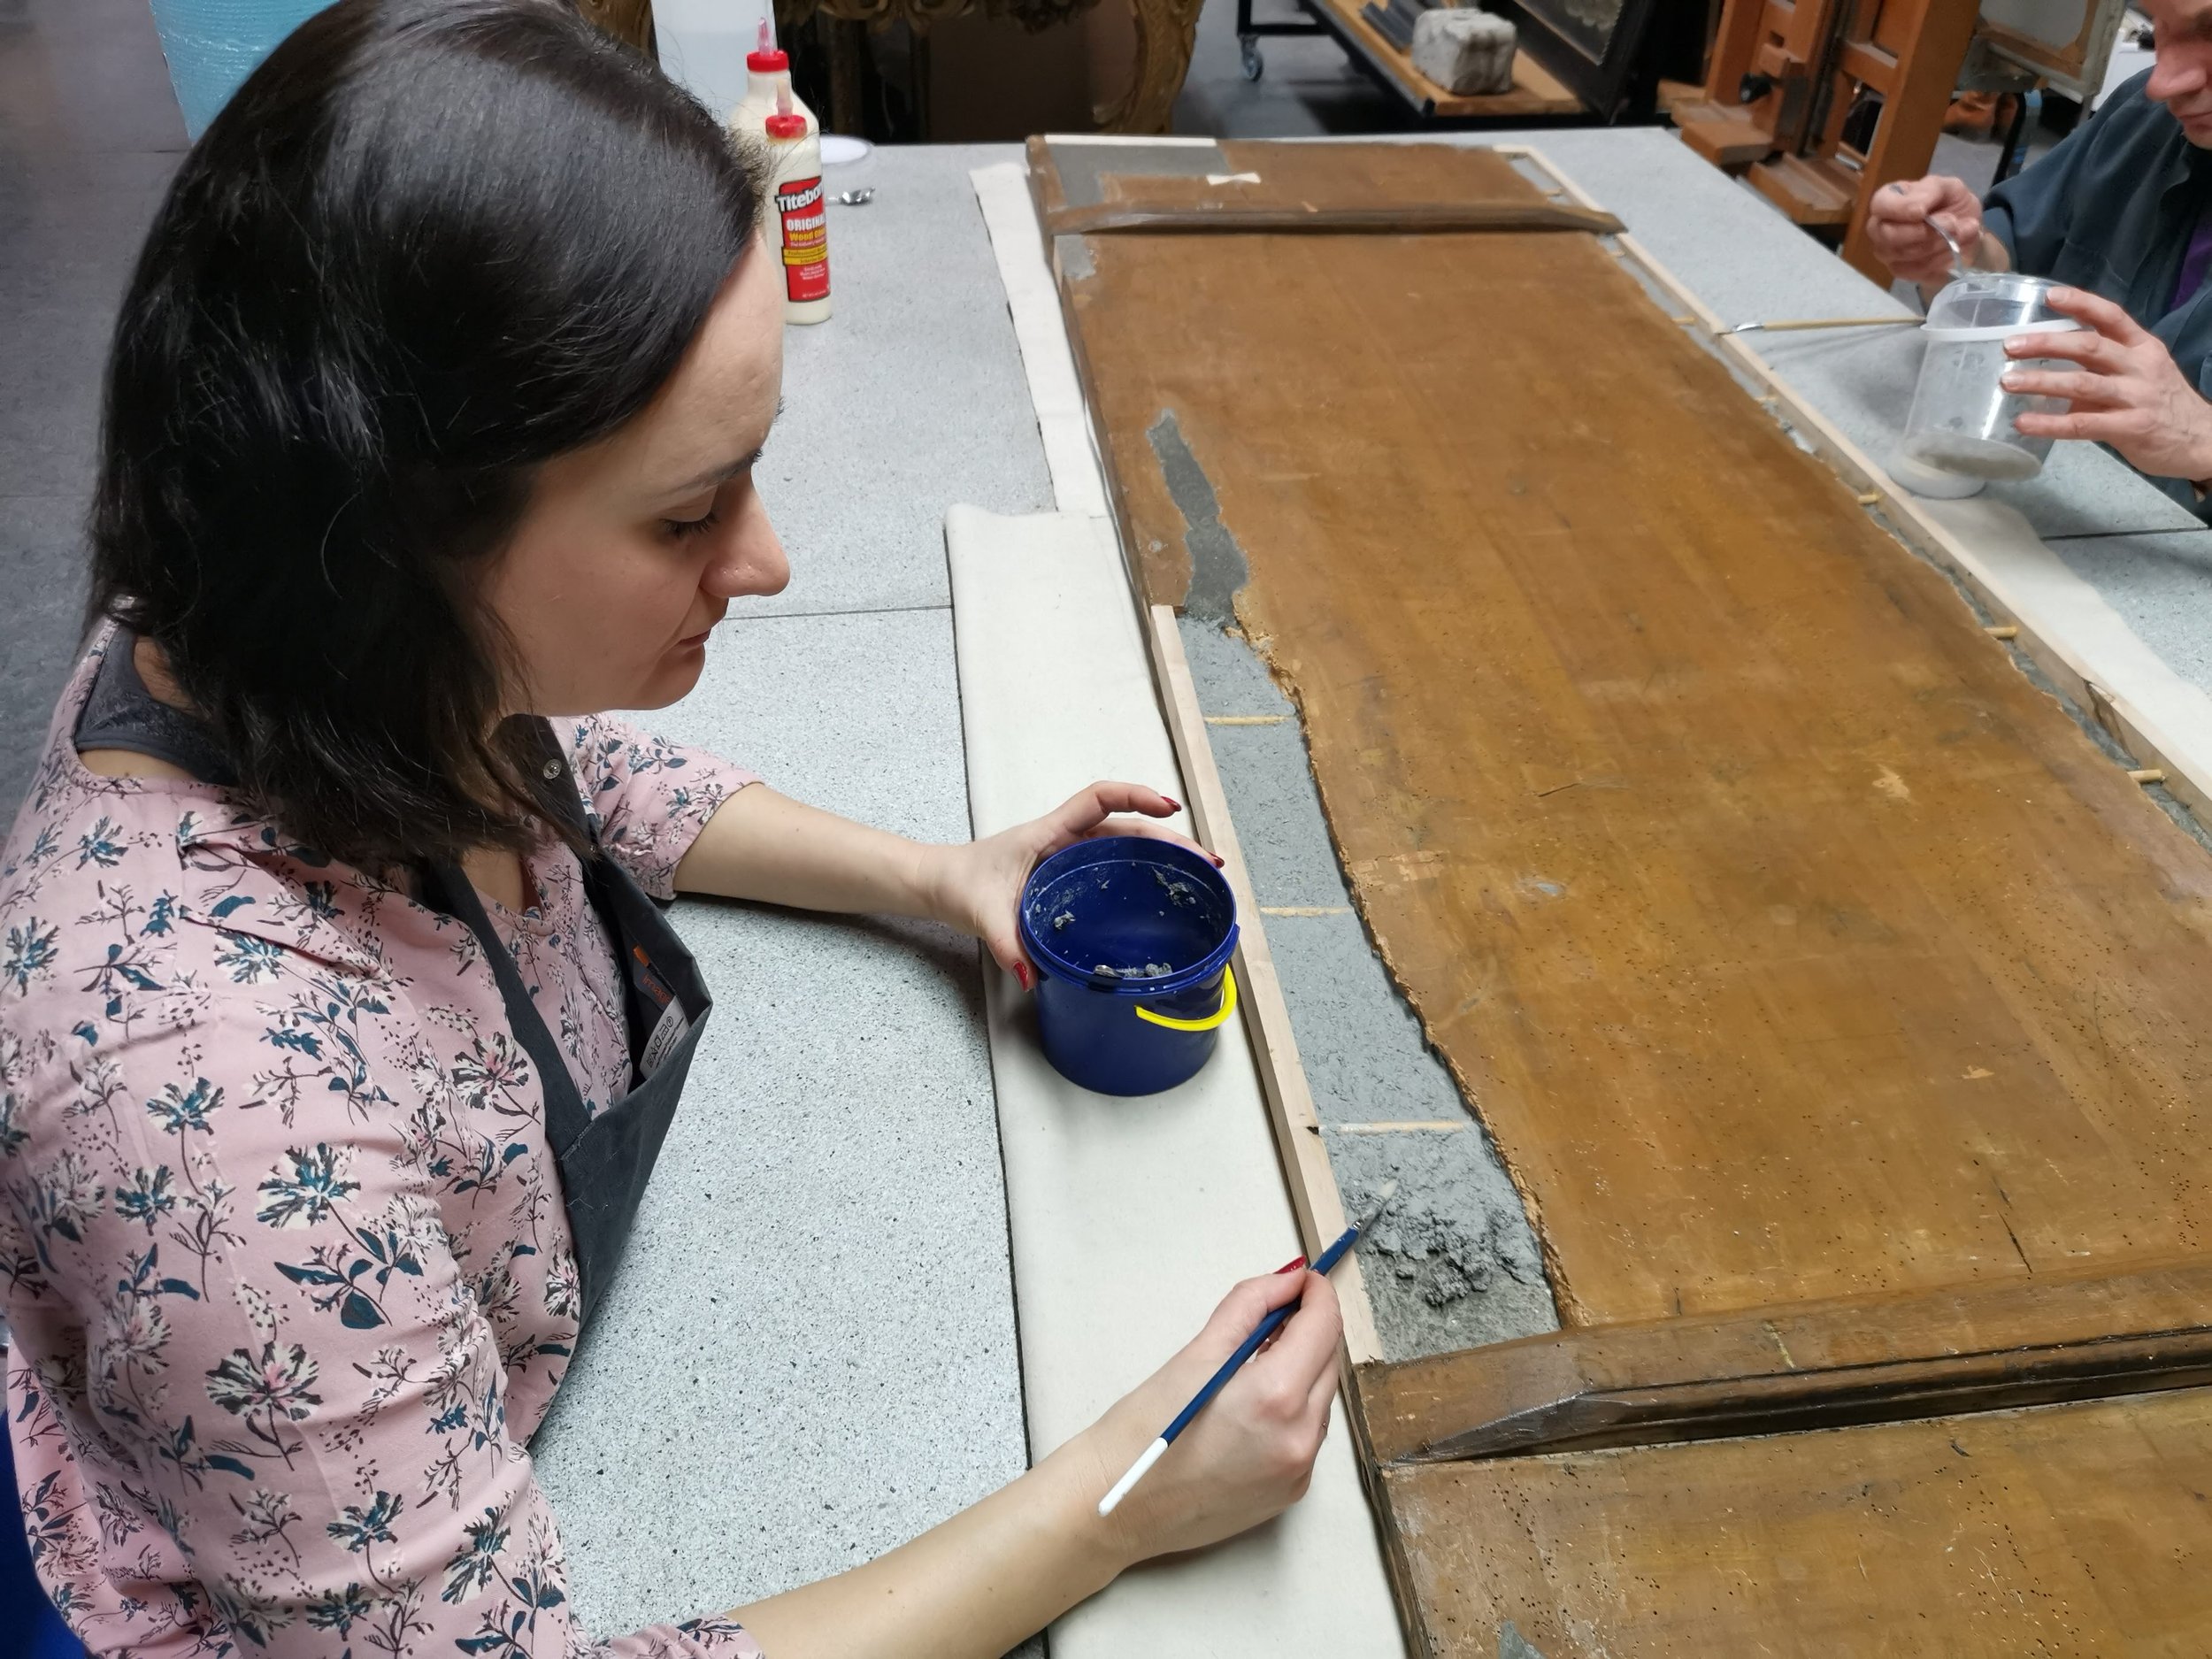
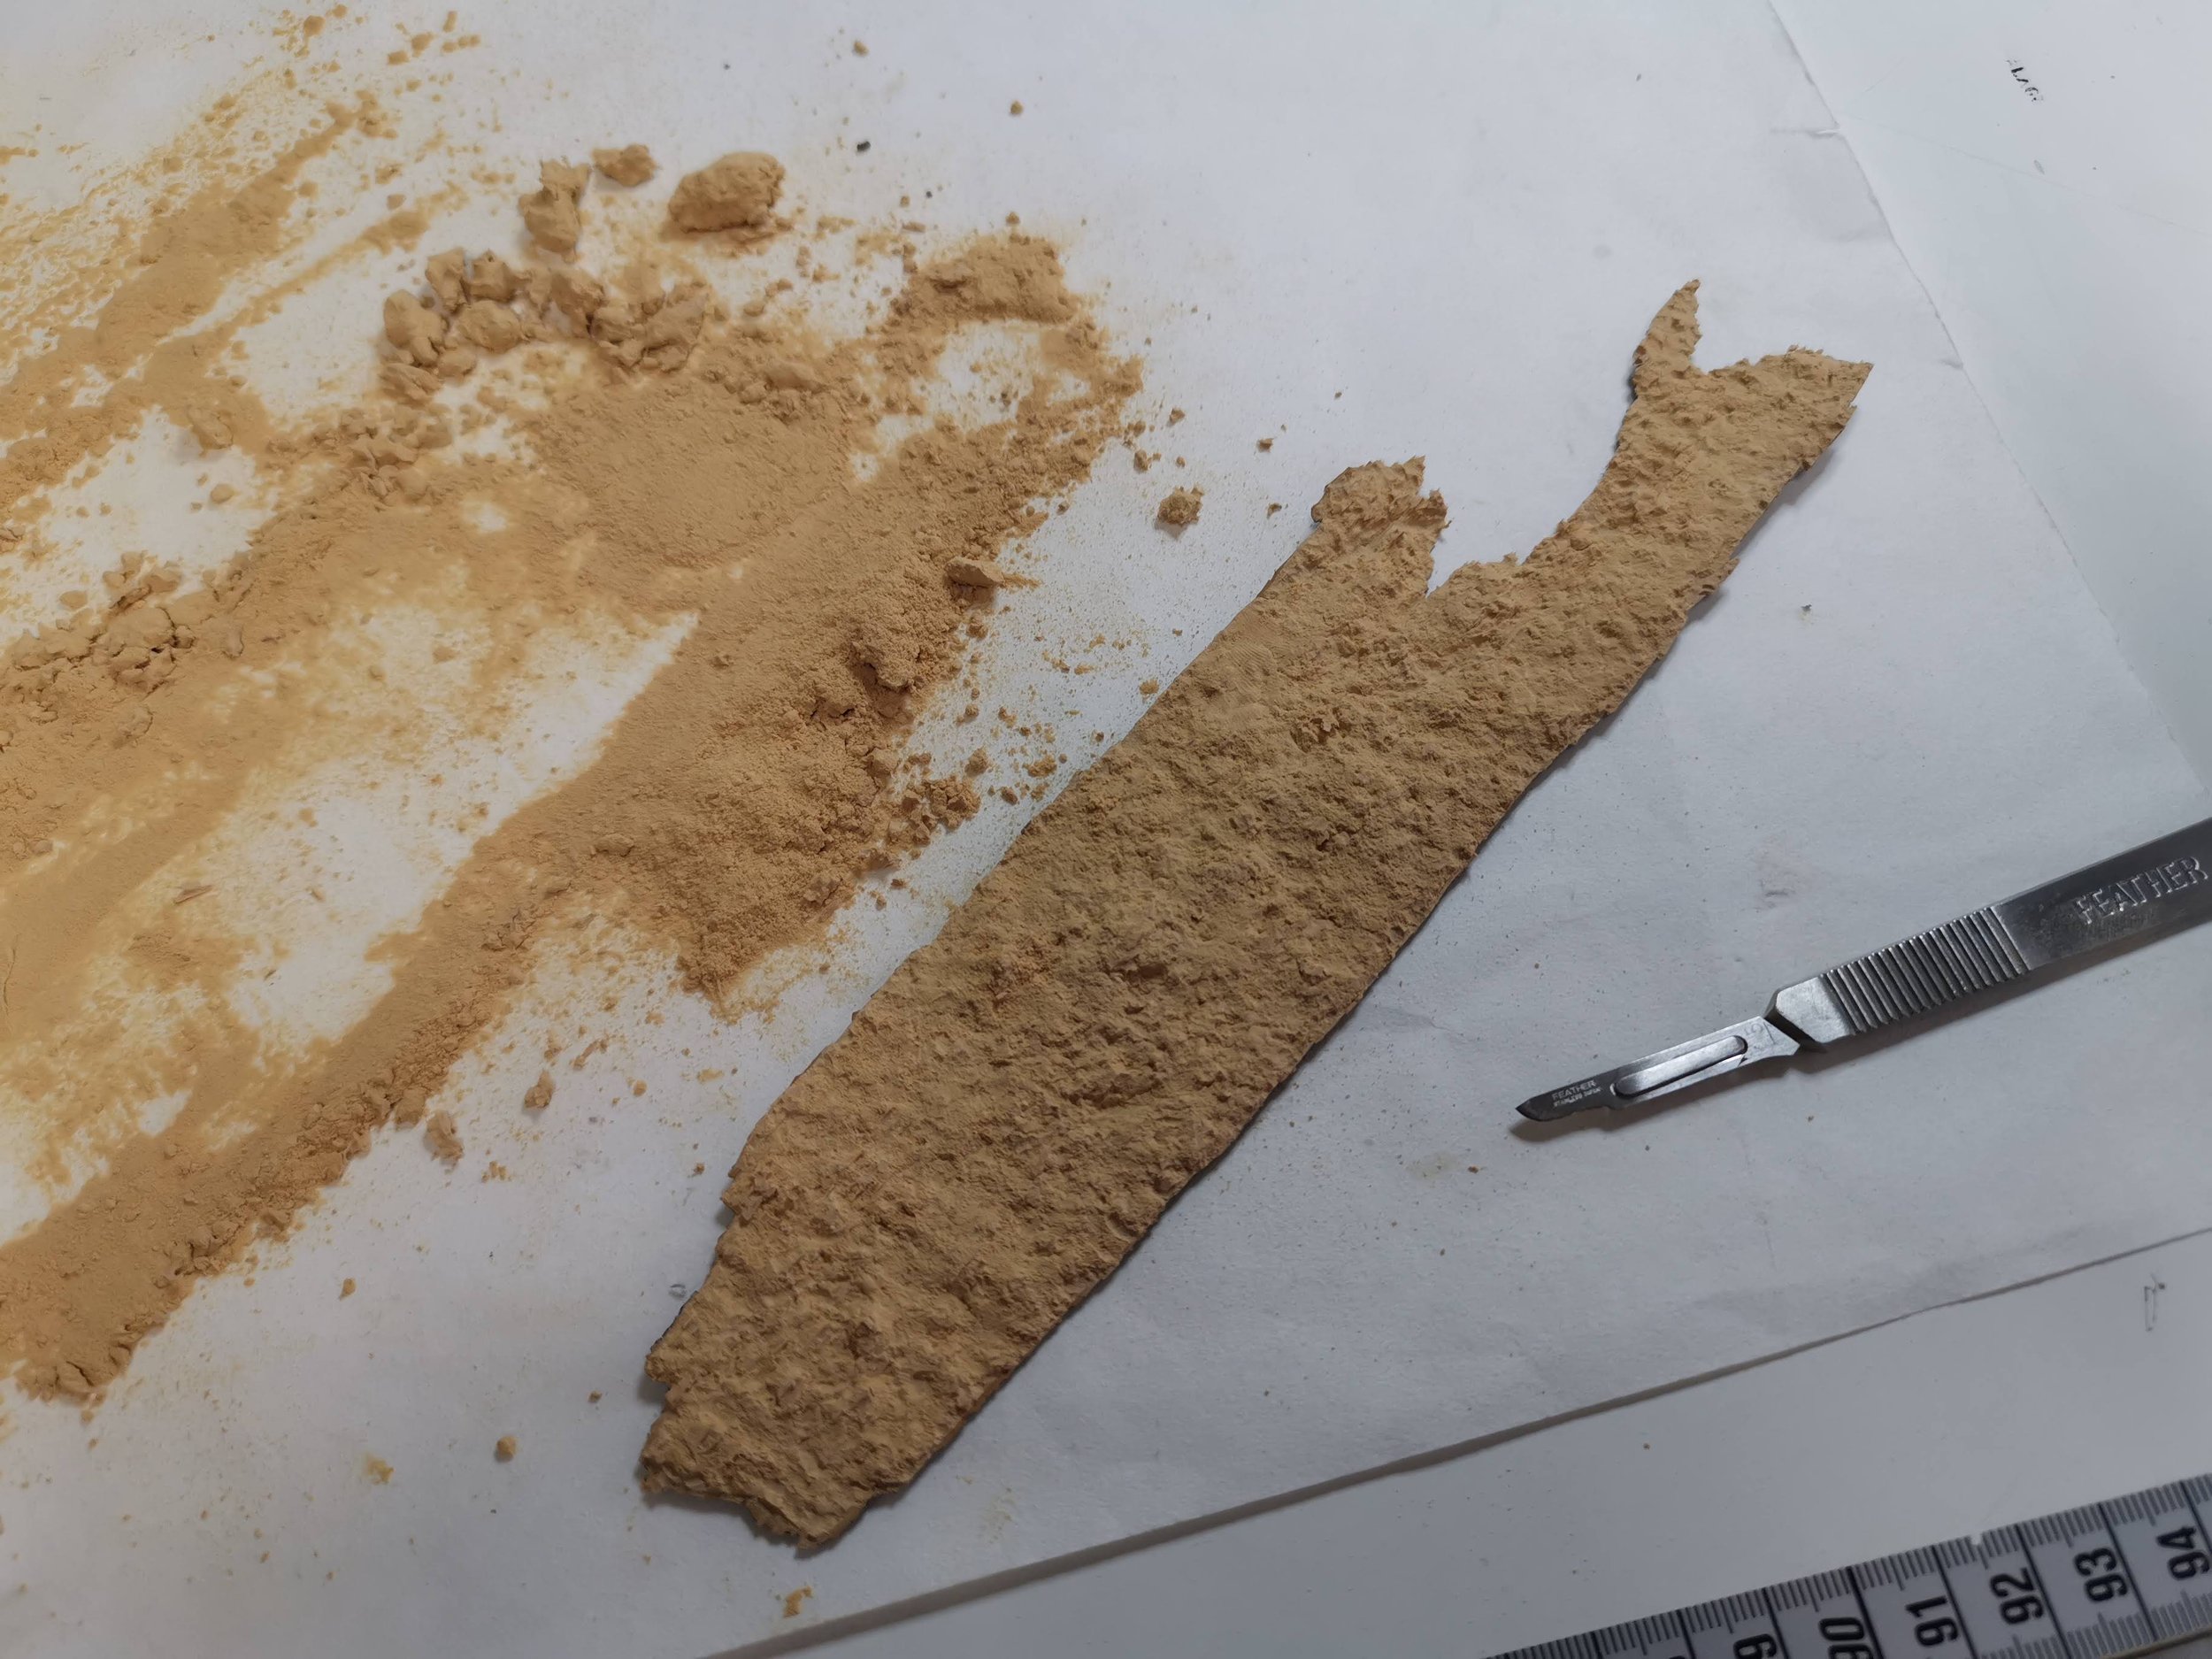
The most time-consuming, however also the most attractive task for the conservators was finding and choosing the filling material. It was agreed that papier-mâché technique would be used for the borders, but choosing the most suitable composite material took much longer. Several materials were tested, mixed with each other one by one, shaped into cubes and left drying on a wooden plate. Then solidity, weight, volume decrease and possible deformation viide6 ⁽⁶⁾ ,as well as colour suitability were checked. [ill 15]
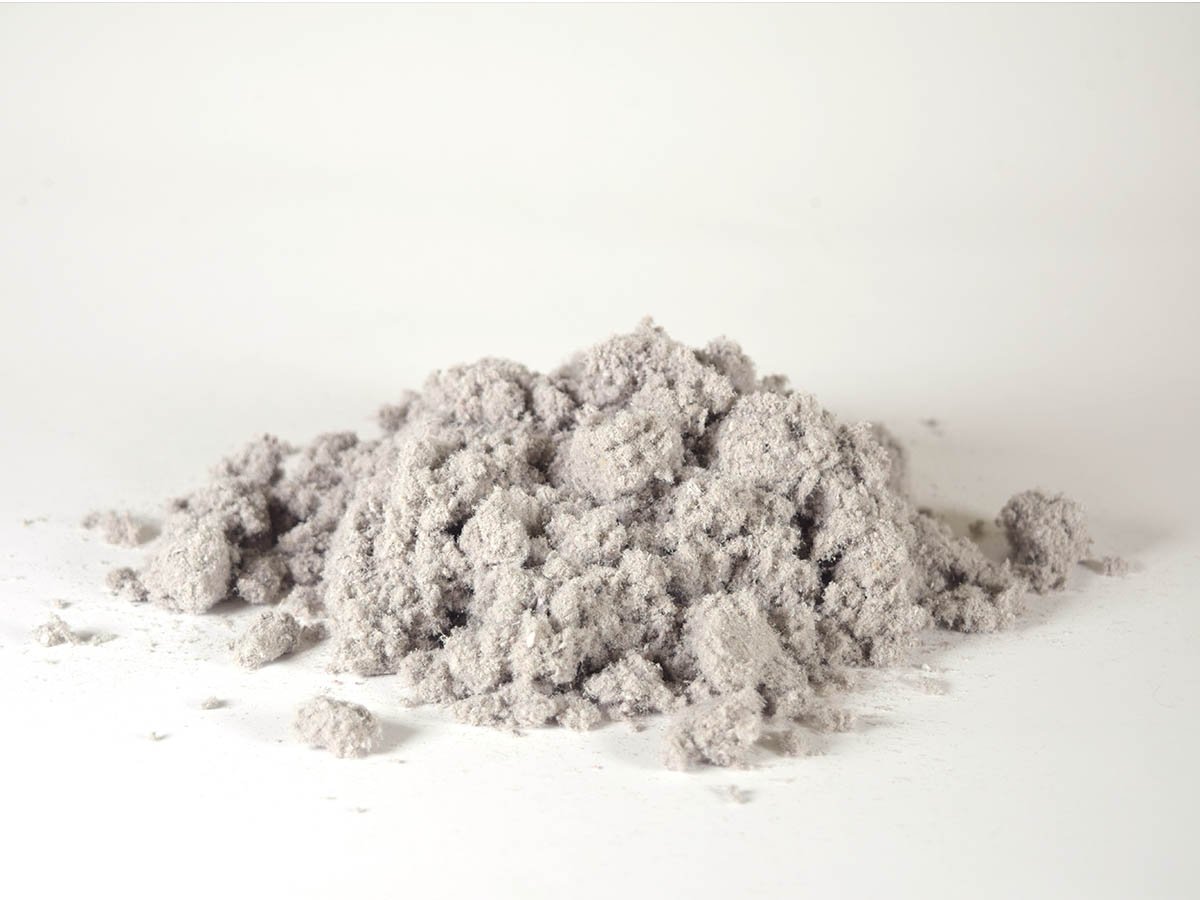
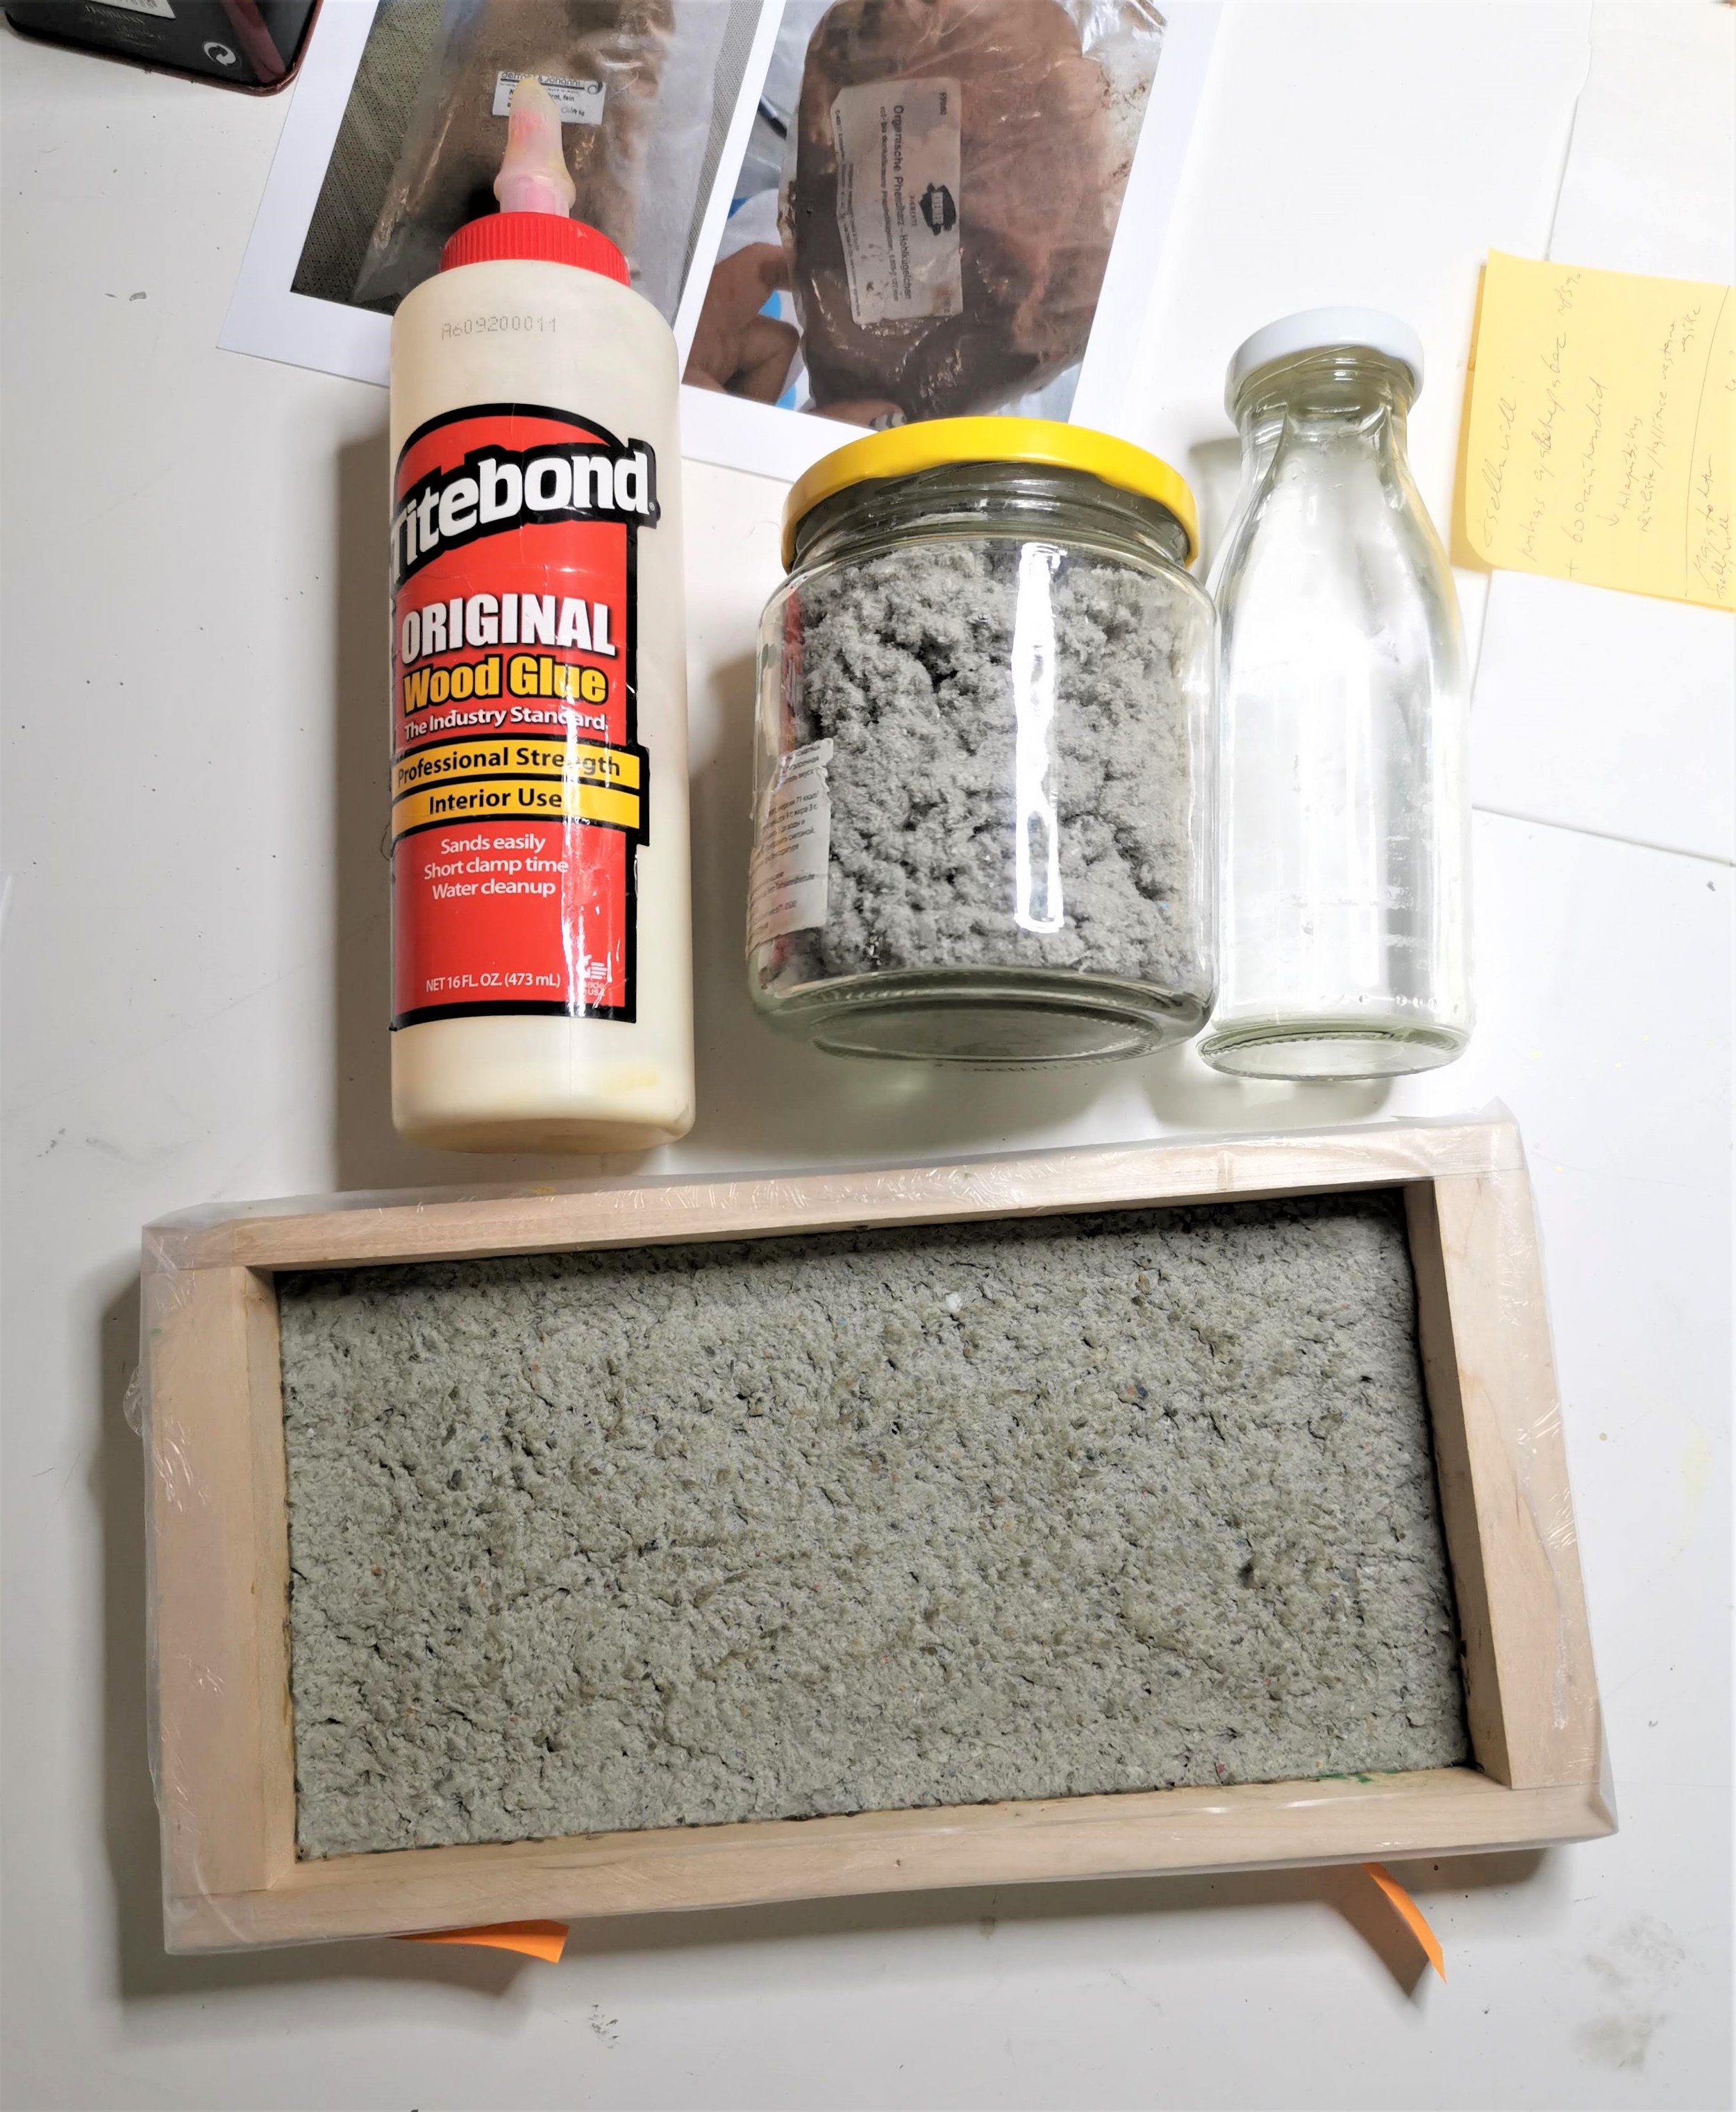
The conclusion was to choose cellulose fibre Antrocel-P viide7 ⁽⁷⁾ mixed with white wood-glue Titebond Original viide8 ⁽⁸⁾. [ill 16] The glue is not toxic and its residue can be removed with water that makes using it more convenient. Distilled water was used for diluting the consistence and decreasing the final weight of the solution. Various combinations were tested and finally Titebond Original: distilled water 6:4 was selected. [ill 17] The tests had proved that the selected filling stuck well on the wood. When drying the mass did decrease a little, but it did not break open. The filling is lighter than wood, the dried mass is not fragile, it allows cutting and polishing and it would not crack or break when proceeded.
We also tested cork granules viide9 ⁽⁹⁾, glass micro-beads viide10 ⁽¹⁰⁾ and synthetic fibre viide11 ⁽¹¹⁾ , but none of them was good enough. Cork granules with Titebond glue became fragile when they dried. The mass with micro-beads was smooth and solid but the borders with extensive losses would have required very much of it. The imitation fibre mass was solid but difficult to proceed when it was dry.
Cellulose fibre was treated with different glues. Mixed with PVA-glue it showed a rather good result, but the mixture required much water and it was not as easy to remove the residue as it was with the Titebond mixture. Brown Titebond viide 12 ⁽¹²⁾was good for a binder but required more water and became darker when drying, much darker than the white Titebond mixture. Both, aesthetic and practical notions voted for the lighter mass.
It was interesting to try traditional paper glues like methyl cellulose viide13 ⁽¹³⁾ and wheat-paste viide14 ⁽¹⁴⁾mixed with cellulose fibre. Both mixtures were almost equable and solid enough but lost quite a lot of bulk when drying. Acrylic Acronal 500 D viide15 ⁽¹⁵⁾and Medium für Konsolidierung viide16 ⁽¹⁶⁾ were also tested but found unsuitable for the purpose, as the mixture remained soft and compliant, turning pink when drying.
Aerosol glue Tectane viide17 ⁽¹⁷⁾ also awoke our interest, as no water is required when it is used. Unfortunately, the mass mixed with that glue was too fragile.
When the suitable mixture had been selected, two replicas were made for imitating the restoration of the borders. [ill 18] The borders were built up layer by layer, just as it had been planned to do on the icon itself. [ill 19] It was essential for the conservators to determine the right movements of hand and decide on the technique for reconstructing the borders.
Reconstruction of the borders
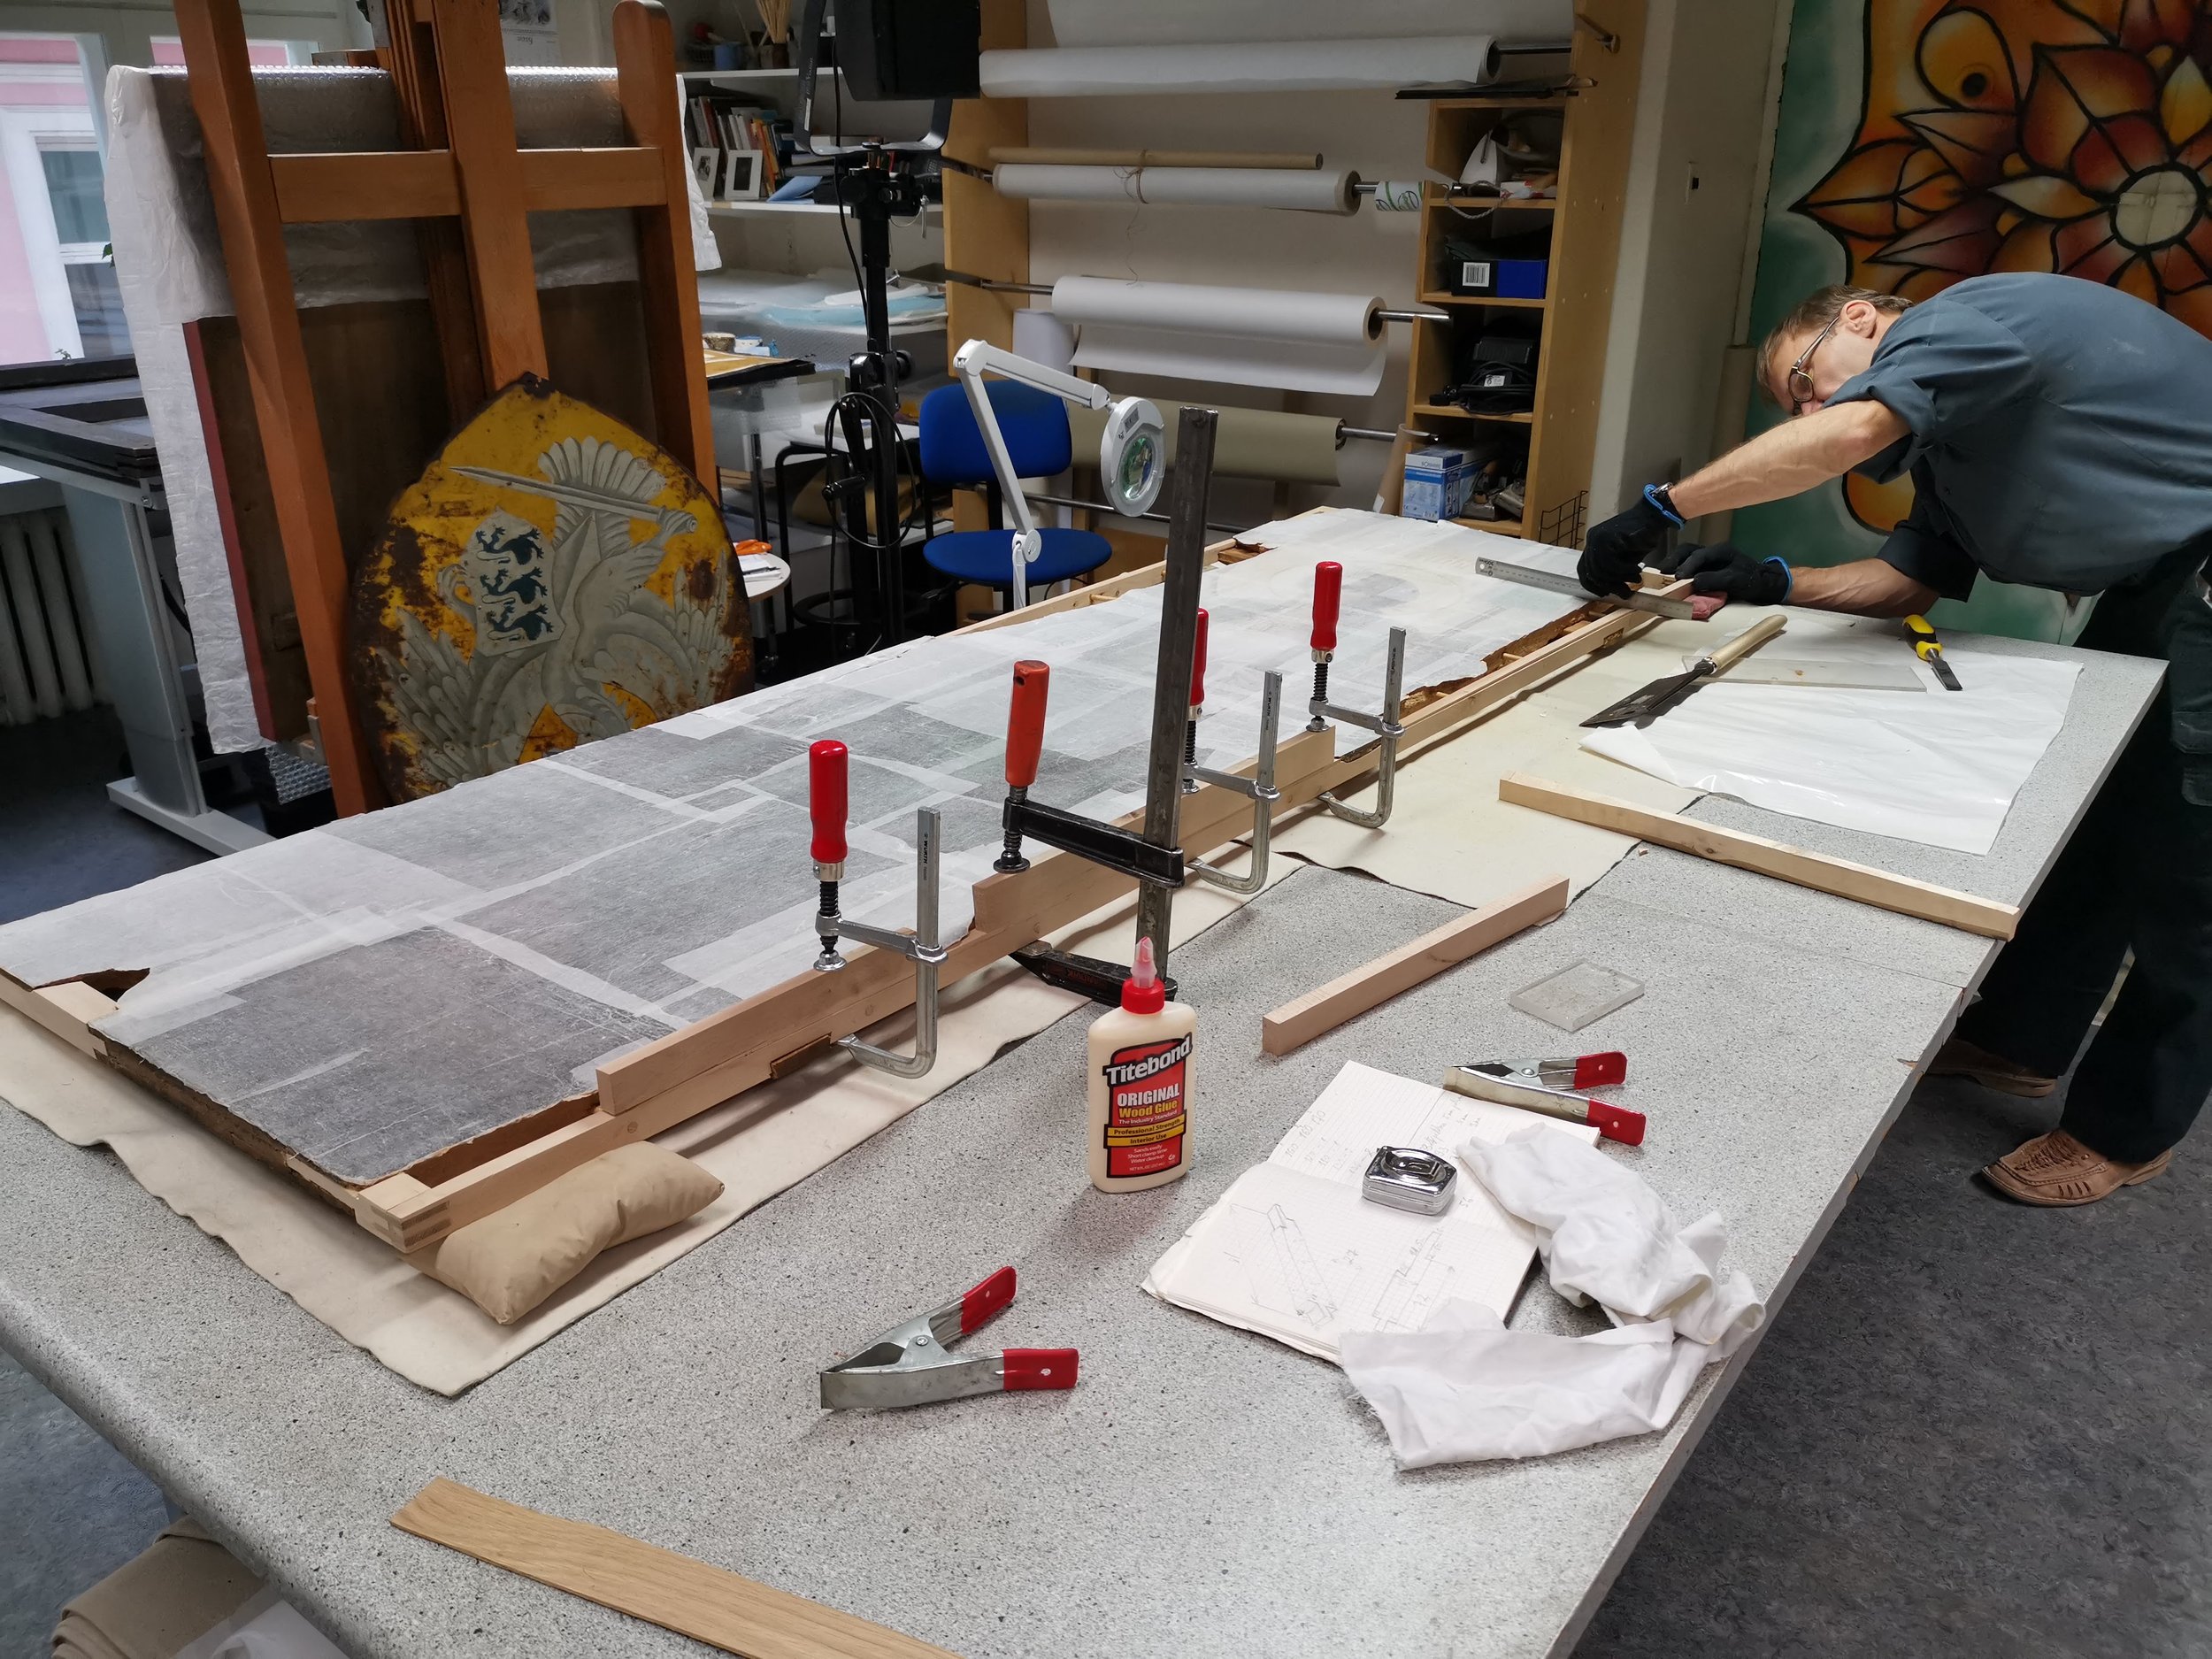
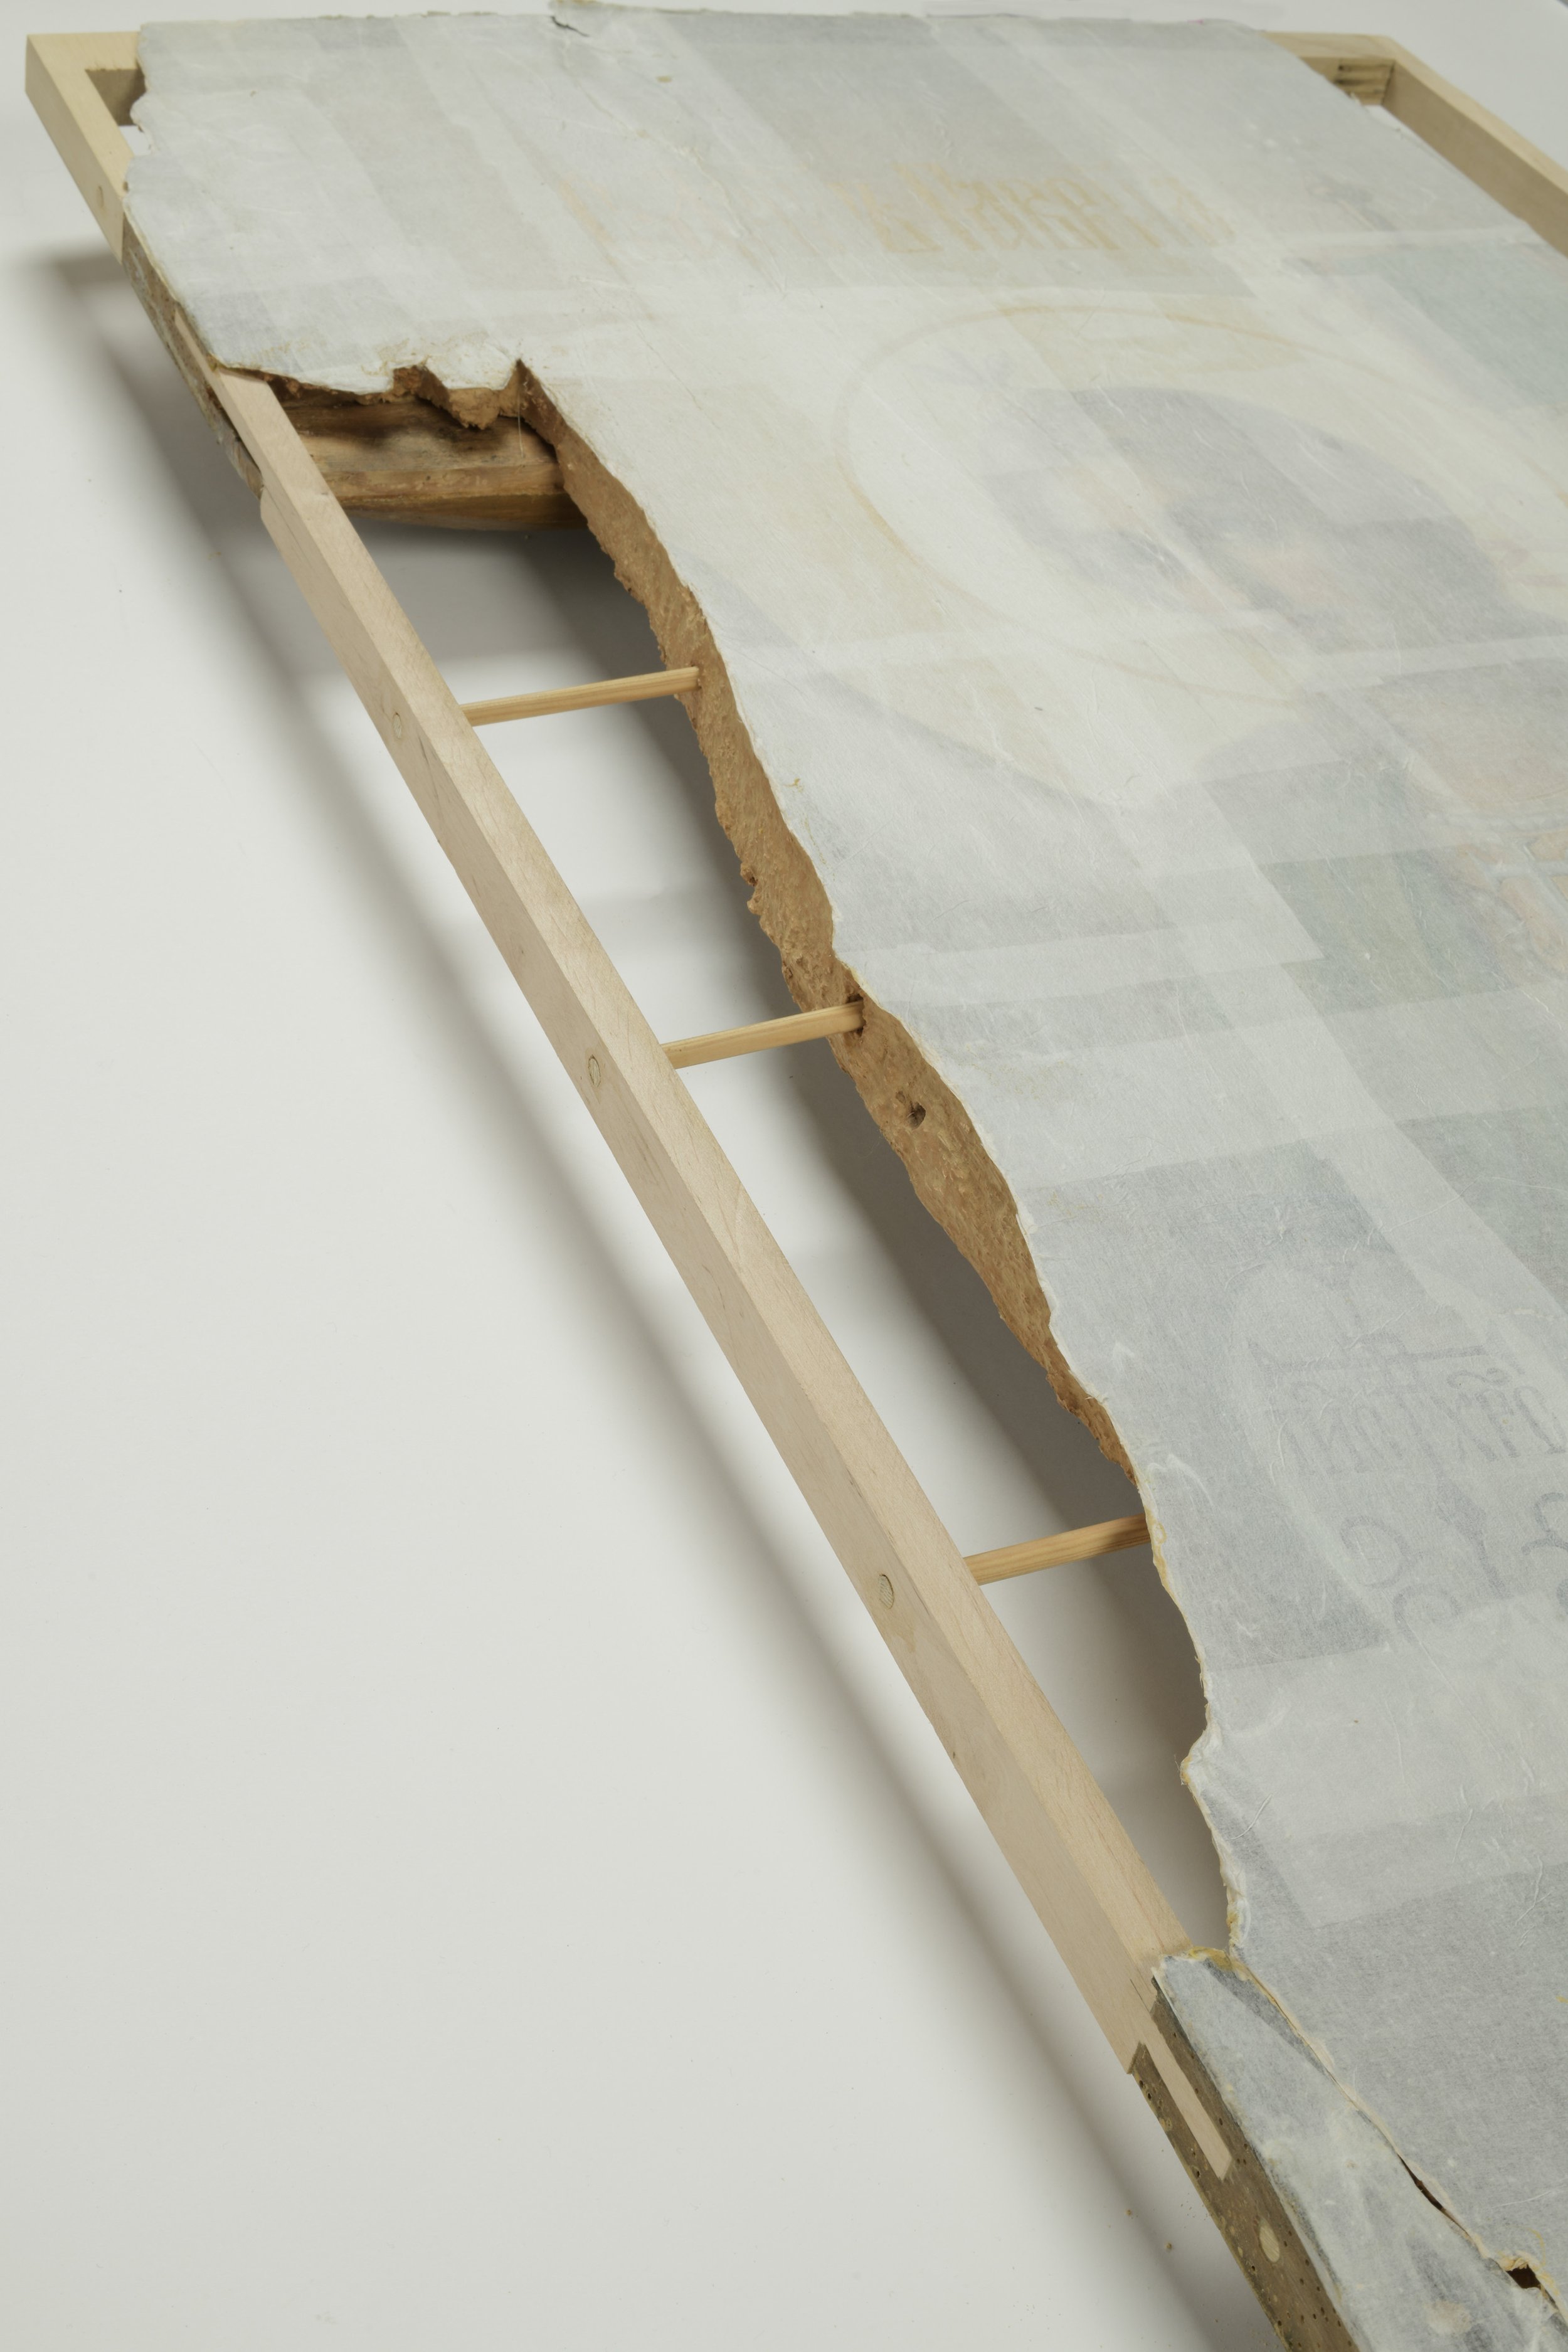
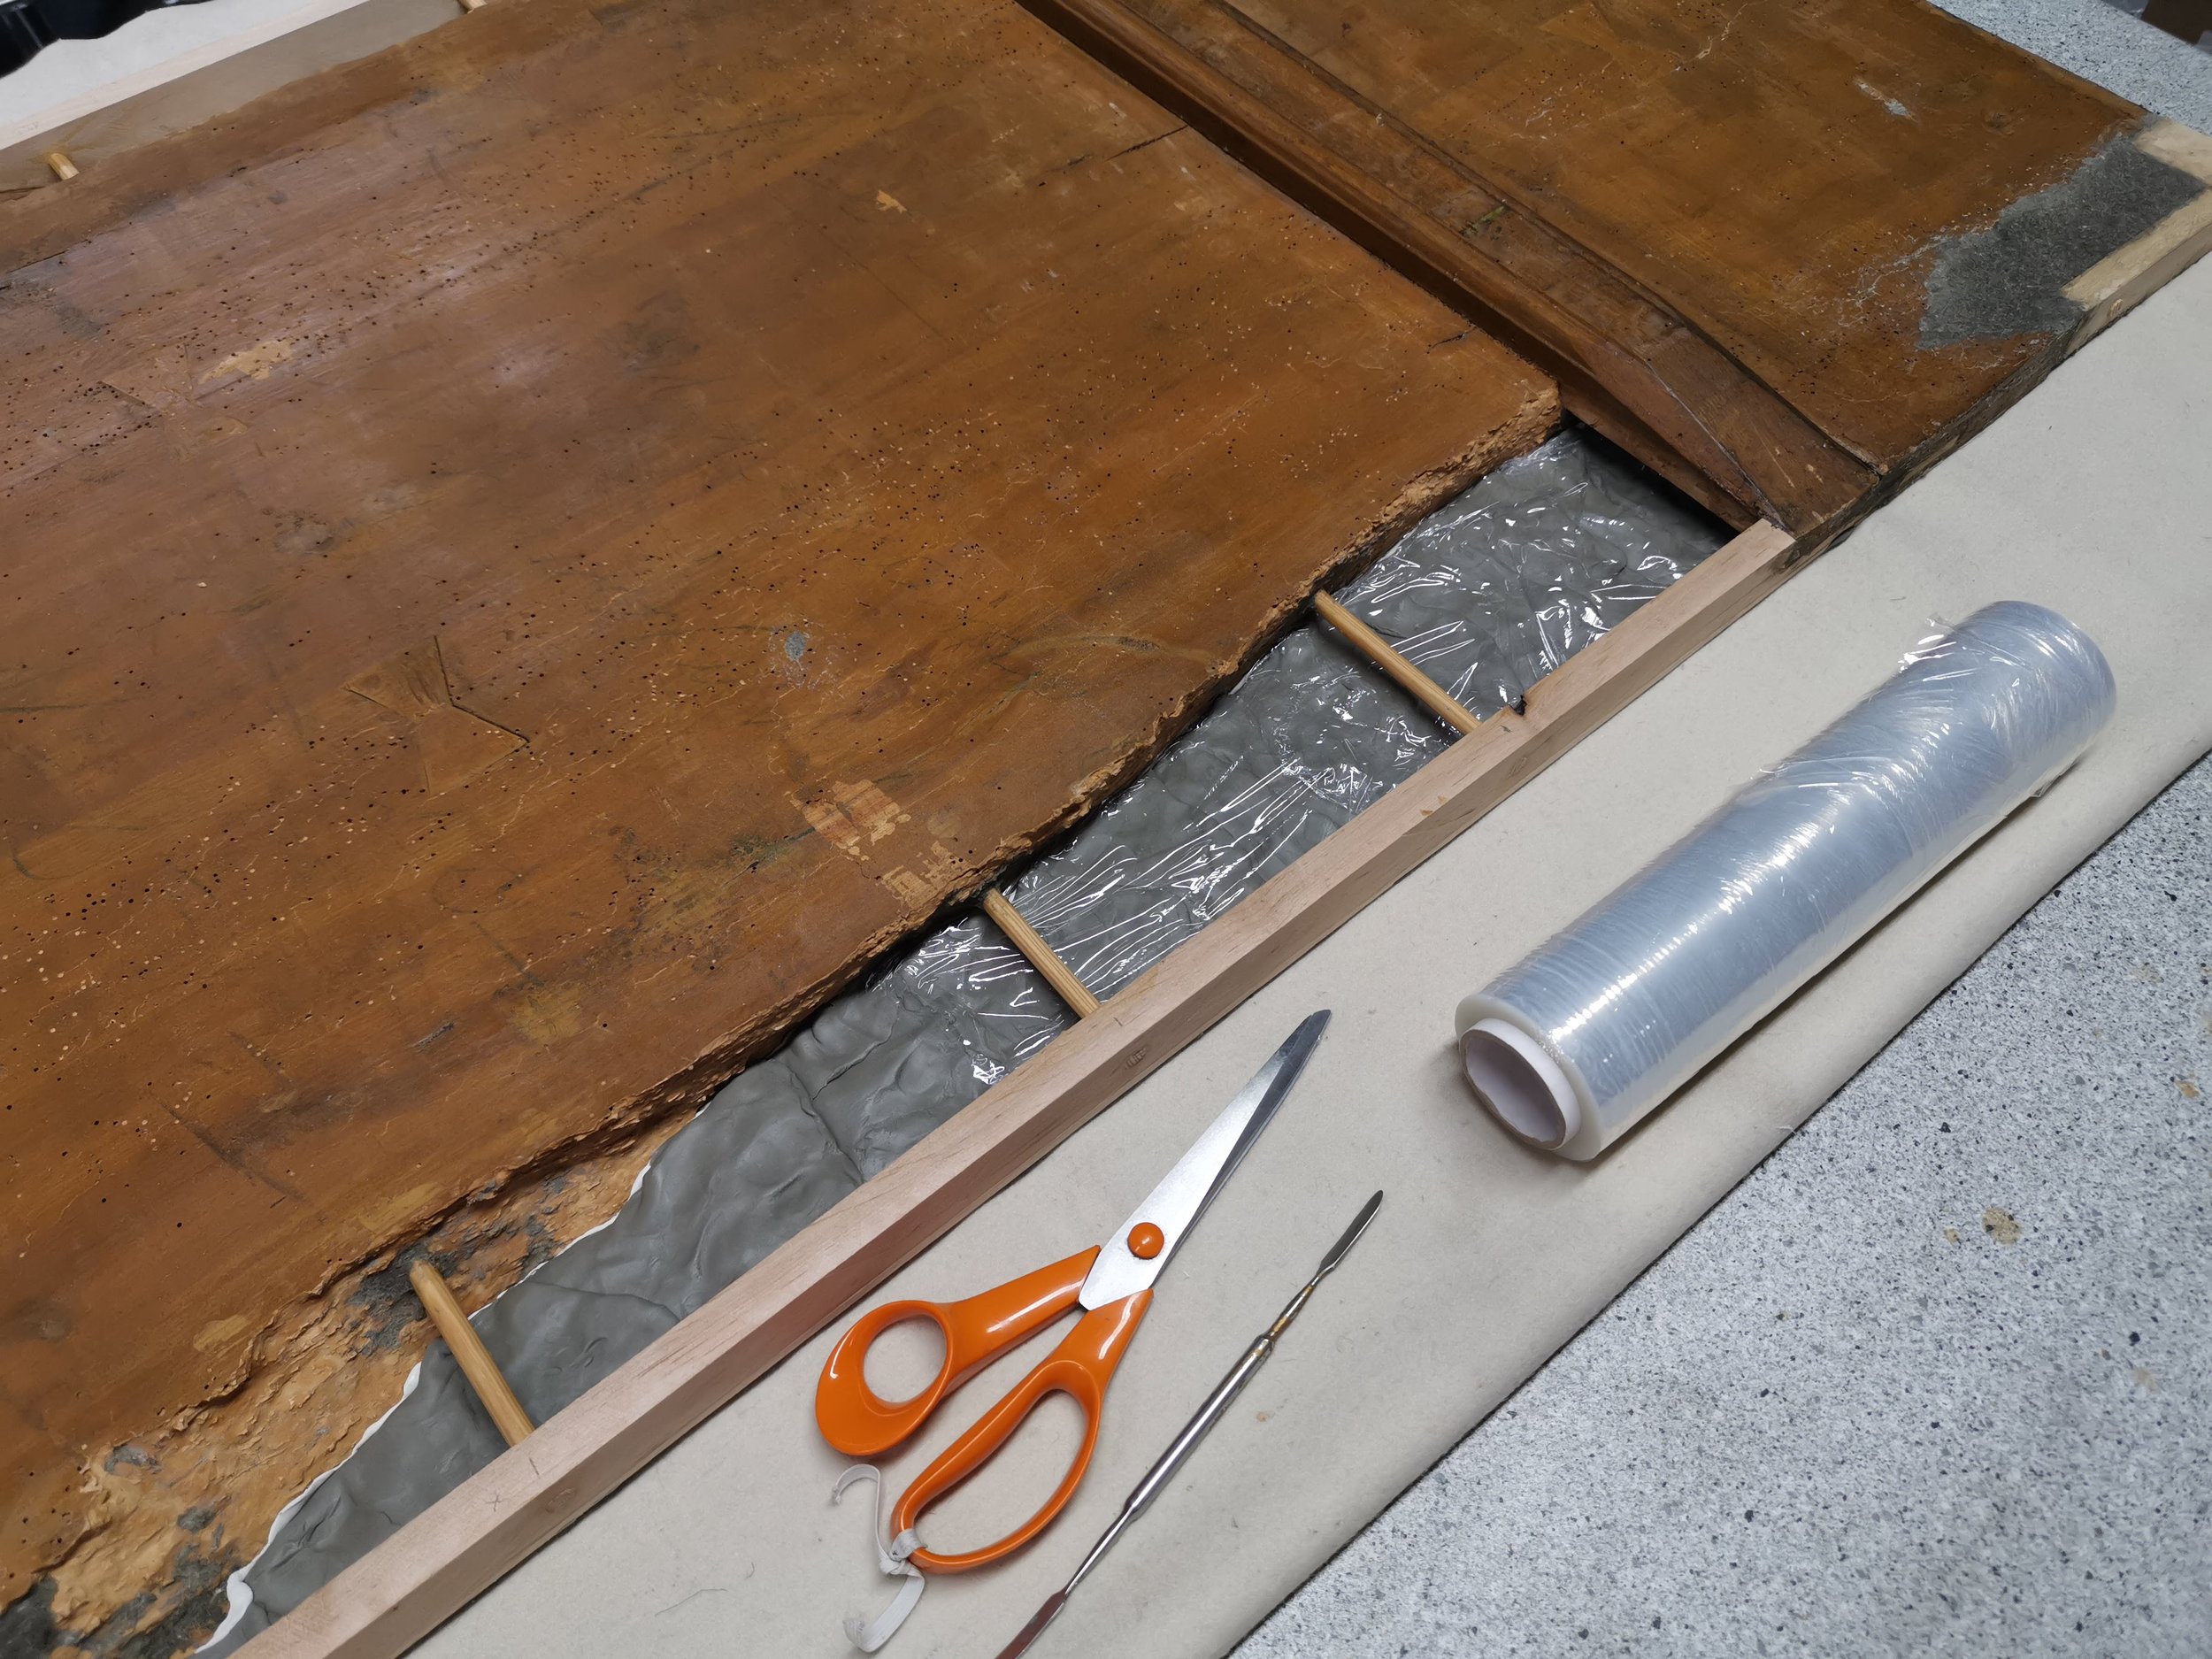
For restoring the oblong shape of the object, the boundary line had to be fixed first. An auxiliary alder wood frame that corresponding to the original shape and size of the icon was made. [ill 20] [ill 21] [ill 22] The frame did not only determine the circumference but also helped at the border restoration. A carcass (skeleton) of thin sticks was fixed in between the edges of the icon and the frame. [ill 23] [ill 24] [ill 25] [ill 26]
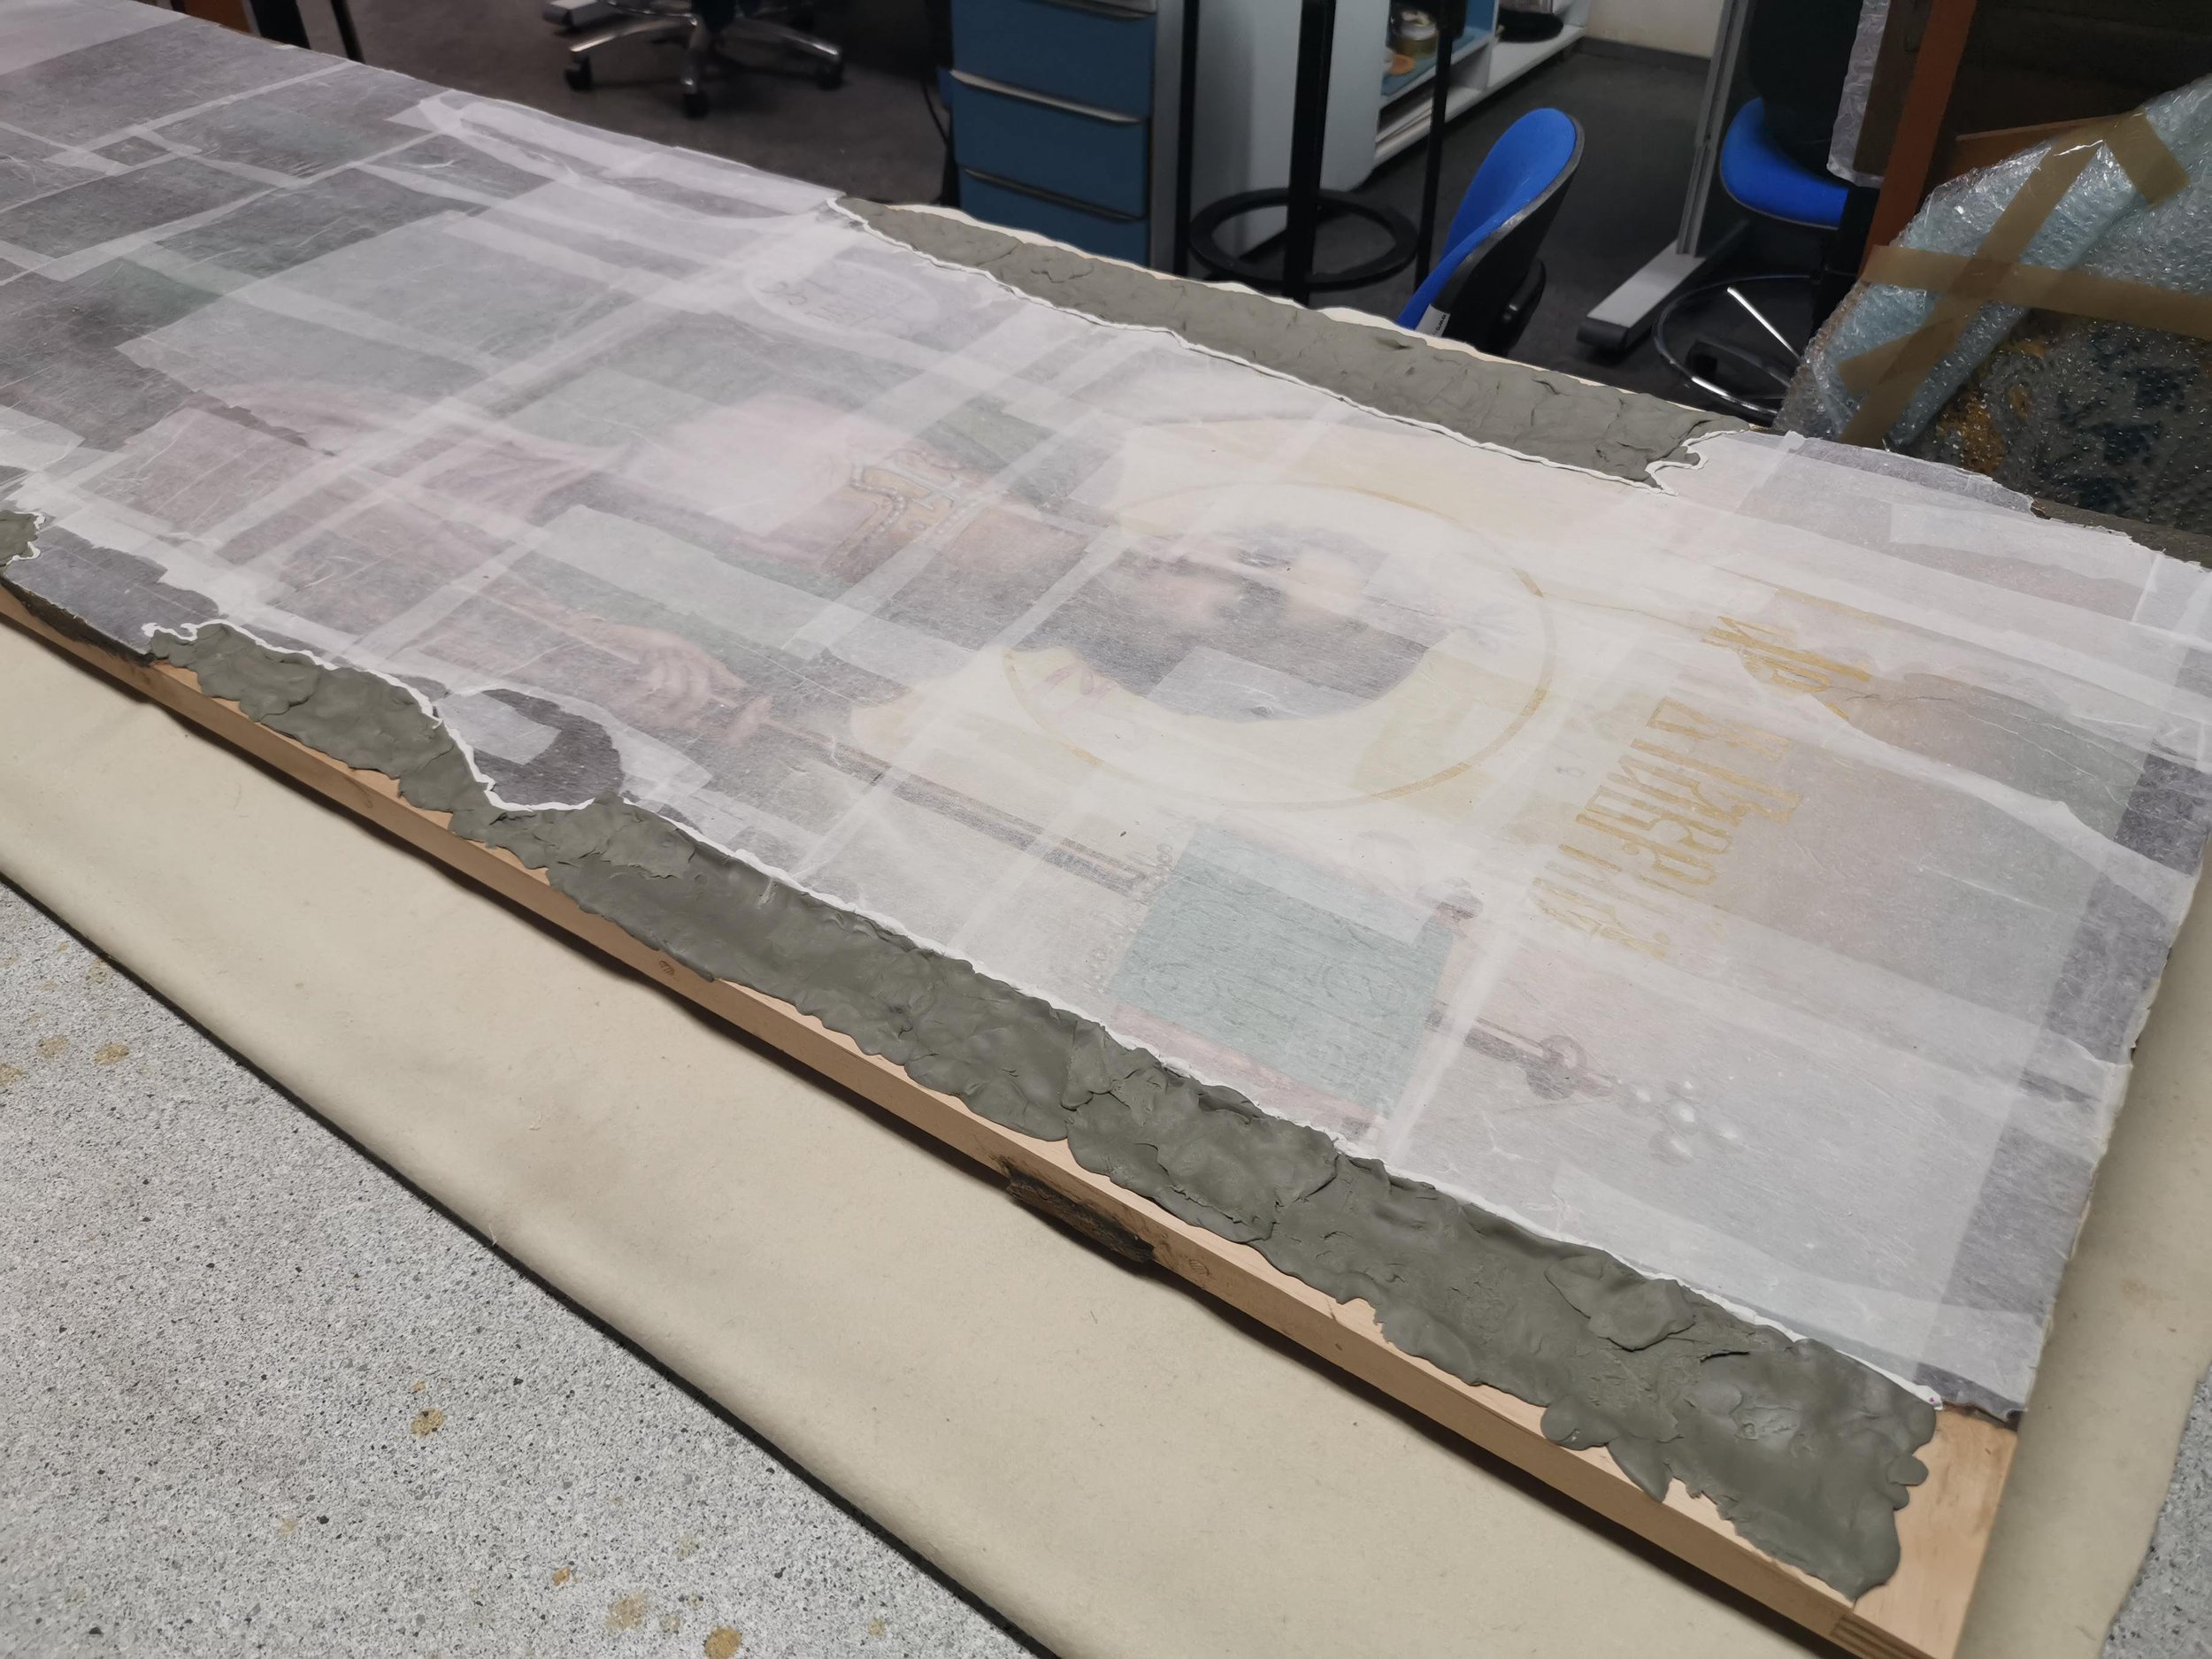
Reconstruction of the borders was accomplished at the back of the icon. A sort of ‘floor’ was created that would help to set the filling properly. This ‘floor’, placed between the preserved border and the newly constructed frame was made of grey sculpting plasticine viide18 ⁽¹⁸⁾ .The about 5mm plasticine layer was moulded on the same level with the painting surface. [ill 27] The icon was turned over so that the plasticine layer became the lowest one of the reconstructed borders. A piece of wrapping foil was placed on the ‘plasticine floor’ to prevent the filling from adhering to plasticine. [ill 28]
Now the layer-by-layer reconstruction of the borders could begin. [ill 29] [ill 30] [ill 31] Five to eight layers of material viide19 ⁽¹⁹⁾were needed for reconstructing the uneven borders with losses. Every layer required from three to seven days for drying properly up. Spatulas and brushes were used for handling the filling stuff. The processing technique had been specially worked out on the replicas: as much water as possible was to be squeezed out of the wet stuff hoping it would not decrease, deform or let loose from the borders when drying. The borders growing layer by layer adhered to the original wood properly and thus the initial oblong shape became restored. [ill 32] The last layer of filling was quite easy to polish when it was dry. When reconstruction of the borders had been completed the cracks and gaps on the reverse side of the icon were treated. Wood-glue was injected into smaller holes and celluloid mass filled bigger cracks and cavities.
Reconstruction of the painting
The back of the icon processed, the object was turned over, the plasticine and foil layers were removed. [ill 33] The prophylactic inset was removed from the surface, the painting was cleaned with distilled water and varnished viide20 ⁽²⁰⁾ .
The loose pieces of the icon painting that had been diligently collected from the bottom of the transporting box were of various shapes and sizes. They had to be reassembled at the right places. The reverse sides of these pieces were carefully cleaned of loose wood-dust. The cleaned pieces if they measured at least 2-4mm thick and so not so easily breaking were in ten different sizes. [ill 34] [ill 35]
When they were clean, even and smooth their proper places were found. Their backs were impregnated with paraloid, bigger pieces twice, the smaller ones only once. Tiny ‘cushions’ were made of filling material to accommodate the pieces.
Next the gaps beneath the painting layers had to be filled. With utmost care wood-glue was injected into them. At several spots the thin paint layer had to be lifted up to get the filling material in. A 2cm deep hole was discovered under paint in the upper end of the painting. Decayed wood was removed and the hole was filled layer by layer. When the last layer of filling was in place, the paint pieces that had been removed earlier were replaced and left drying under press. [ill 36] [ill 37] [ill 38]
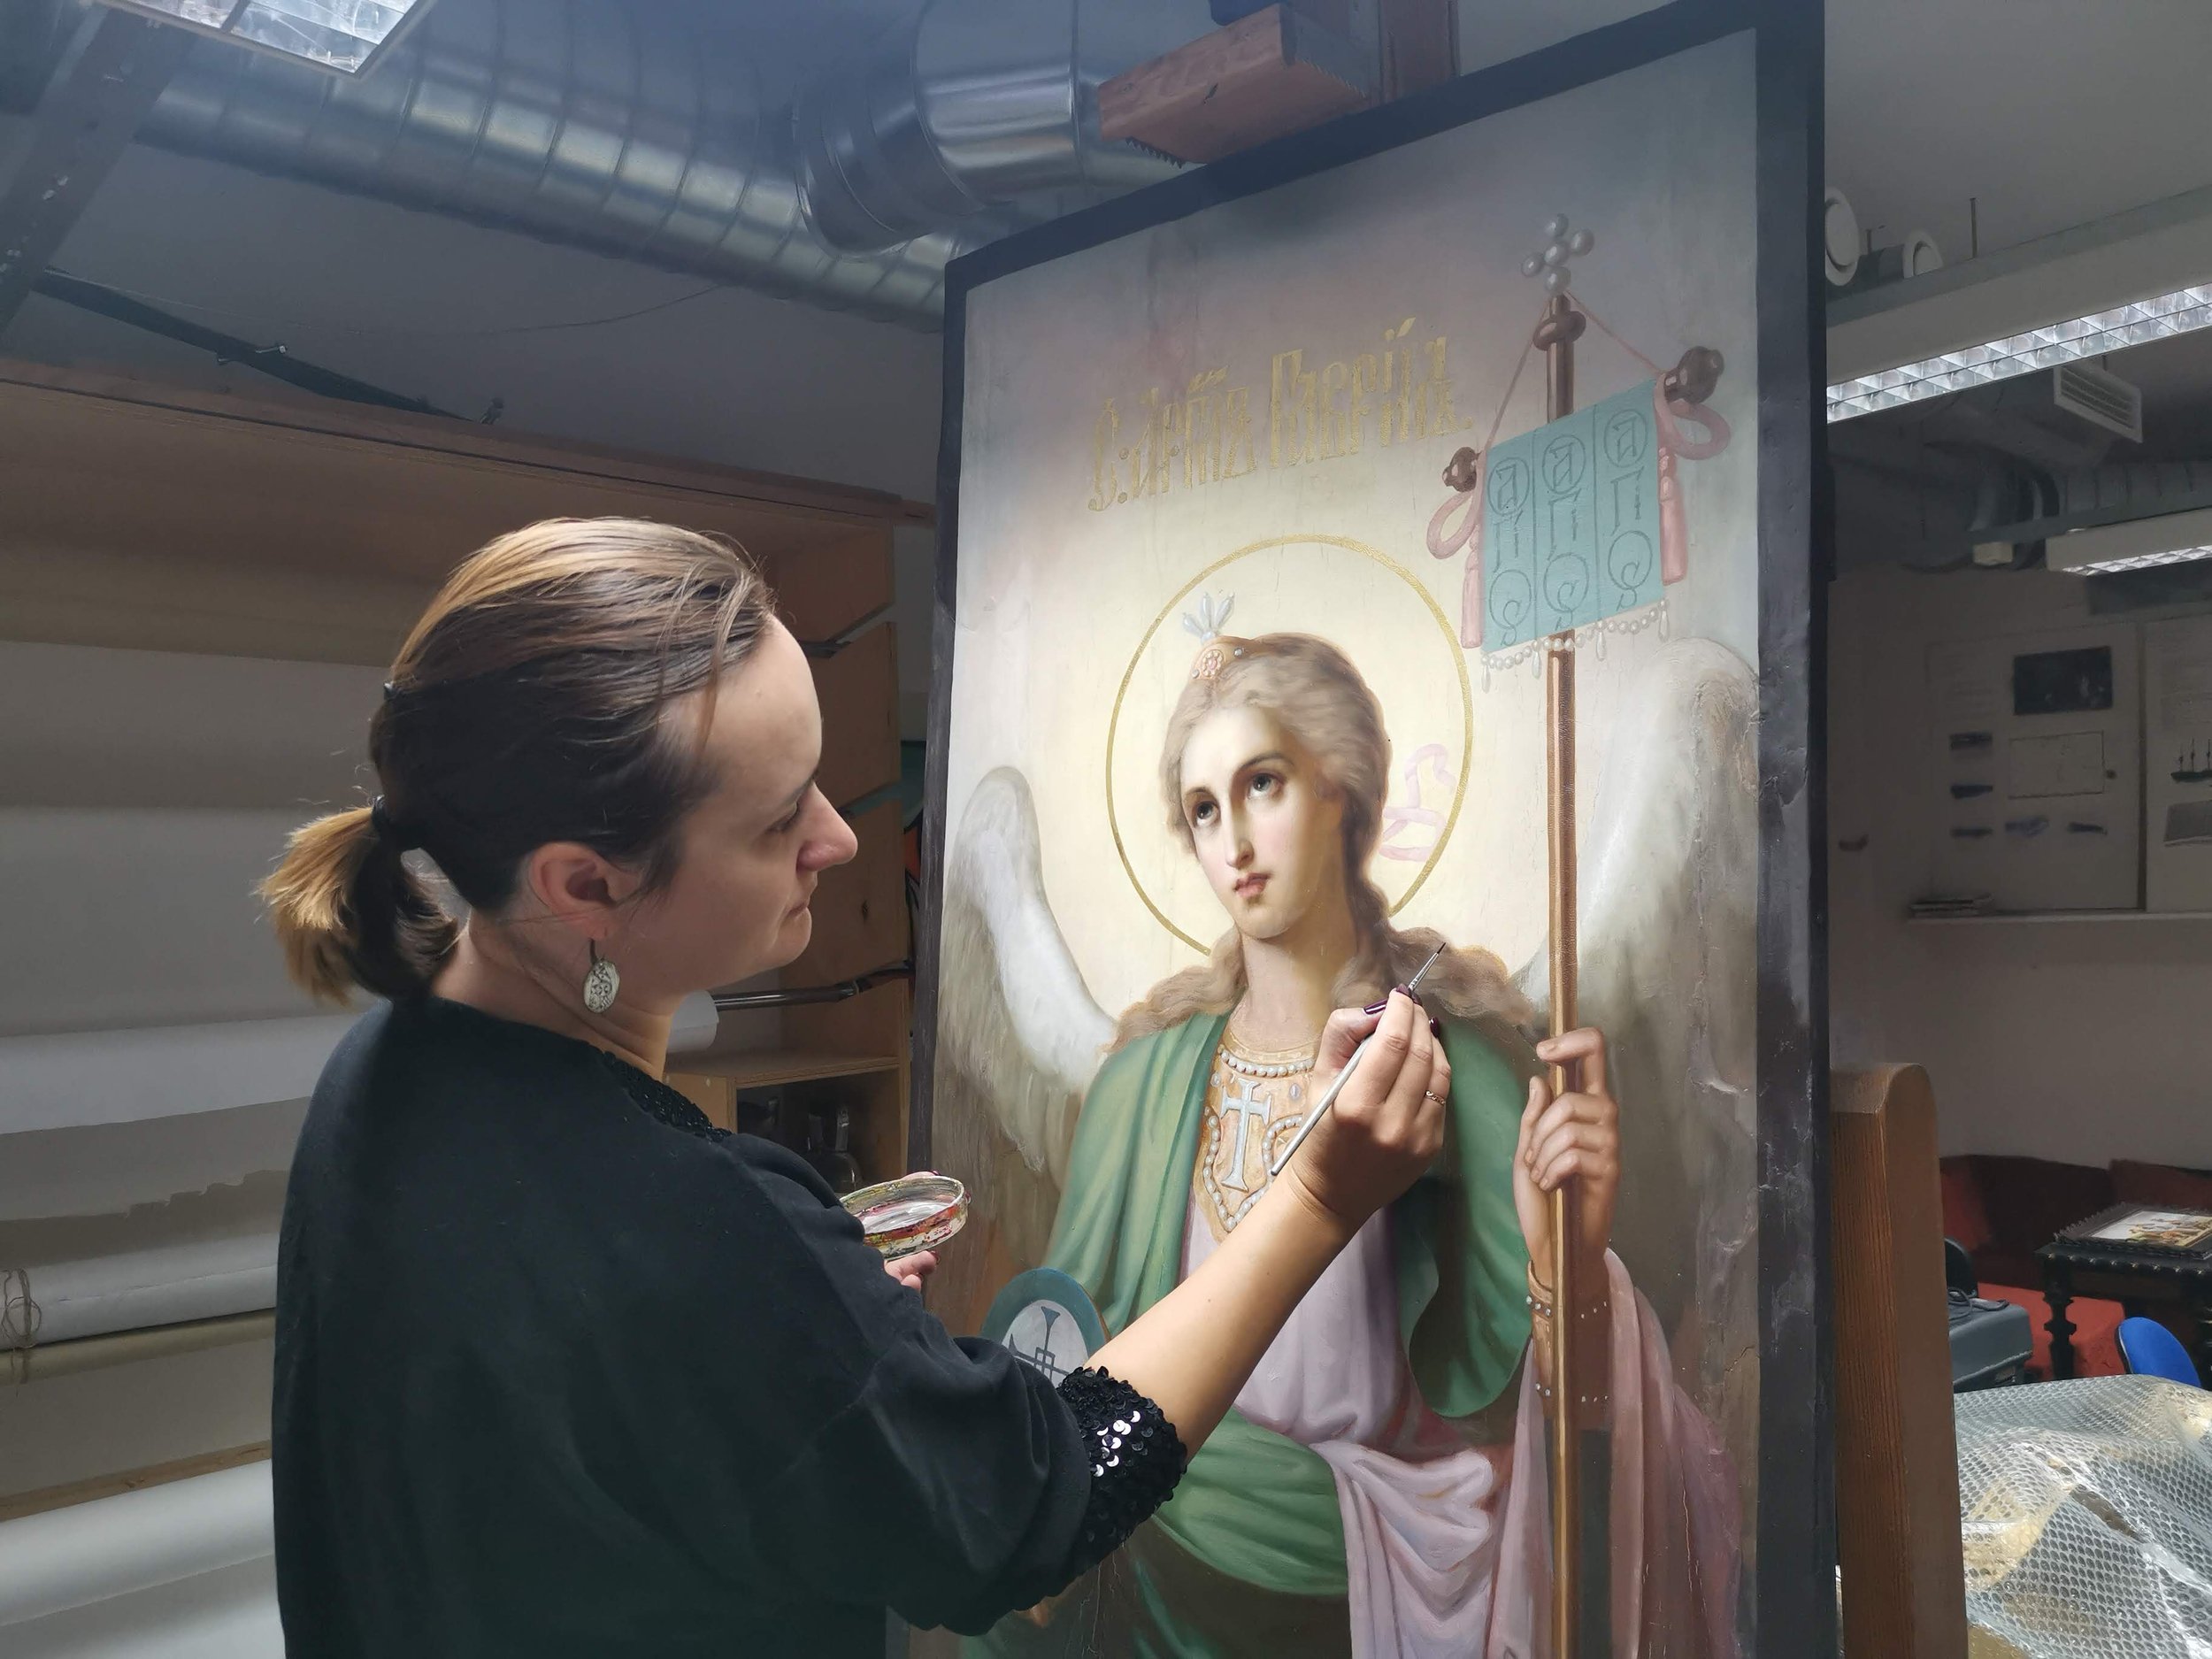
Then it was the turn of the losses in the paint. First, they were filled with primer. As the area with losses was rather extensive, it was decided not to make new primer but to use high-quality snow-white finishing putty Fine Pro Filler viide21 ⁽²¹⁾. It is light, easy to handle, adheres well onto the base, dries fast and can be polished. As the paint losses on the surface were of different depth, they had to be filled with primer layer by layer for 2 to 4 times. Then the restored spots were smoothed down. [ill 39] The missing details (angel’s wings, details of the flag and a part of the background) could be restored owing to earlier photos. Fortunately, there still are photos of the icon in the church taken before the damage occurred. [ill 40] [ill 41] Watercolours were used first, followed by special colours Maimeri Restauro viide22 ⁽²²⁾. [ill 42] [ill 43] The restored icon painting was coated with uniform covering varnish viide23 ⁽²³⁾.[ill 44] [ill 45]
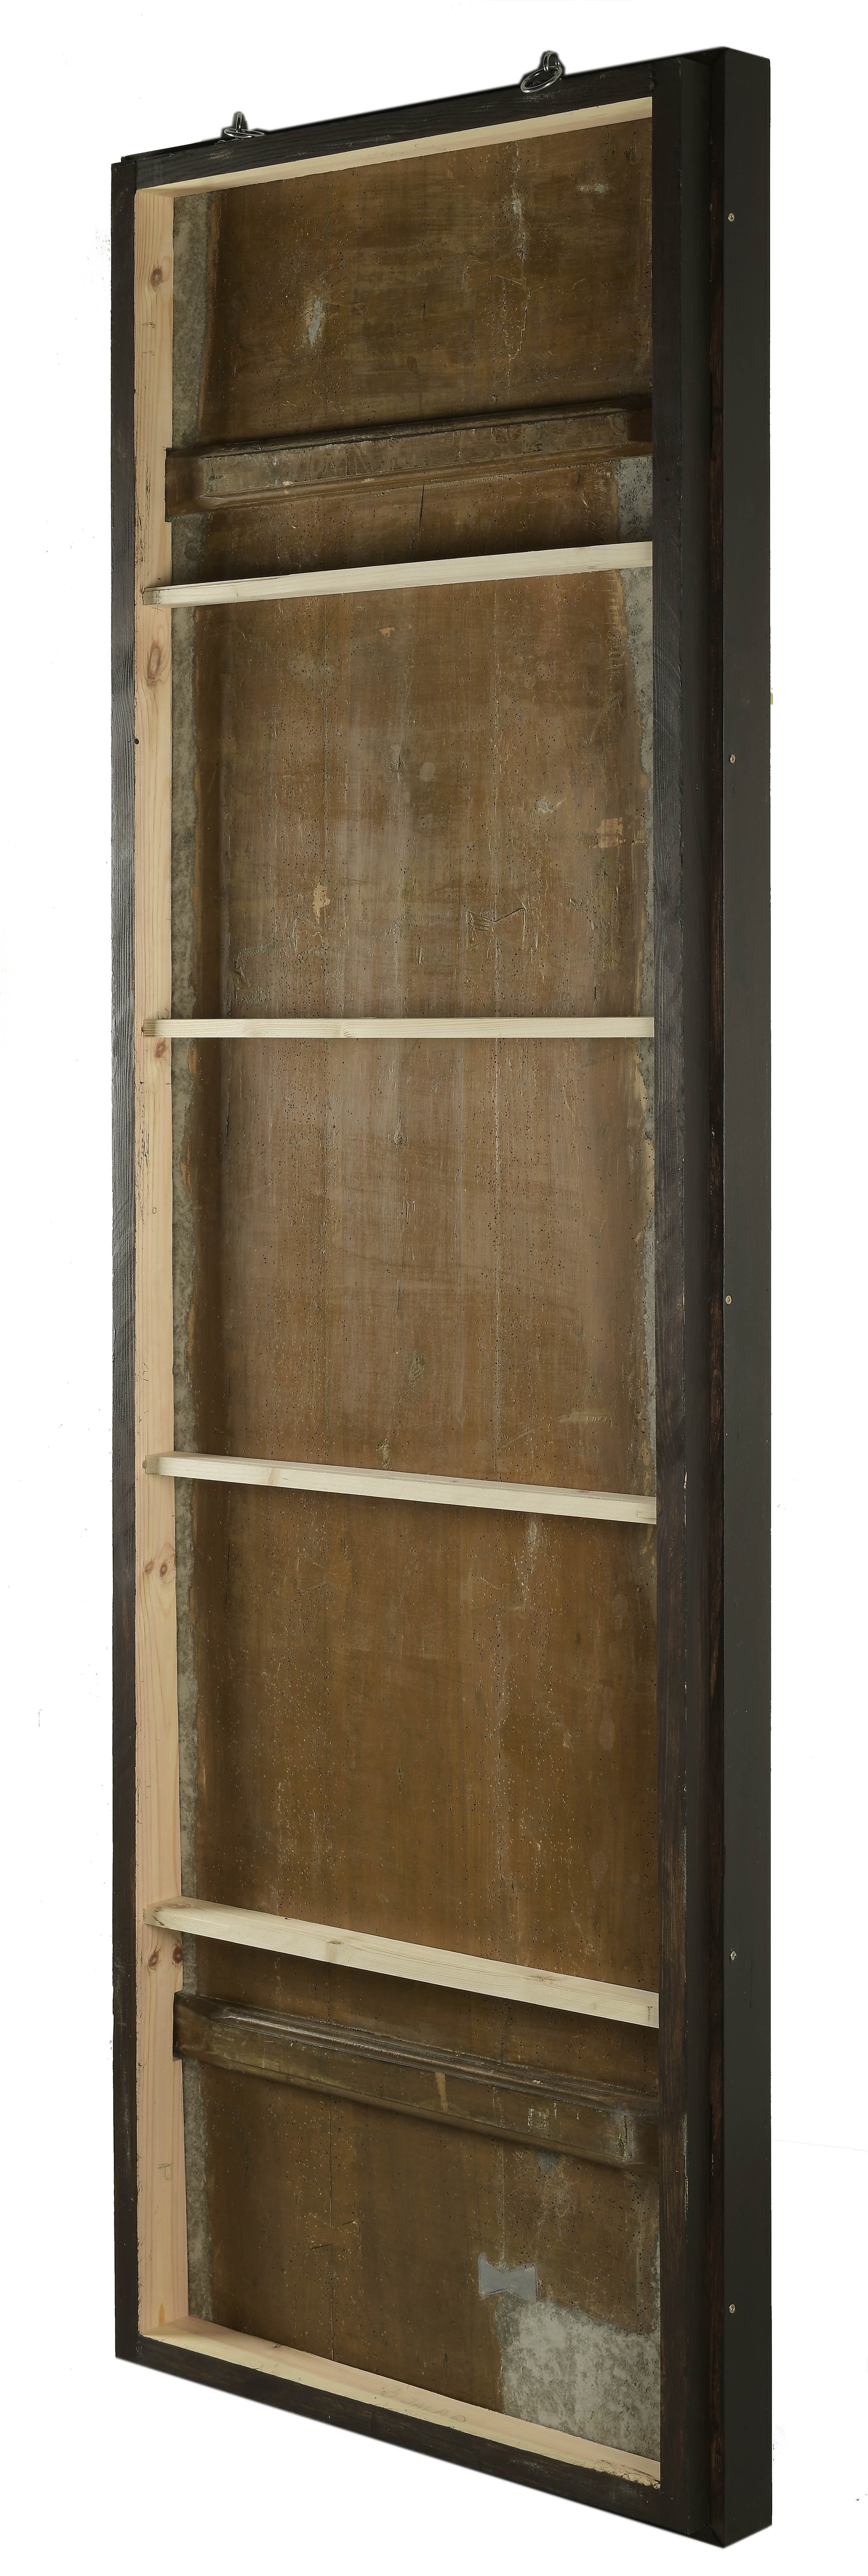
Functional frame
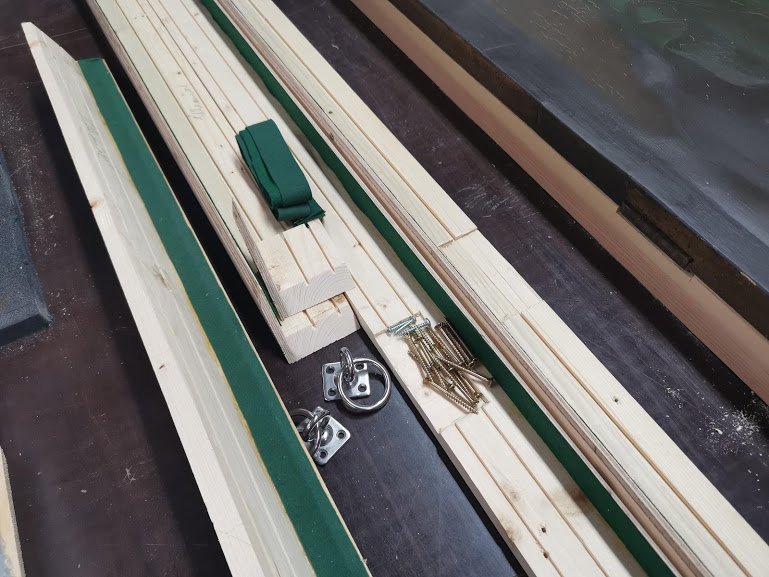
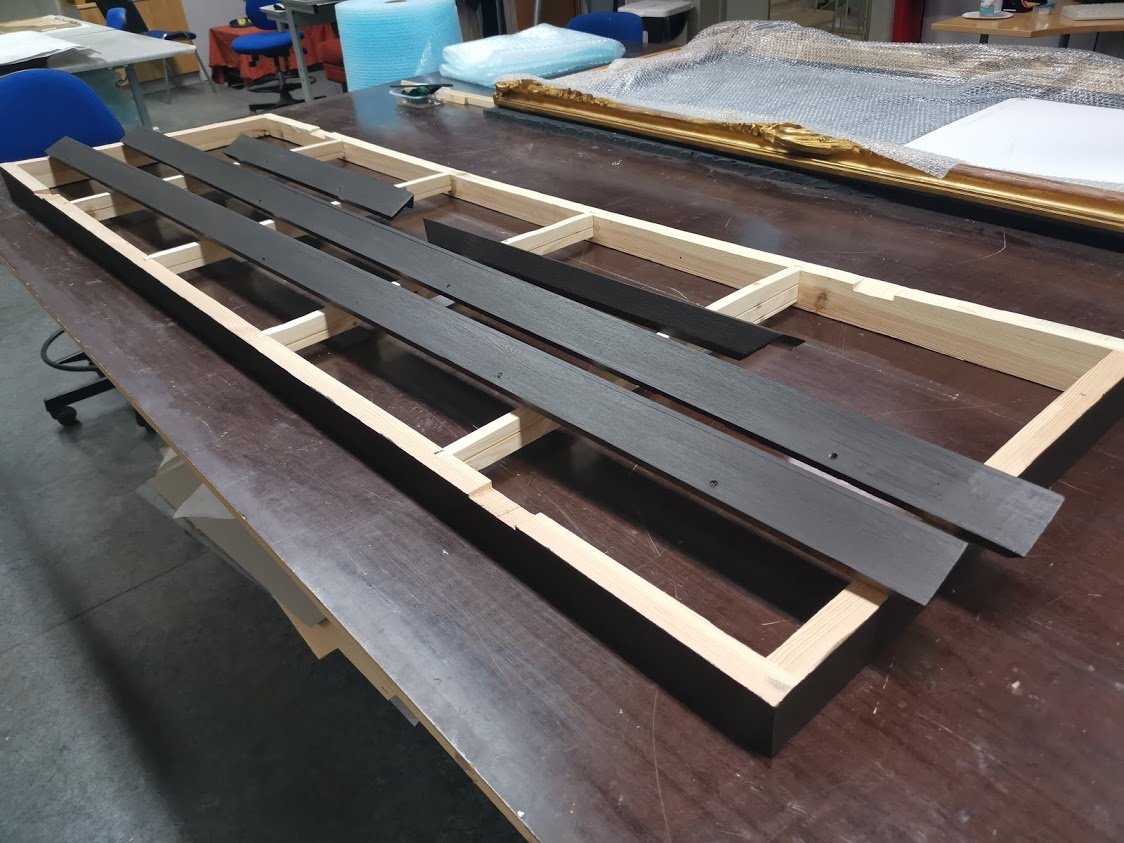
The icon was not returned to the church but taken to the storeroom of the Hiiumaa Museum. A special frame for transportation, storing and further display was constructed for its protection and support. The frame also serves as an encasement for the icon. It was made of 3cm-thick pinewood boards. The four ribs that support the bottom were made of spruce-wood. Fishtail-dowel method was used for joining the ribs and sides. The corners were joined with 10mm beech dowels and glued with PVA. As the icon was noticeably deformed, the supporting construction had to fit its shape, making the whole assignment complicated and time-consuming. The frame and its supports followed convexities and slants of the back precisely. This makes the frame a masterpiece in its own right!
L-shaped spruce-wood and 5mm birch veneer slats were made for fixing the icon on the frame. PVA was used as glue. Cloth strips were placed with hide glue on the inner side of the slats to protect the painting on its borders viide24 ⁽²⁴⁾.[ill 46] The slats were stained brown and screwed to the frame. [ill 47] In case the icon must be taken out of the frame these slats can be easily removed. Two revolving loops were fixed on the upper edge of the frame to allow displaying the icon and its frame on a wall. [ill 48] Once again – the work resulted in a frame that supported the icon on every side and had an integral effect of a piece of art itself.
Summary
The door of the iconostasis from the Hiiumaa Kuriste Apostolic Orthodox Church was in a fractured condition when it arrived at the SA EVM Conservation and Digitisation Centre Kanut. Its conservation and restoration for further exhibiting lasted for a year and a half. The long process required conservators not only skilful, but real masters who understand materials and are open to several innovative solutions. The outcome of their efforts was outstanding. The process had required numerous tests and experiments. It seems that the methods selected were practised for the first time in Estonia. [ill 49] [ill 50] Owing to this complicated object the conservators obtained a lot of useful know-how about various materials. We all learned that even in a seemingly hopeless situation conservators can cope when they are tenacious and consistent but also flexible and resourceful viide25 ⁽²⁵⁾ .
The survey of the icon Archangel Gabriel restoration can be watched on a film.
See: Kanut You Tube channel: https://youtu.be/vGT2O1Gsuh0
12345678910111213141516171819202122232425
References
Here: boring a hole to determine the potency of wood. ↩︎
Large icon-triptych from the Mustvee Town Old Believers’ Congregation (reg. no 21298). The wood was in danger of crumbling, the painting in bad condition. Having treated the panels with insect-repelling chemicals the icons were kept in a fume cupboard for a week. Careful dry- and wet- cleaning of the surface followed, candle-grease splashes were also removed. When the paint and priming layers of the damaged areas had been fixed, the surface was cleansed off the uneven varnish layer and covered with a three-layered prophylactic inset. Now it was possible to process the reverse side – damaged wood was removed and replaced with new. The structure of the initial wood surface was reinforced, the loose pieces of paint on the front were re-glued, priming, interim varnishing and toning followed. After coating the painting with a protective layer the metal nimbi were replaced on the icons. The conservators were Ingrid Pihelgas and Viljar Talimaa of the Kanut. ↩︎
Mikalent paper – equally centripetal 100% celluloid fibre paper produced in Russia in the late 1980s. The present-day mikalent paper is different in properties (the surface too smooth) and not suitable for making insets (Editor’s note) ↩︎
Paraloid B 72, acrylic polymer (Kremer-Pigmente, Germany; kremer-pigmente.com) ↩︎
Solutions with paraloid were made in ethyl-acetate and toluene. ↩︎
For testing the properties of materials, the samples were sawn into pieces, weighed, twisted by hand and polished with sandpaper. It was visually checked whether the samples decreased, deformed, became fragile or changed colour at drying. ↩︎
Antrocel ®–P (cellulose fibre) is produced in Lithuania for making crushed stone-mastic asphalt concrete. Only high-quality wastepaper is re-used for production. Antrocel P industrial parameters: humidity <3%, medium length of fibre1.0-1.1mm, medium diameter of fibre 0.045-0.05mm, pure borax-free cellulose 85-90% (https://www.antrocel.com/products/antrocel-p, importer Estonia. ↩︎
White wood-glue (Franklin Titebond® , Titebond Original, Kremer-Pigmente, Germany). ↩︎
Fine red cork granules (Cork Granulate, Deffner & Johann, Germany). ↩︎
Glass beads used for filling cracks (Glass Beads, Kremer-Pigmente, Germany). ↩︎
Dralon®, white 4mm polyacryl-nitrile fibre (Dralon® Short-Cut Fibres(Polyacryl-Nitrile), Deffner & Johann, Germany). ↩︎
Brown wood-glue (Franklin Titebond®, Titebond Original, Kremer-Pigmente, Germany). ↩︎
Methyl cellulose, MC (Kremer-Pigmente, Germany). ↩︎
Glue made of wheat-meal and water. ↩︎
Acronal 500 D, acrylate dispersion, (Kremer-Pigmente, Germany). ↩︎
Lascaux Medium für Konsolidierung (Kremer-Pigmente, Germany). ↩︎
Universal (polyuretane) aerosol glue Tectane (Netherlands/Poland). ↩︎
Sculpting-plasticine glue Gamma uvletšenij (Russia, importer Estonia). ↩︎
Filling: cellulose fibre, wood-glue Titebond Original. ↩︎
Satin varnish, aerosol (Lefranc & Bourgeois, importer Estonia). ↩︎
Fine Pro Filler fine putty (Eskaro AS, Finland, importer Estonia). ↩︎
Maimeri® colours (Ready-made Colors, Kremer-Pigmente, Germany). ↩︎
Gloss-varnish, aerosol (Lefranc & Bourgeois, importer Estonia). ↩︎
Titebond hide-glue (Titebond Genuine Hide Glue, USA). ↩︎
The Estonian Museum Association together with the Museum Board of the Ministry of Culture and the Cultural Endowment issue museum rats – annual prizes for museums. In the conservation category Maria Lillepruun and Harle Pooman were declared laureates in 2020. Their prize-winning project was ‘Conservation and restoration of the Hiiumaa Kuriste Church iconostasis with the image of Archangel Gabriel’ ↩︎