

Restoration of the Icon Christ Enthroned
Autor: Kristina Aas
Number: Anno 2022/2023
Rubriik: Conservation
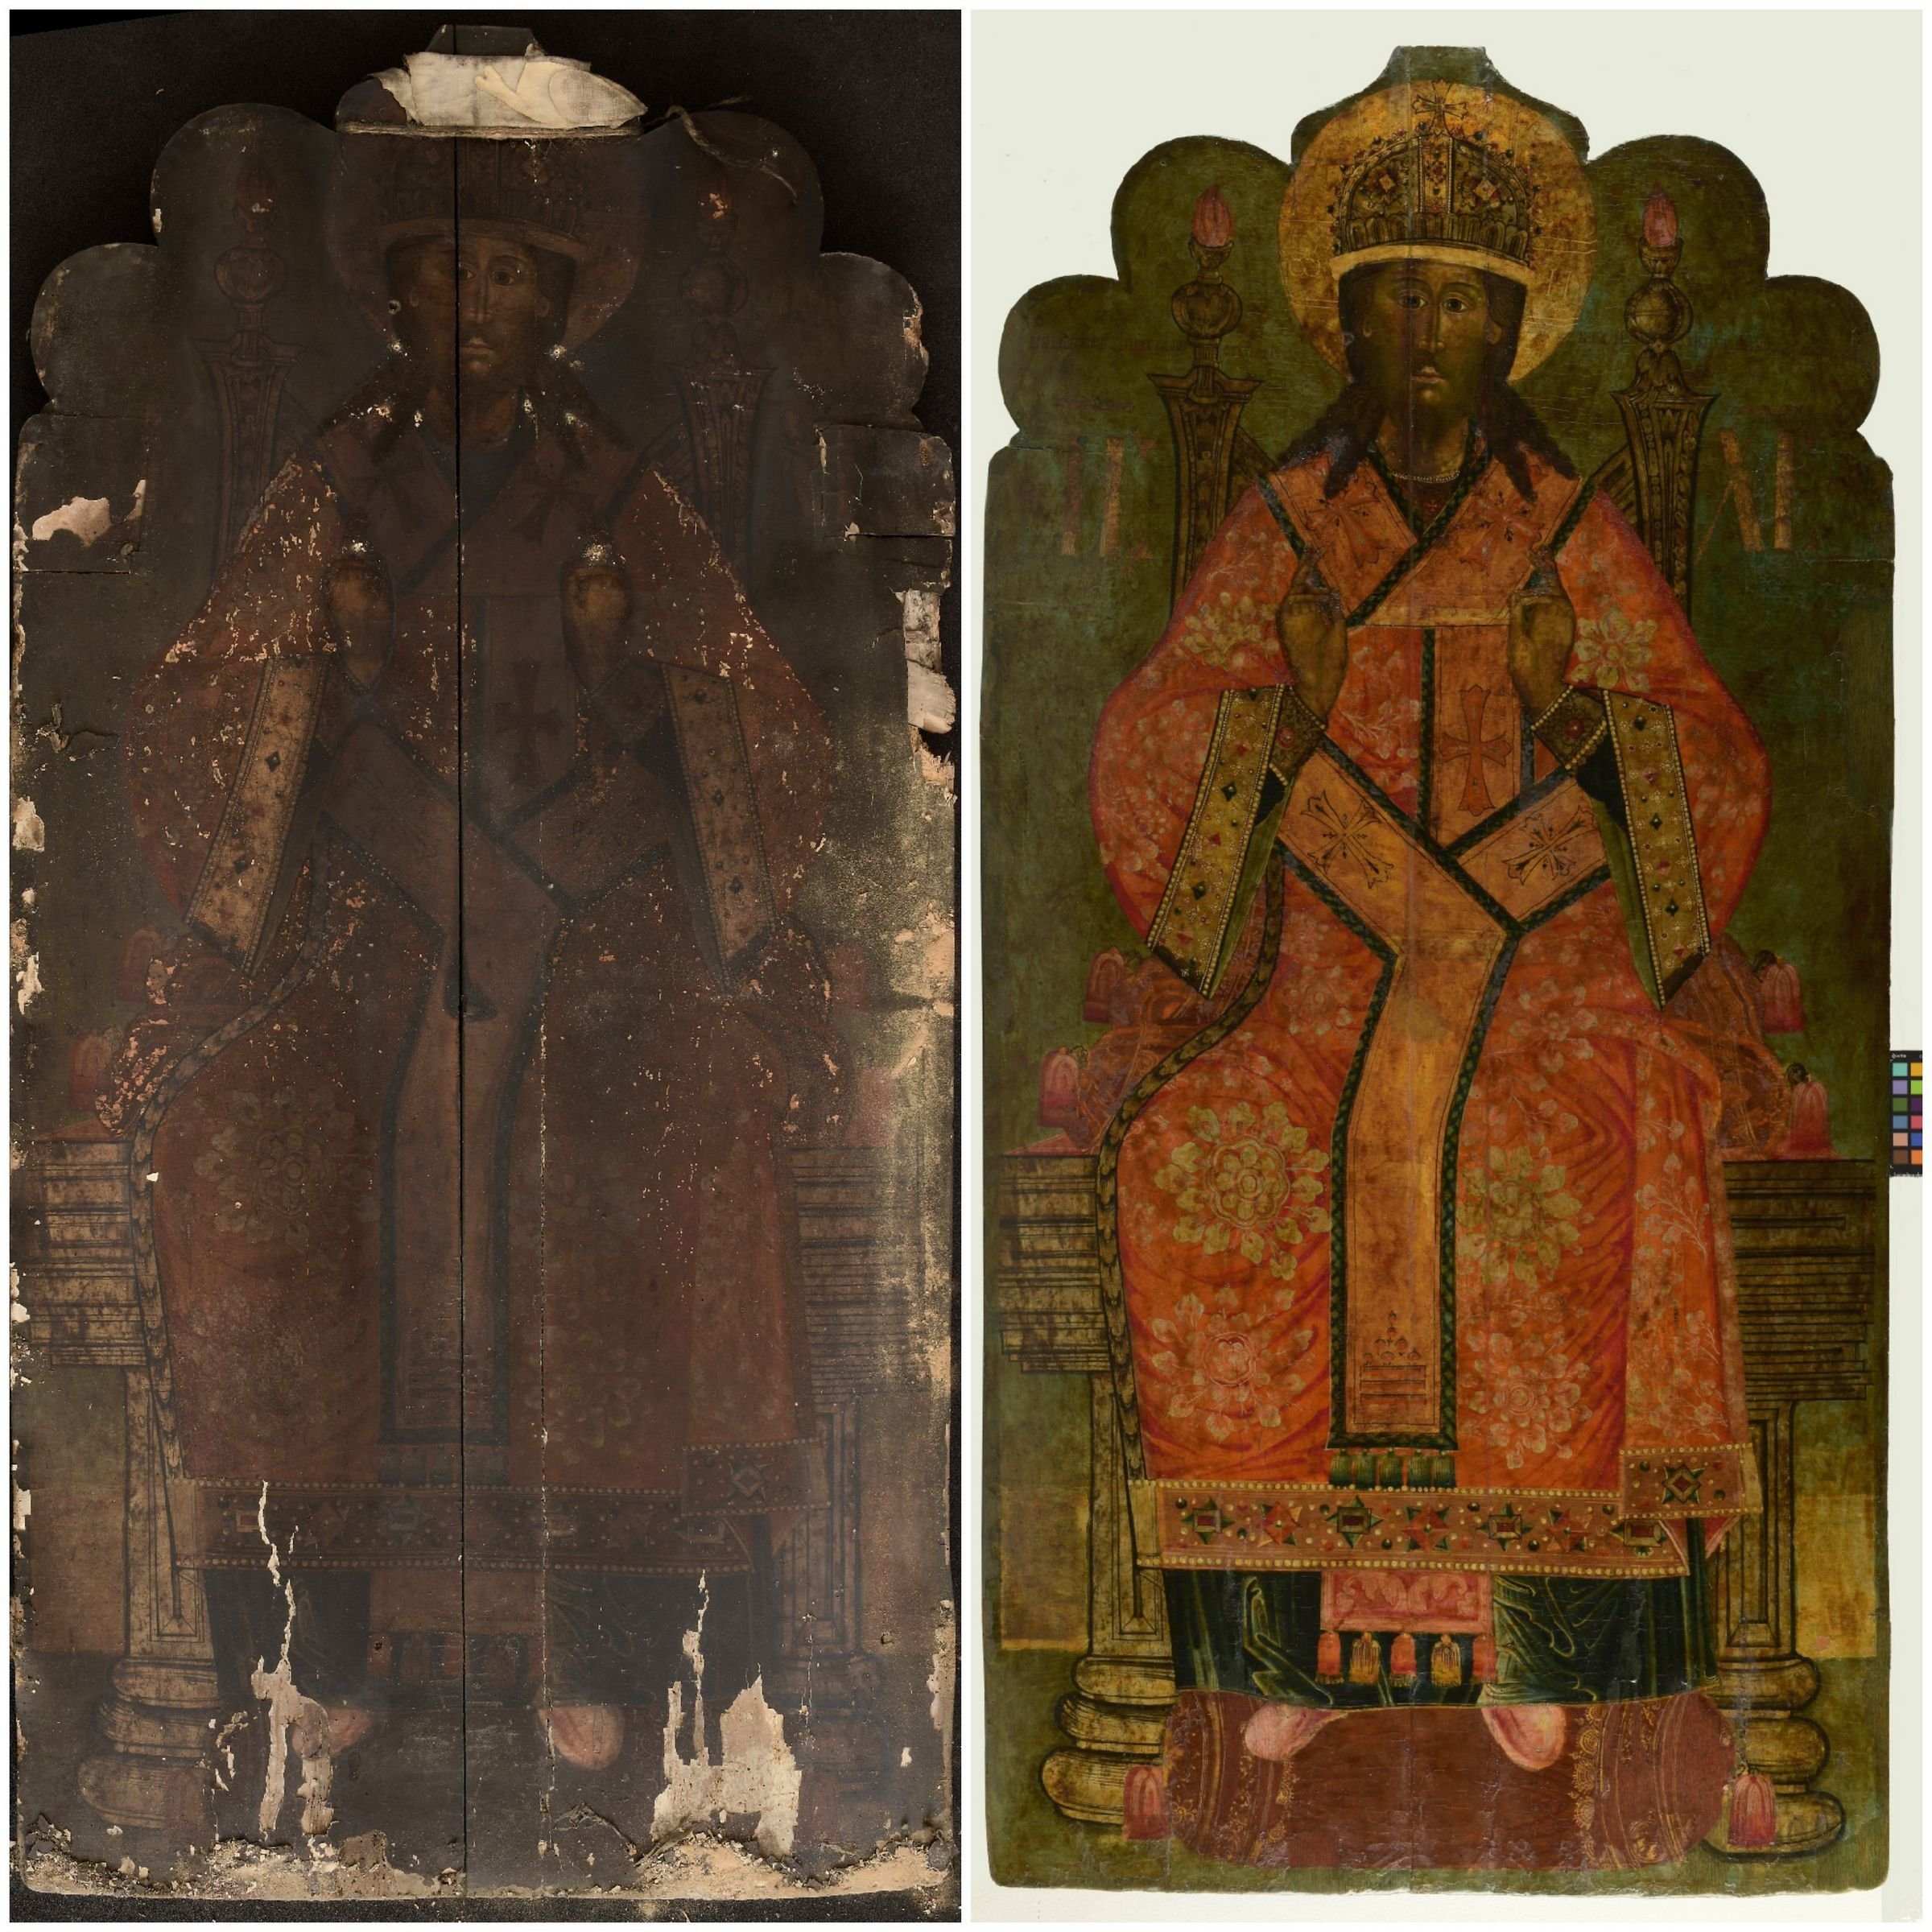
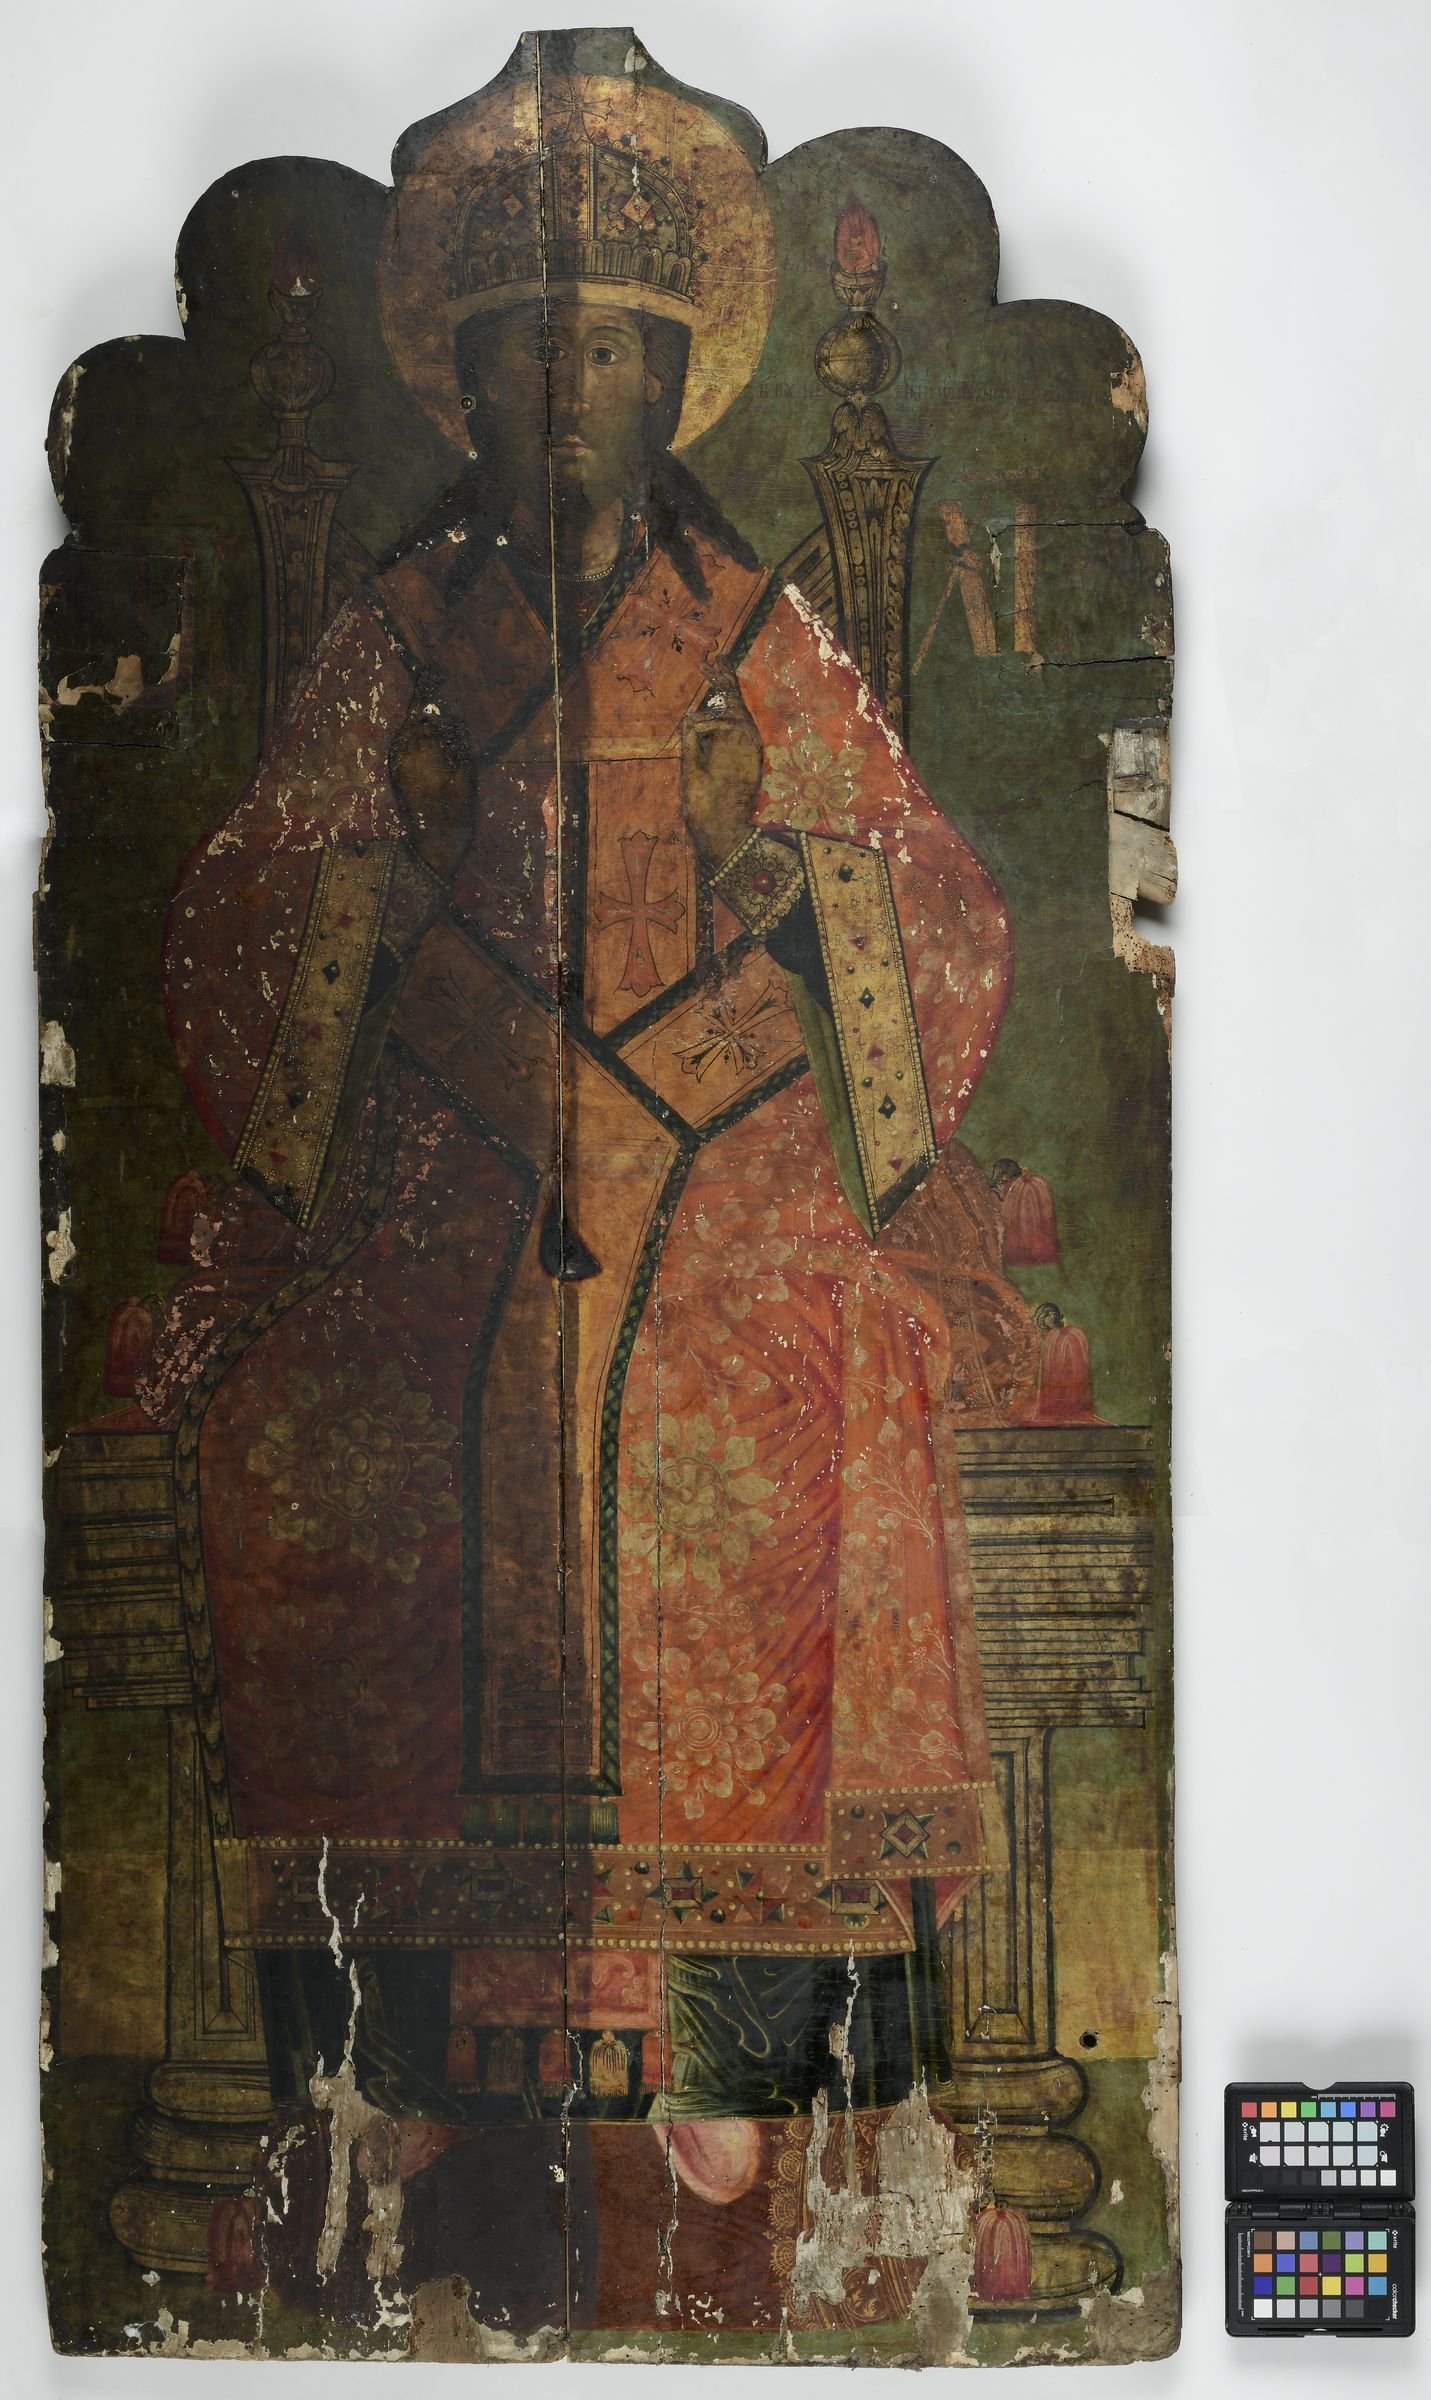

This exceptional example of Russian icon-painting art, dating from the 18th century, belongs to the Tallinn Our Lady of Kazan’s Birth Church. For quite some time the icon was in the chancel and approachable only for a selected few. Now it has been decided to display the restored icon in the nave of the church so that everybody interested could see it.
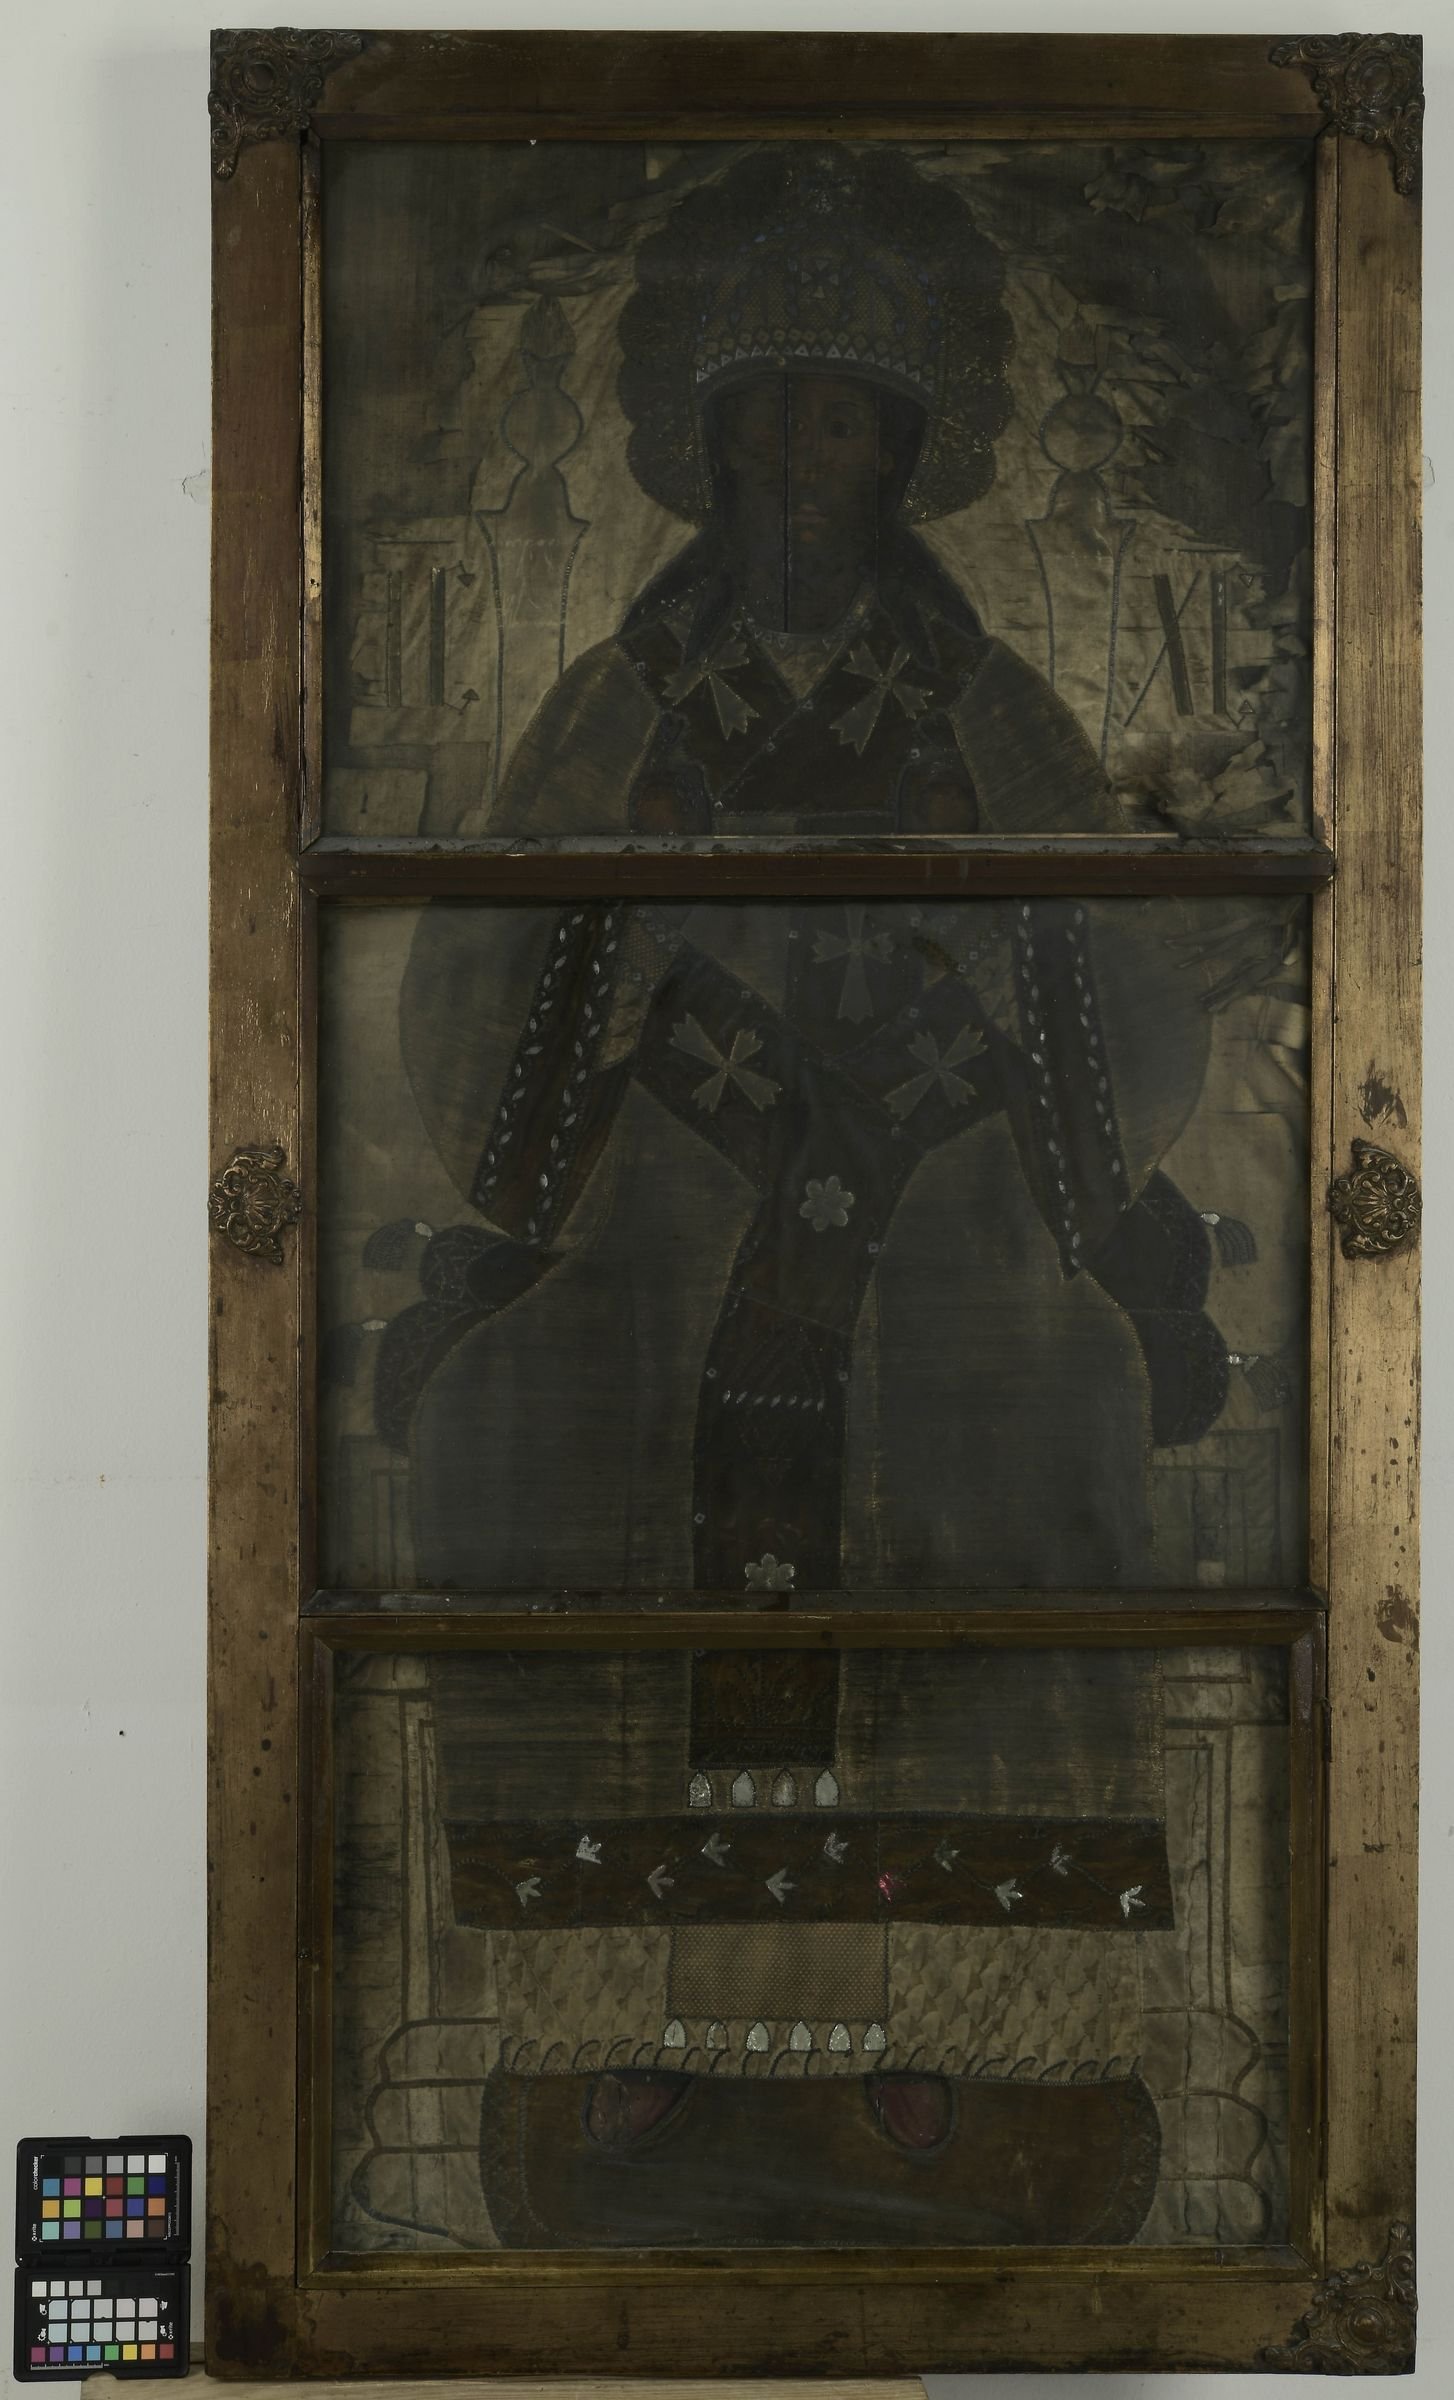
The icon depicts crowned Christ in a bishop’s apparel sitting on a stately throne, thus representing the King of the kings blessing the faithful [ill 1].
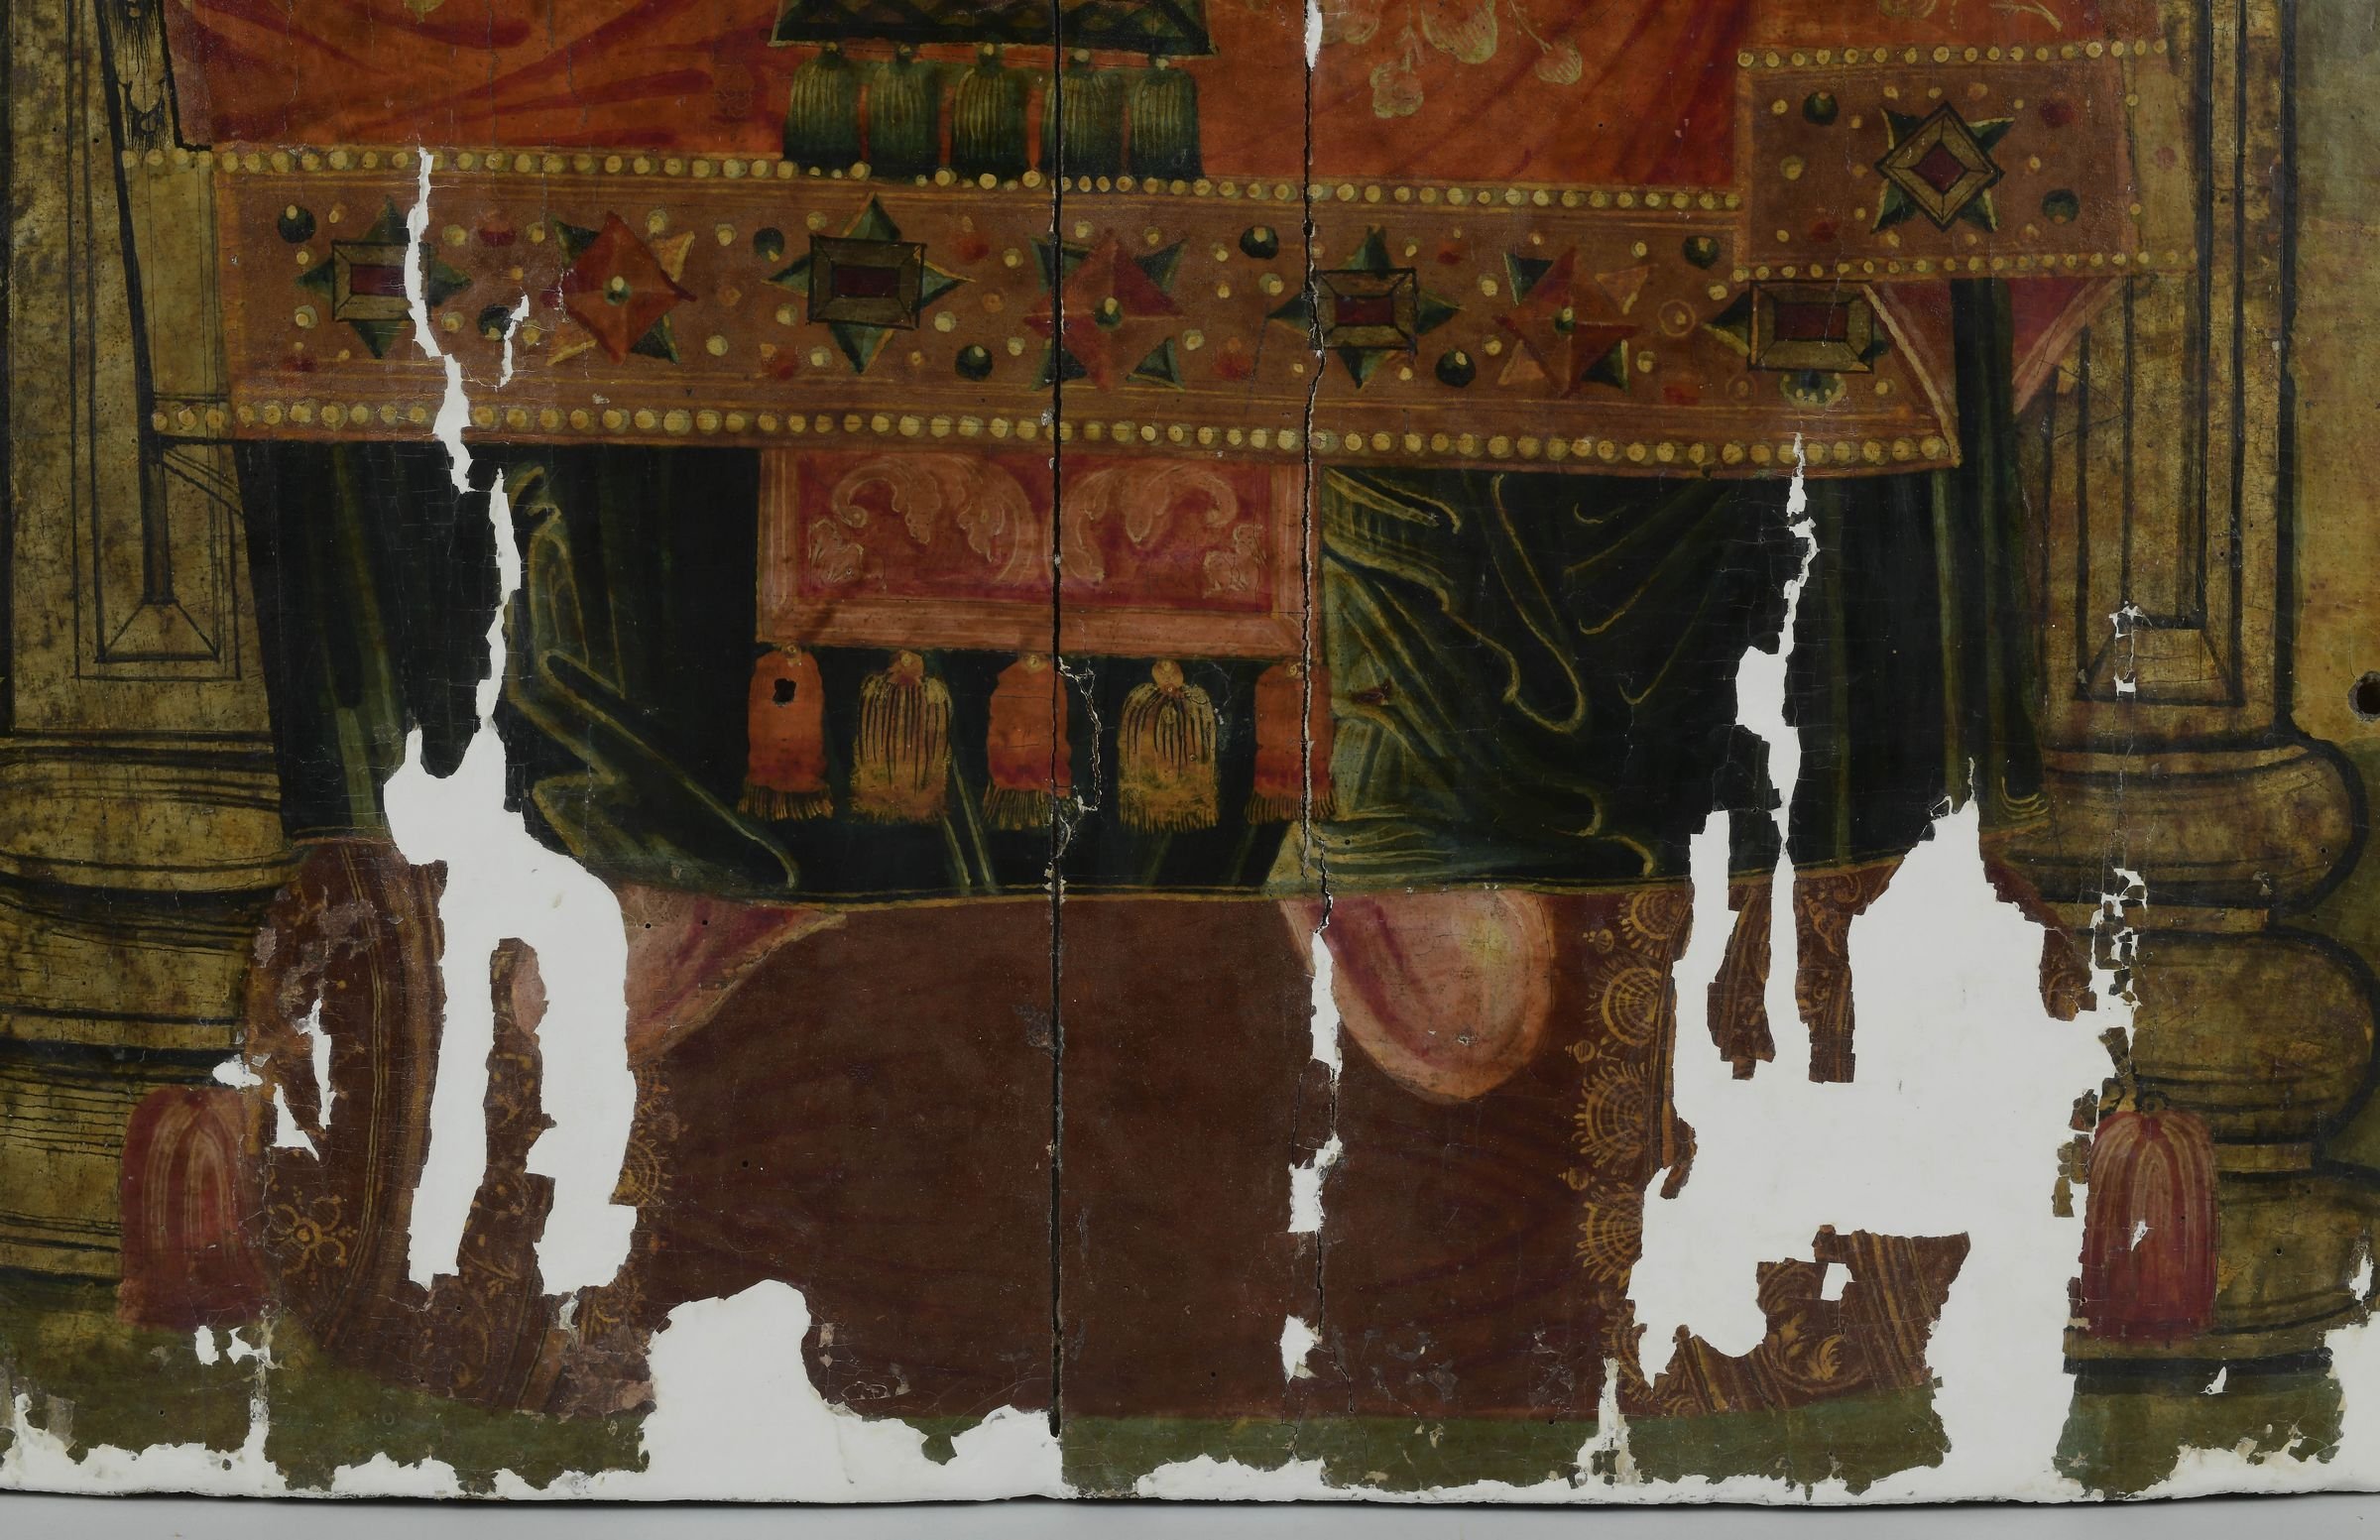
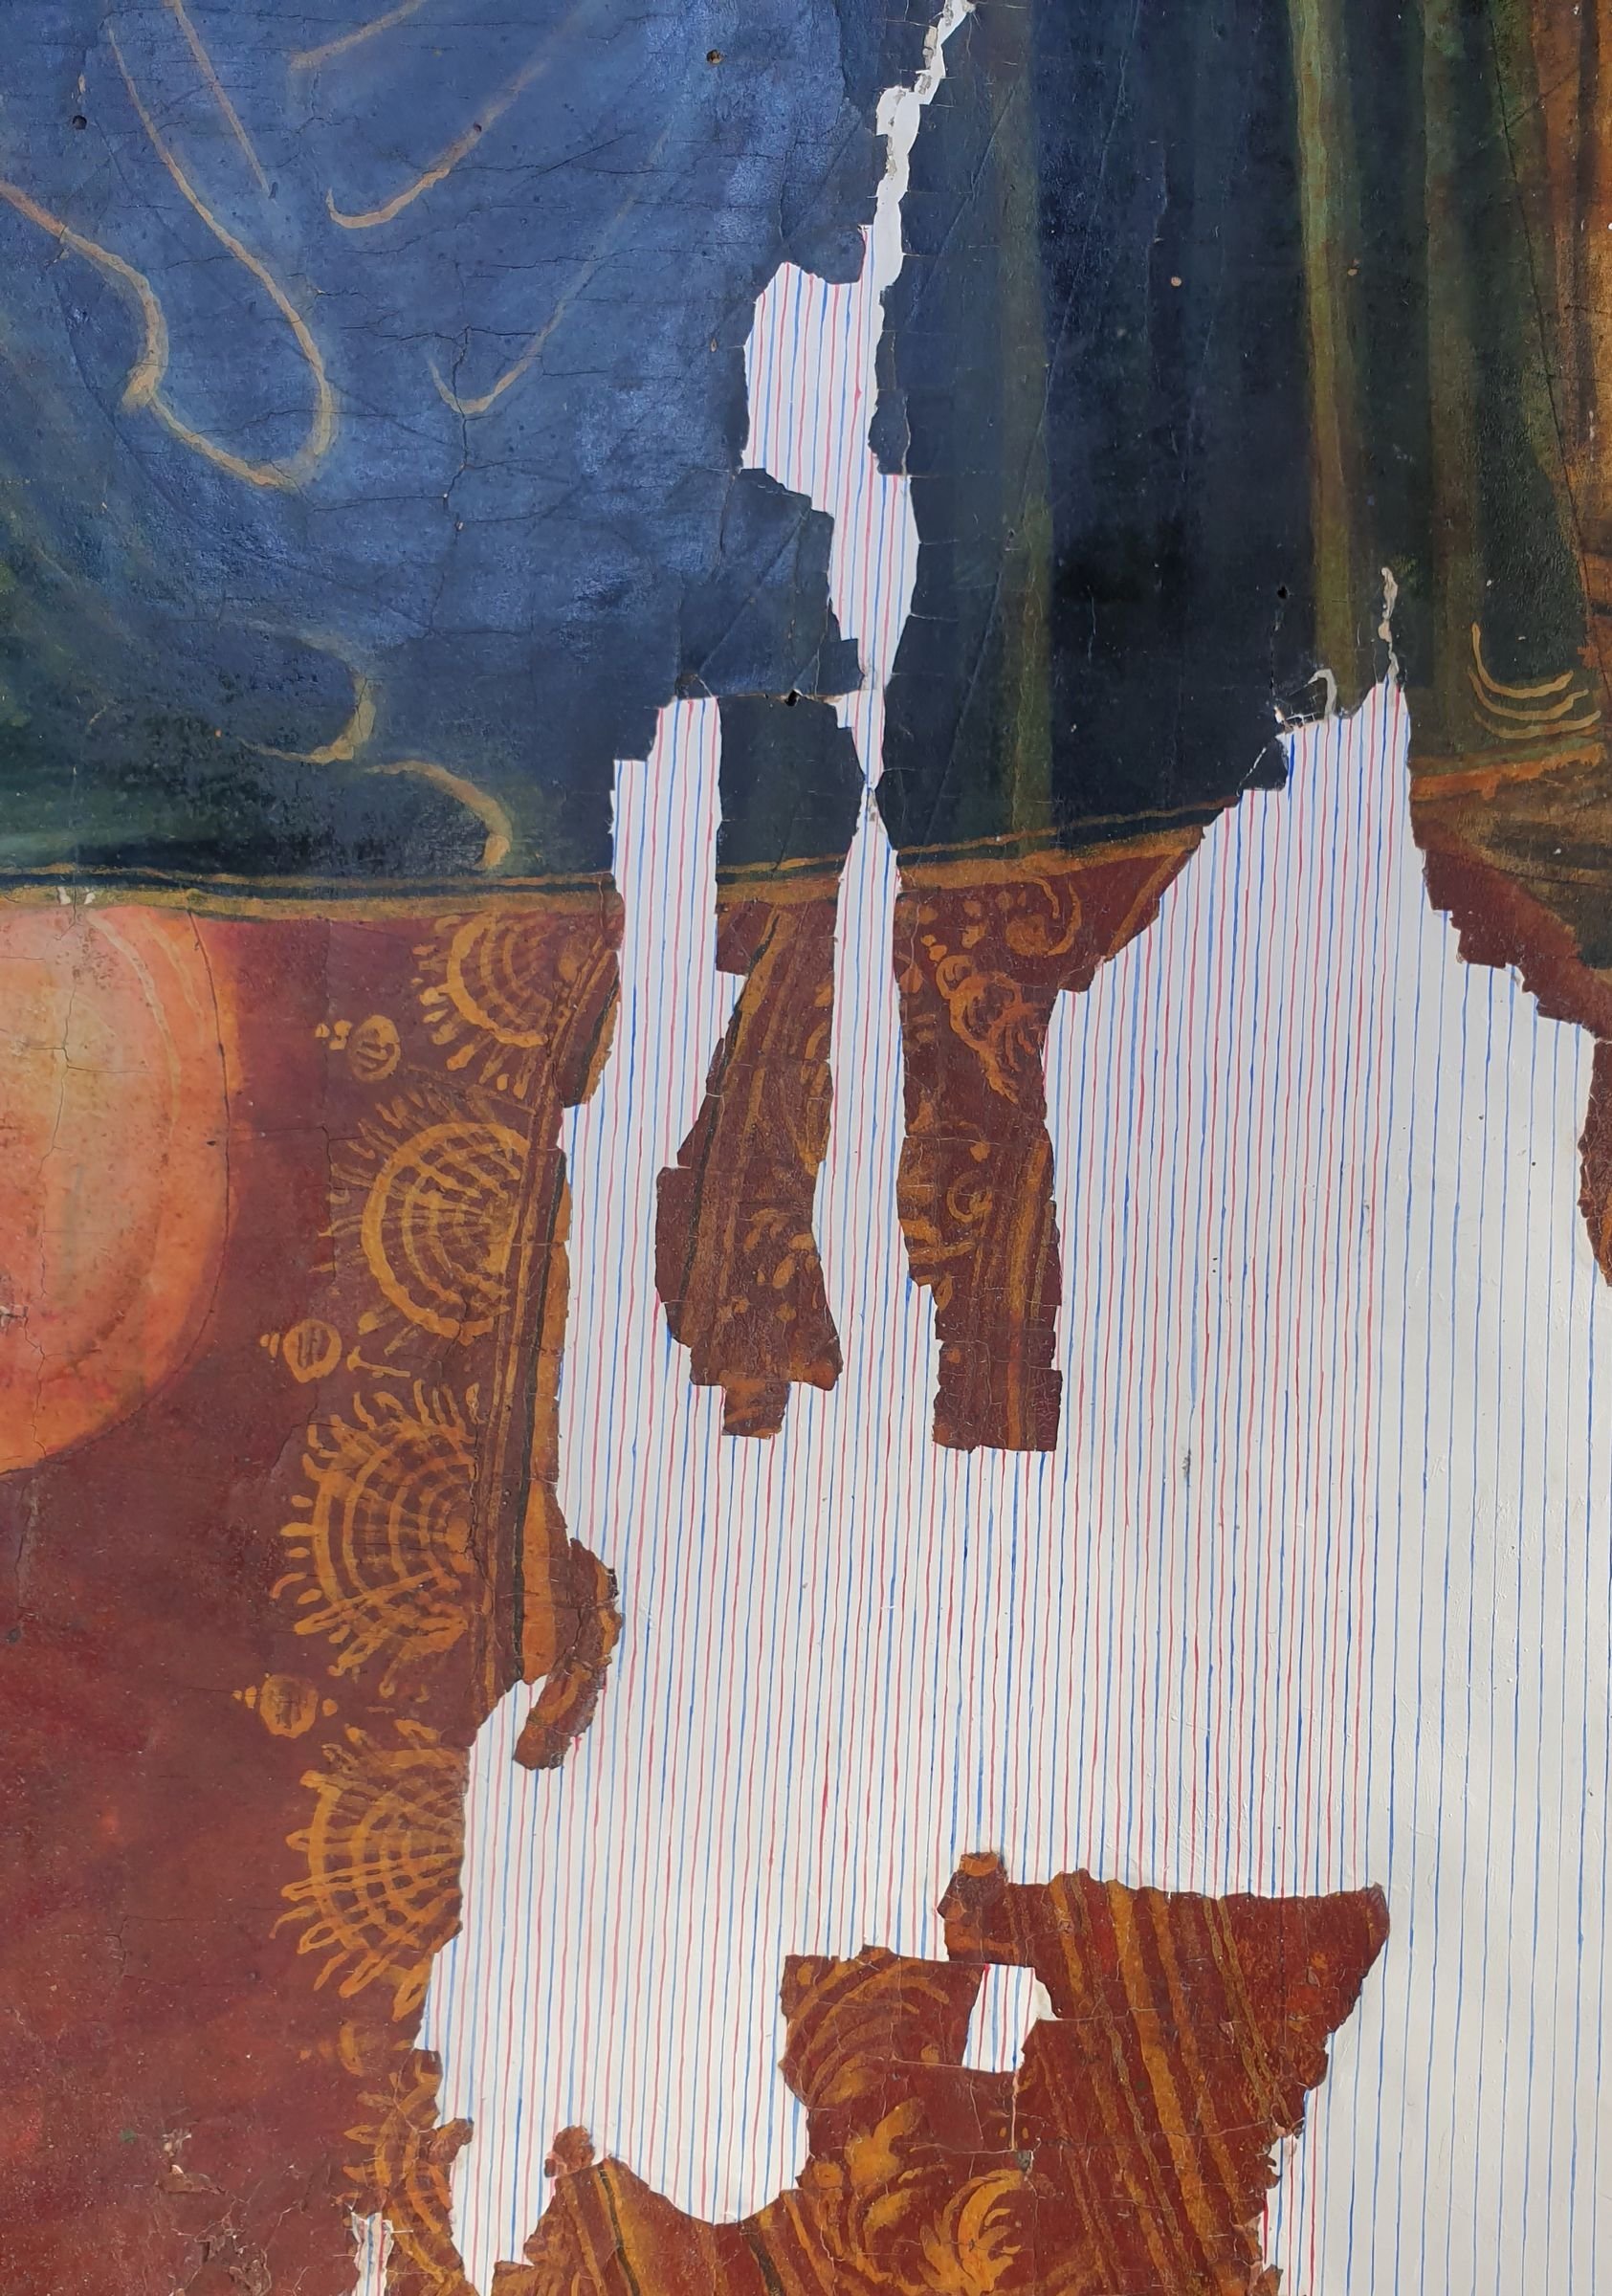
Condition
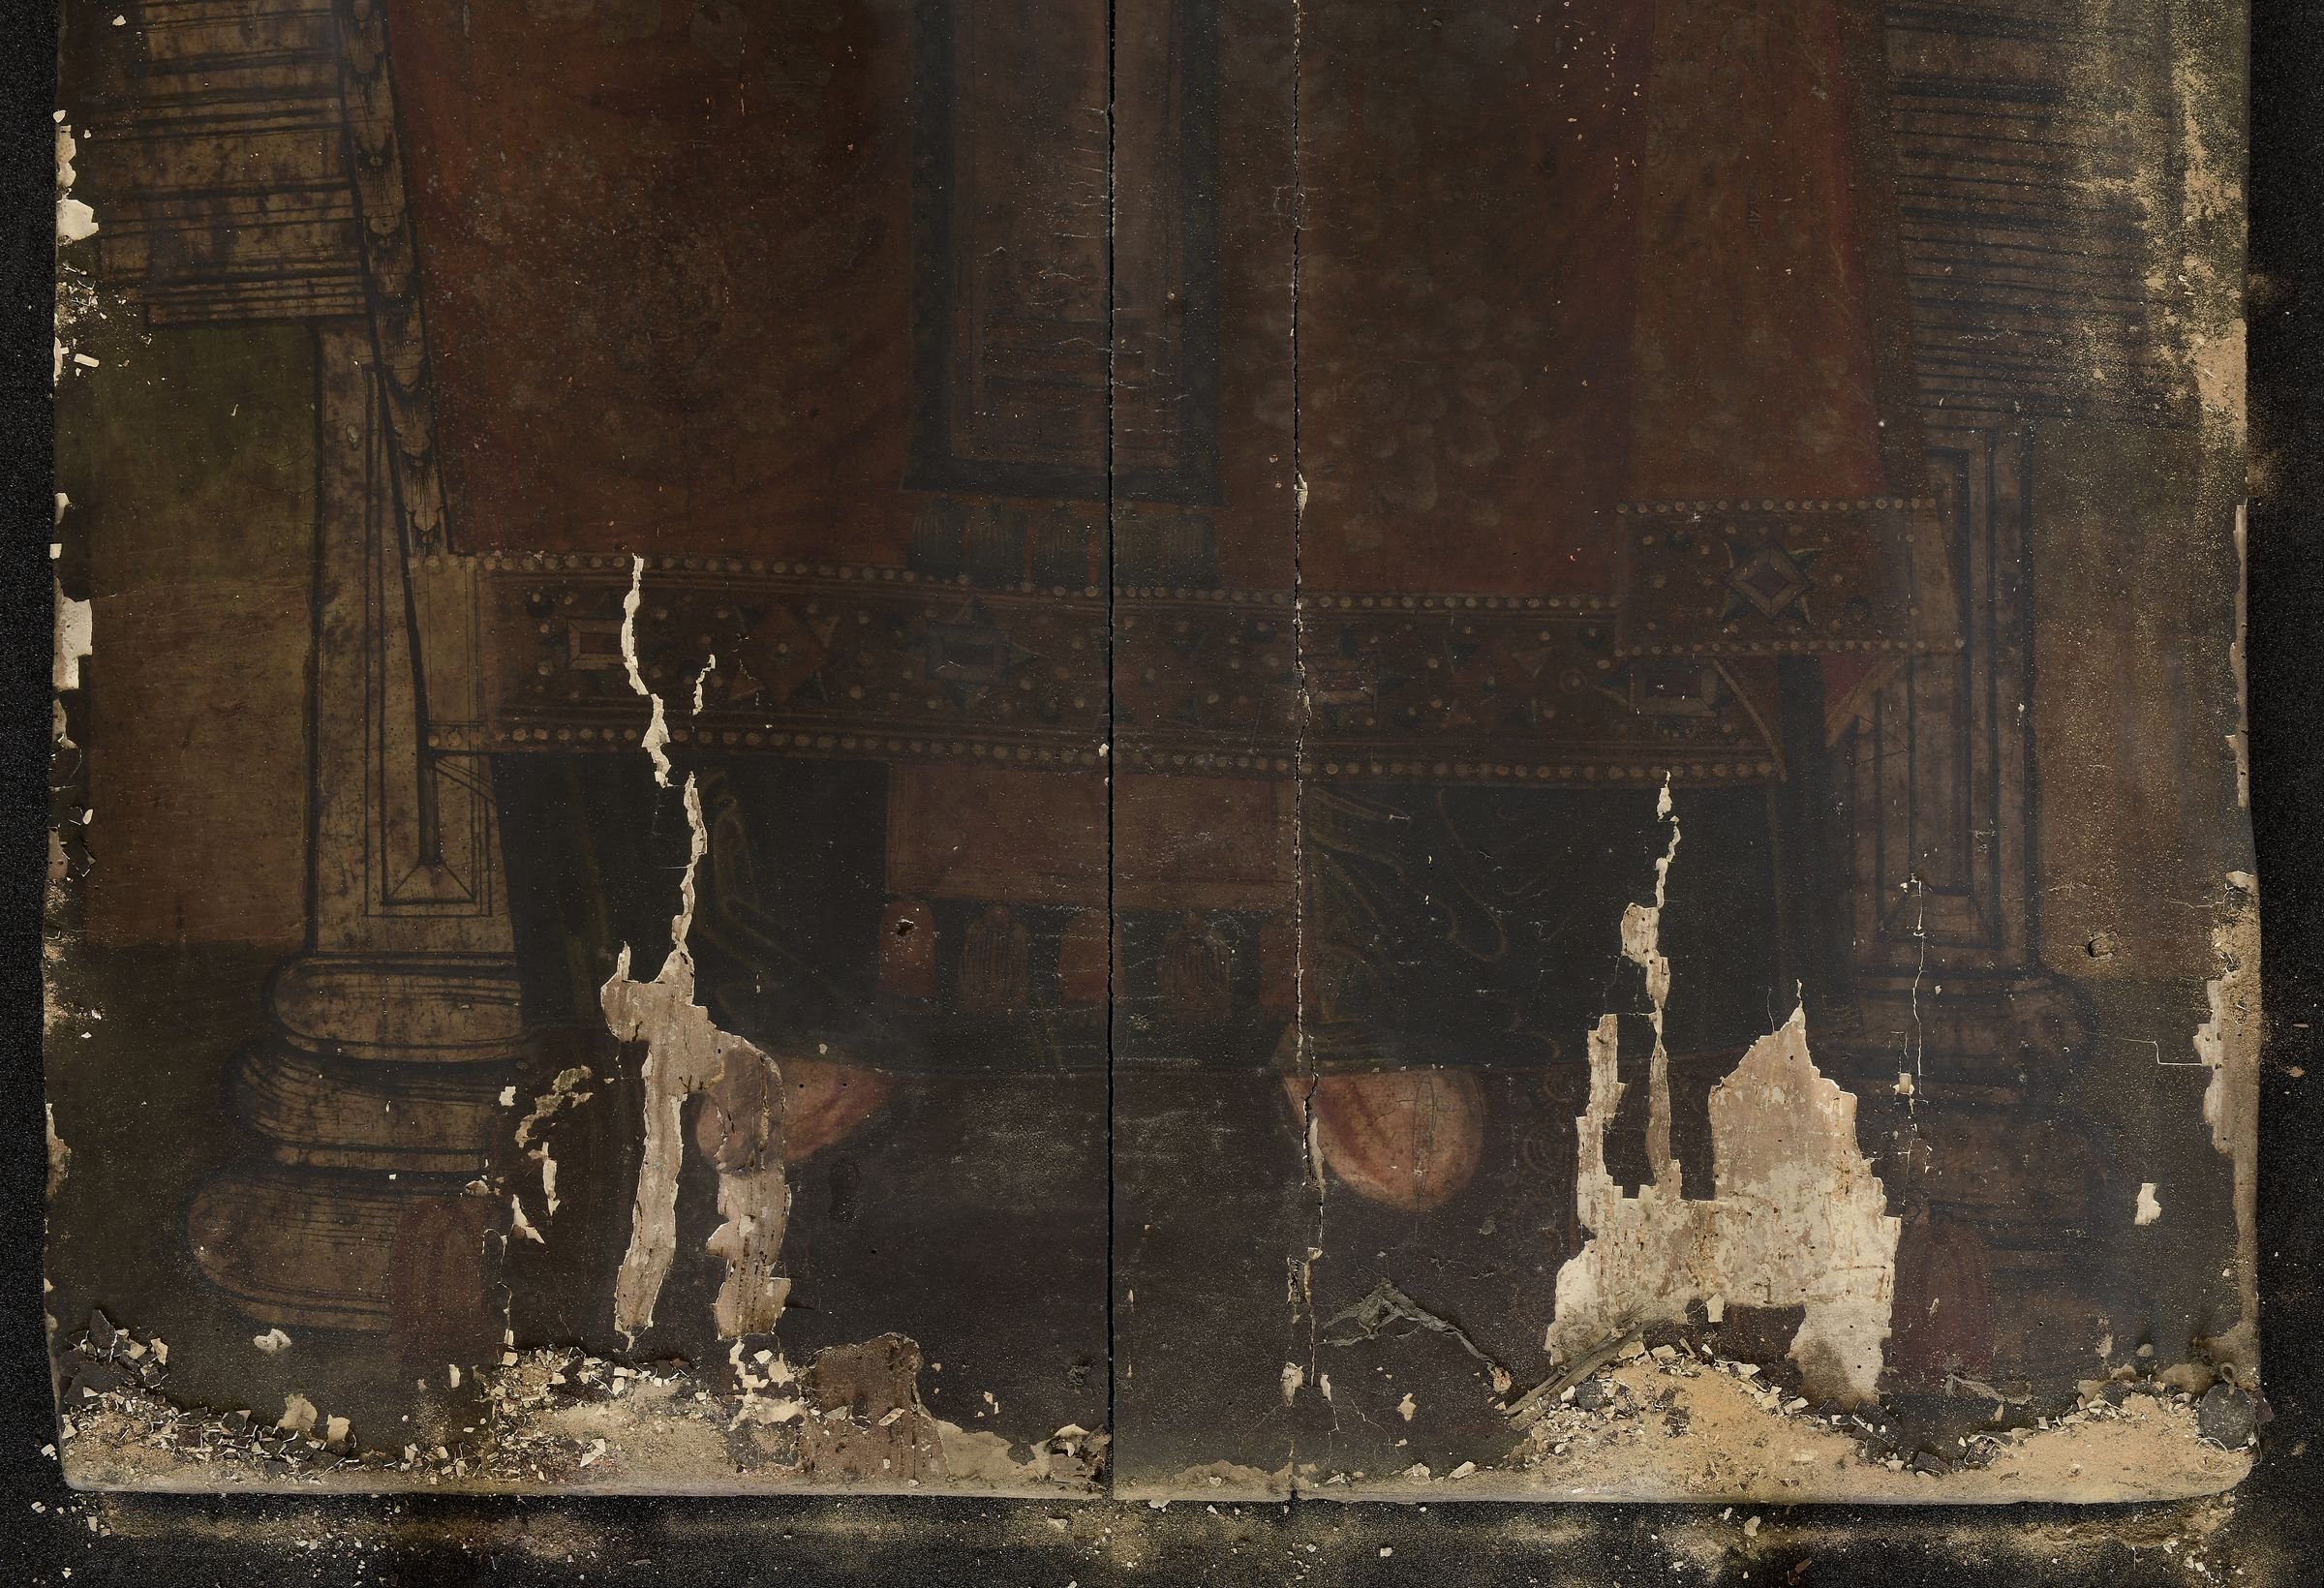
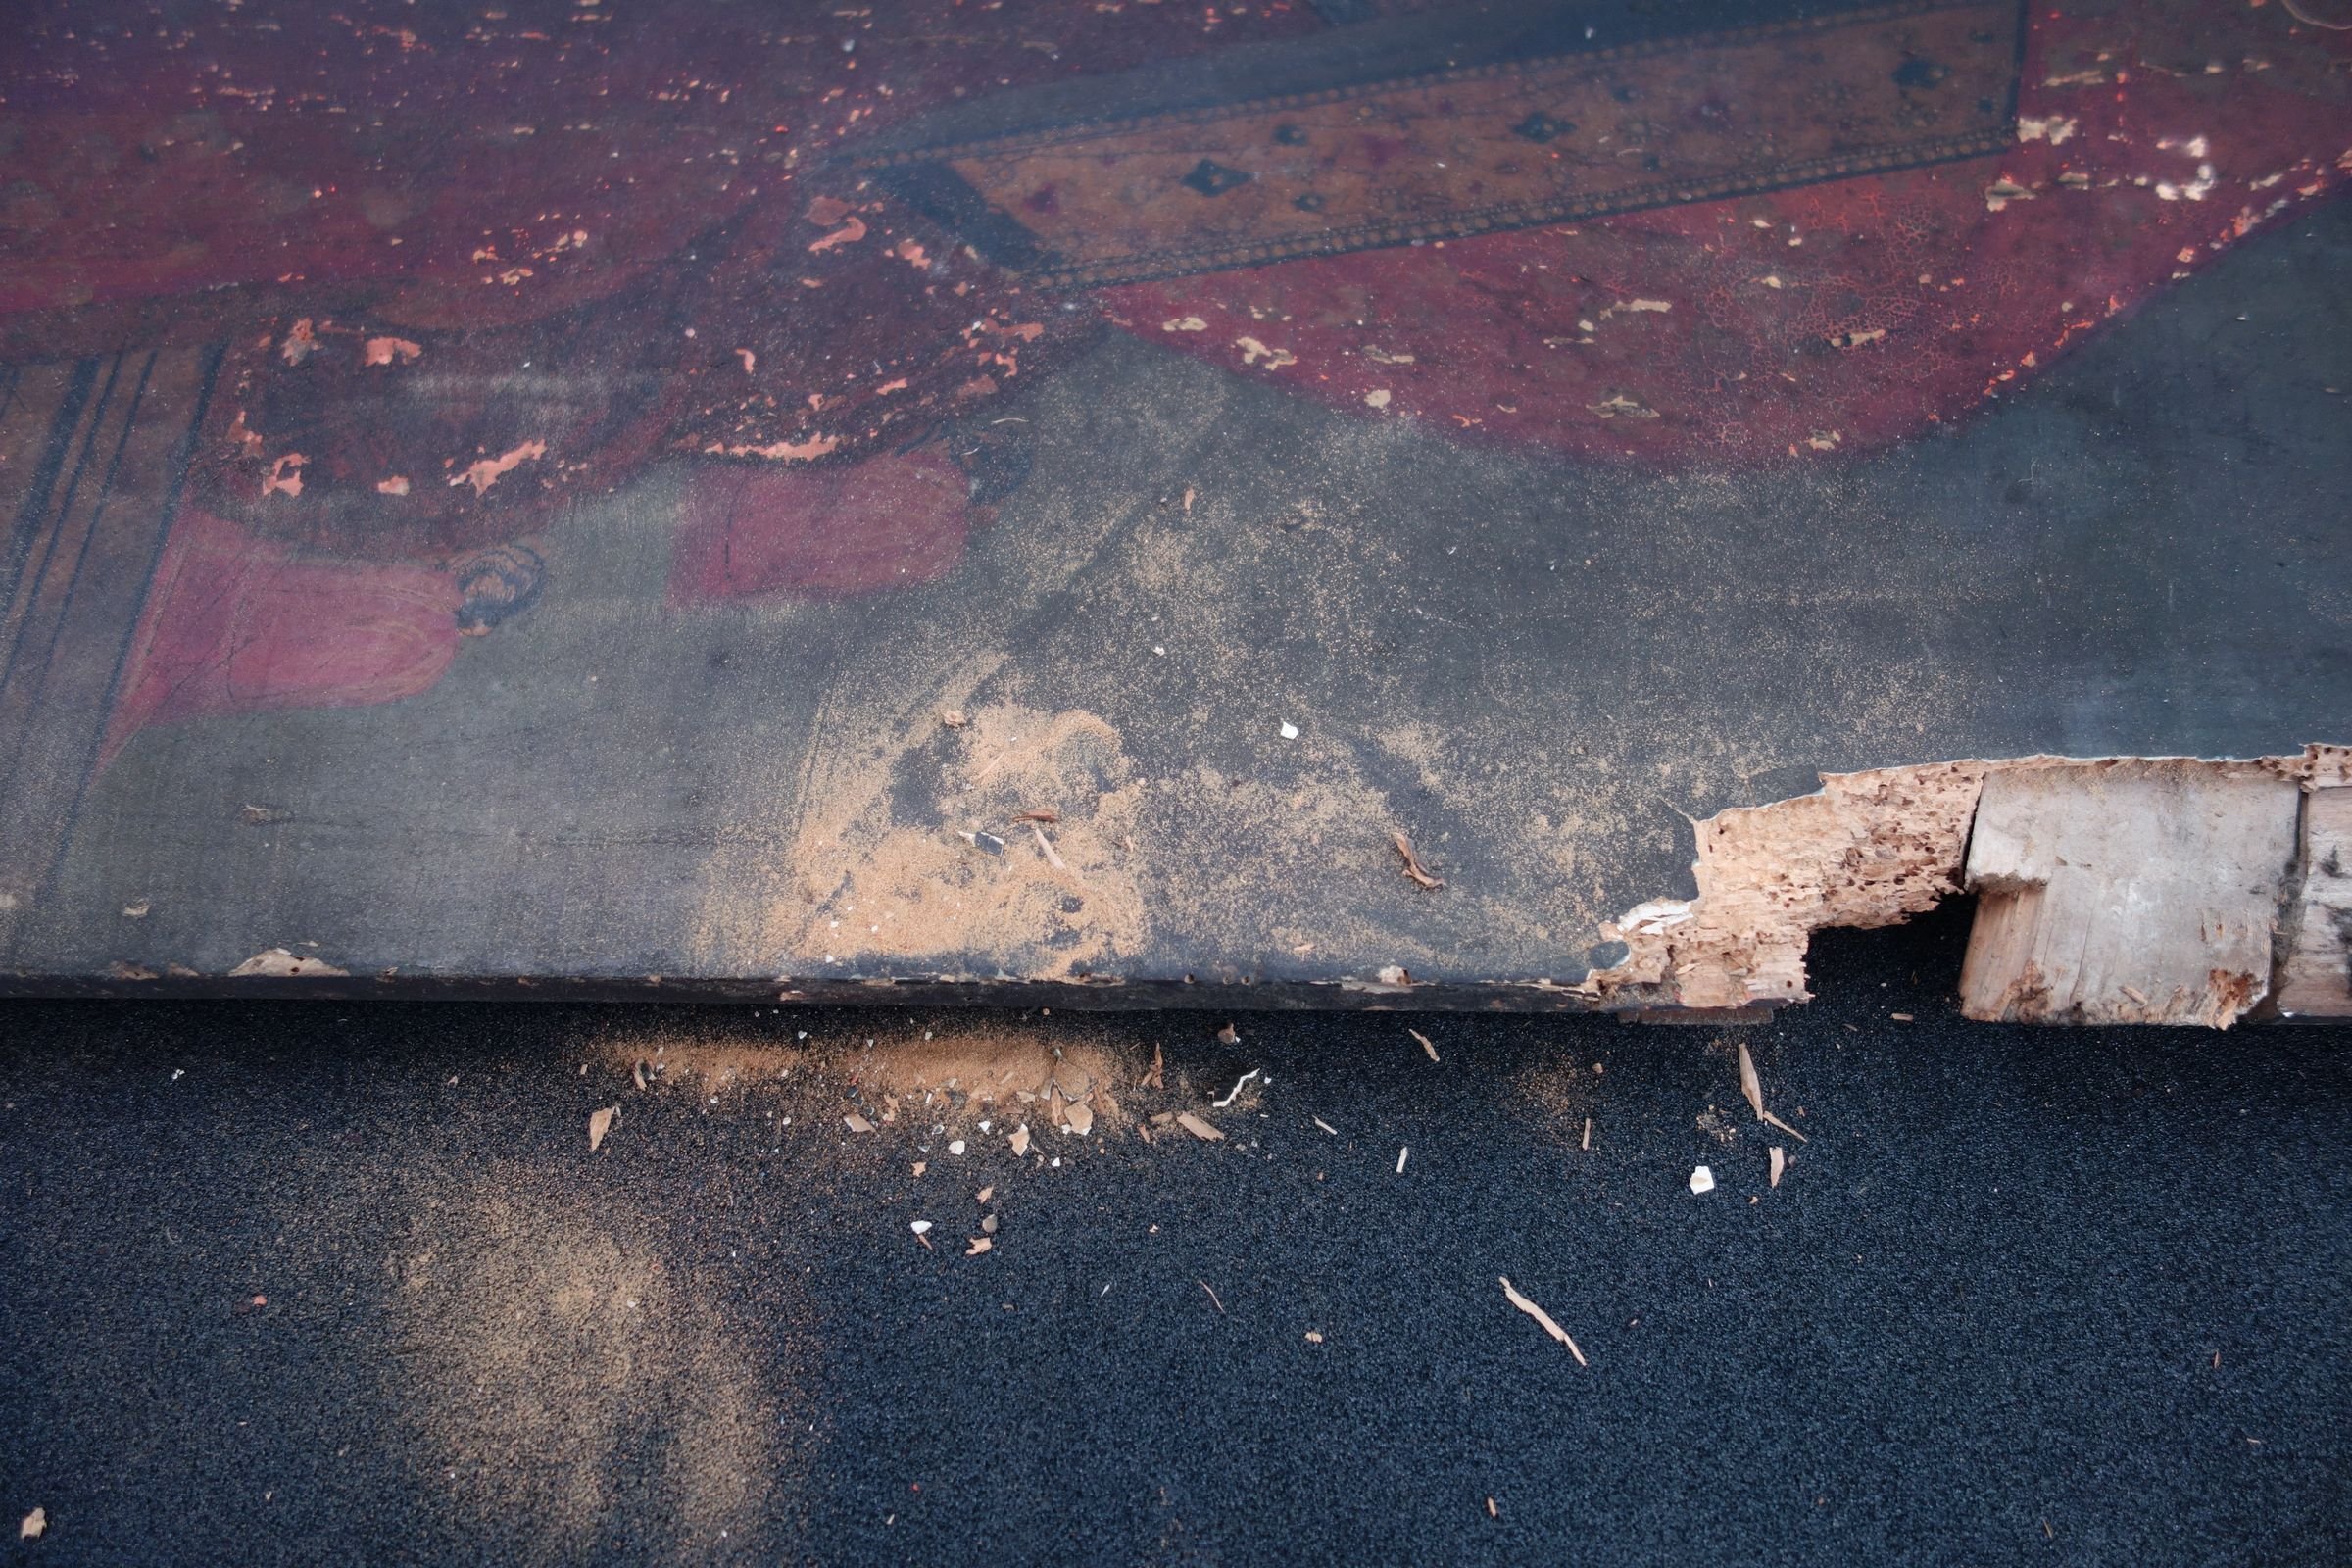
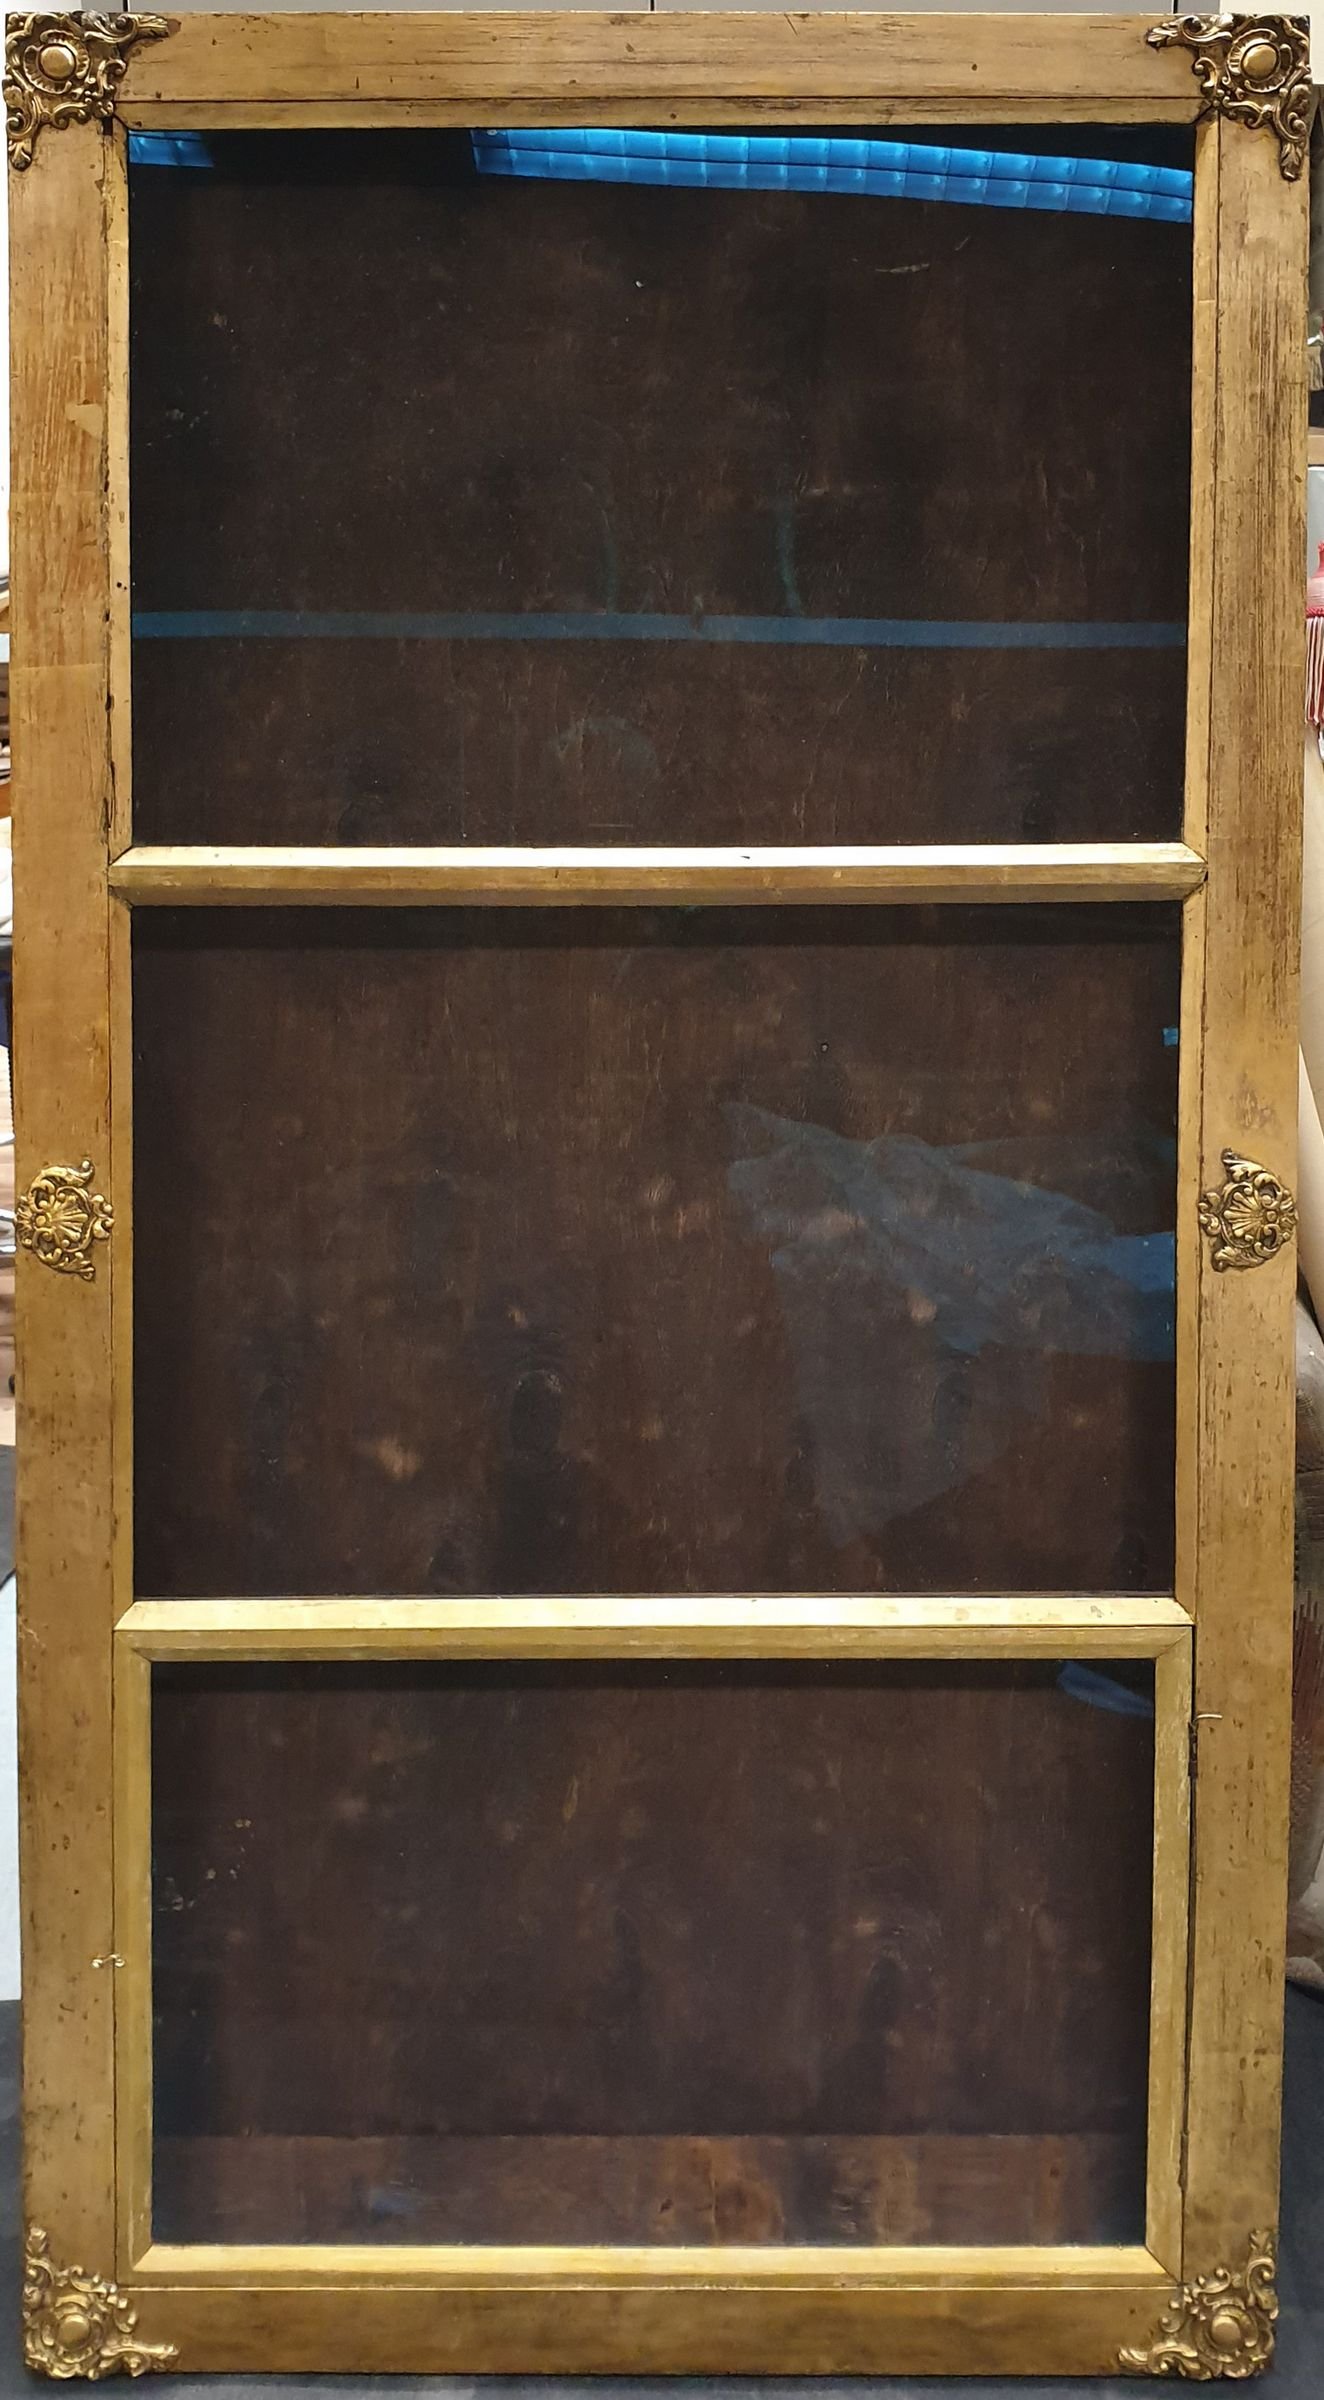
The icon appeared to be in a poor condition – the layers of the lower part had broken loose from the base together with the canvas. Extensive shedding of priming and paint layer had taken place [ill 2]. The baseboard was in a miserable state – its boards had detached, the wood had decayed, becoming crumbly and biologically damaged as well. The holes on the edges of the base were shedding fine wood-dust [ill 3]. Thus, the wooden panel lost its physical properties and mechanical potency. The icon case was dirty and dusty and in a lower corner an ornament was missing.
Restoration
The icon
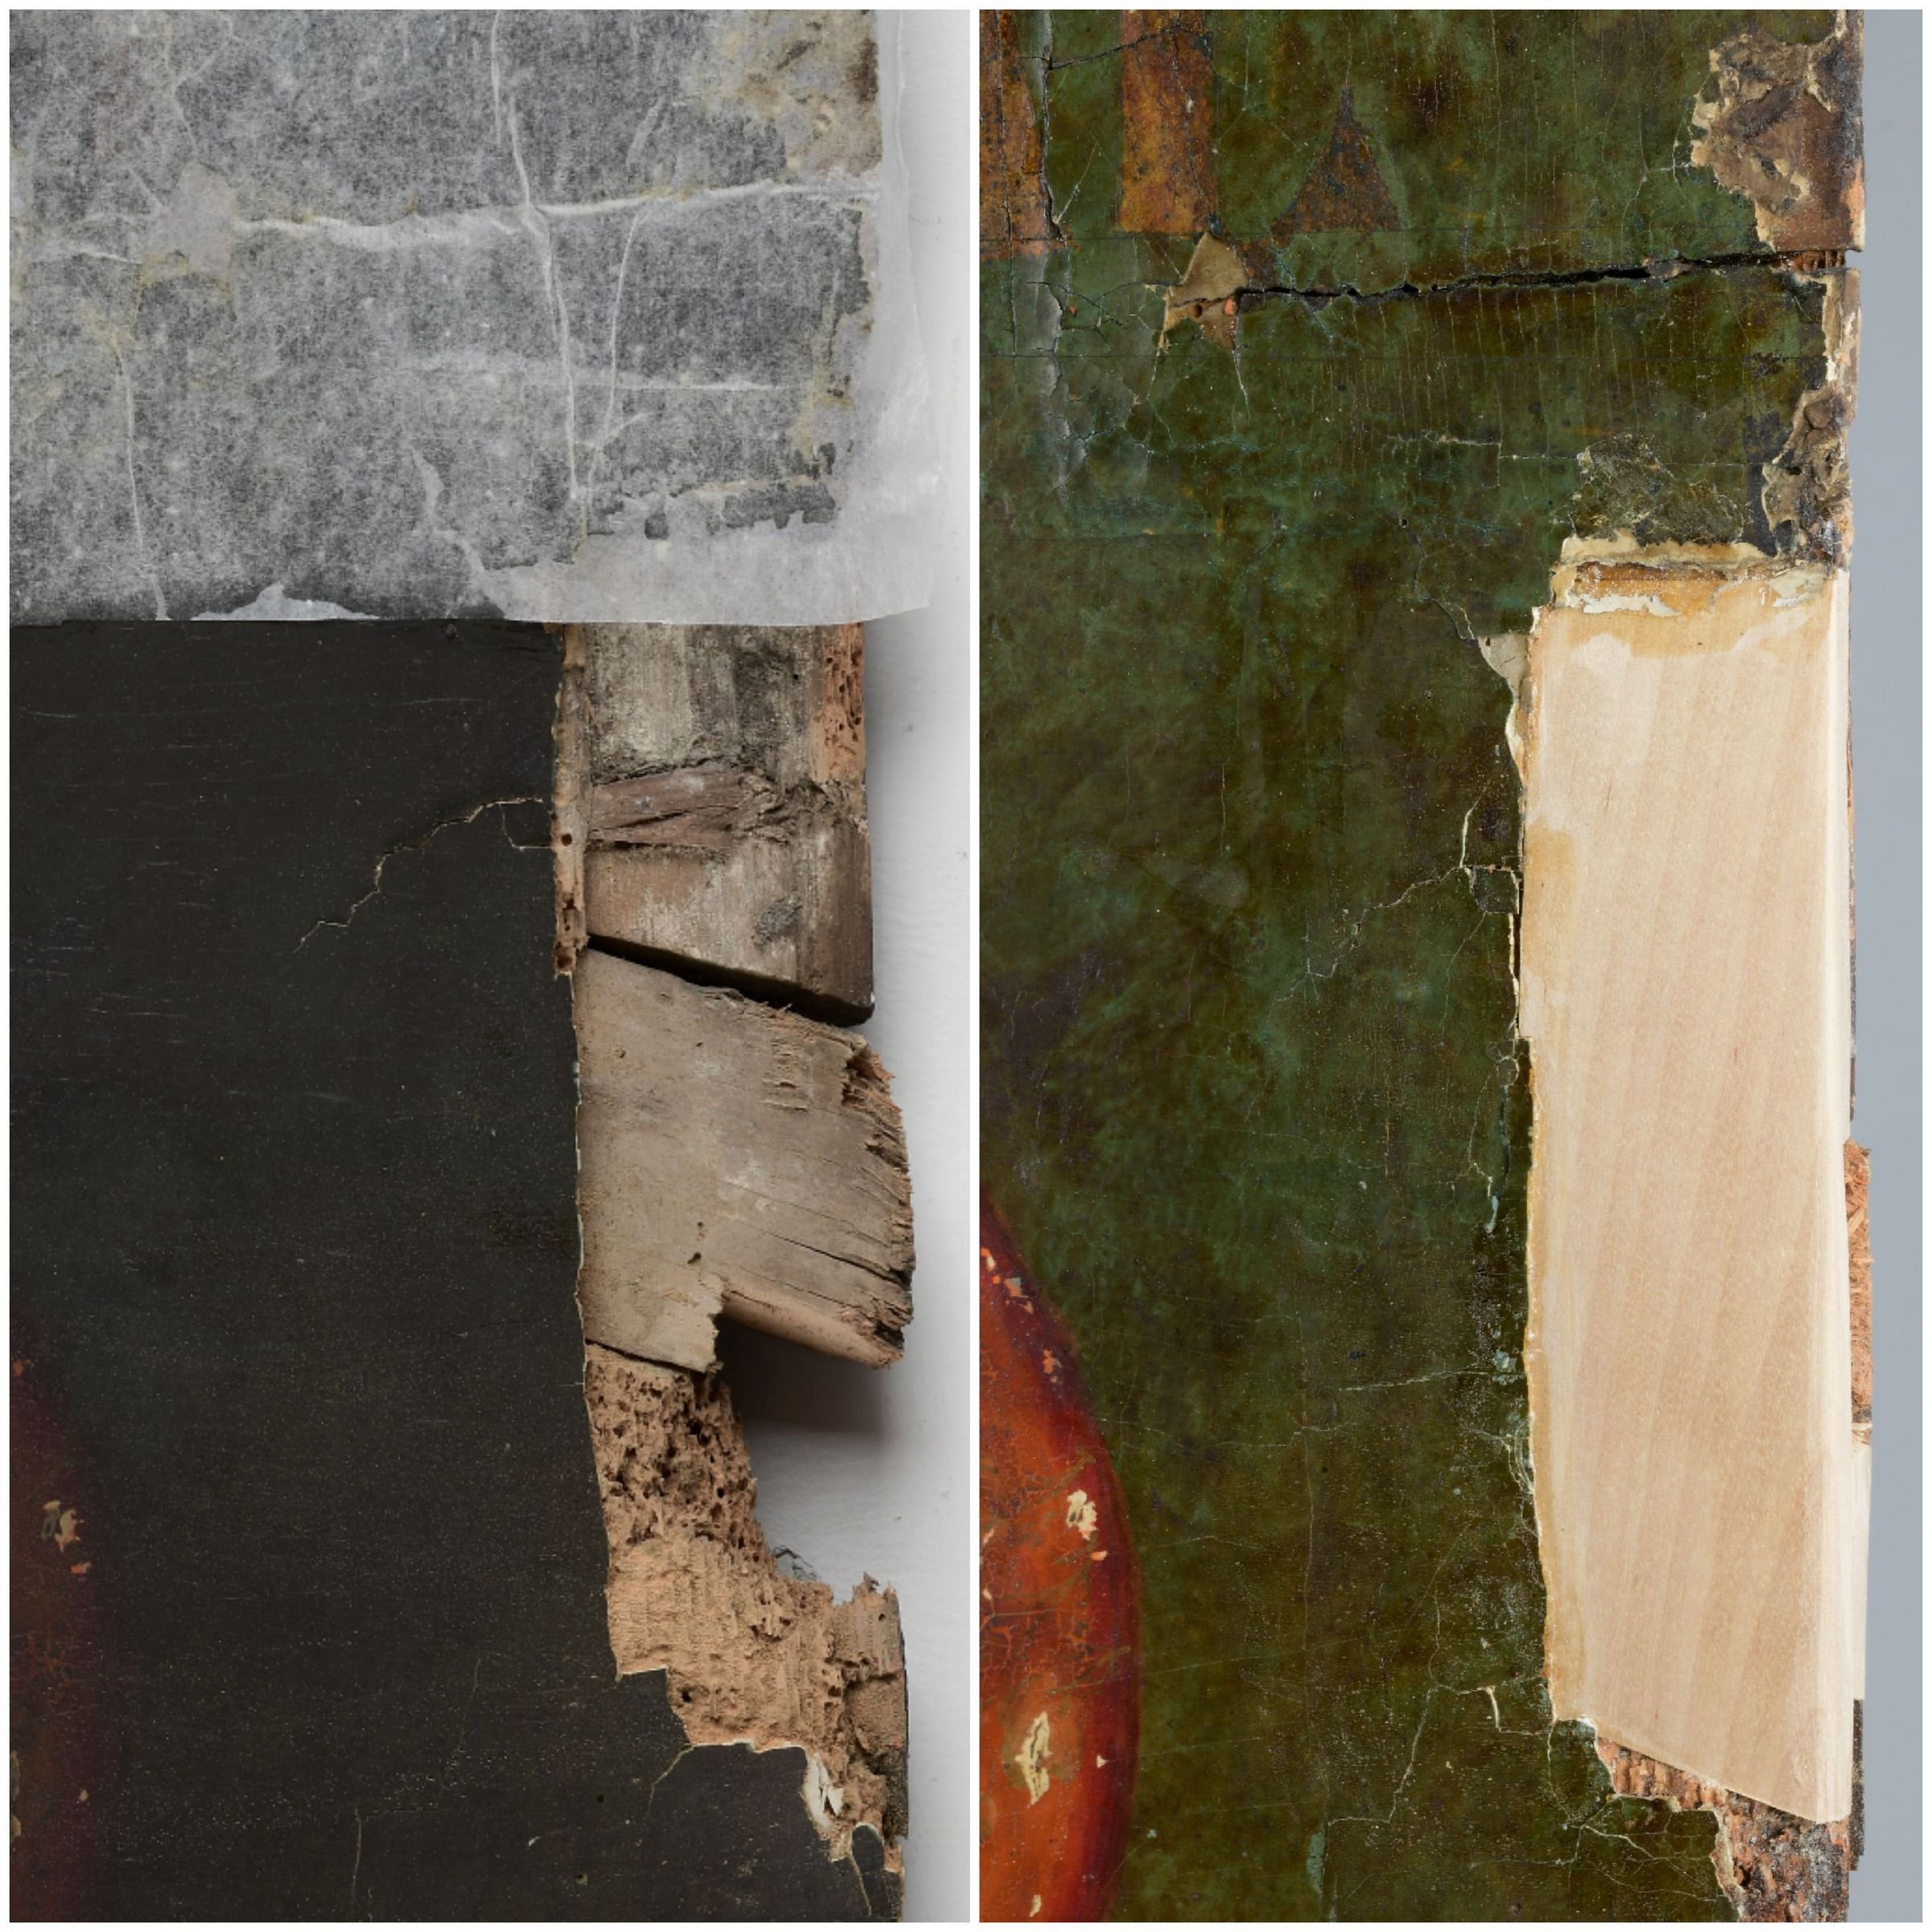
A facing was placed on the paint layer to avoid further crumbling and shedding. Stabilising the base came next. Losses and holes in the priming allowed us to impregnate the wood with Paraloid B-72 and acetone solution in three different concentrations. Before impregnation and also during the processing ethanol was poured on the wood surface to help the solution soak in deeper. The impregnation was started with 2% solution, continued with 5% solution and the finishing touches were carried out with 10% solution. After a week of drying the needle point pressing test showed that the wooden structure had hardened and the loose shedding was fixed. The hardened wood allowed join the detached boards. A specific polymer-glue was used – Titebond Liquid Hide Glue that is water-soluble after drying up. The same glue was used for filling the wood-losses in the right-hand upper edge of the base. The repair-piece was of a deciduous tree wood [ill 4]. Cracks and grooves were filled with a mixture of Titebond glue and wood-dust. When the wooden baseboard had been stabilised it was possible to start fixing the layers of the icon. The canvas layer was the first. It had roofed up together with the upper layers of priming and taken some paint along, as the layers had been well connected. The canvas layer was fixed with about 10% sturgeon glue (isinglass), as the area that needed it was quite wide. Sturgeon glue is known for its good adherence and smaller viscosity that makes penetration quicker than in case of some synthetic ones. Isinglass can also be thermally proceeded. The roofed spots were treated with heat spatula that warmed up the glue and, on the other hand, made the proceeded layers more elastic. Silicon paper with weights on it was laid onto the fixed area that remained under pressure for several days. The fixing process had to be repeated at some spots.
It was not possible to remove the really thick and uneven layer of varnish without harming the layer of paint. Removal tests were made, using several solutions and gels. The more common solutions and mixtures (like ethanol:turpentine, acetone) did not react to the varnish at all. Gels made on the basis of these solutions (Carbopol EZ2, Gellan Gum”LT100 High Acyl) needed an intensive follow-up cleansing with acetone and cotton swabs. Examining the varnish removal tests under microscope, it turned out that the paint layer had suffered during processing. That is why it was decided to cleanse the interior layer from dirt and soot with 5% tri-ammonium-citrate aqueous solution. The follow-up cleaning was accomplished with distilled water [ill 5].
It was still possible to remove the varnish partially from Christ’s face and hands, as these places had been freshened with a new layer of varnish sometime later. This layer was thinned up with 1:1 ethanol:turpentine solution.
Before filling up the losses in the layer of the undercoat, a thin interlay varnish layer was spread on it with cotton swabs. Then the losses were filled with about 10% mixture of sturgeon glue and chalk. The areas where the losses were extensive got 5-7 thin priming layers one upon another when the previous one had dried up. This helped to avoid possible cracking at drying [ill 6], [ill 7]. When the priming was dry the surface was retouched with sandpaper.
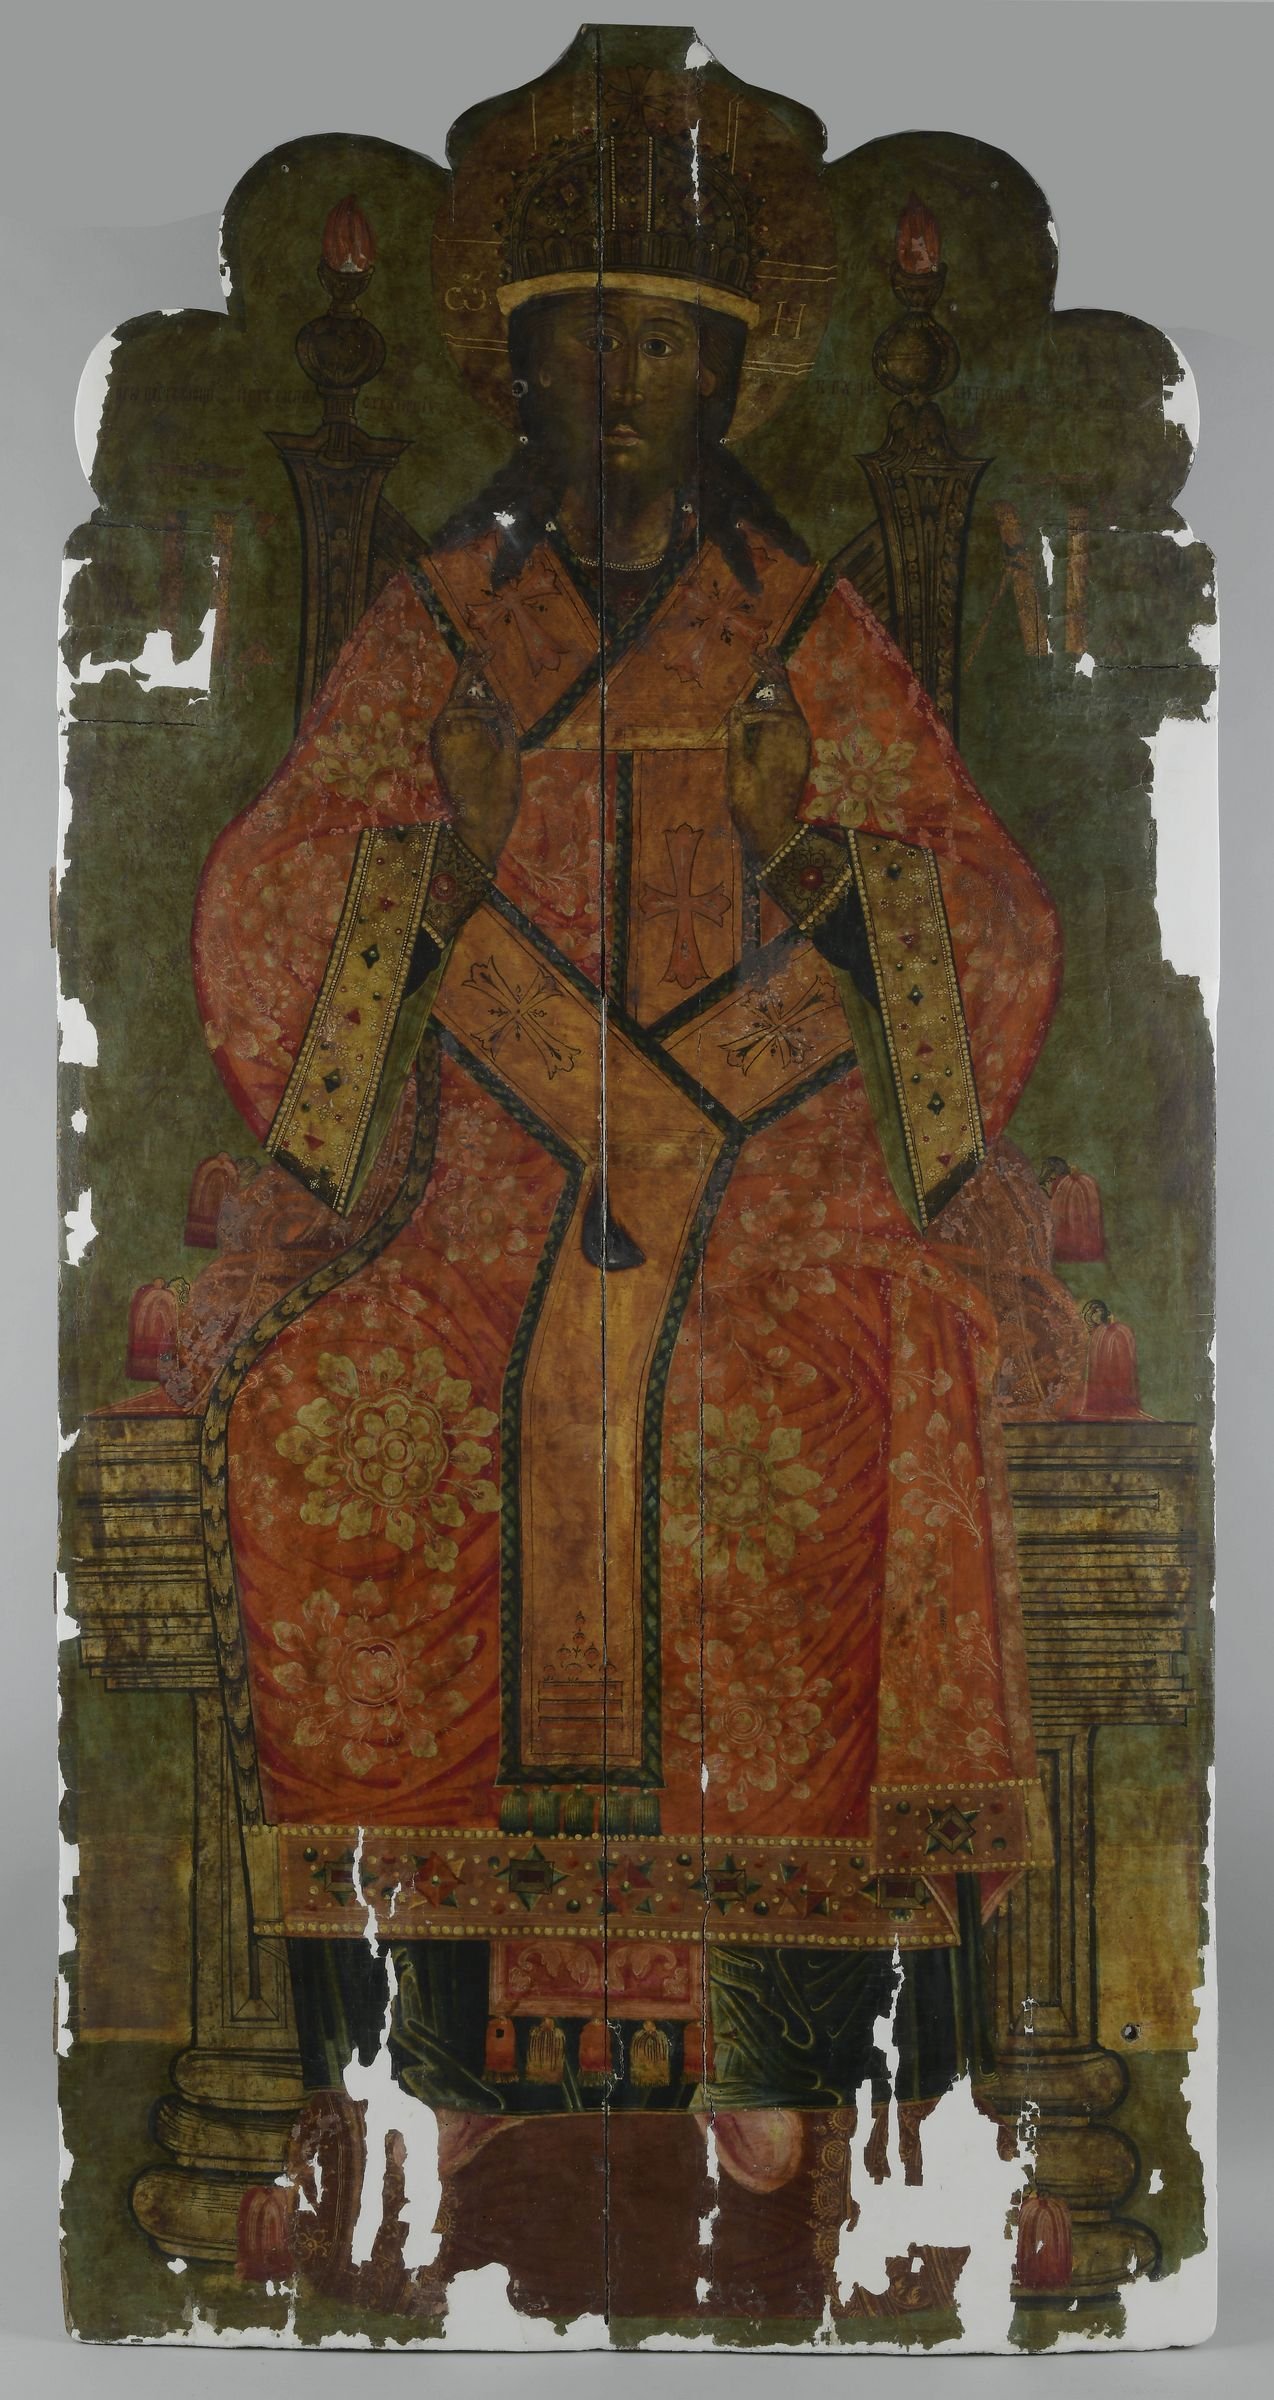
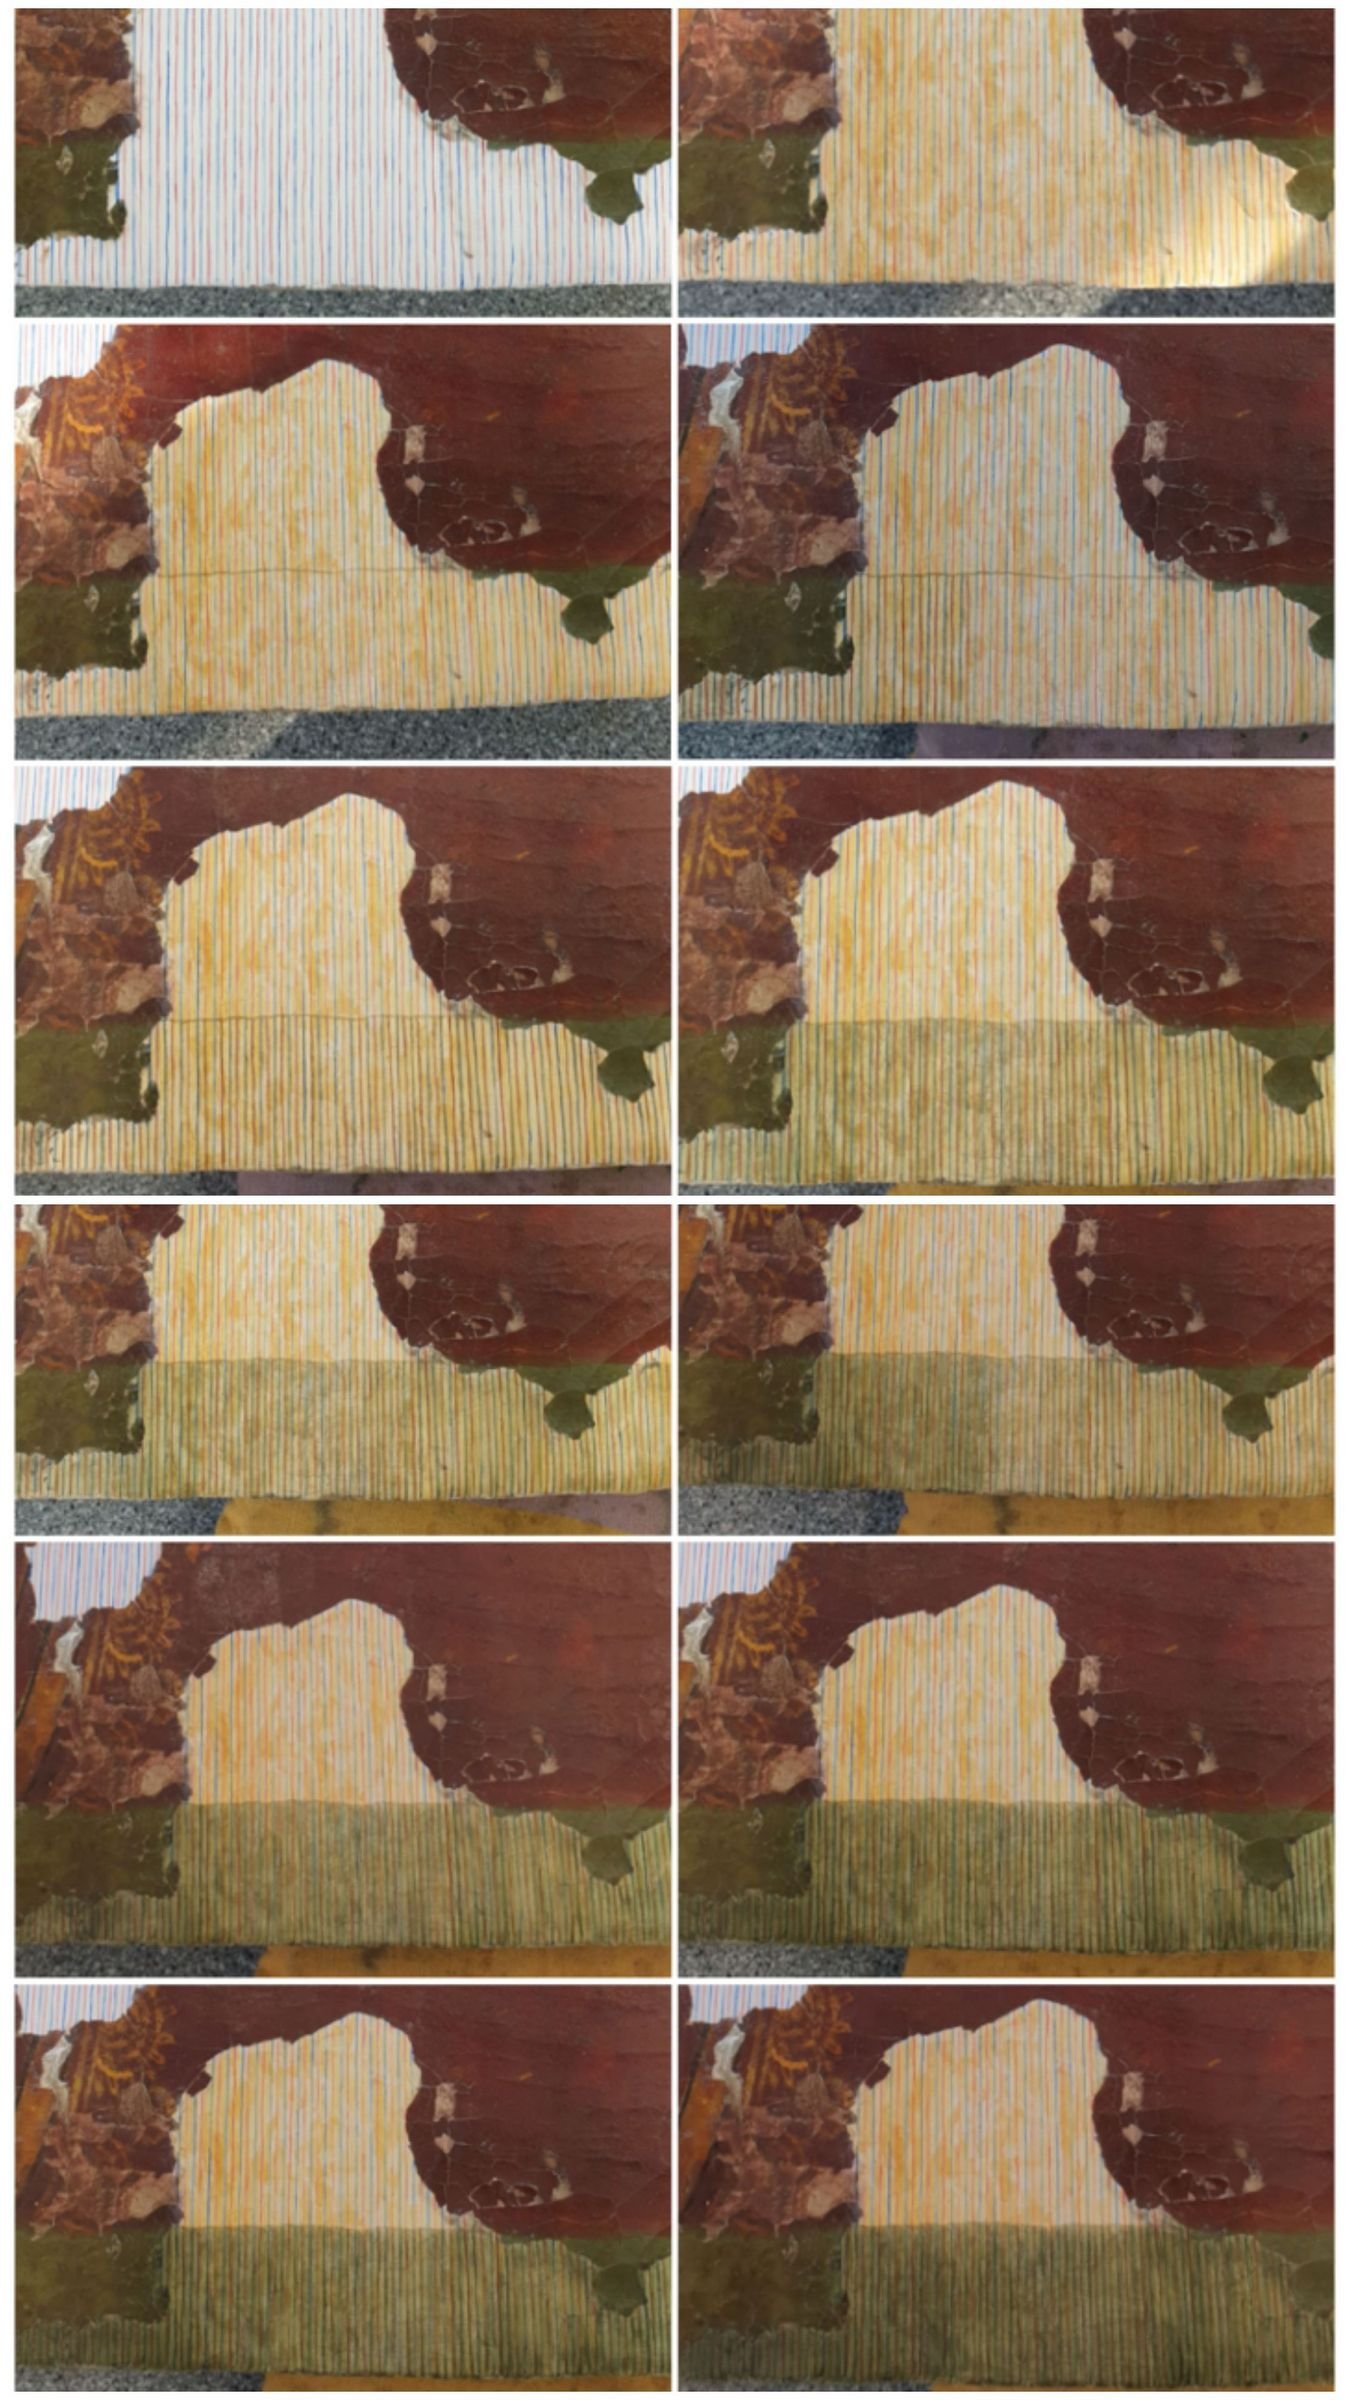
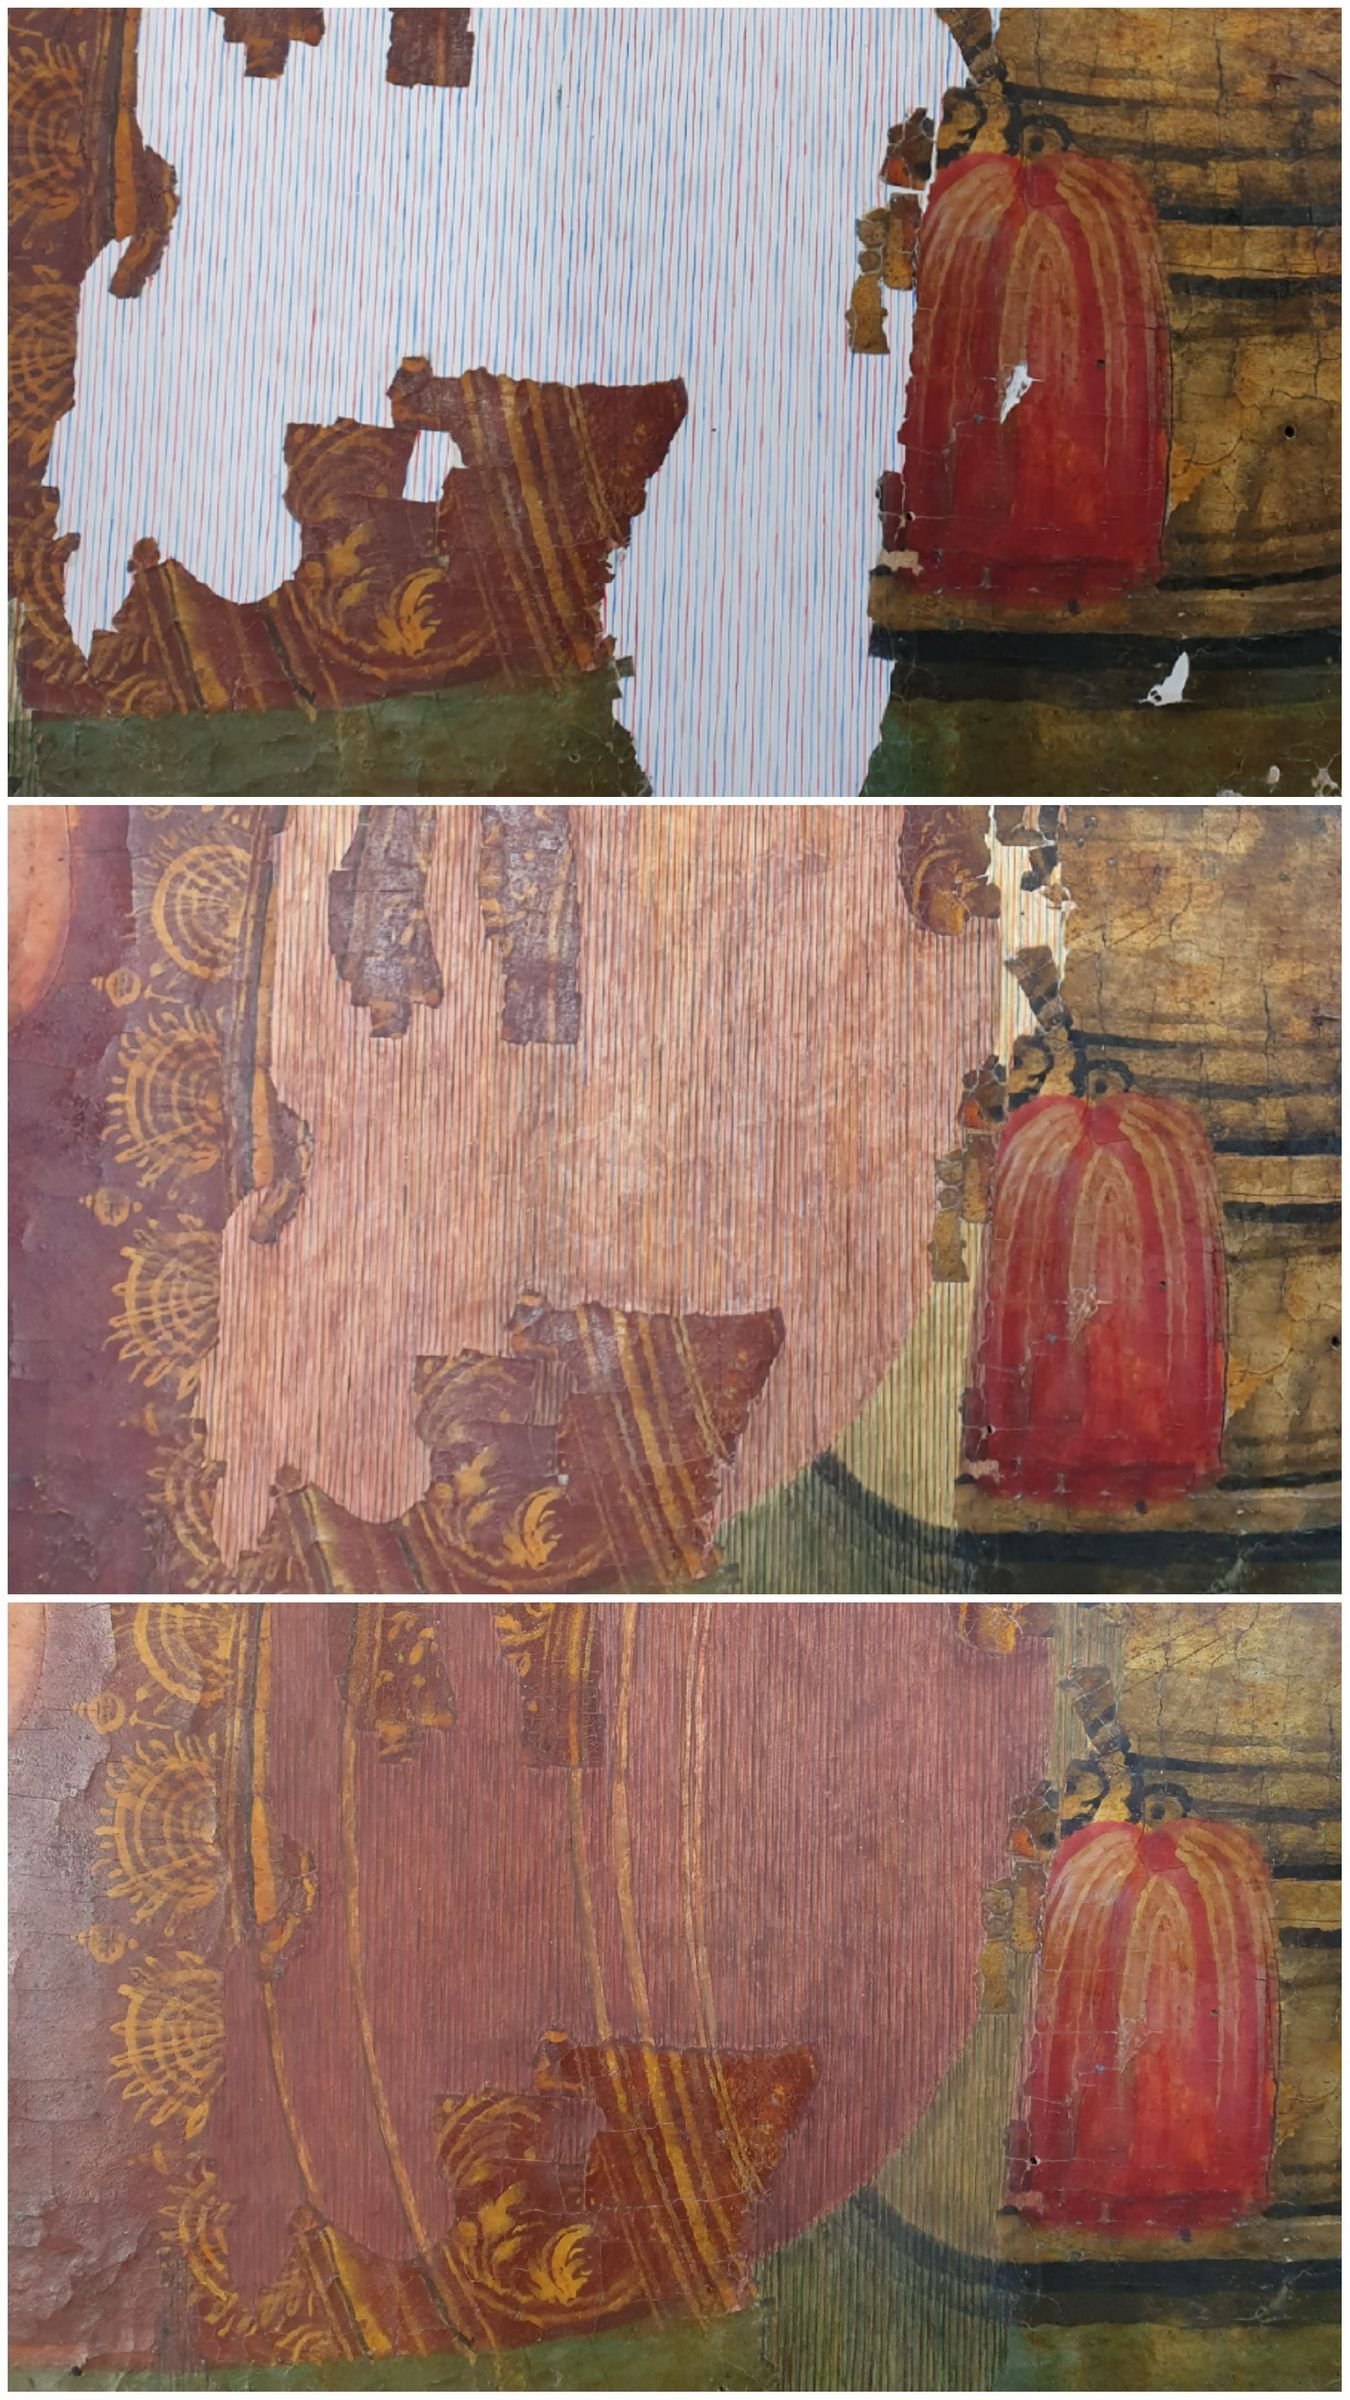
The extensive paint losses in the lower part and sides of the icon were toned up with watercolours, using trattegio technique [ill 8], [ill 9], [ill 10], [ill 11]. Small losses were tinted with Maimer’s Restauro retouch. For finishing dammar varnish was used.
The case of the icon
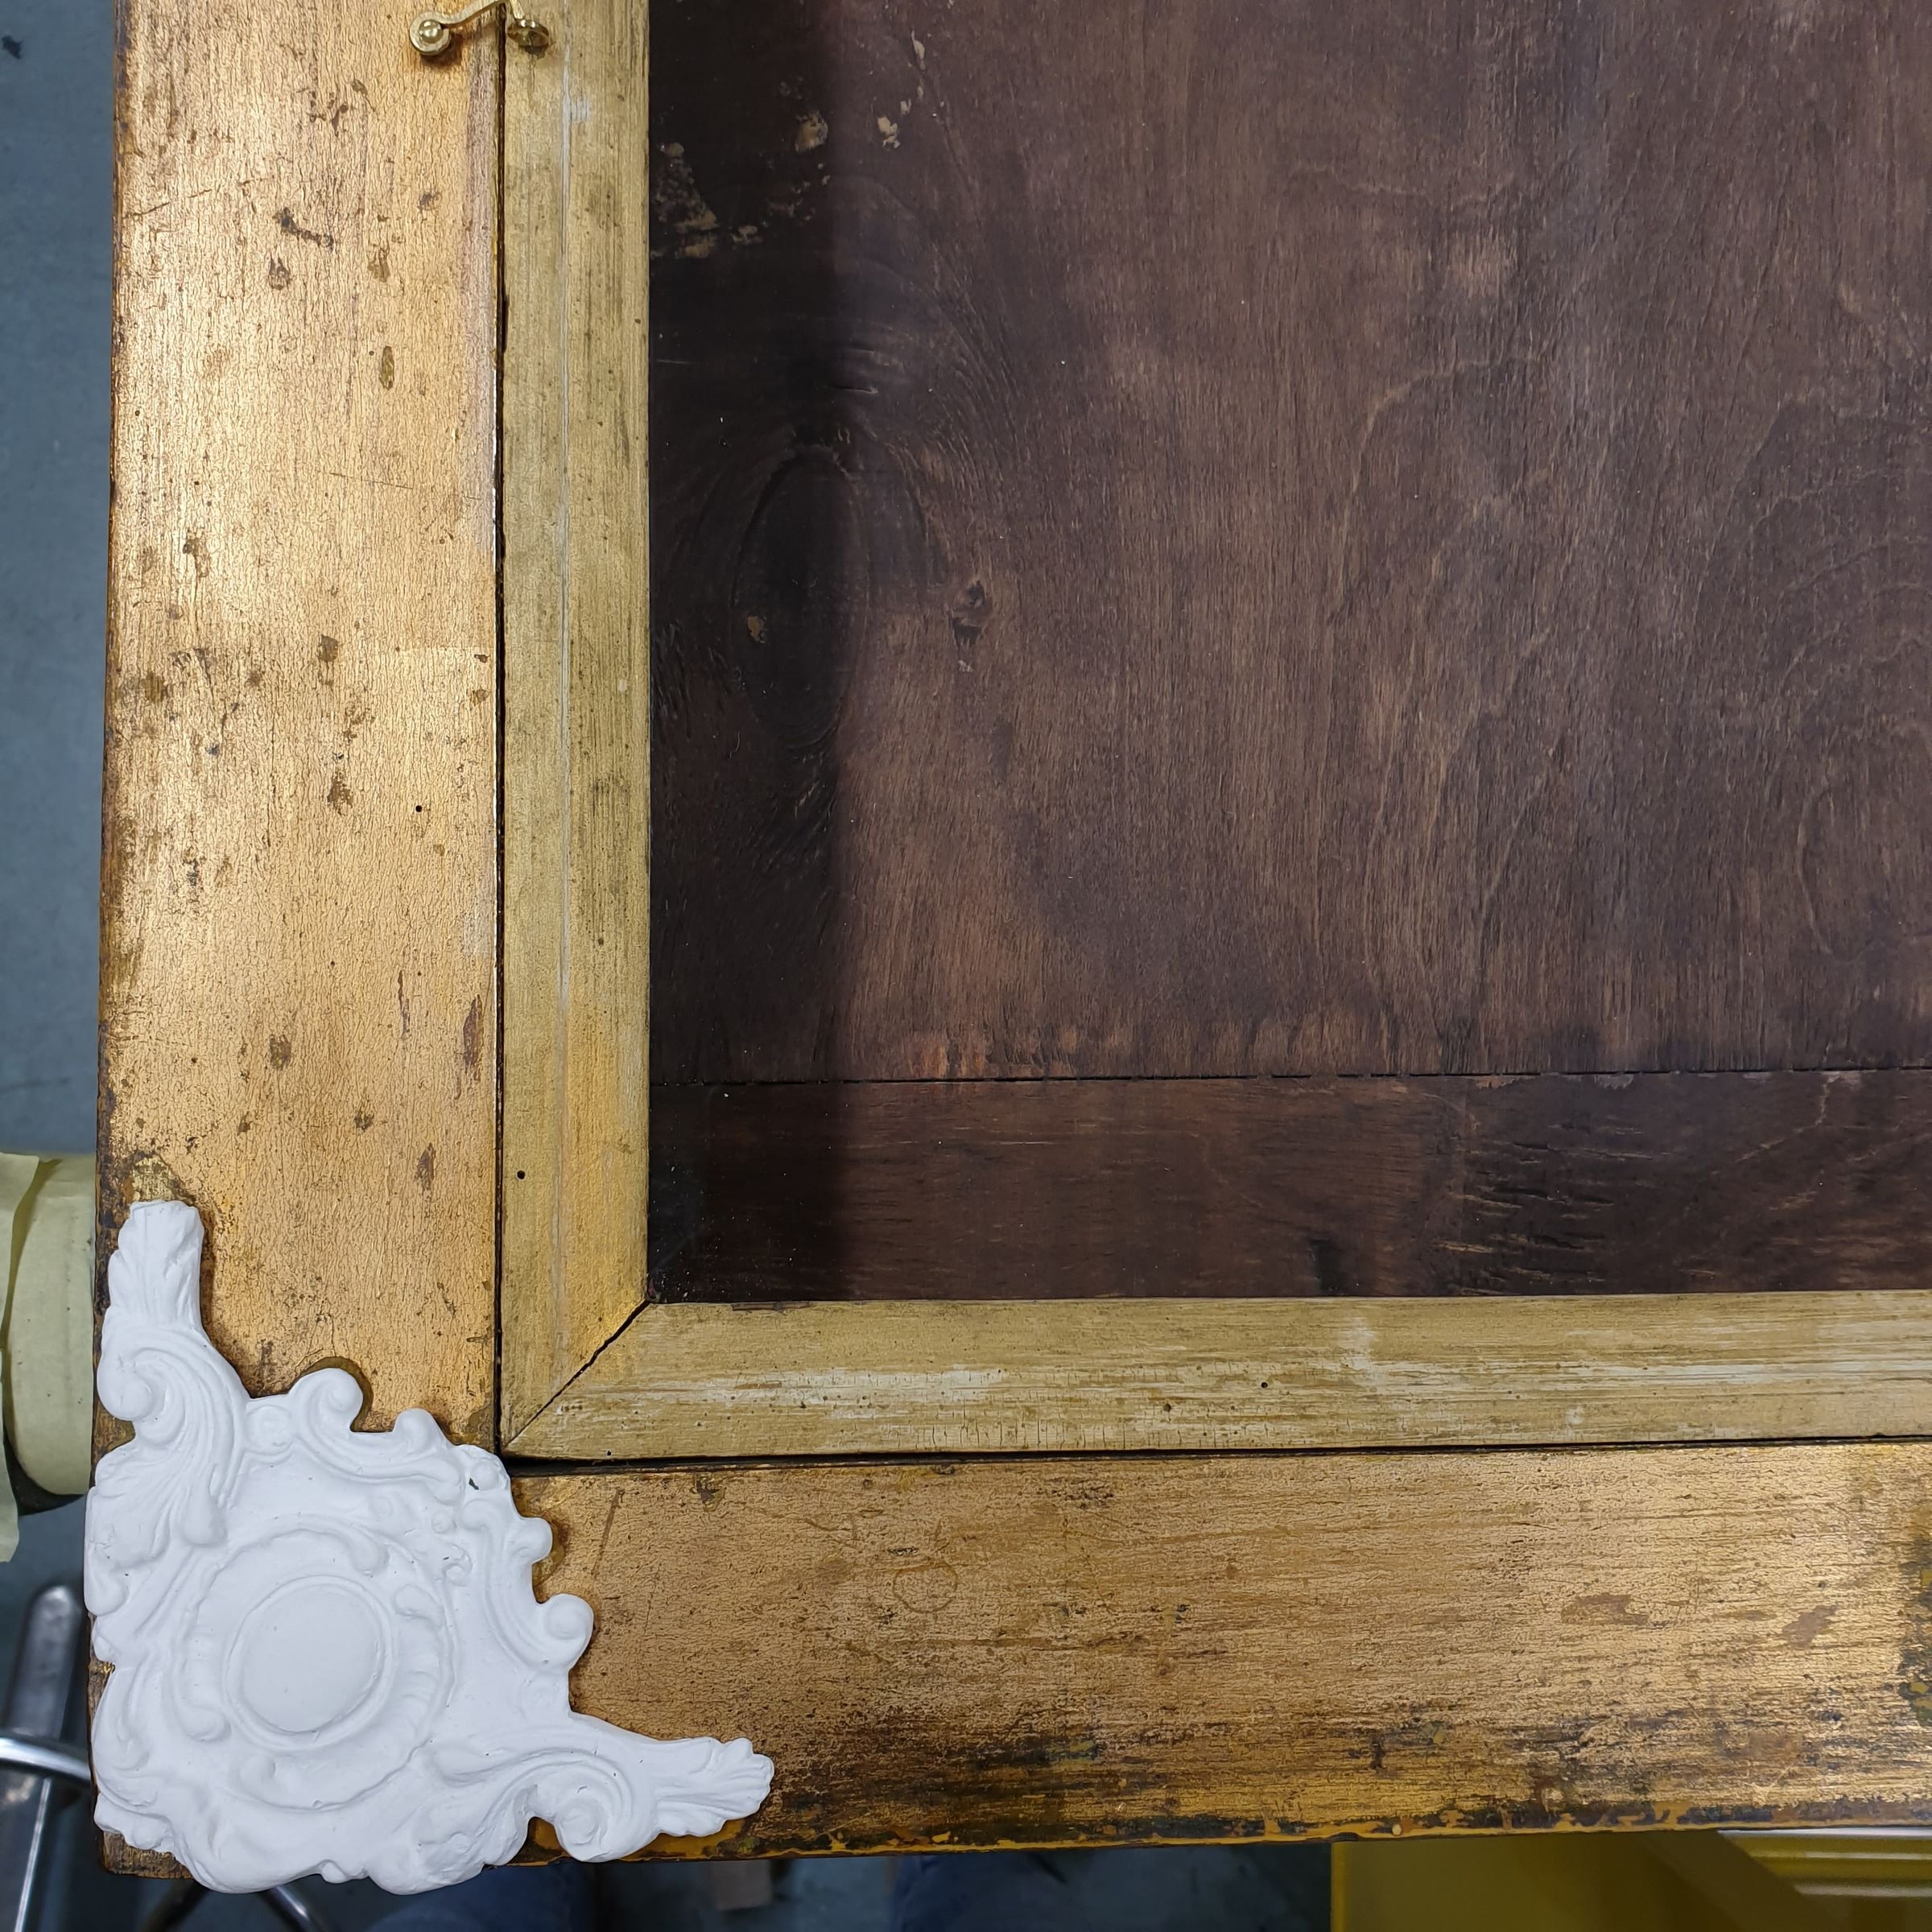
The icon was in a box, the front of which consisted of three separate panes of glass, its back was open and its corners and centre-part decorated with woodcarvings [ill 12]. Cleaning-tests showed that some original gilding had survived beneath the bronze-coloured paint. It was decided to use gel for cleaning it up. The gel made on the basis of Gellan Gum viide1 ⁽¹⁾ with acetone and benzyl alcohol was left on the paint layer for about ten minutes. The gel liquefied the paint on the gilding and the finishing touches were completed with acetone and cotton swabs. The missing detail was replaced with a replica made with the help of a silicone mold and resin plaster [ill 13]. The new detail was toned with watercolours and Goldfinger paste. The spots, where the original gilding had wider scratches or was grated Goldfinger paste came in handy as well. The surface was coated with dammar varnish and the glass substituted with museum glass [ill 14].
An appealing find
When dirt- and soot-layers had been removed changes that had occurred in the composition and details of the original icon came in sight. The original, the shape of which had been scratched into the priming with a fine needle seemed to have been rather different from the later-day painting.
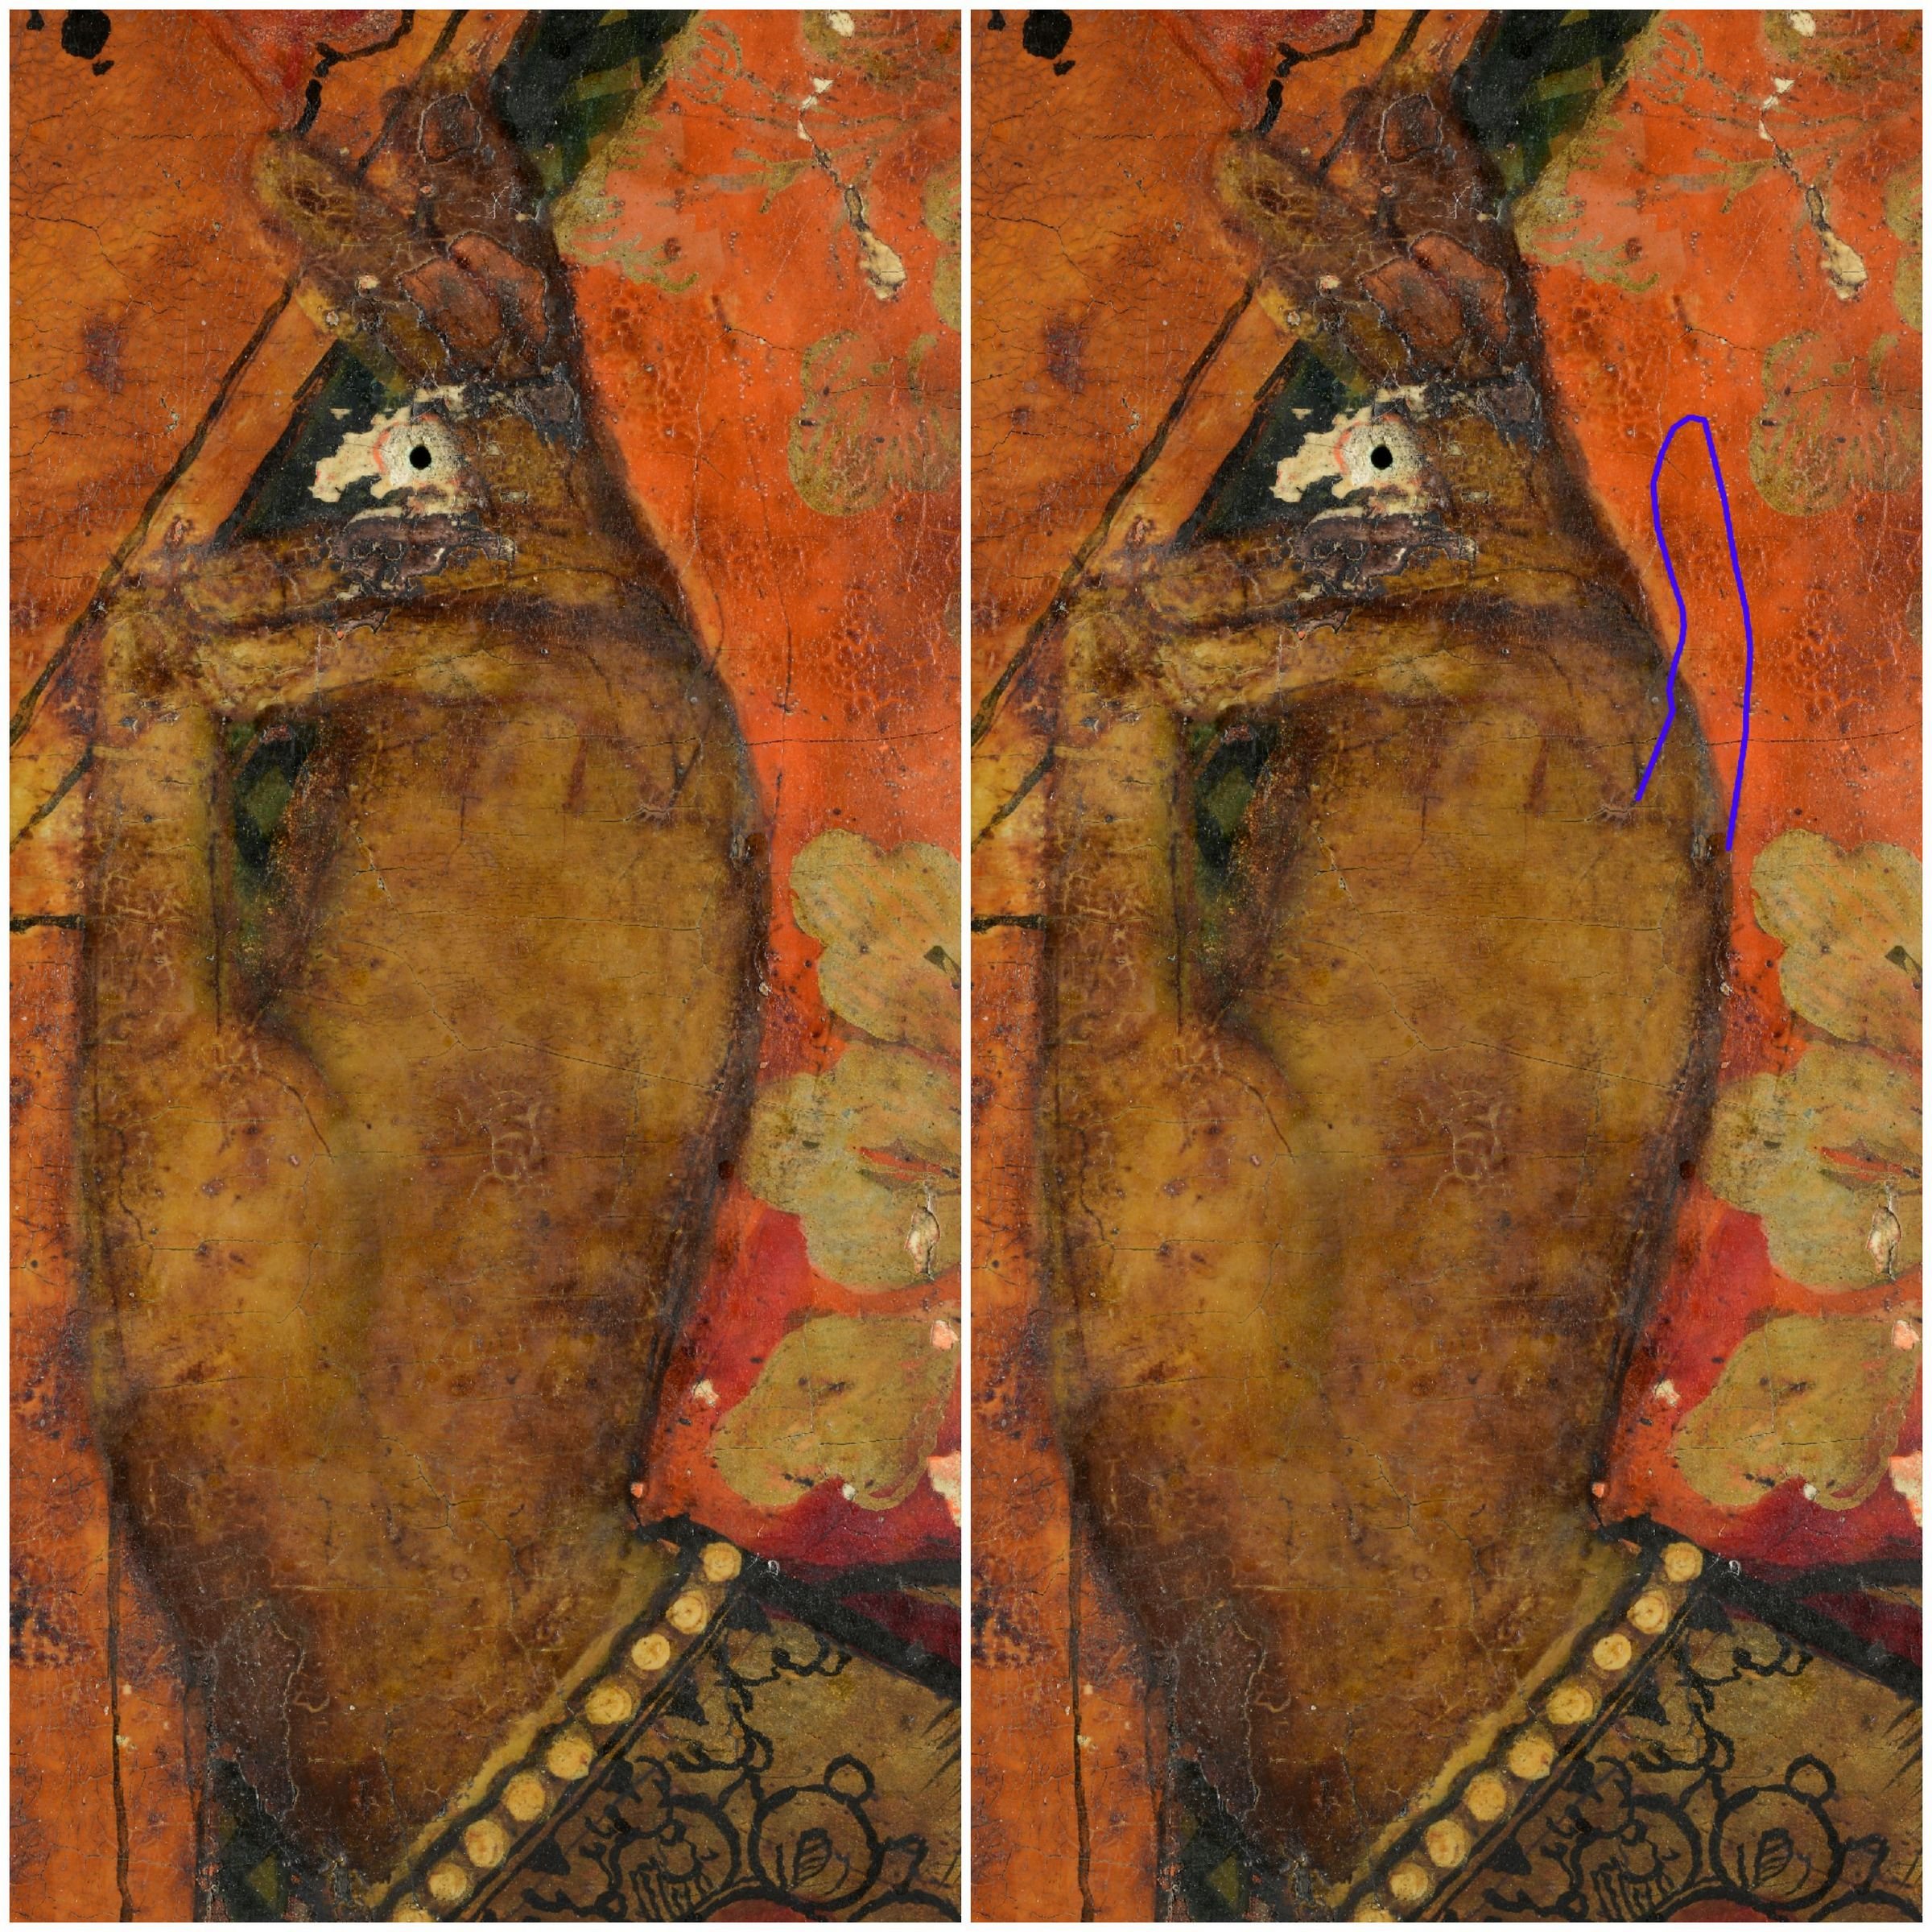
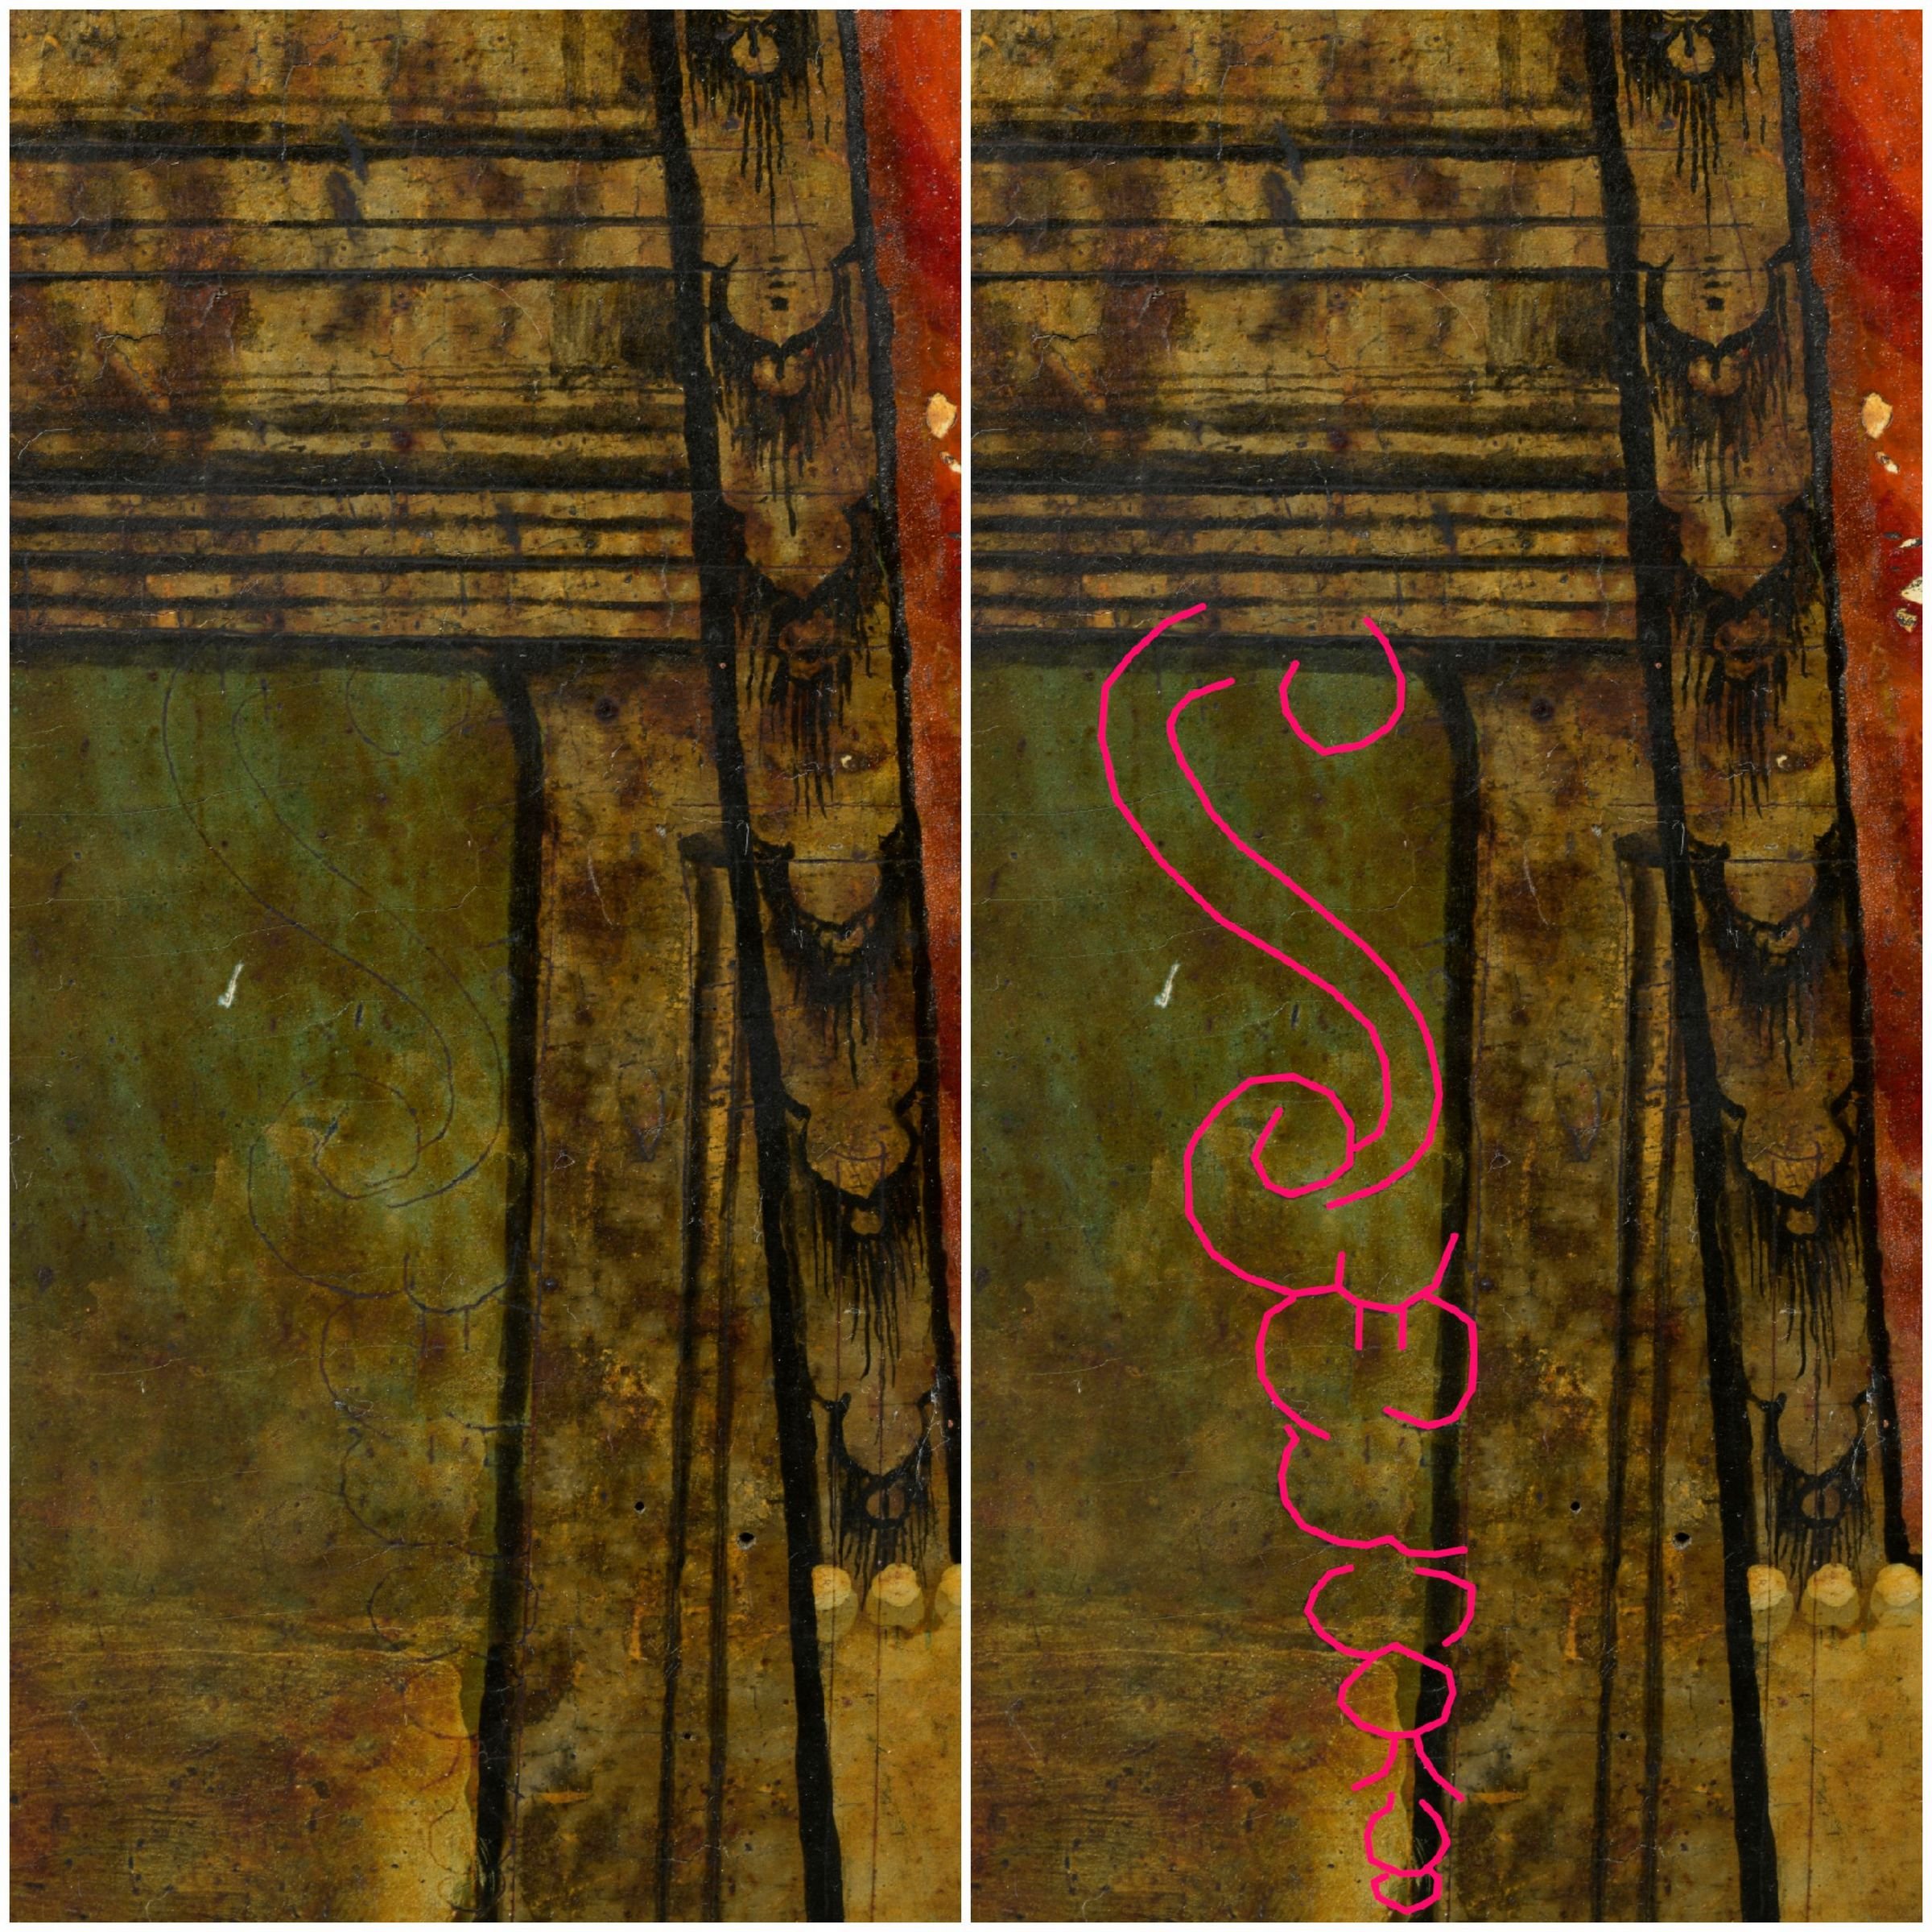
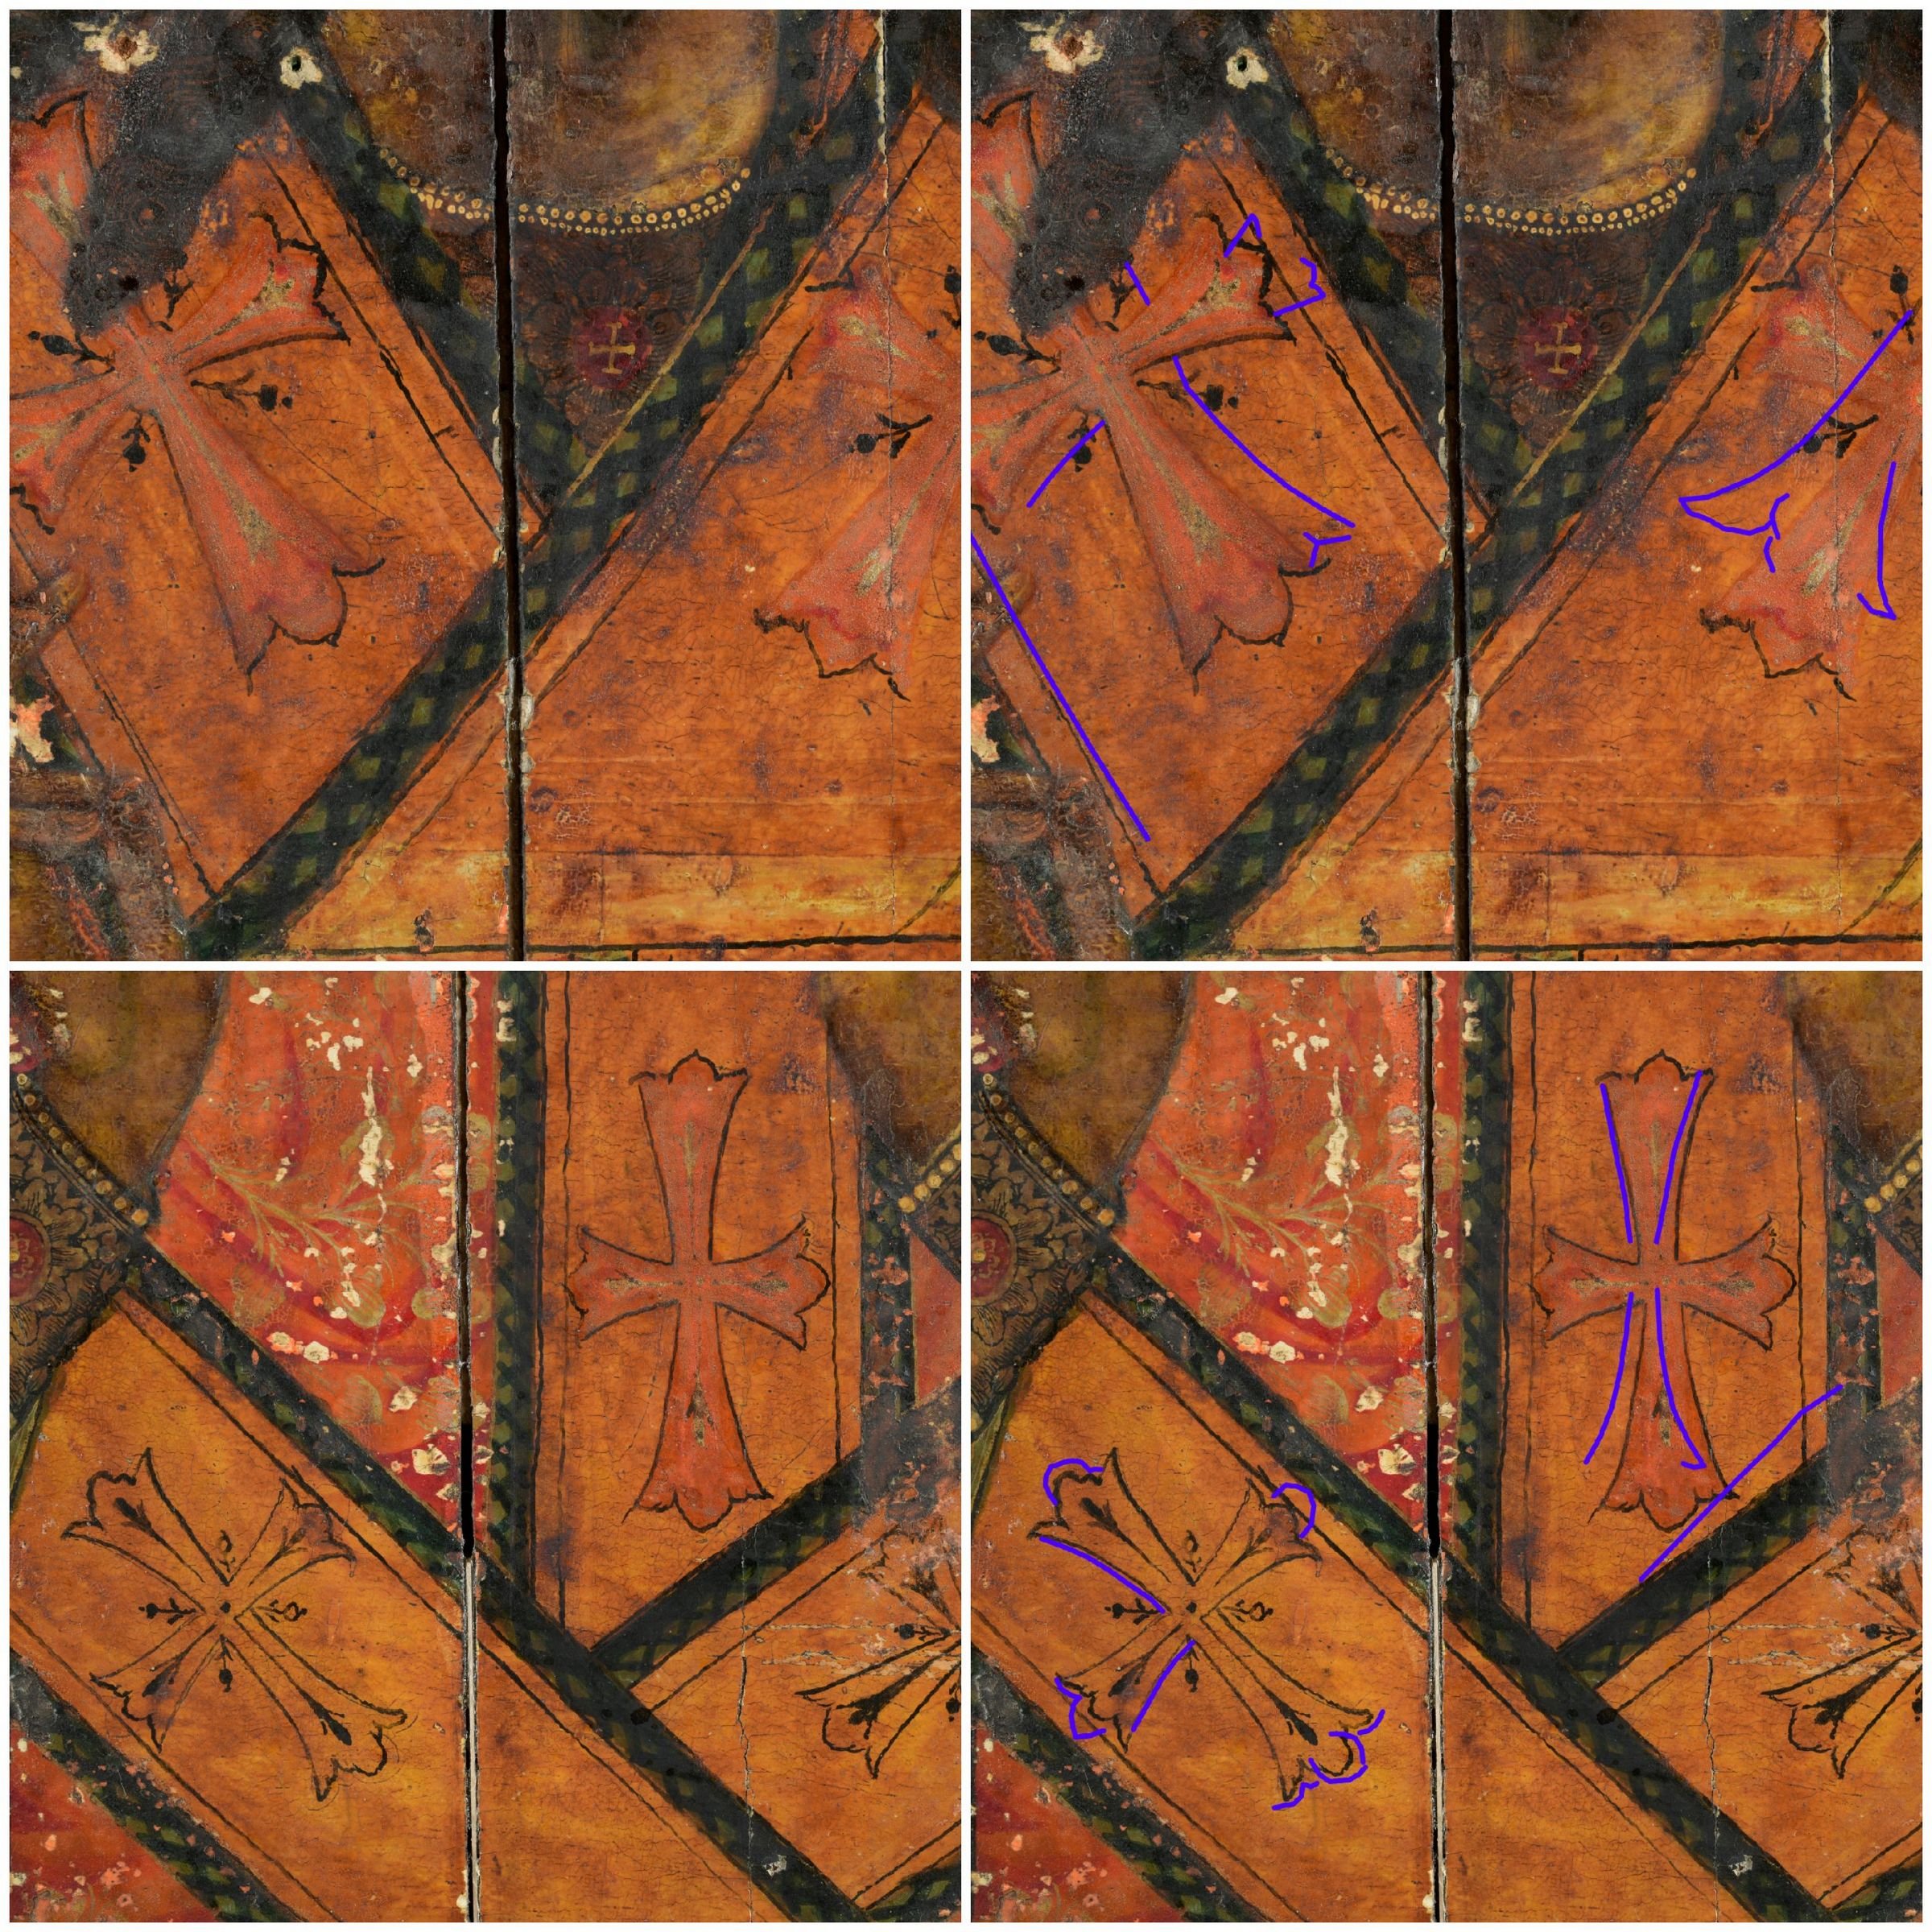
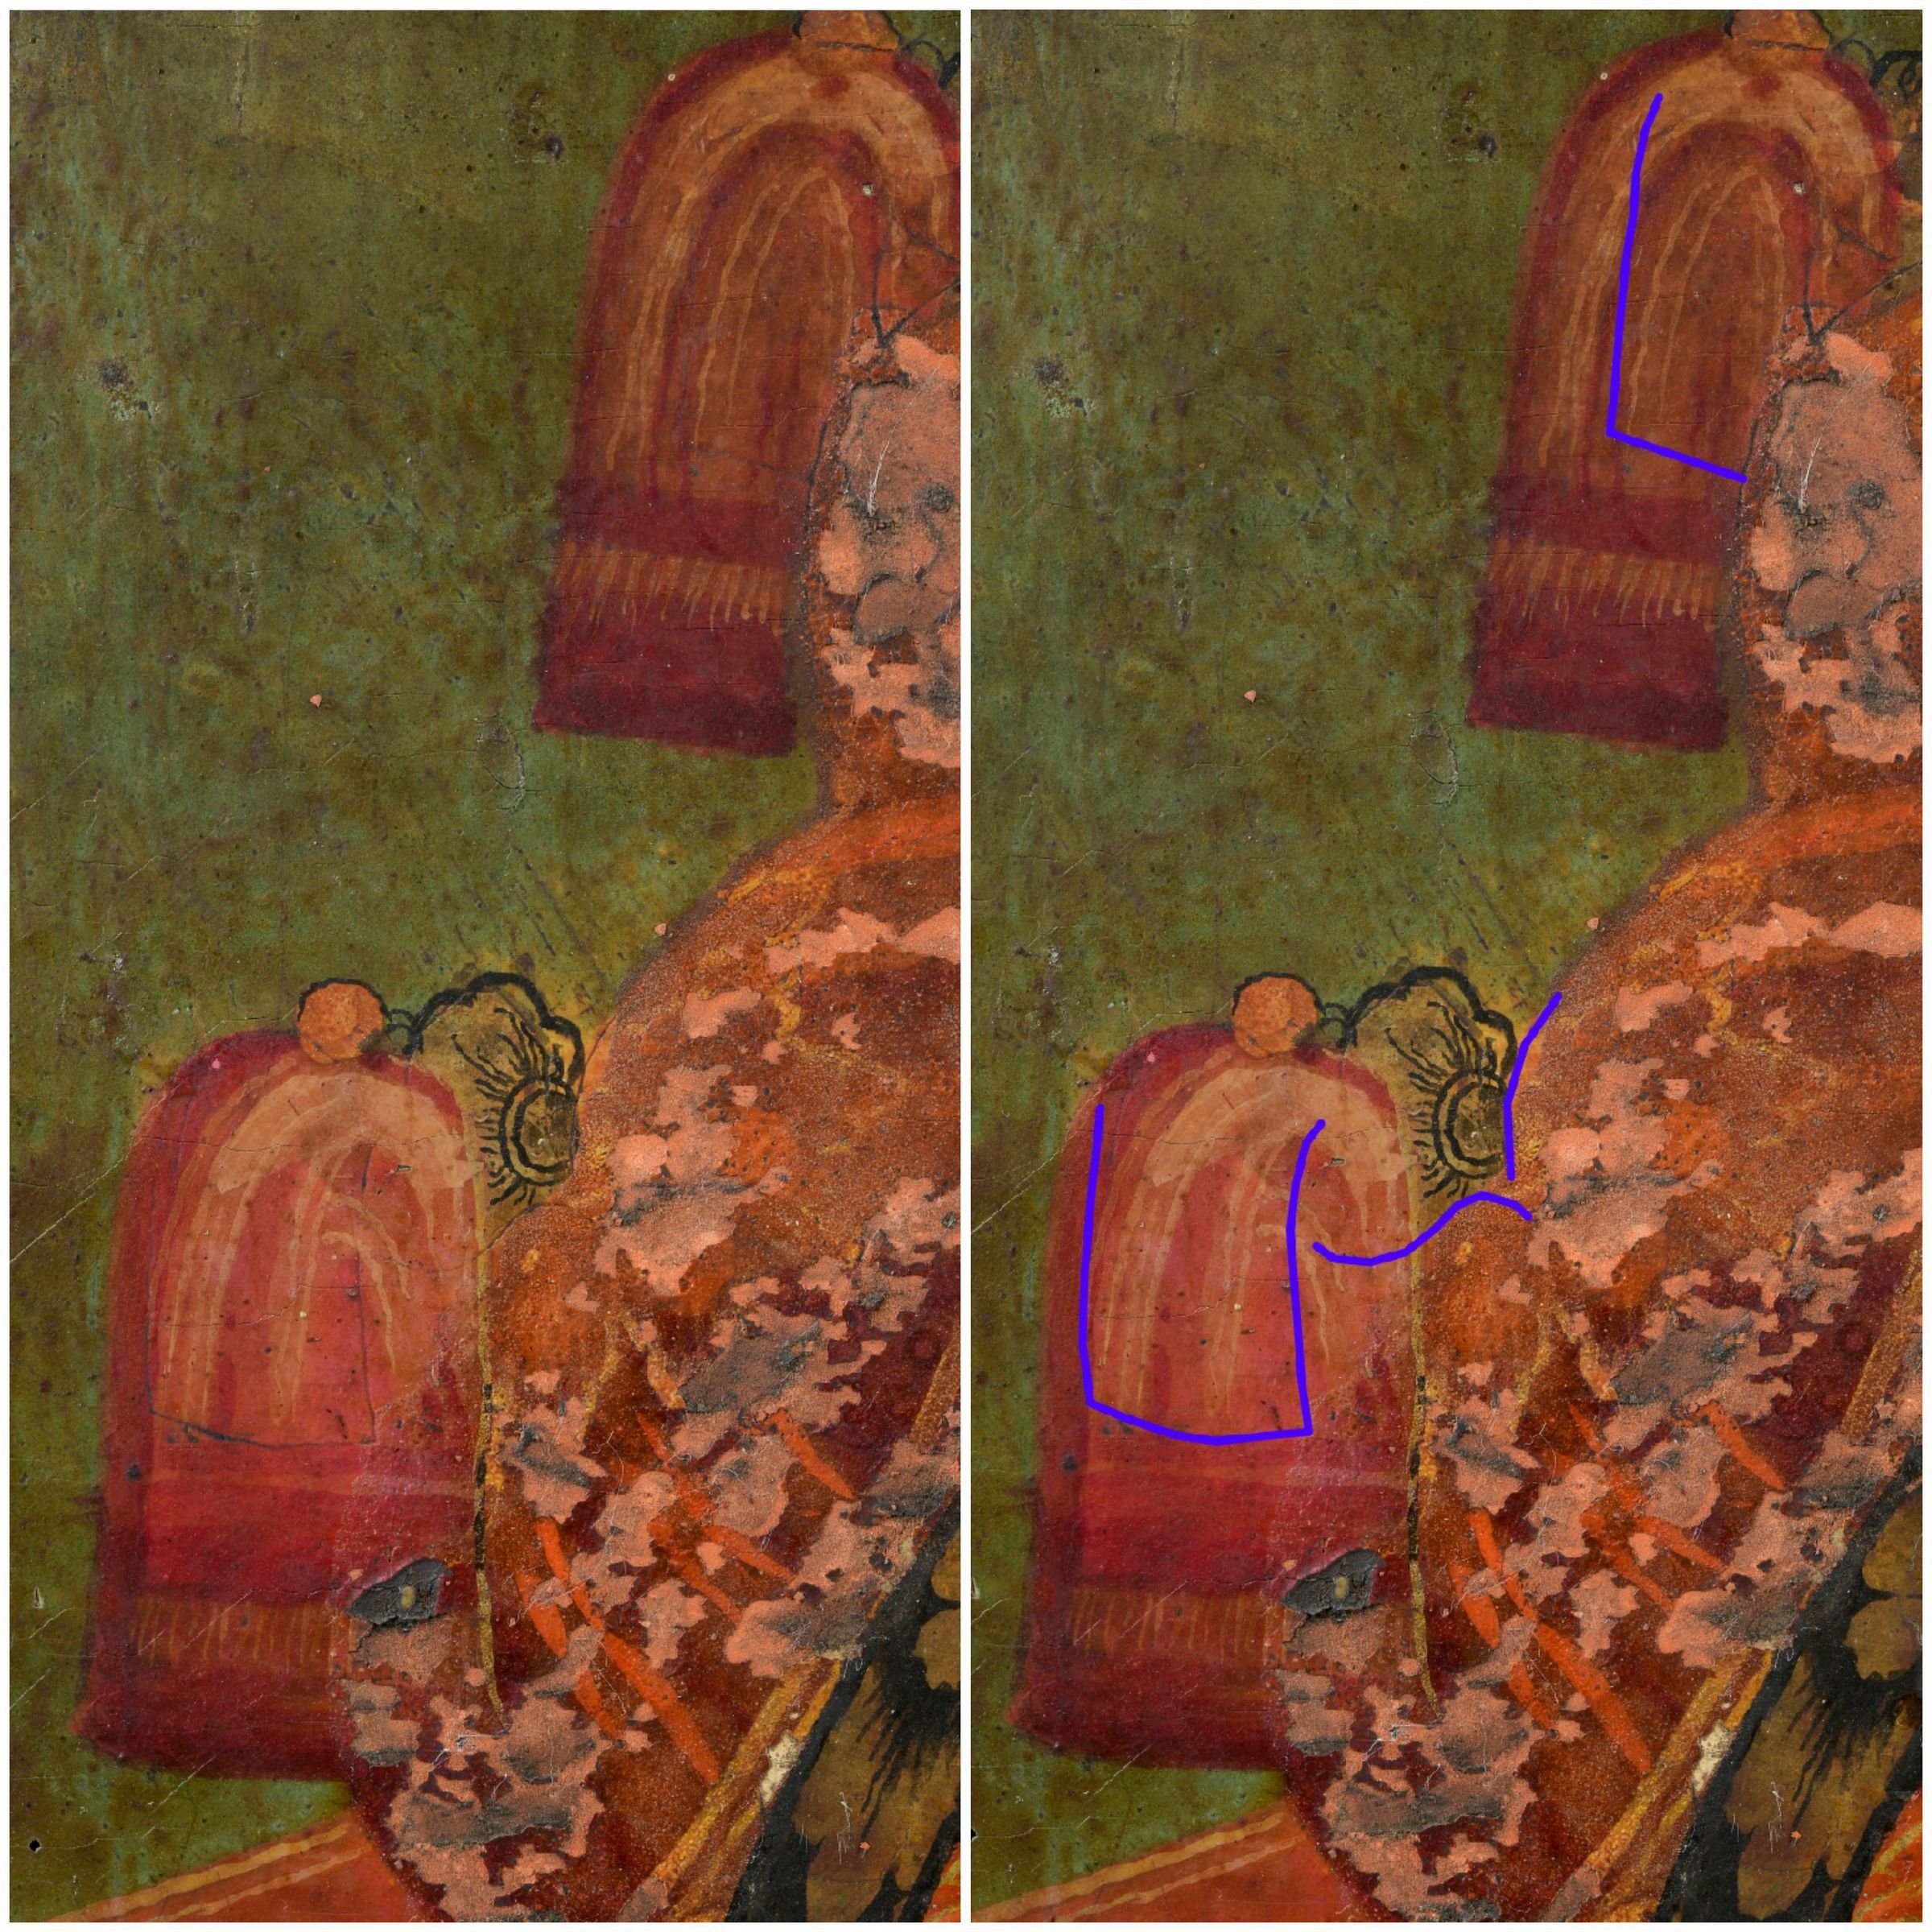
The most interesting change is the position of Christ’s fingers on the hand he has raised for blessing. The original icon shows the so-called Latin crossing (the later-day three-fingered sign), but the painting depicts the earlier, two-fingered gesture that was common among the Old Believers [ill 15]. The throne had been envisaged in much greater detail in the original. The left side of it shows spirally furled ornaments [ill 16]. More differences can be detected in smaller details like in the position and size of the crosses and ornaments on the bishop’s garb [ill 17], as well as in the size of the fringe tassels of the cushion [ill 18].
The new place for the icon
An absorbing discussion was held after the bright colours of the icon had appeared from under the thick layer of dirt and soot. A new idea was to display the icon separately from its textile cover to show the art historical value of the icon better. Actually, it has been done also sometime in the past, as proved by a candle burn on the icon that is missing on the cover. After an exhaustive dispute between the conservators, congregation and the heritage board the decision to display the icon and its cover separately was made. The new place in the church offers everybody interested in the icon an opportunity to observe it.